Discover how to seamlessly add a co-tenant, update personal details, and upload profile pictures for streamlined tenant management.

1. Start by navigating to the General section to access tenant management features.
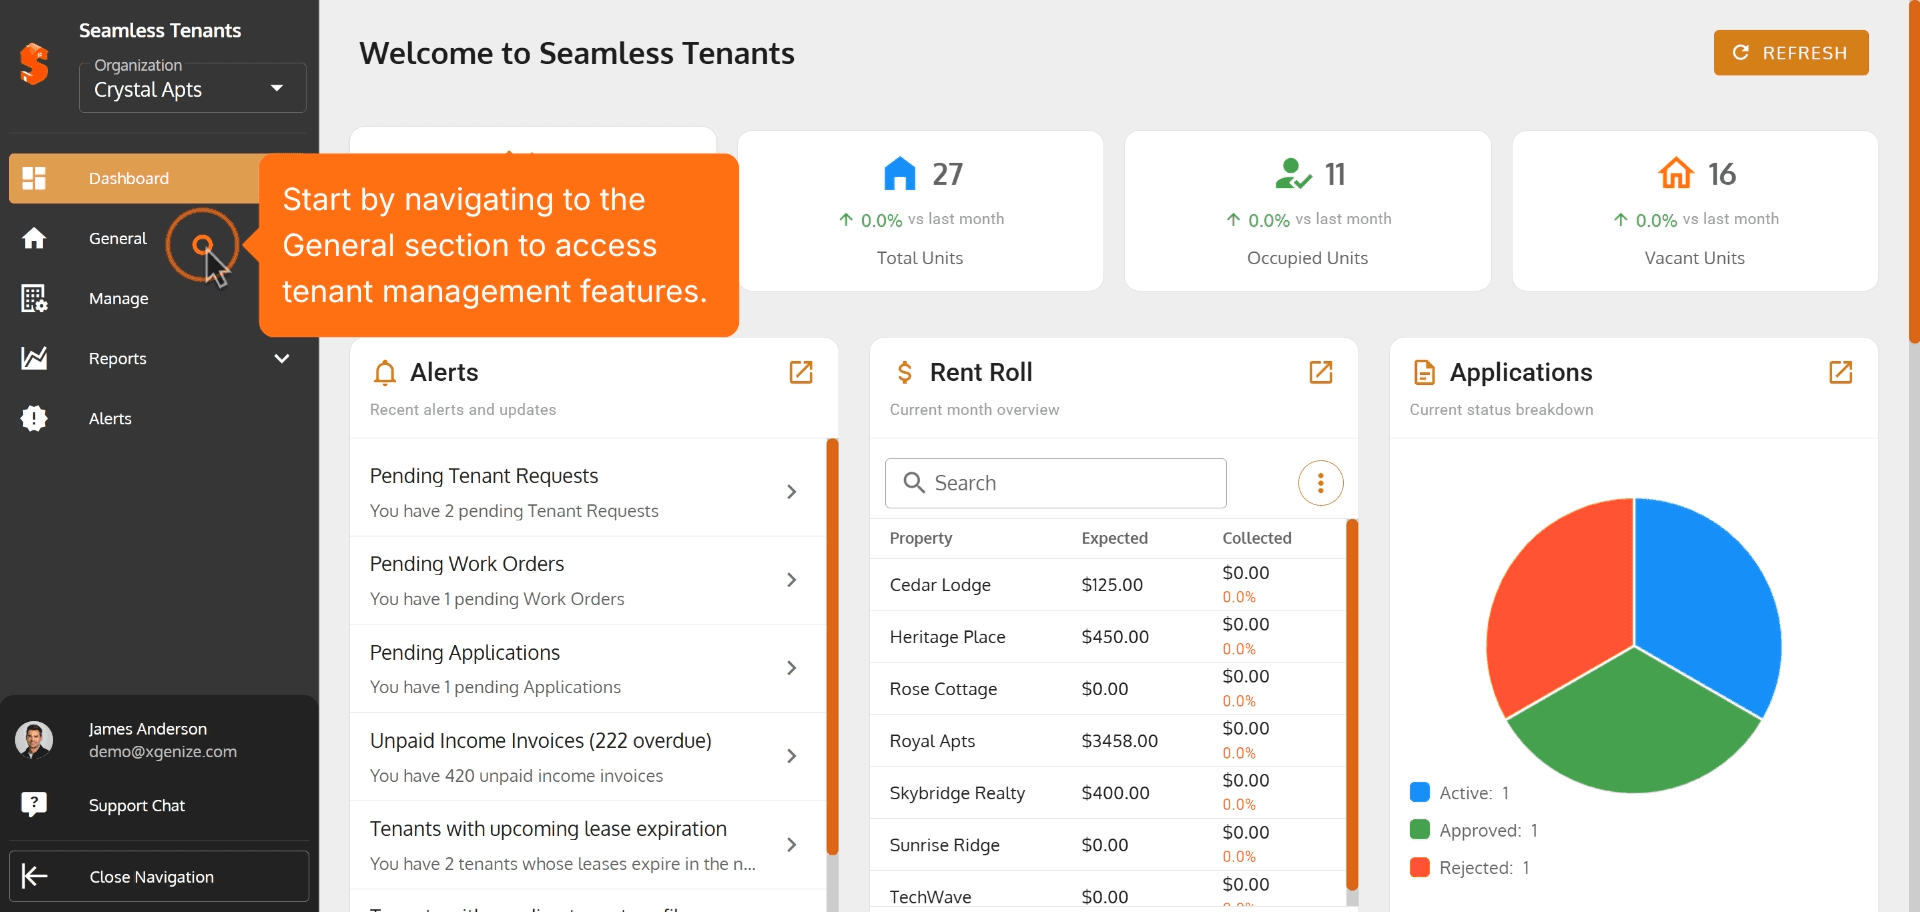
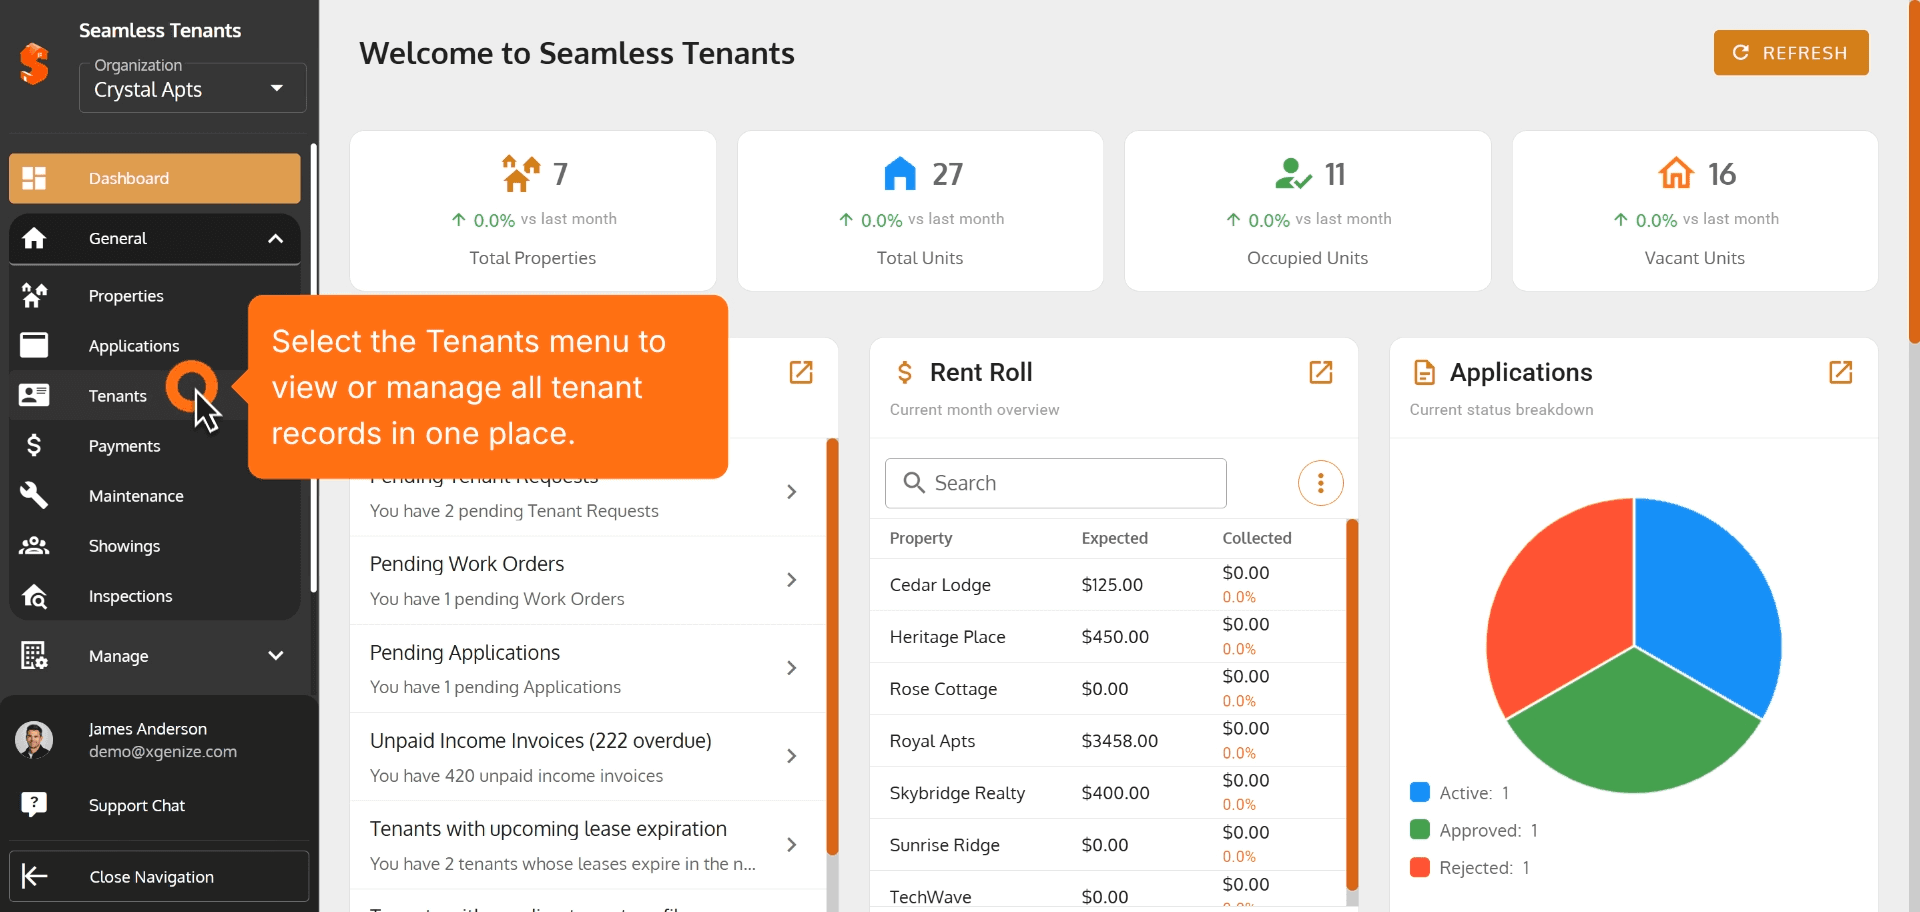
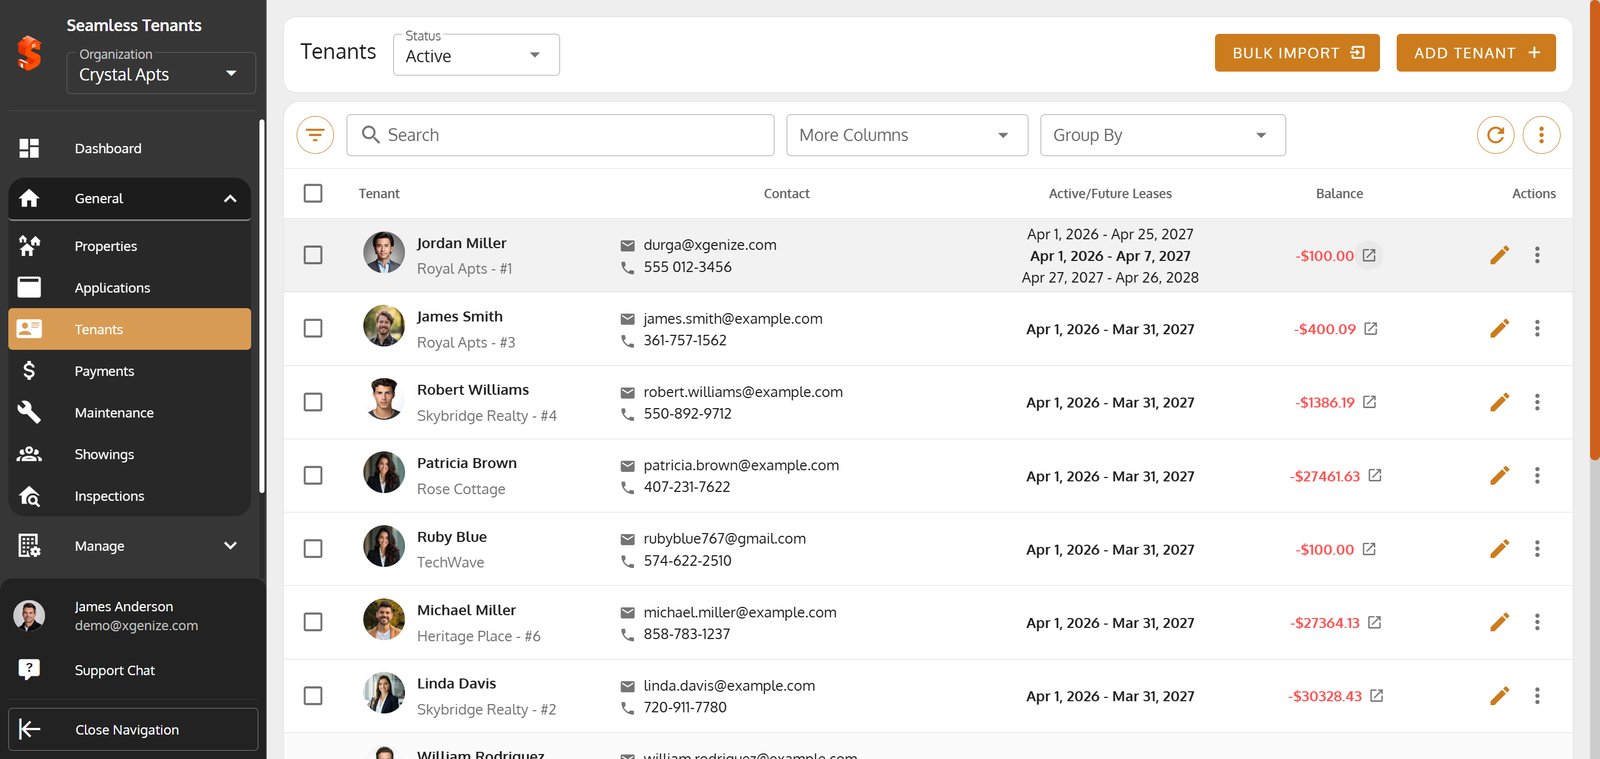
2. Select the Tenants menu to view or manage all tenant records in one place.
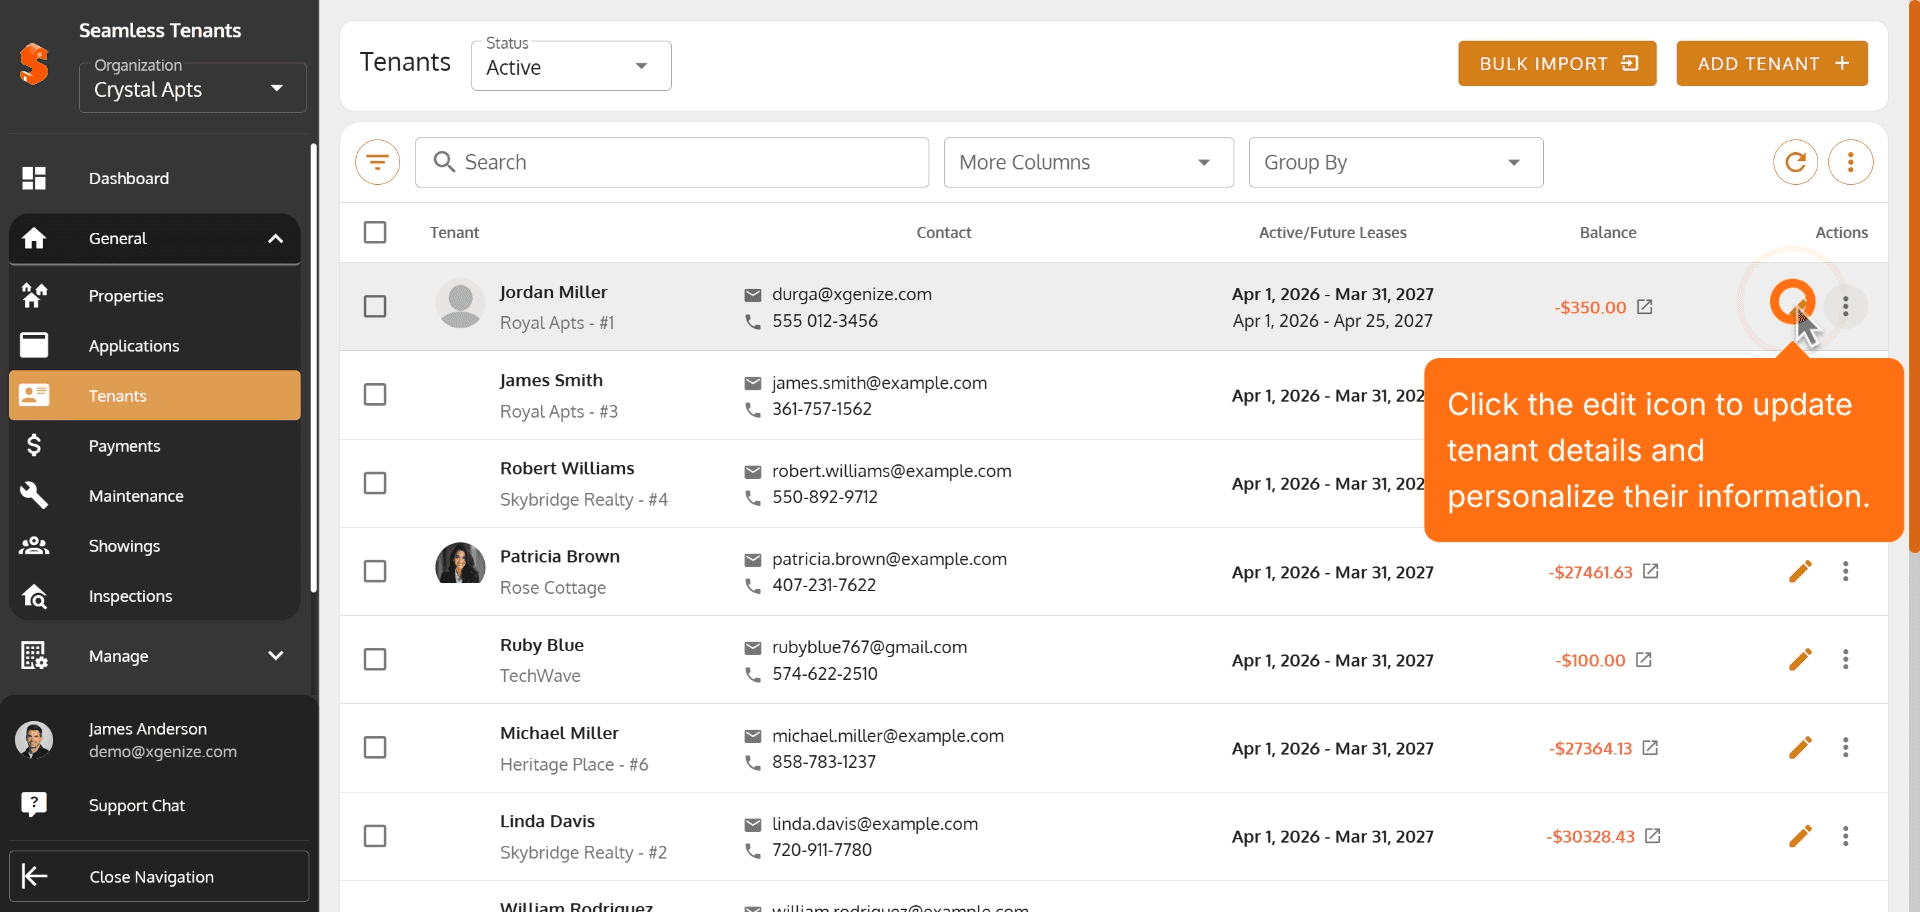
3. Click the edit icon to update tenant details and personalize their information.
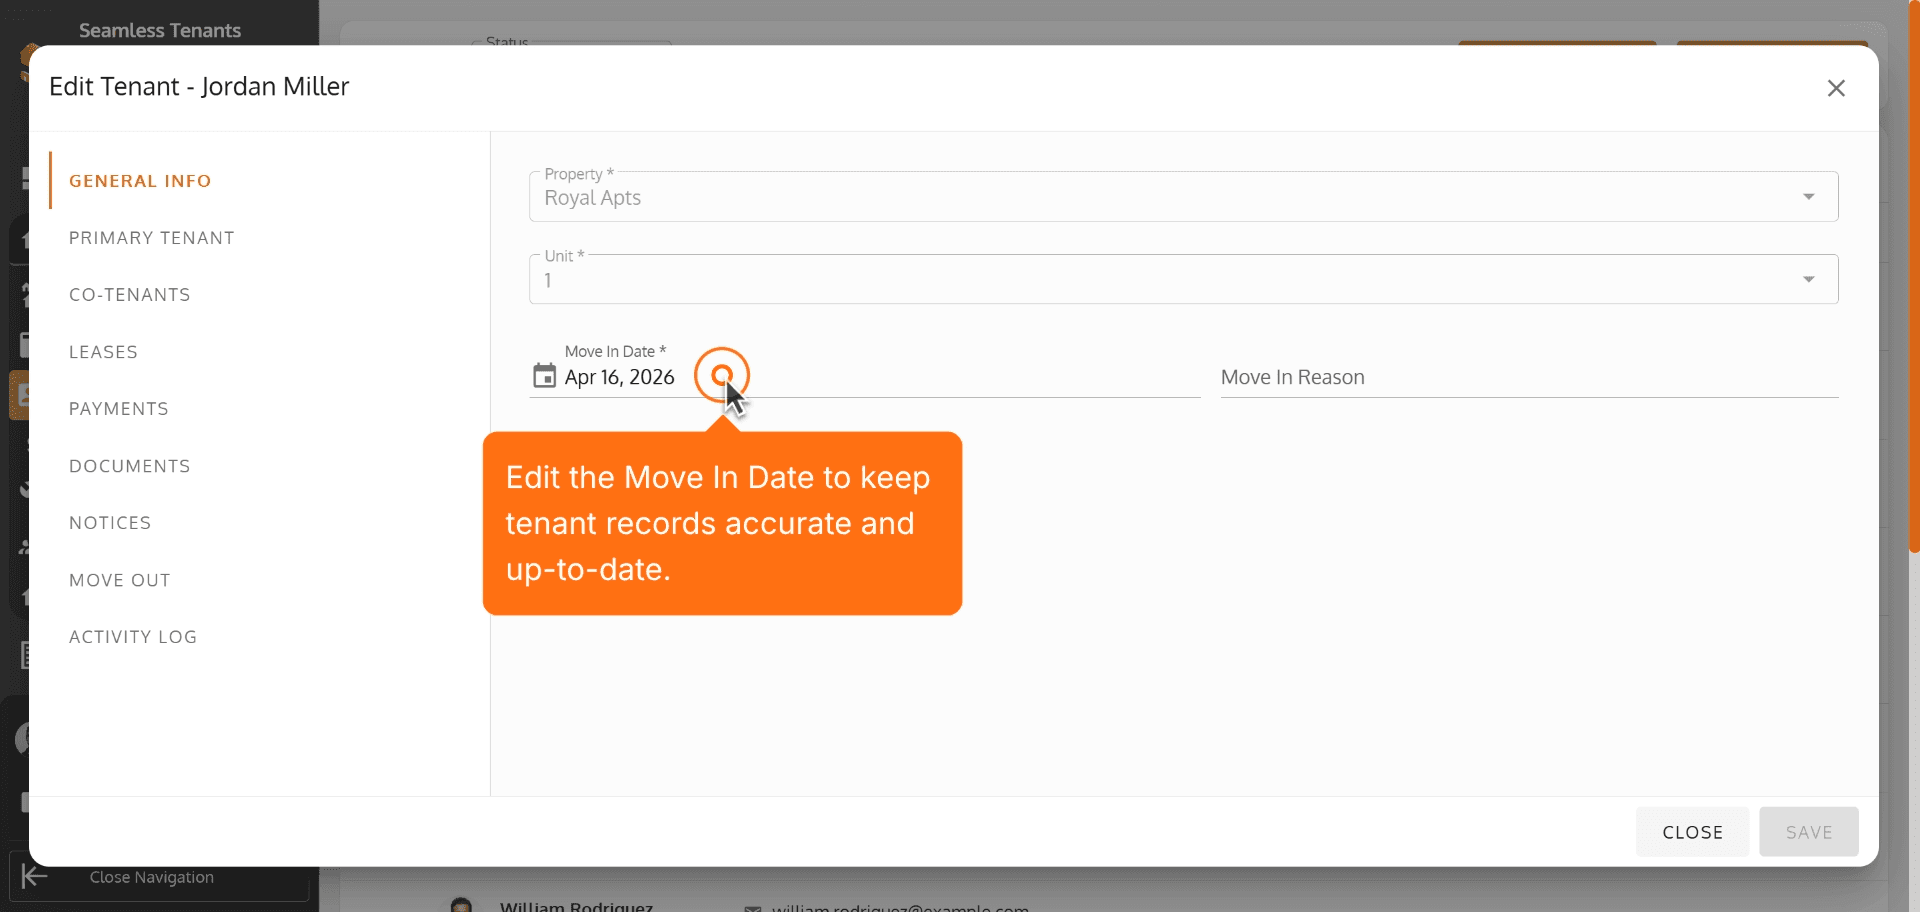
4. Edit the Move In Date to keep tenant records accurate and up-to-date.
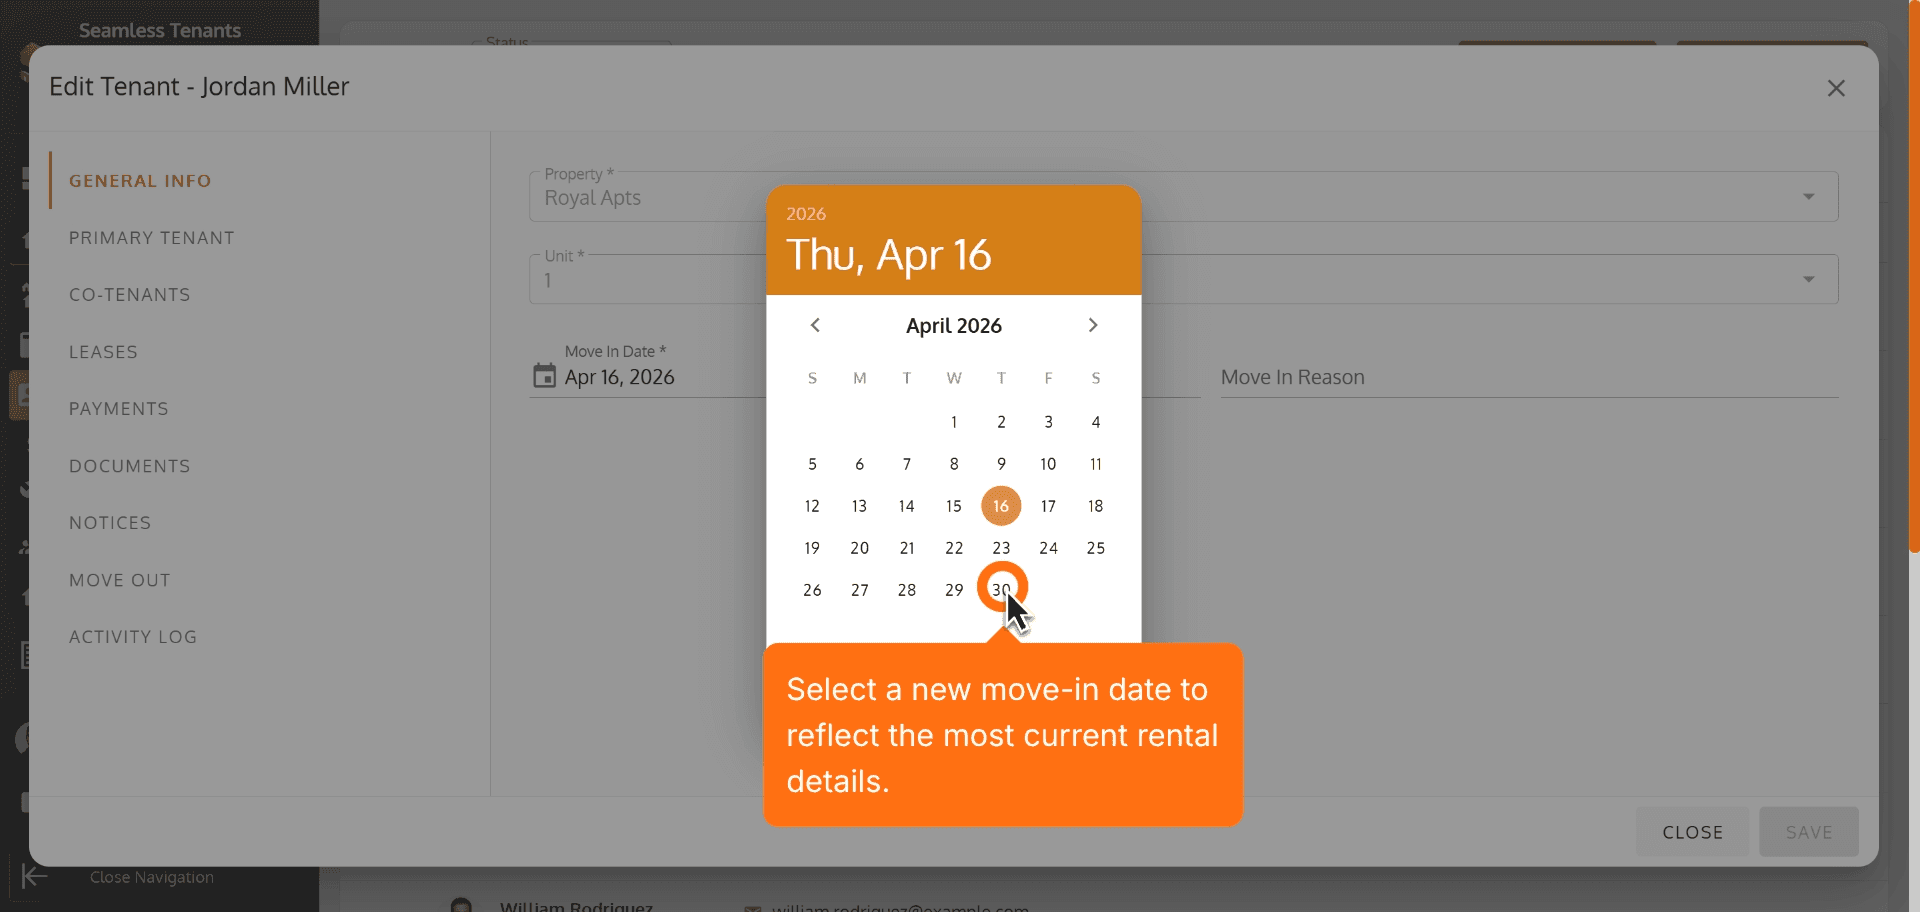
5. Select a new move-in date to reflect the most current rental details.
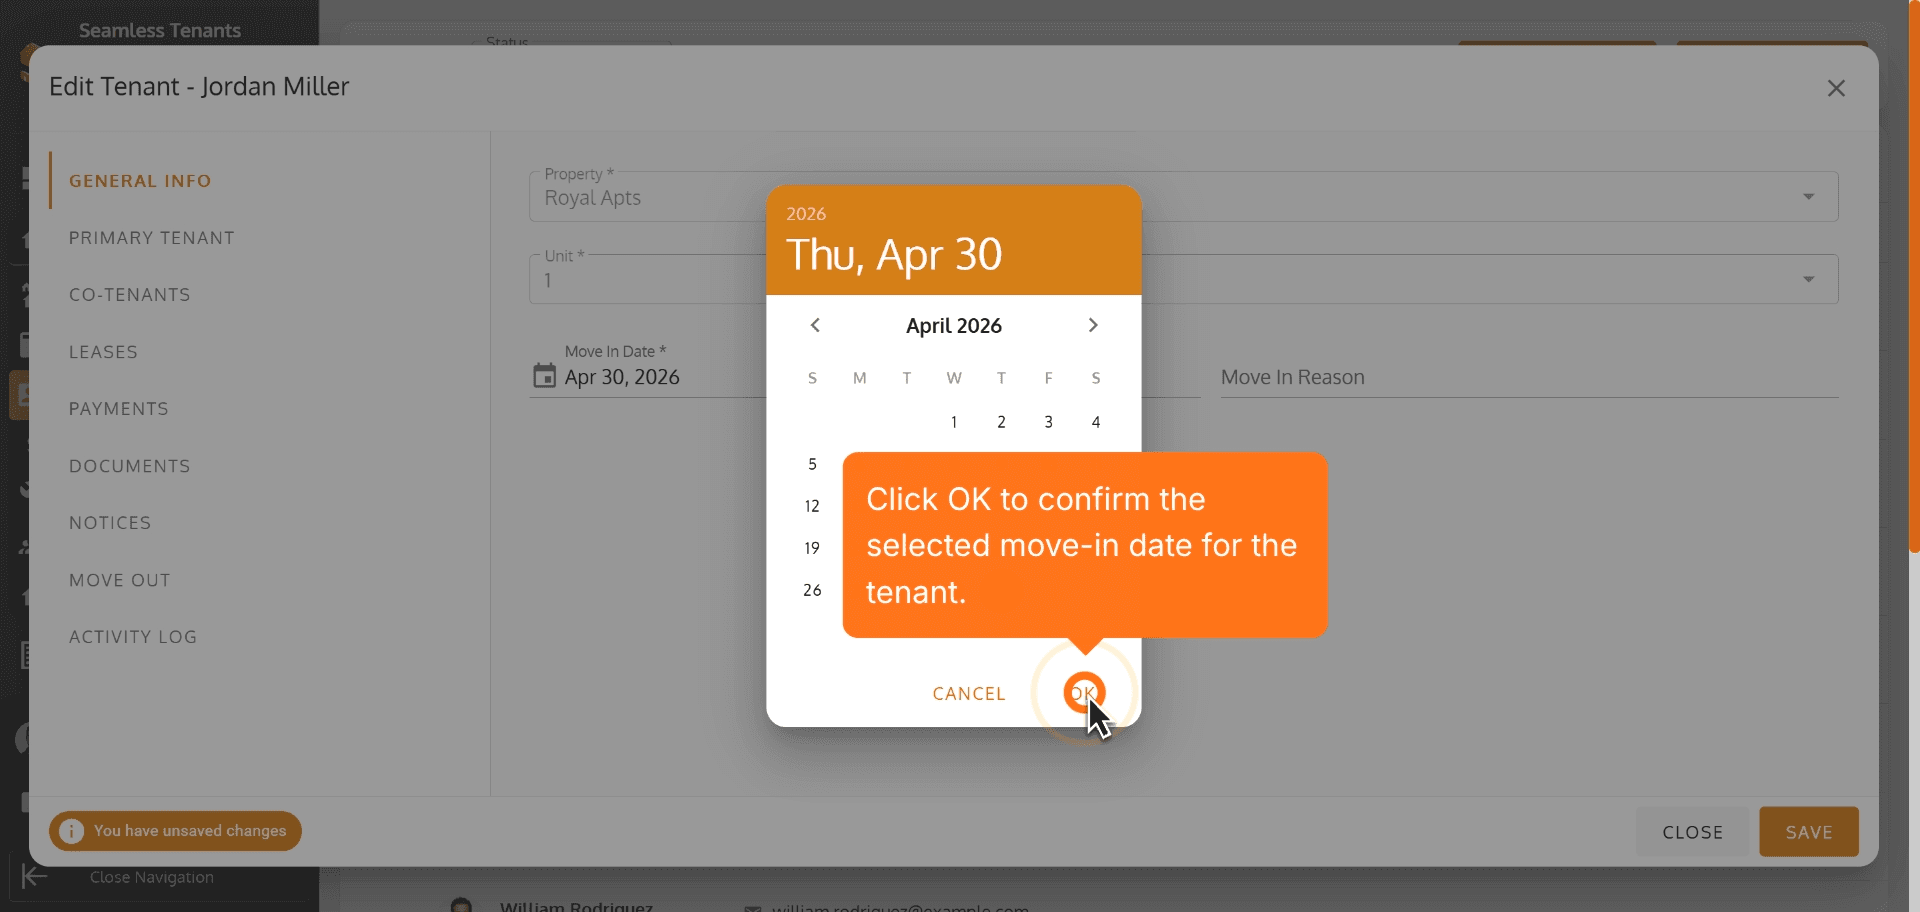
6. Click OK to confirm the selected move-in date for the tenant.
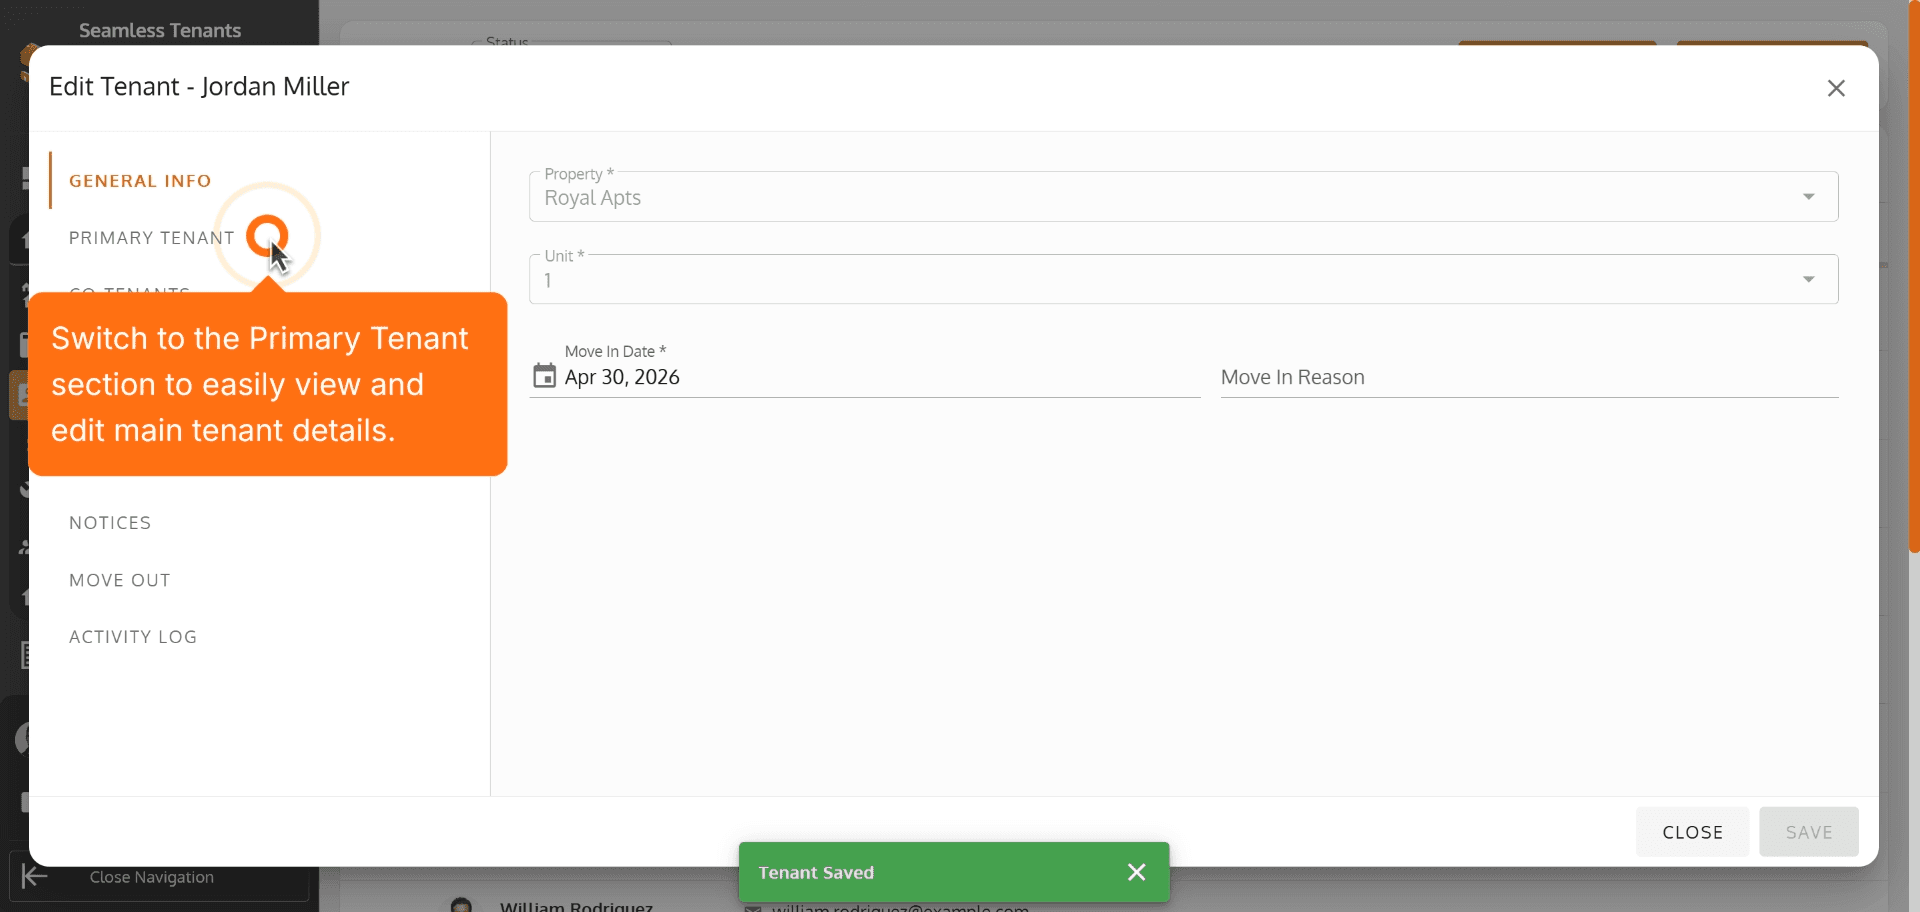
7. Save your changes to make sure all updates are instantly reflected in the system.

8. Switch to the Primary Tenant section to easily view and edit main tenant details.
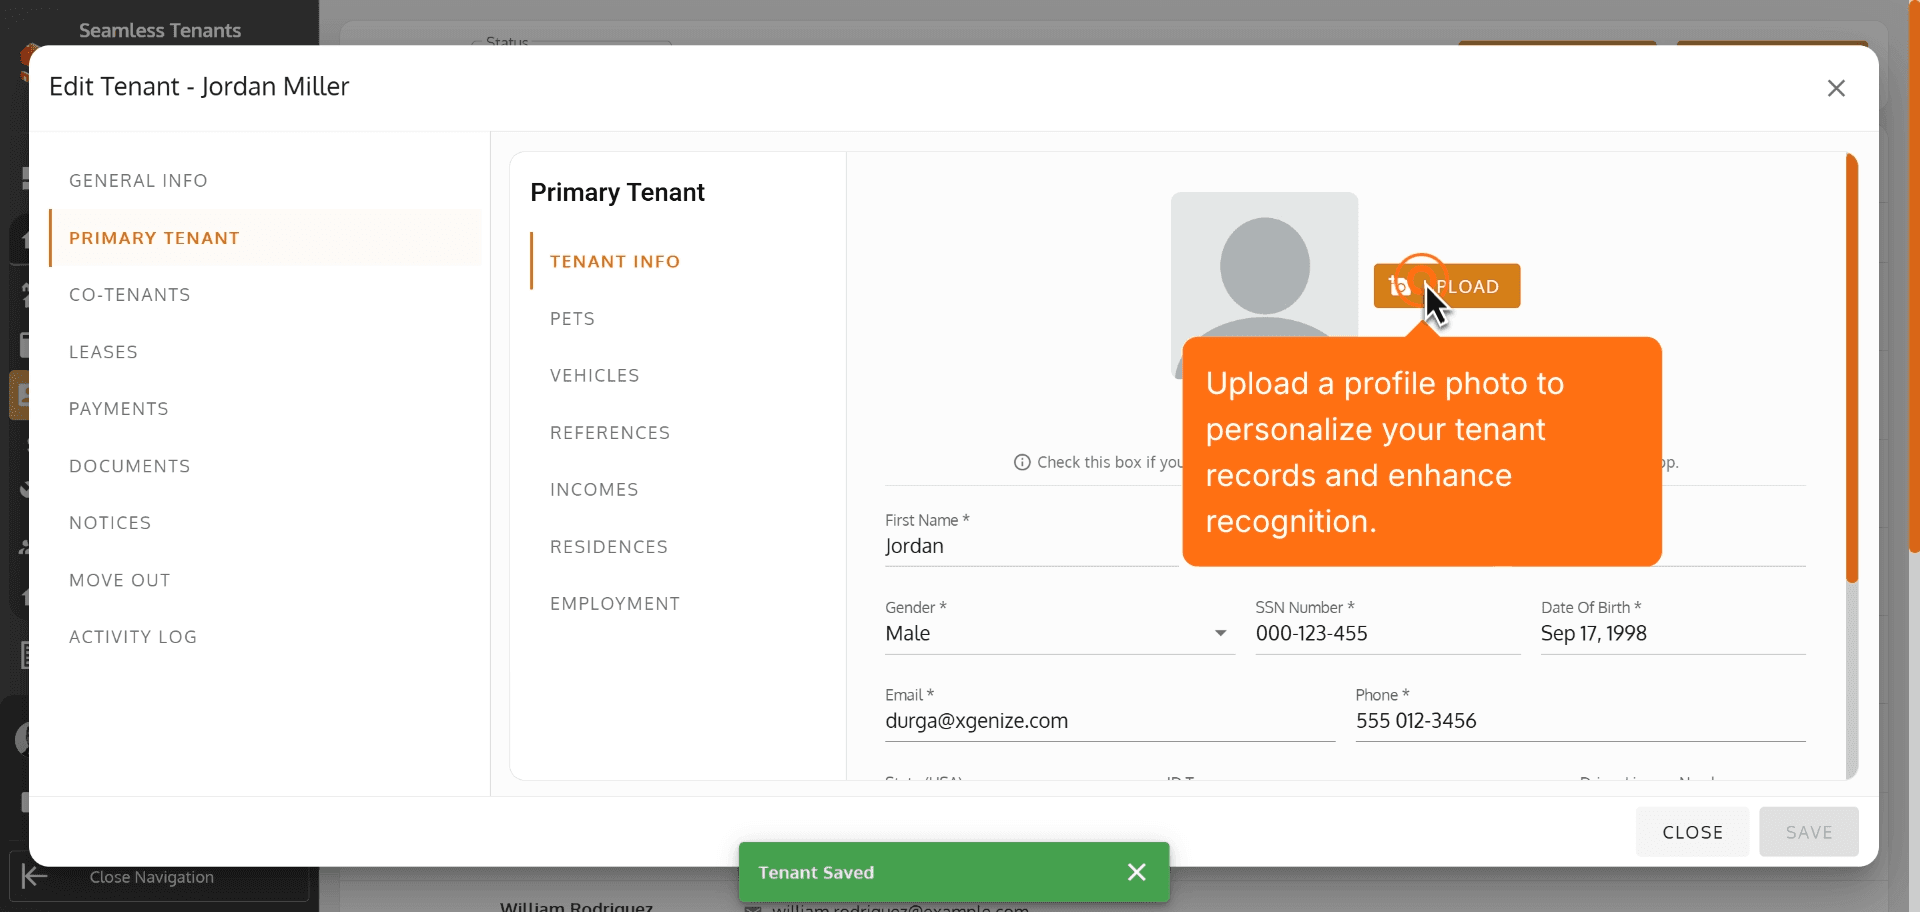
9. Upload a profile photo to personalize your tenant records and enhance recognition.
10. Choose a new image file to update the tenant's profile picture.
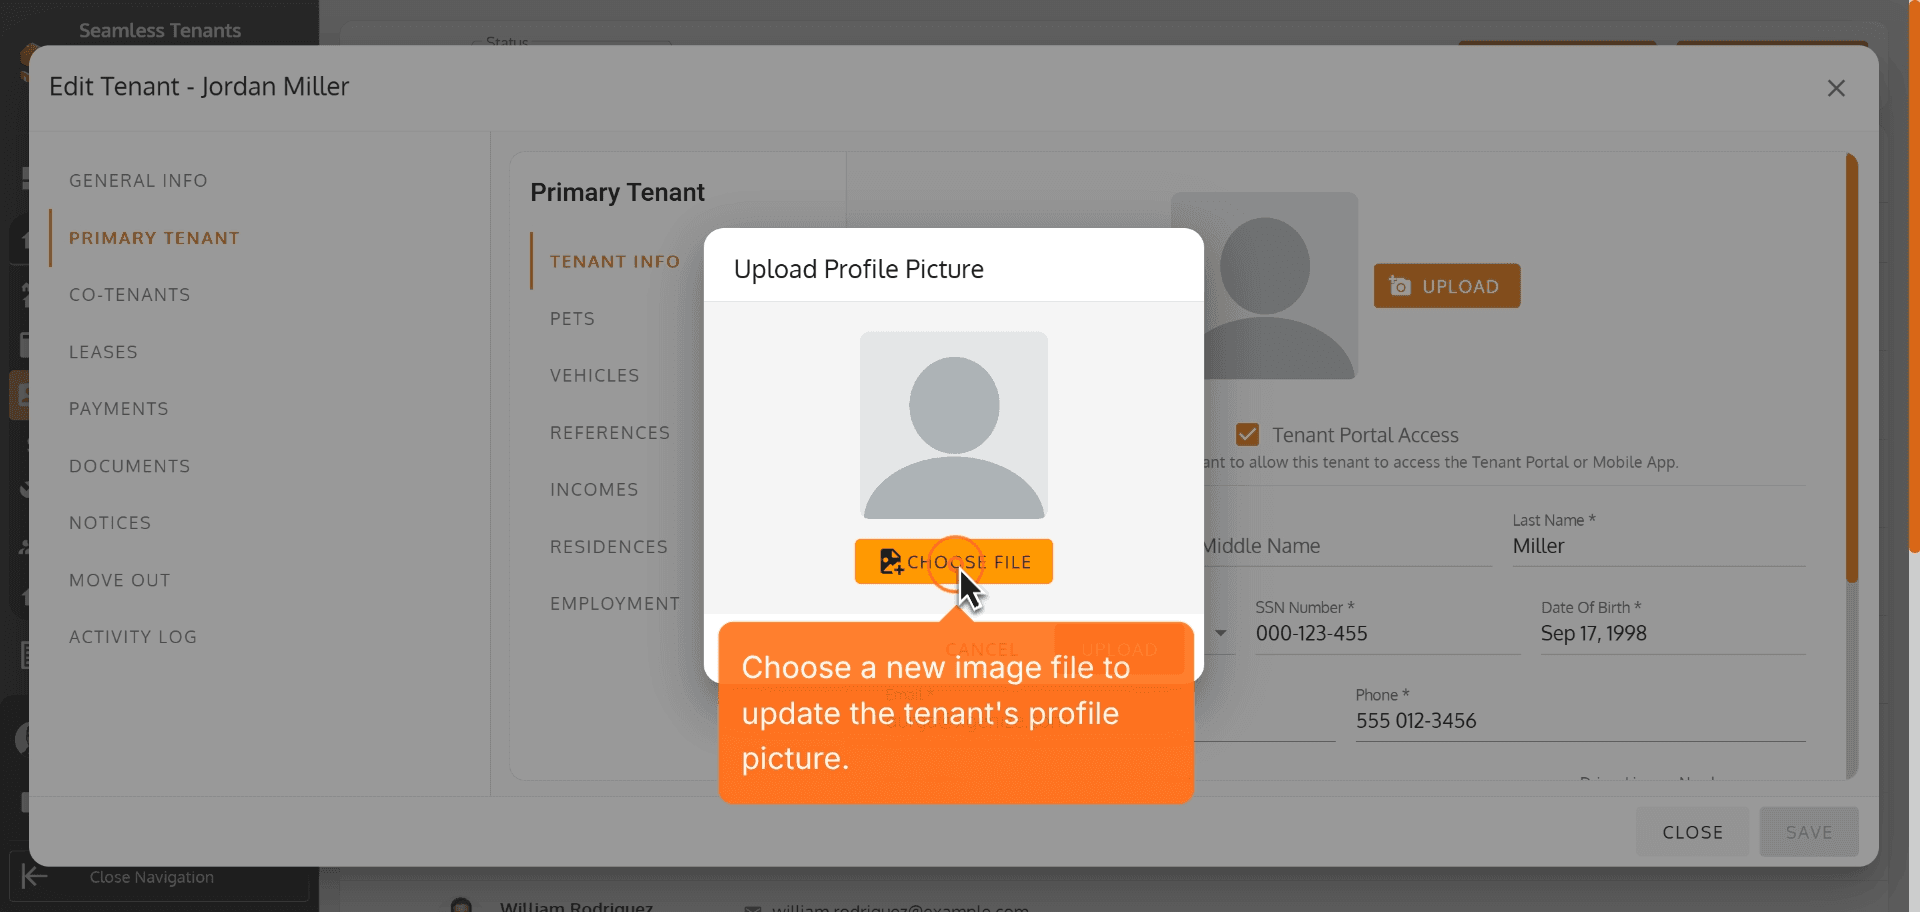
11. Click UPLOAD to finalize the tenant's new profile image.
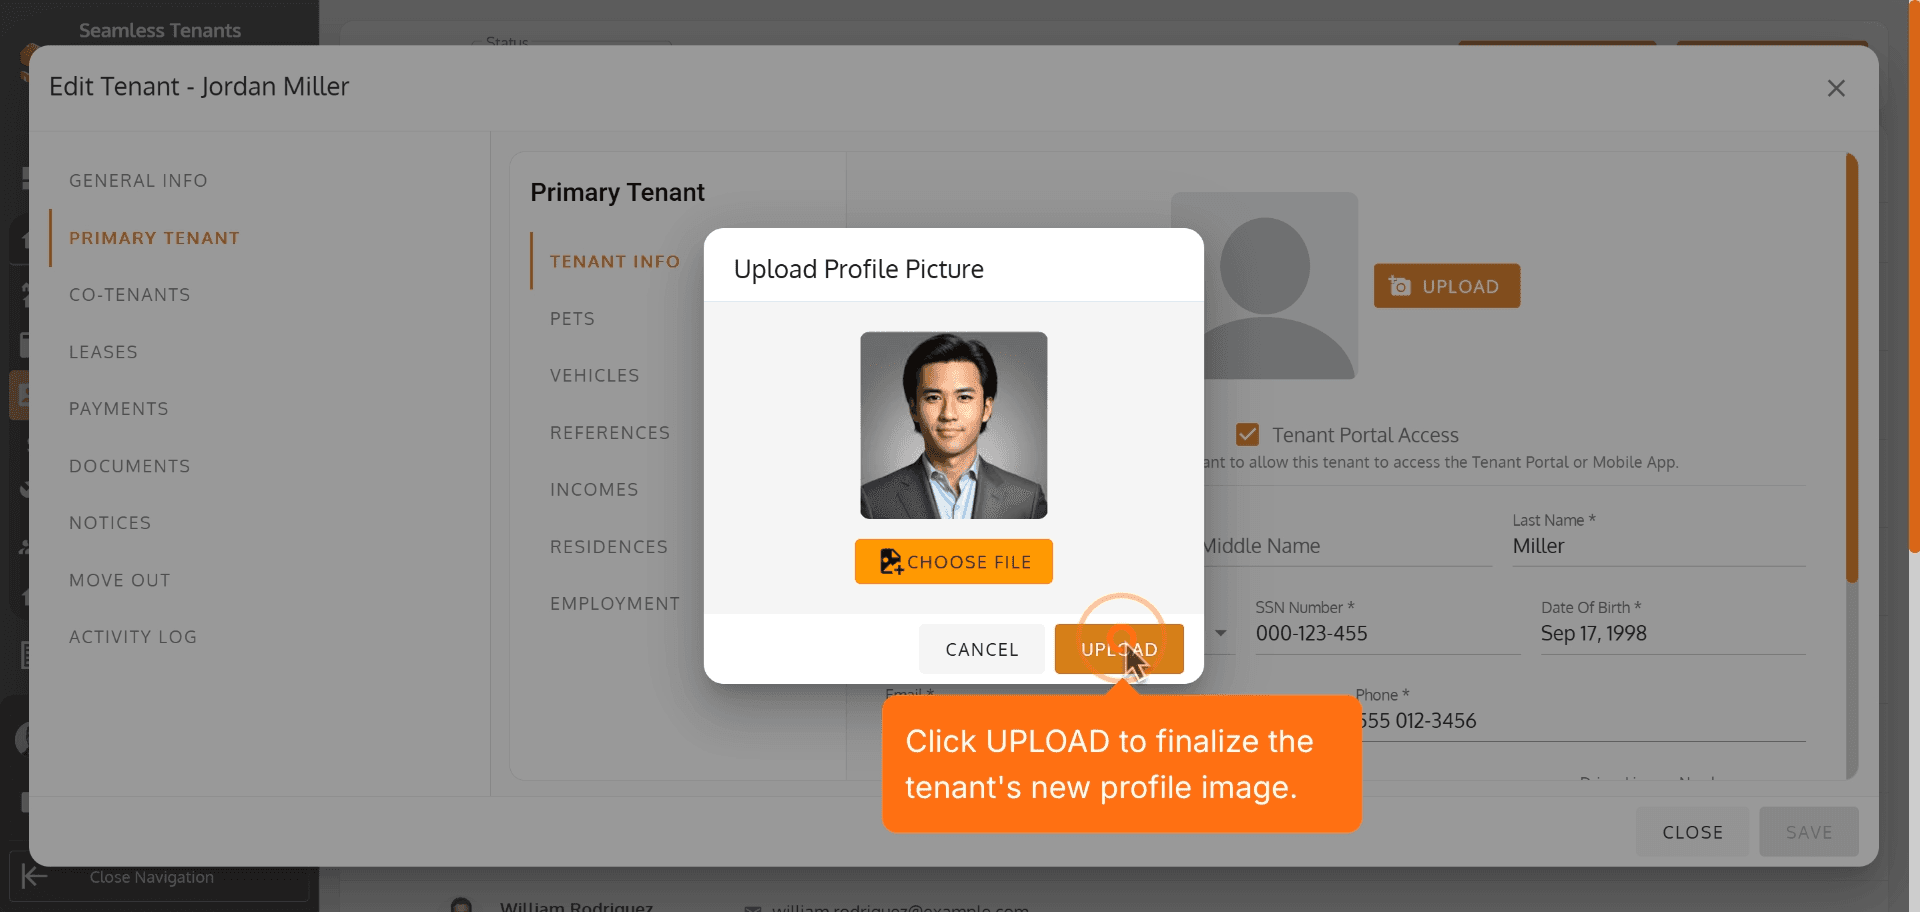
12. Switch to the Pets tab to manage your tenant’s pet details with ease.
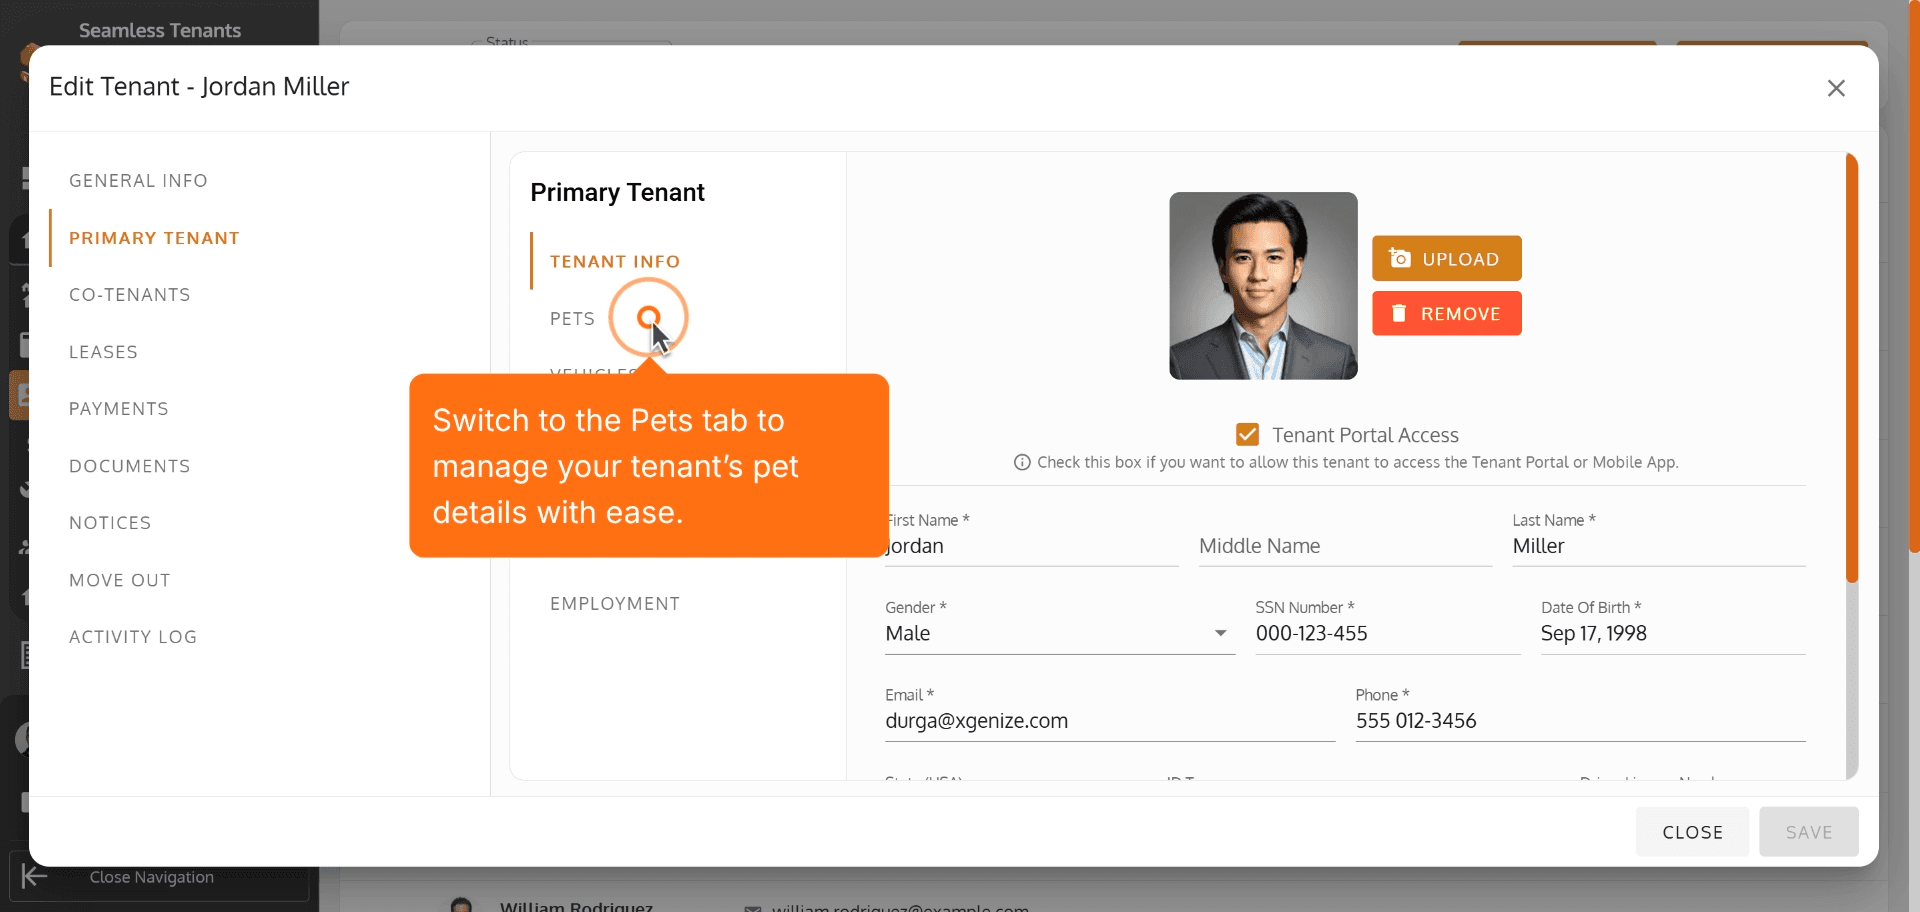
13. Go to the Vehicles section to record details about your tenant's vehicles for complete records.
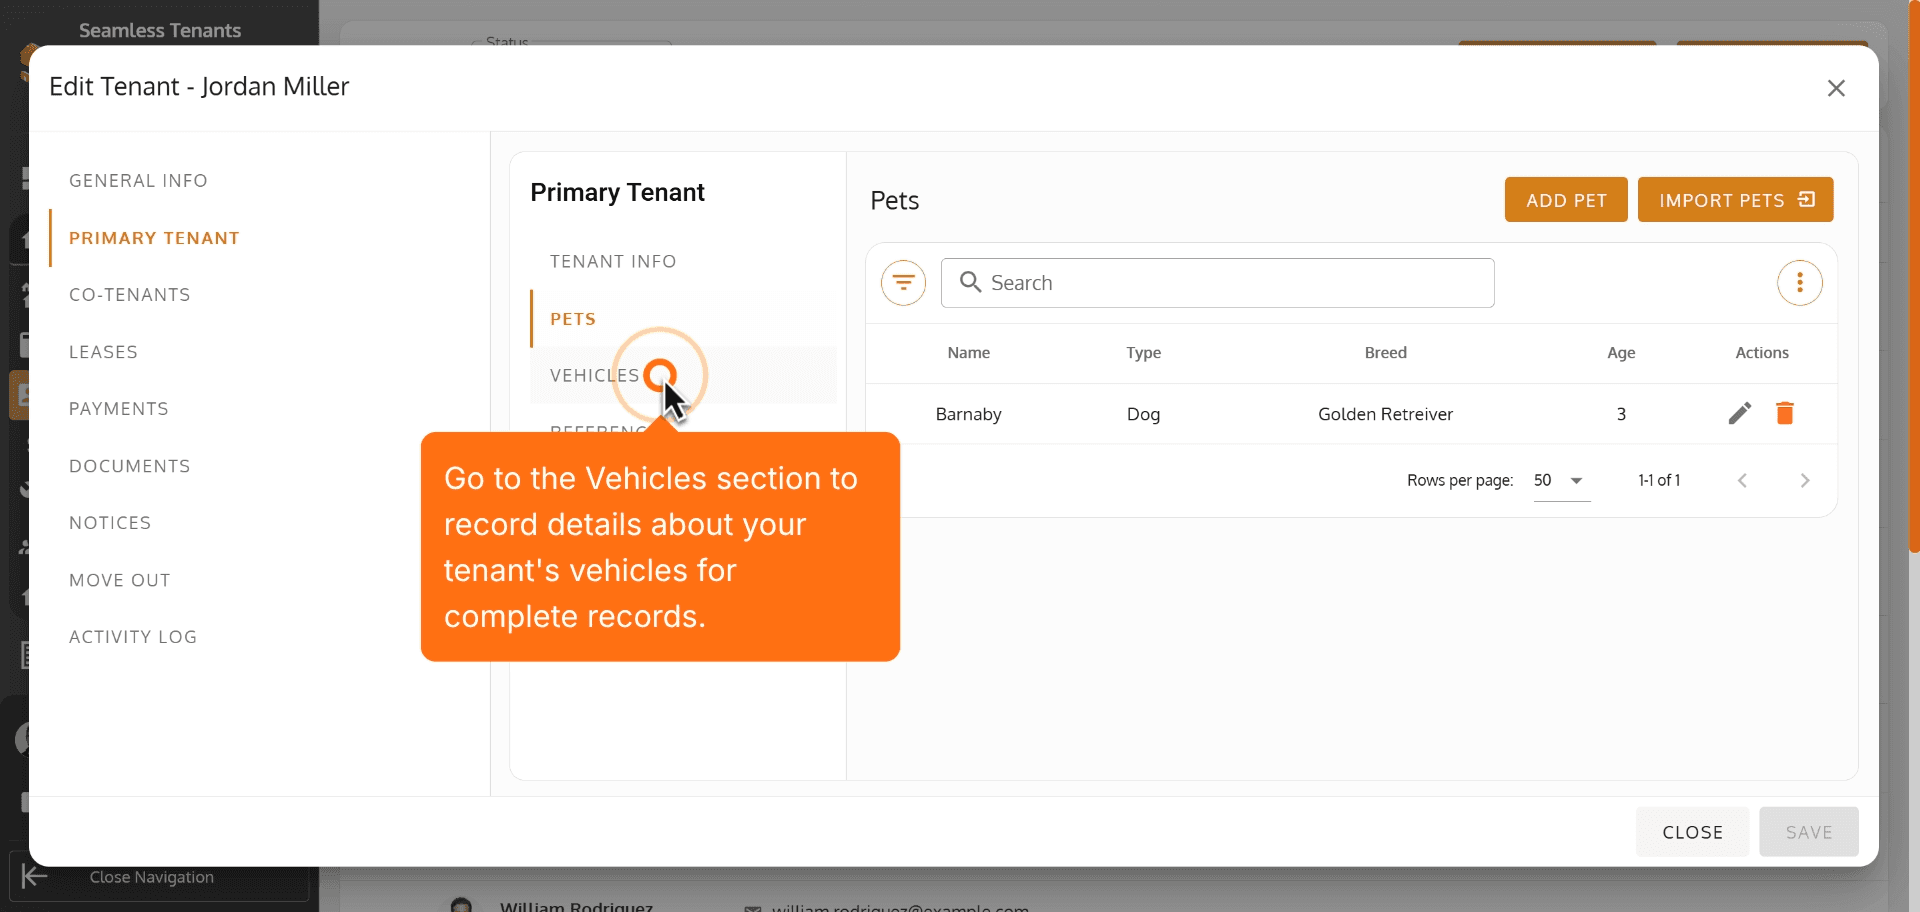
14. Select References to manage trusted contacts for tenant verification.
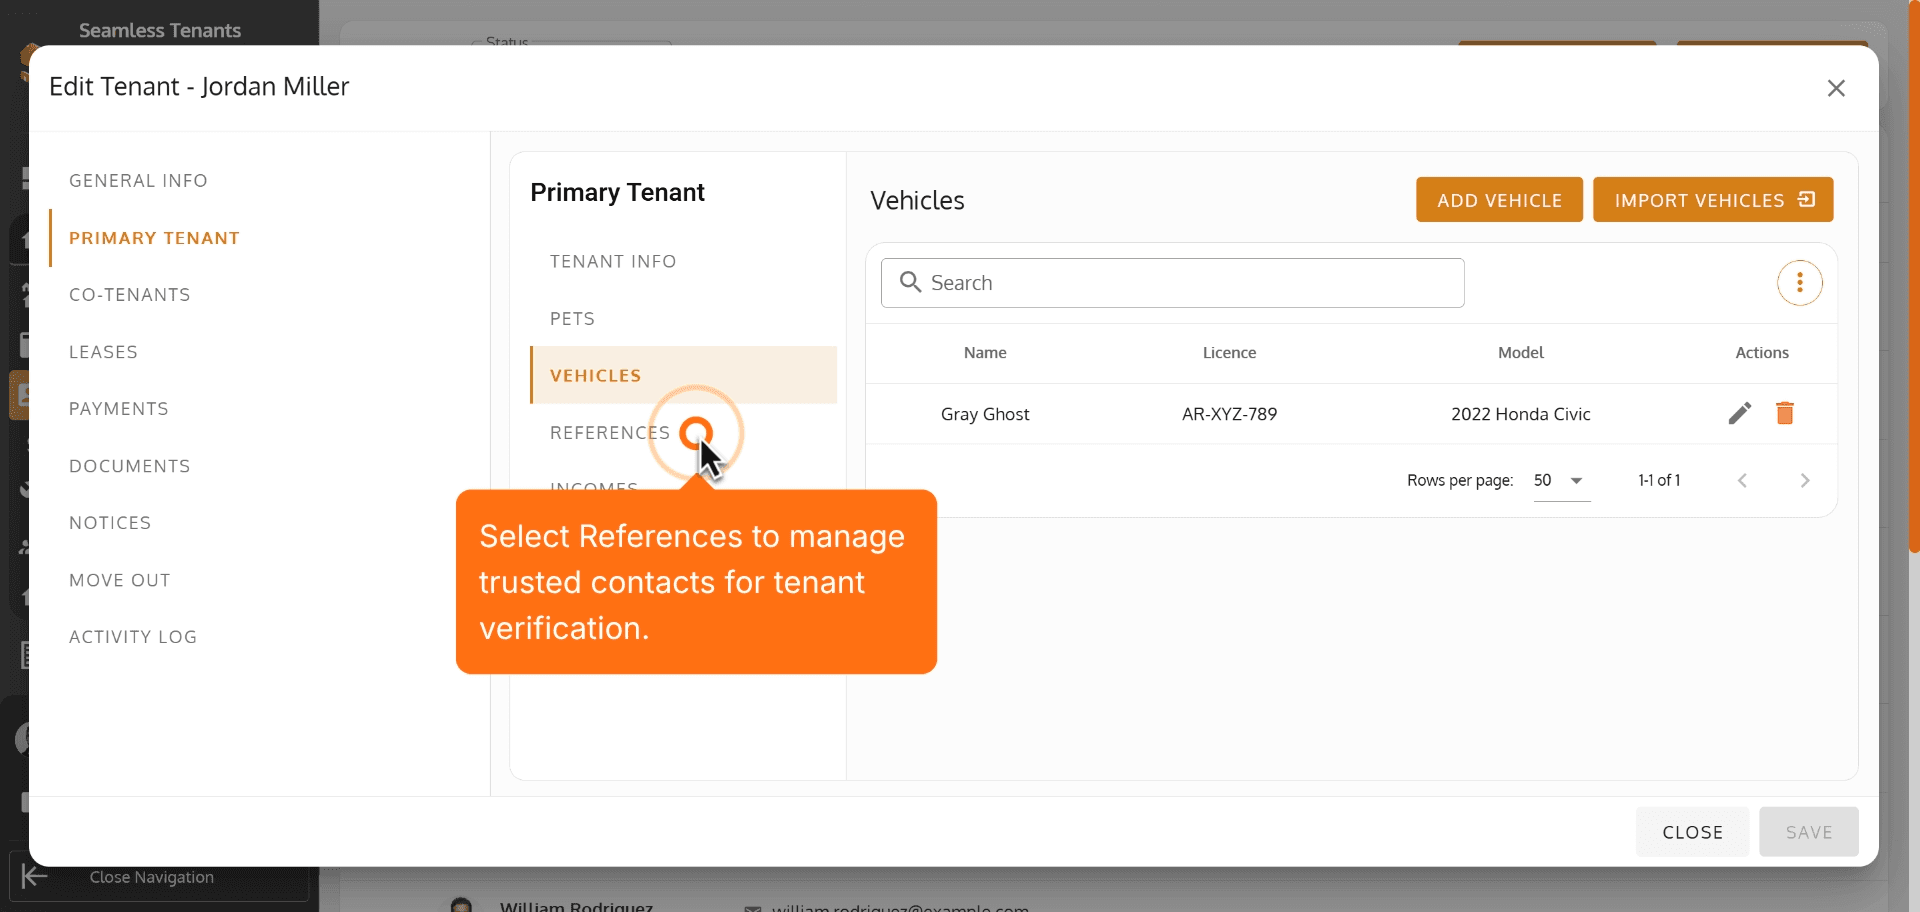
15. Visit Incomes to keep financial information for tenants well organized and up to date.
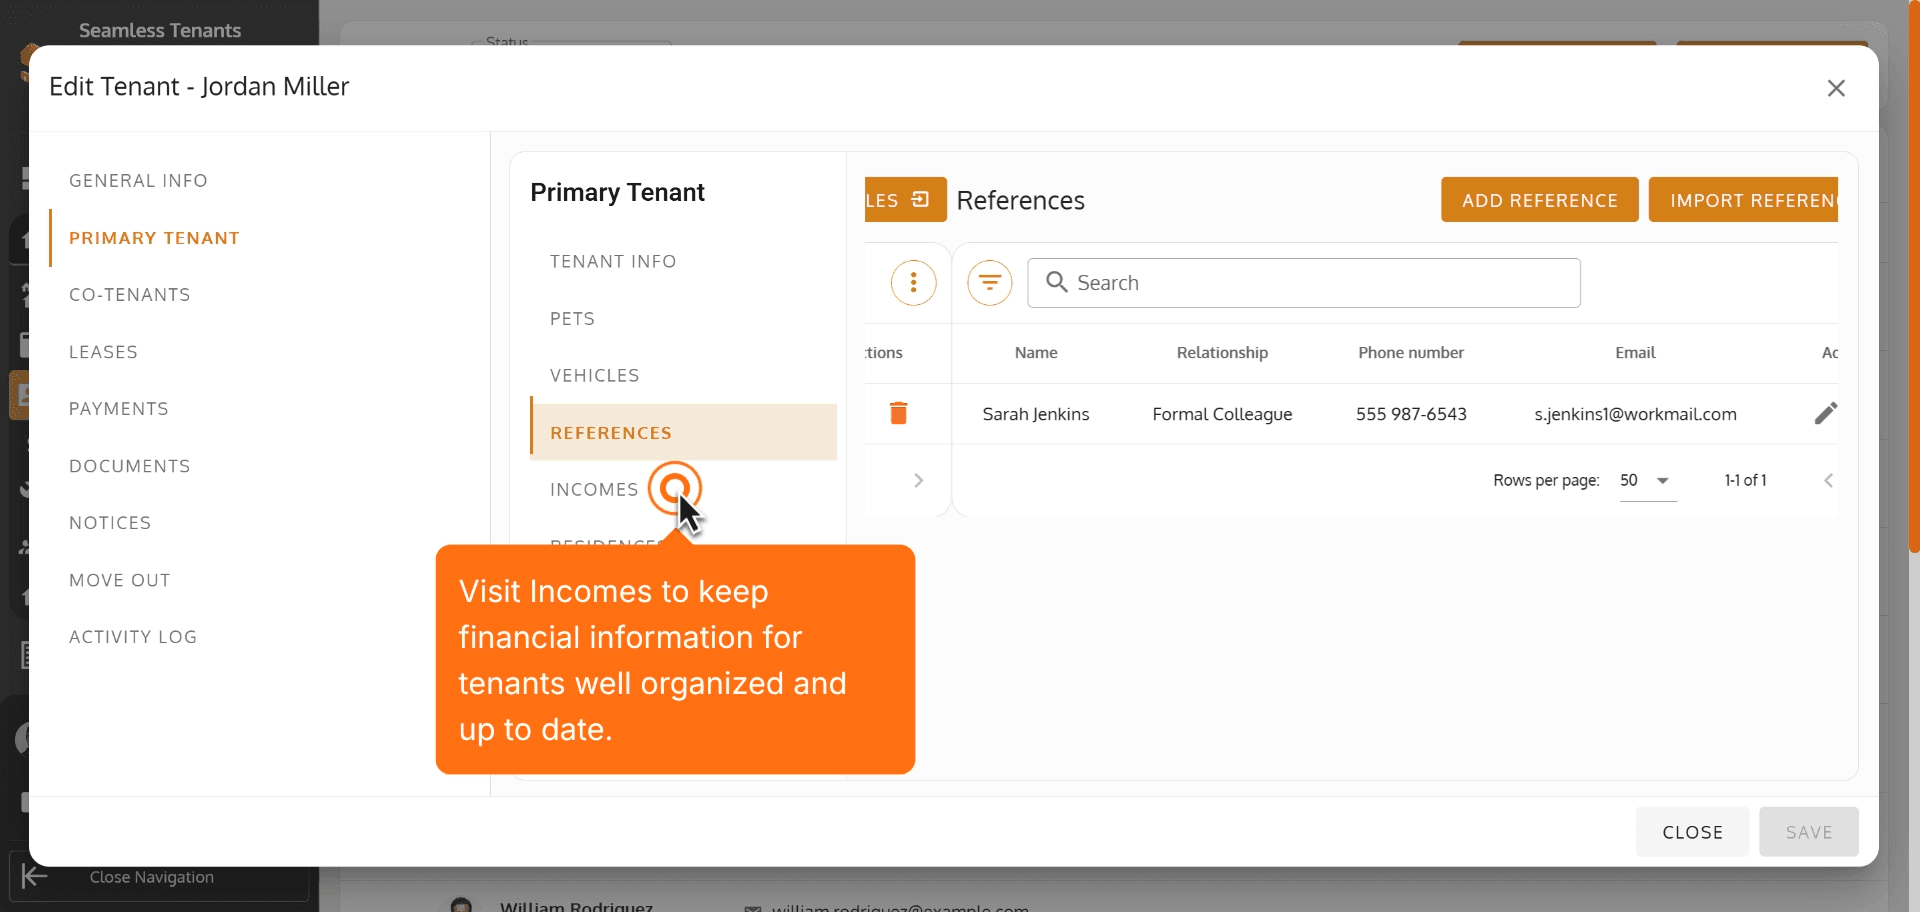
16. Open Residences to track a tenant’s previous addresses for a full rental history.
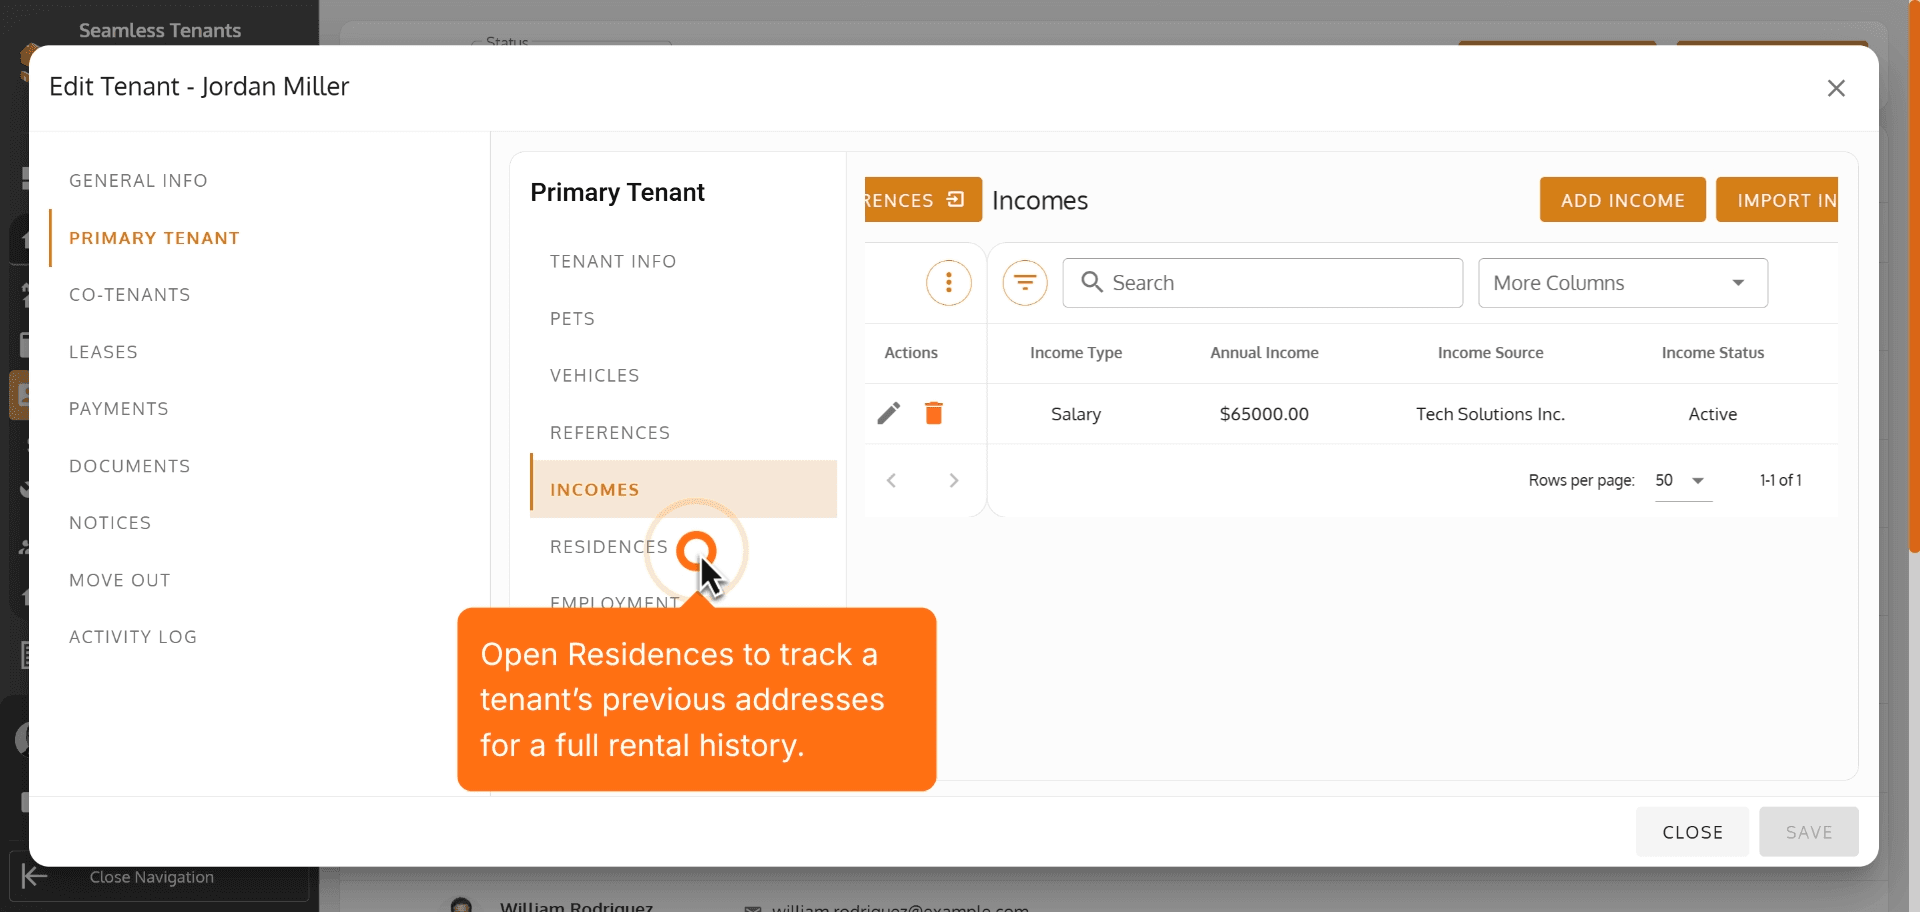
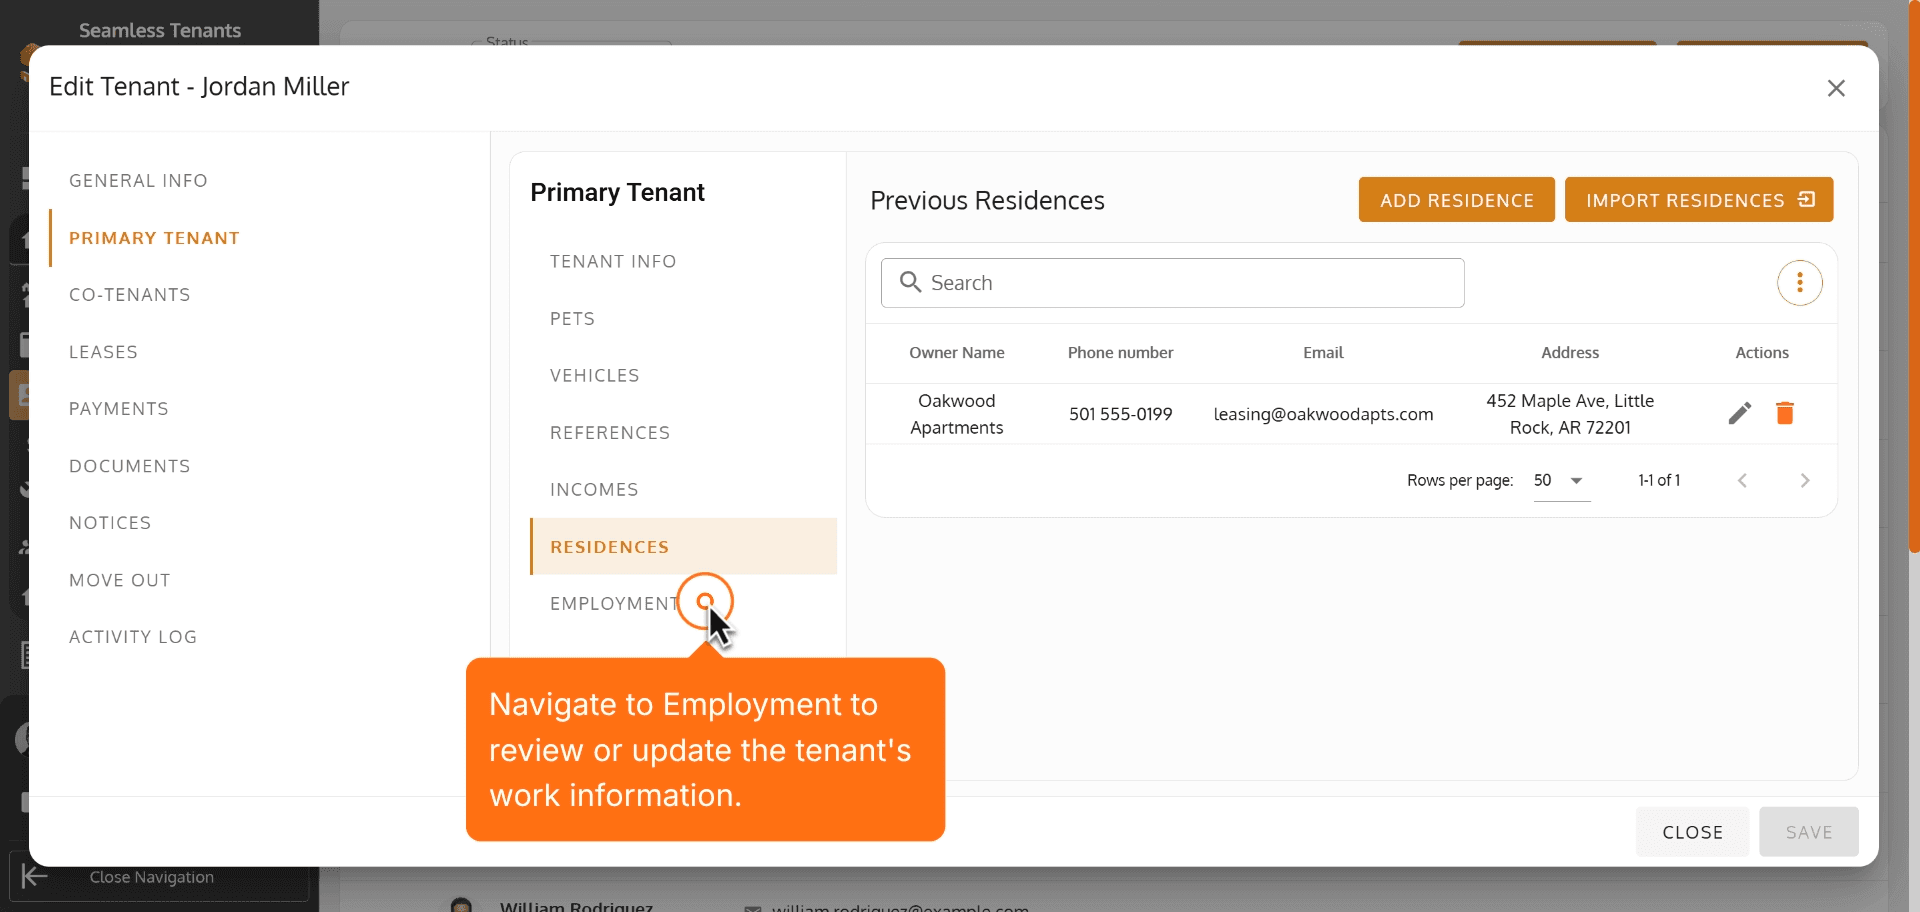
17. Navigate to Employment to review or update the tenant's work information.
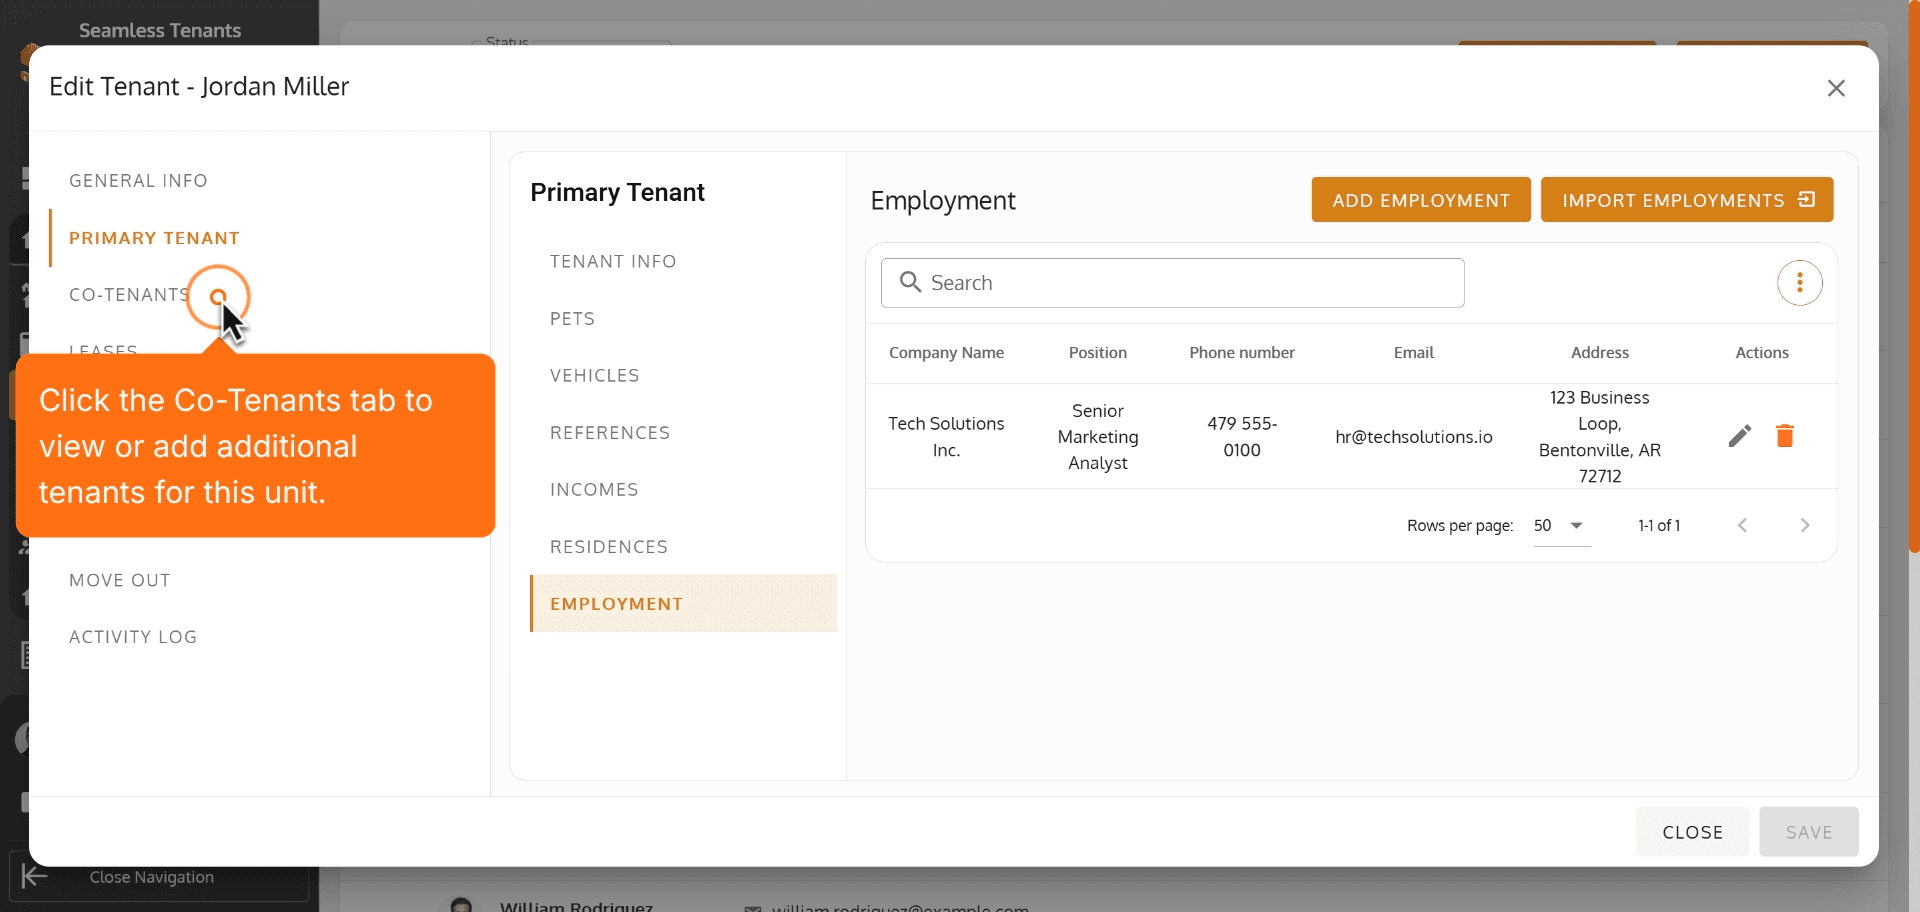
18. Click the Co-Tenants tab to view or add additional tenants for this unit.
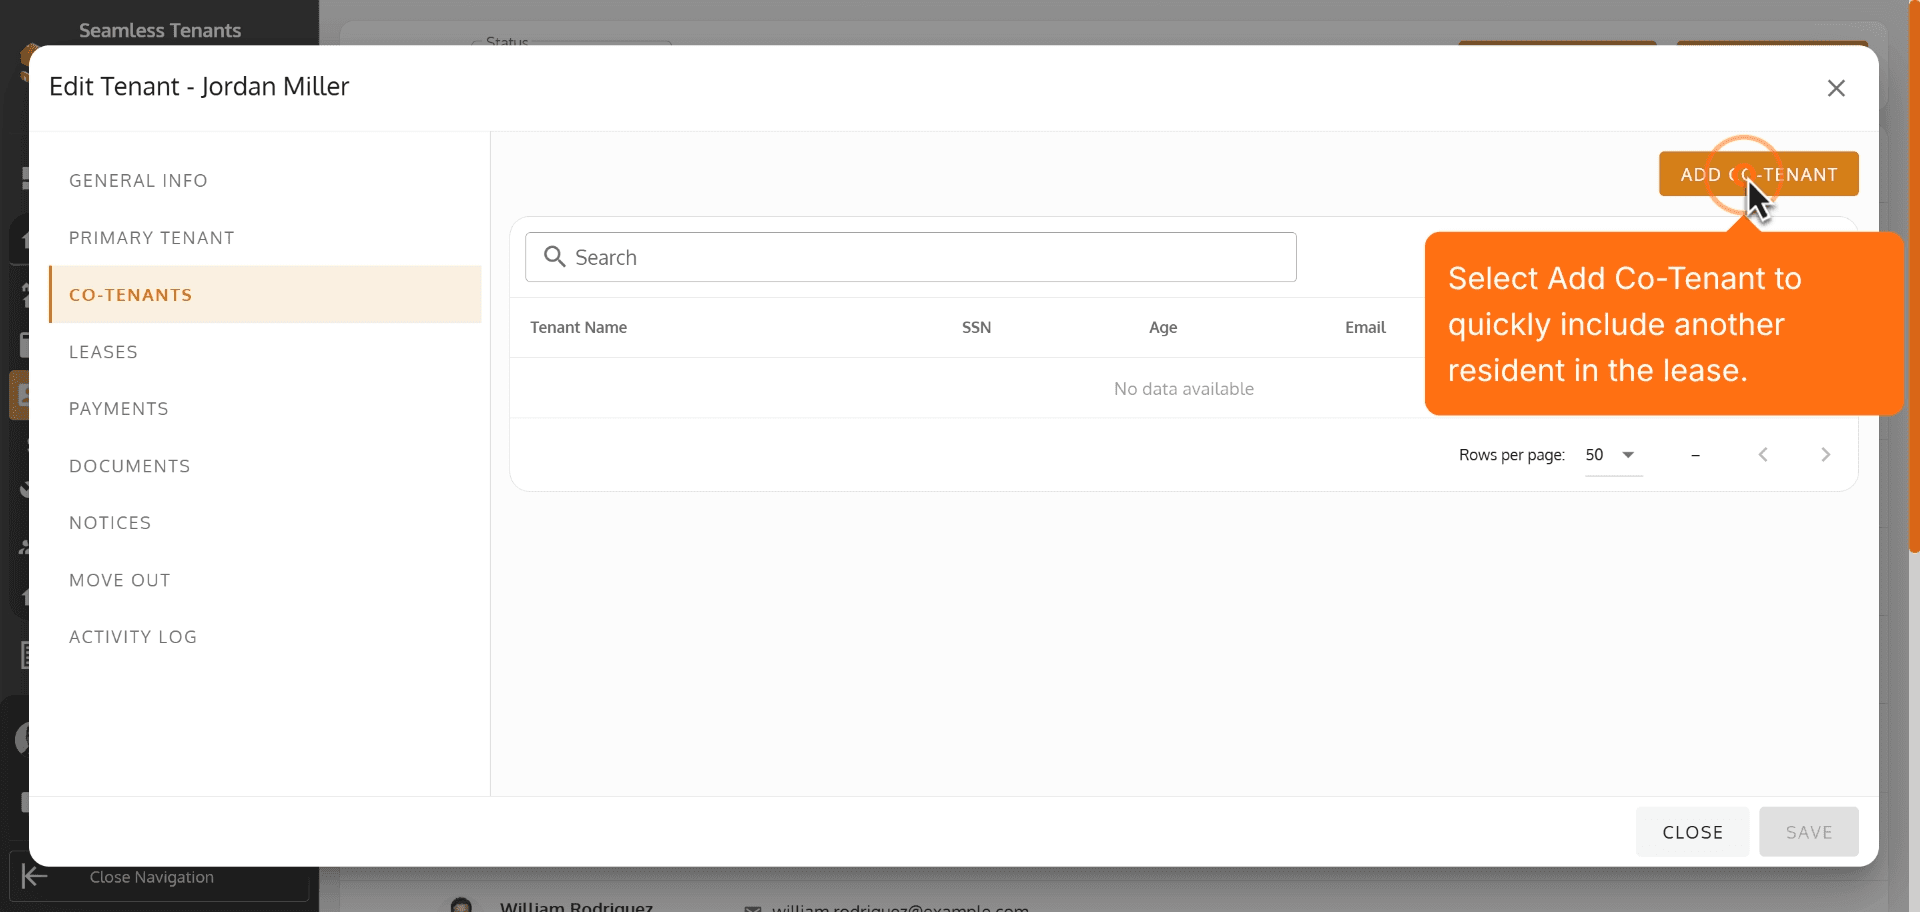
19. Select Add Co-Tenant to quickly include another resident in the lease.
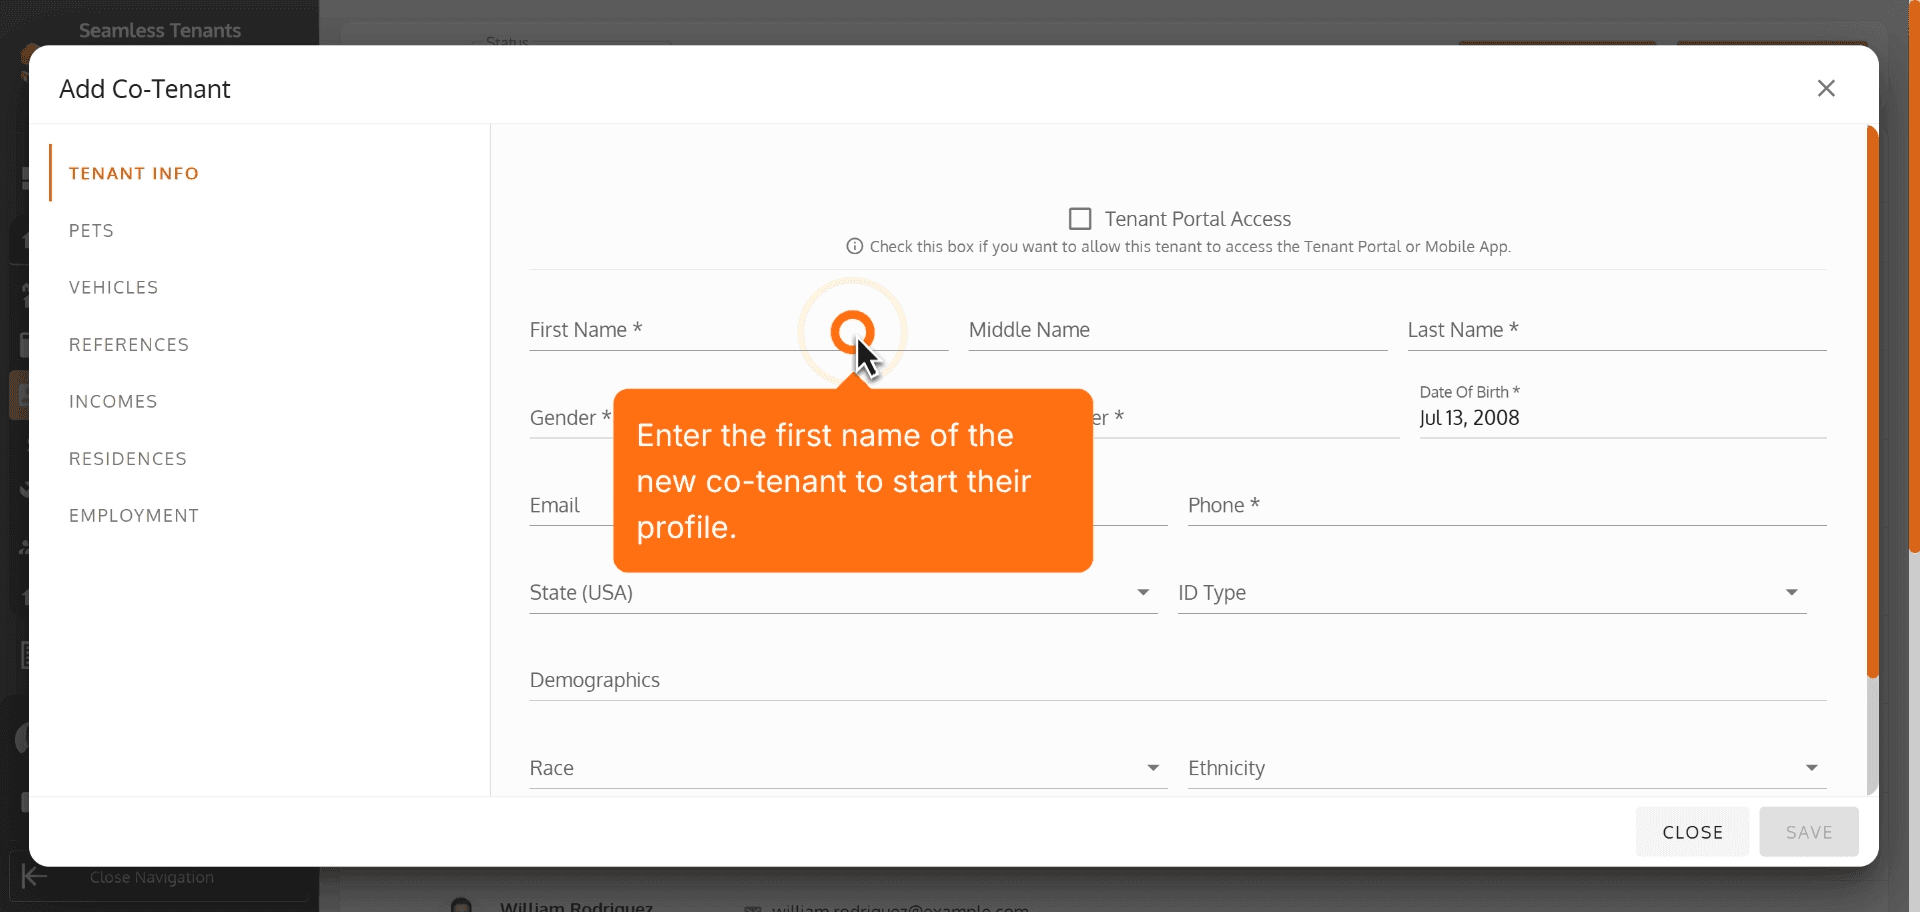
20. Enter the first name of the new co-tenant to start their profile.
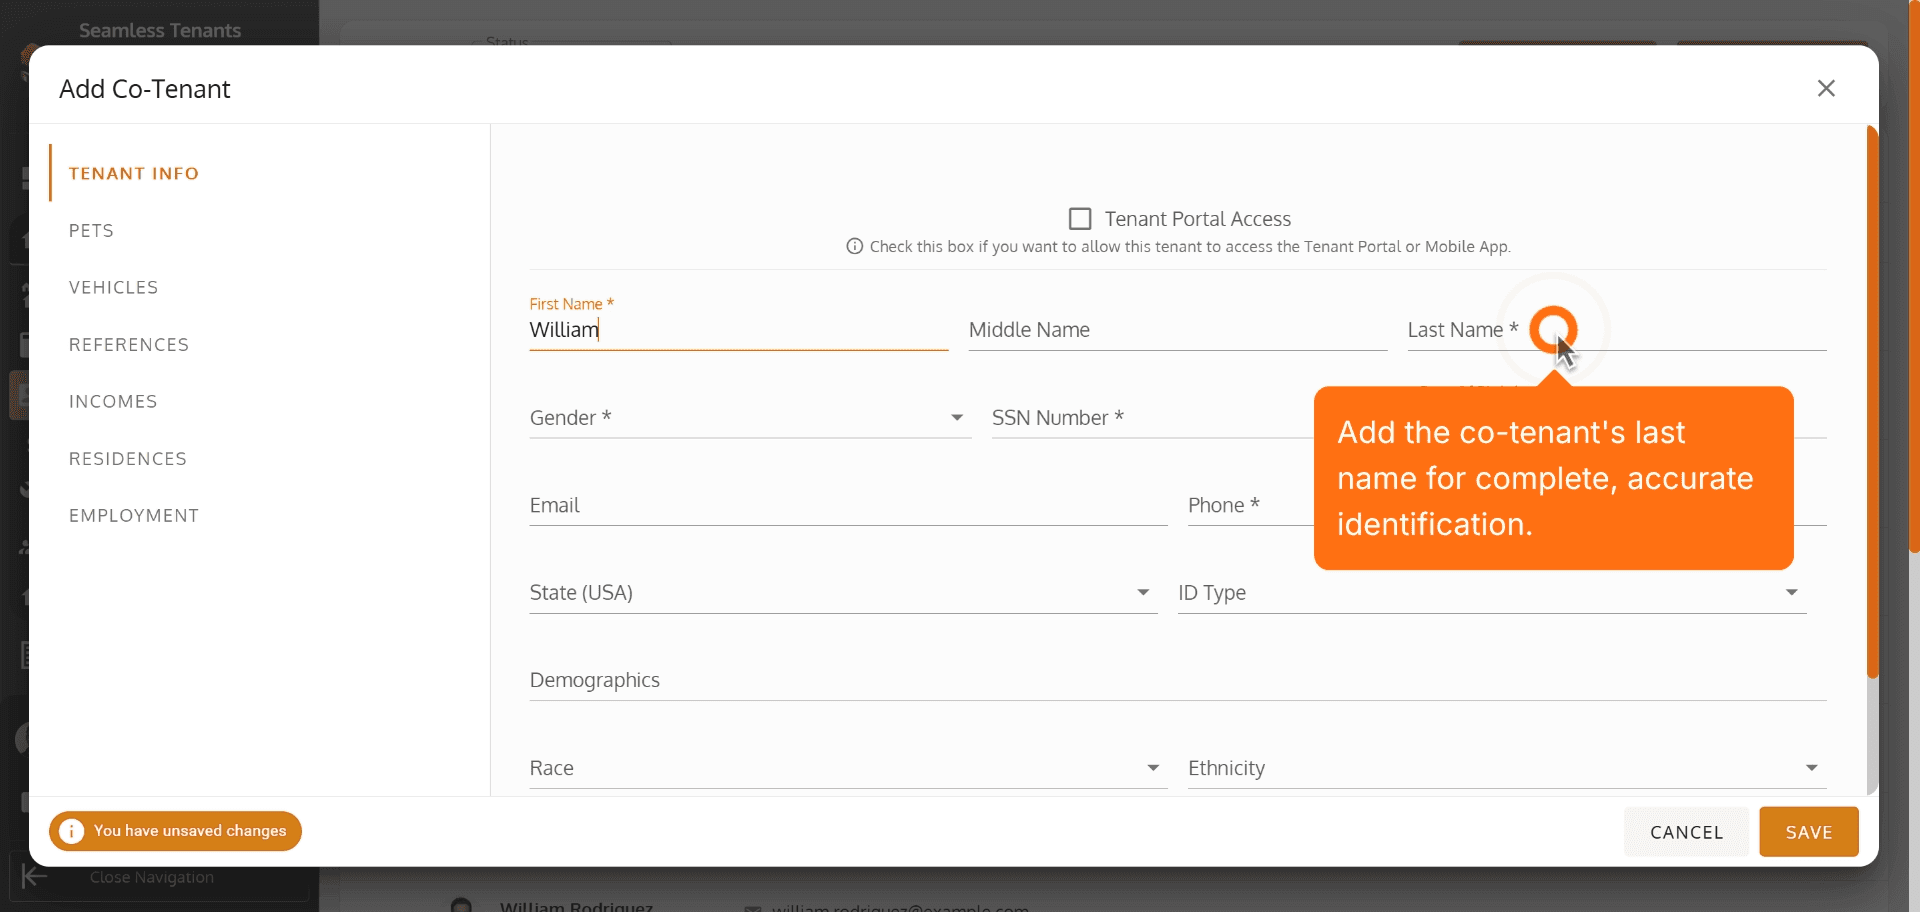
21. Add the co-tenant's last name for complete, accurate identification.
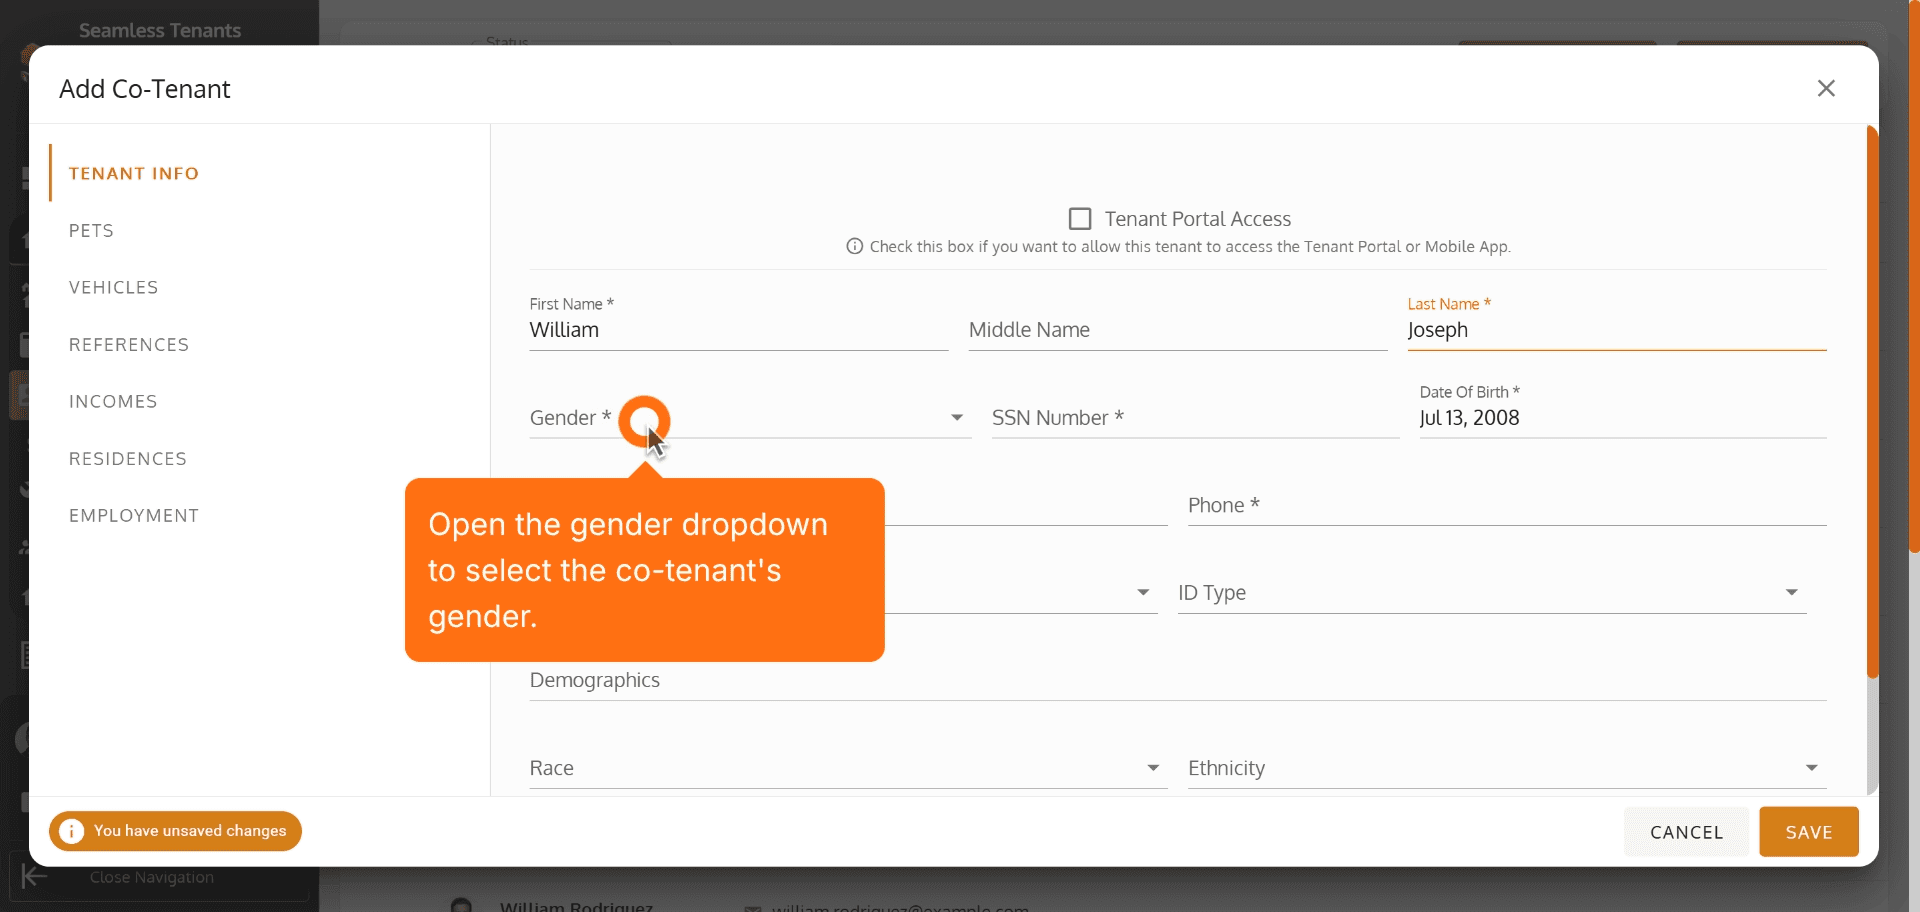
22. Open the gender dropdown to select the co-tenant's gender.
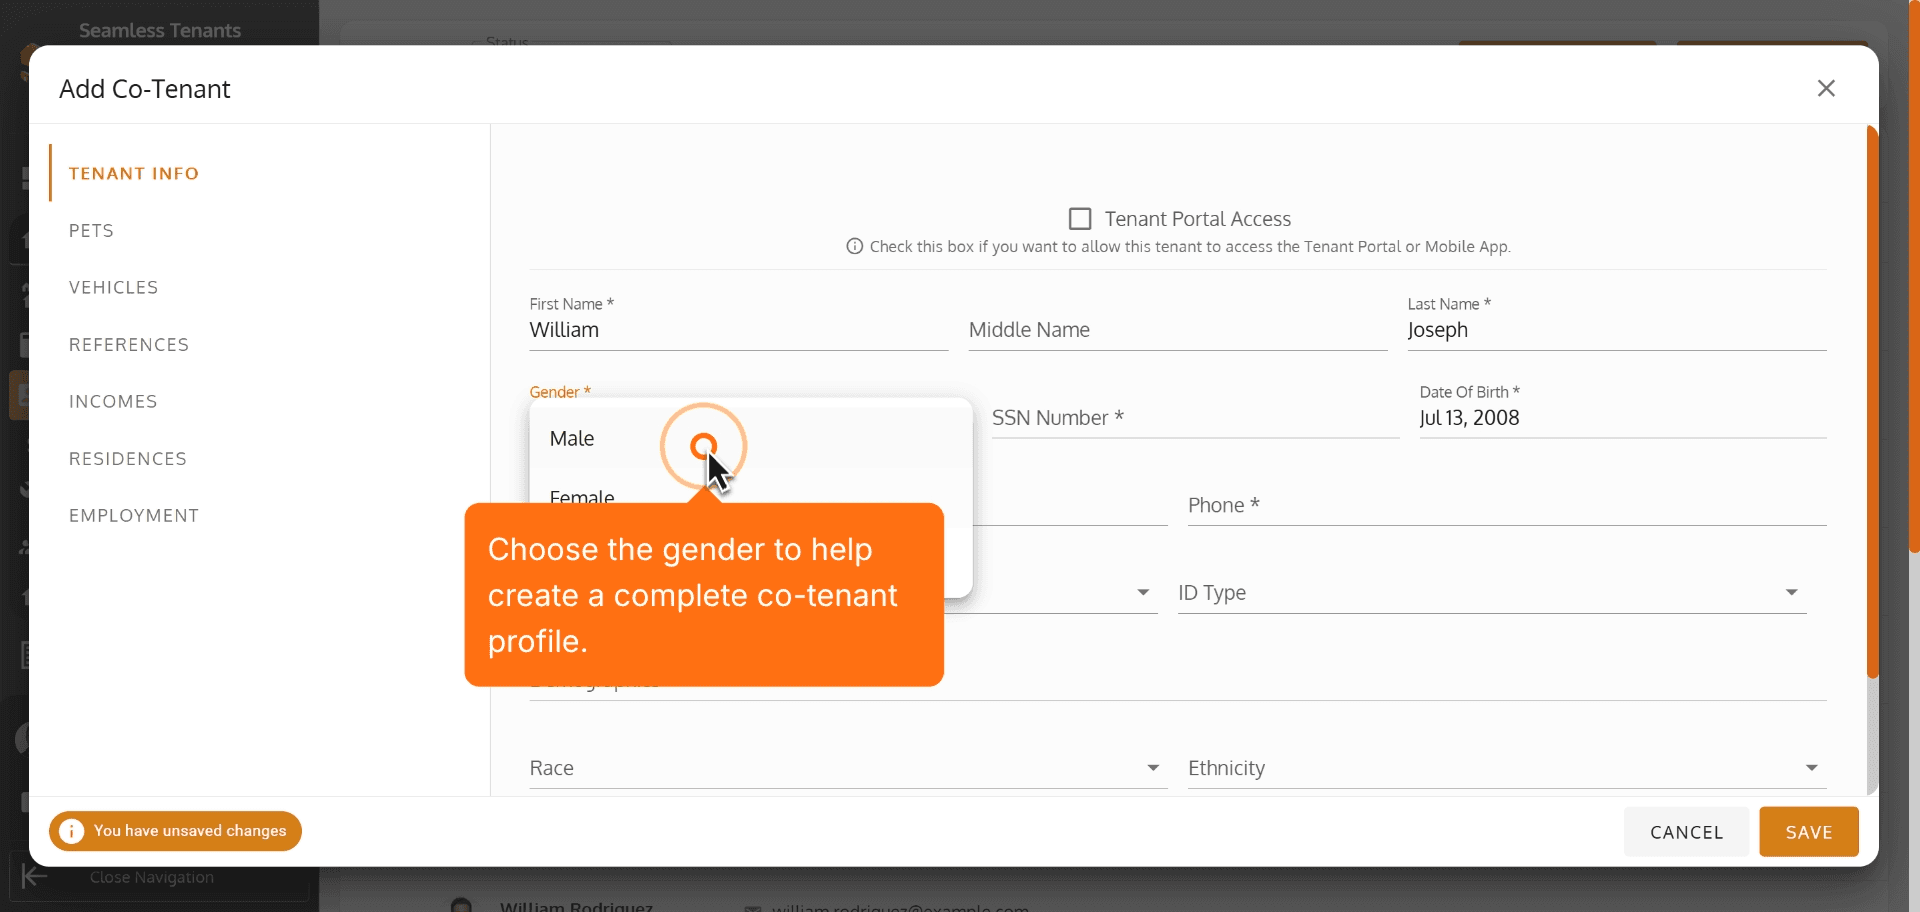
23. Choose the gender to help create a complete co-tenant profile.
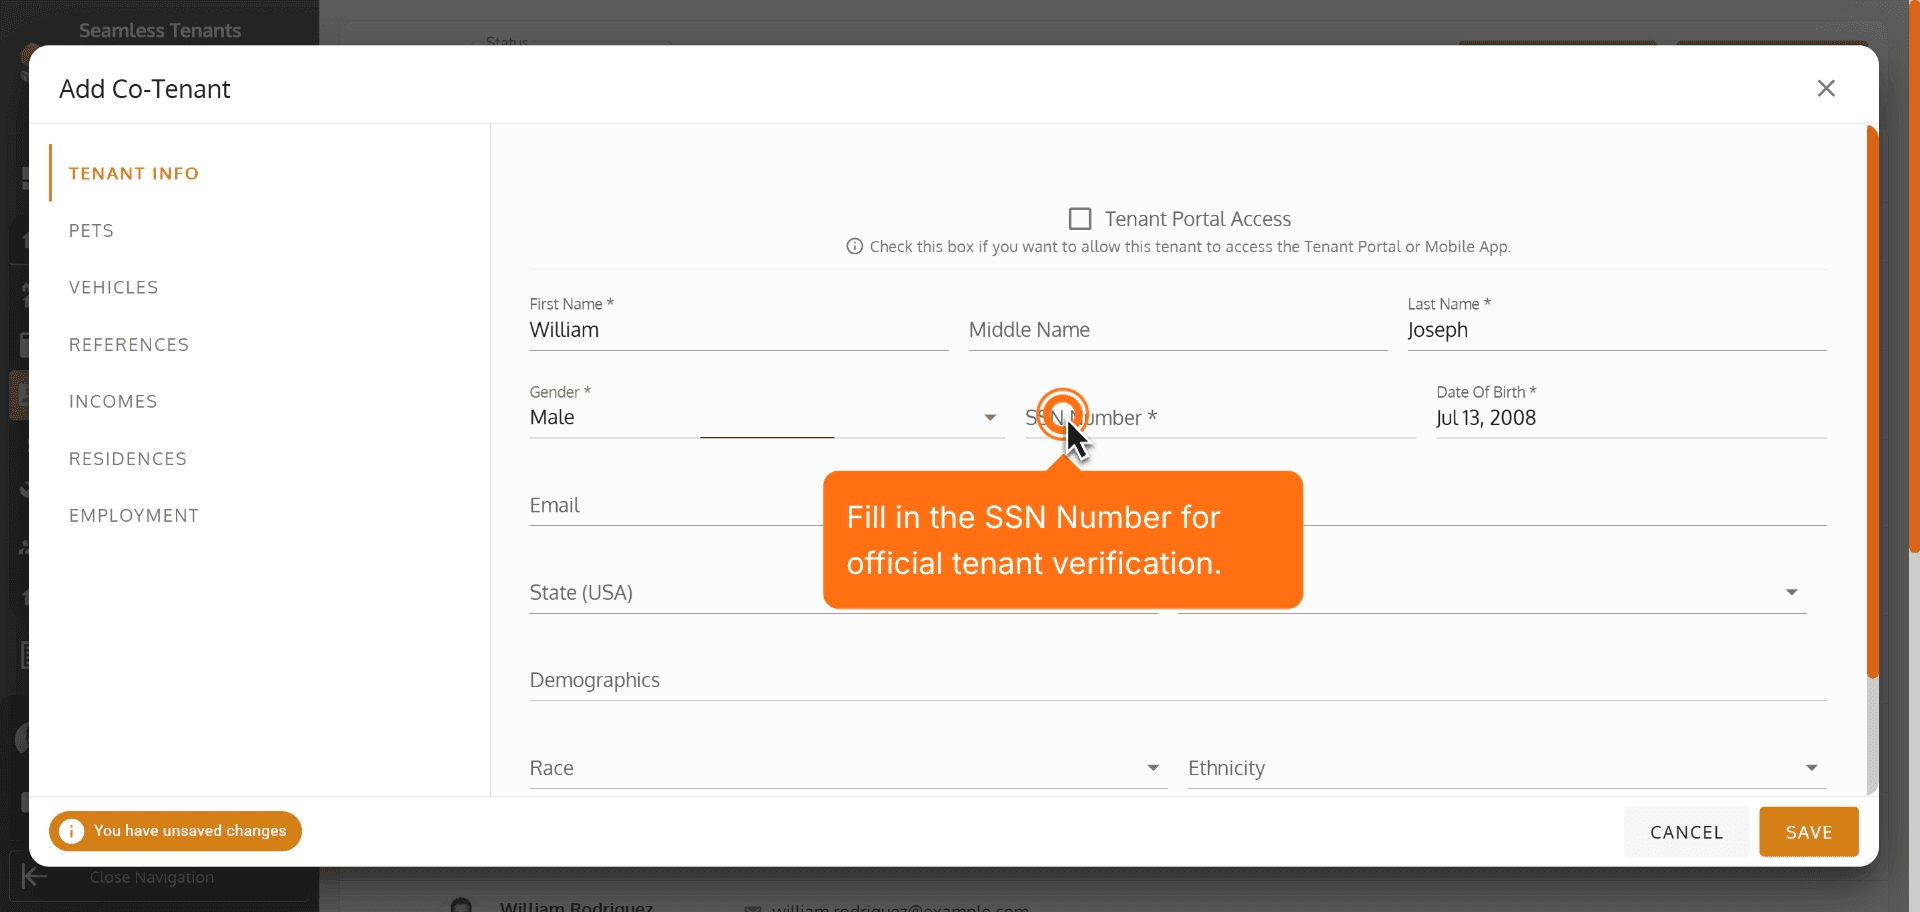
24. Fill in the SSN Number for official tenant verification.
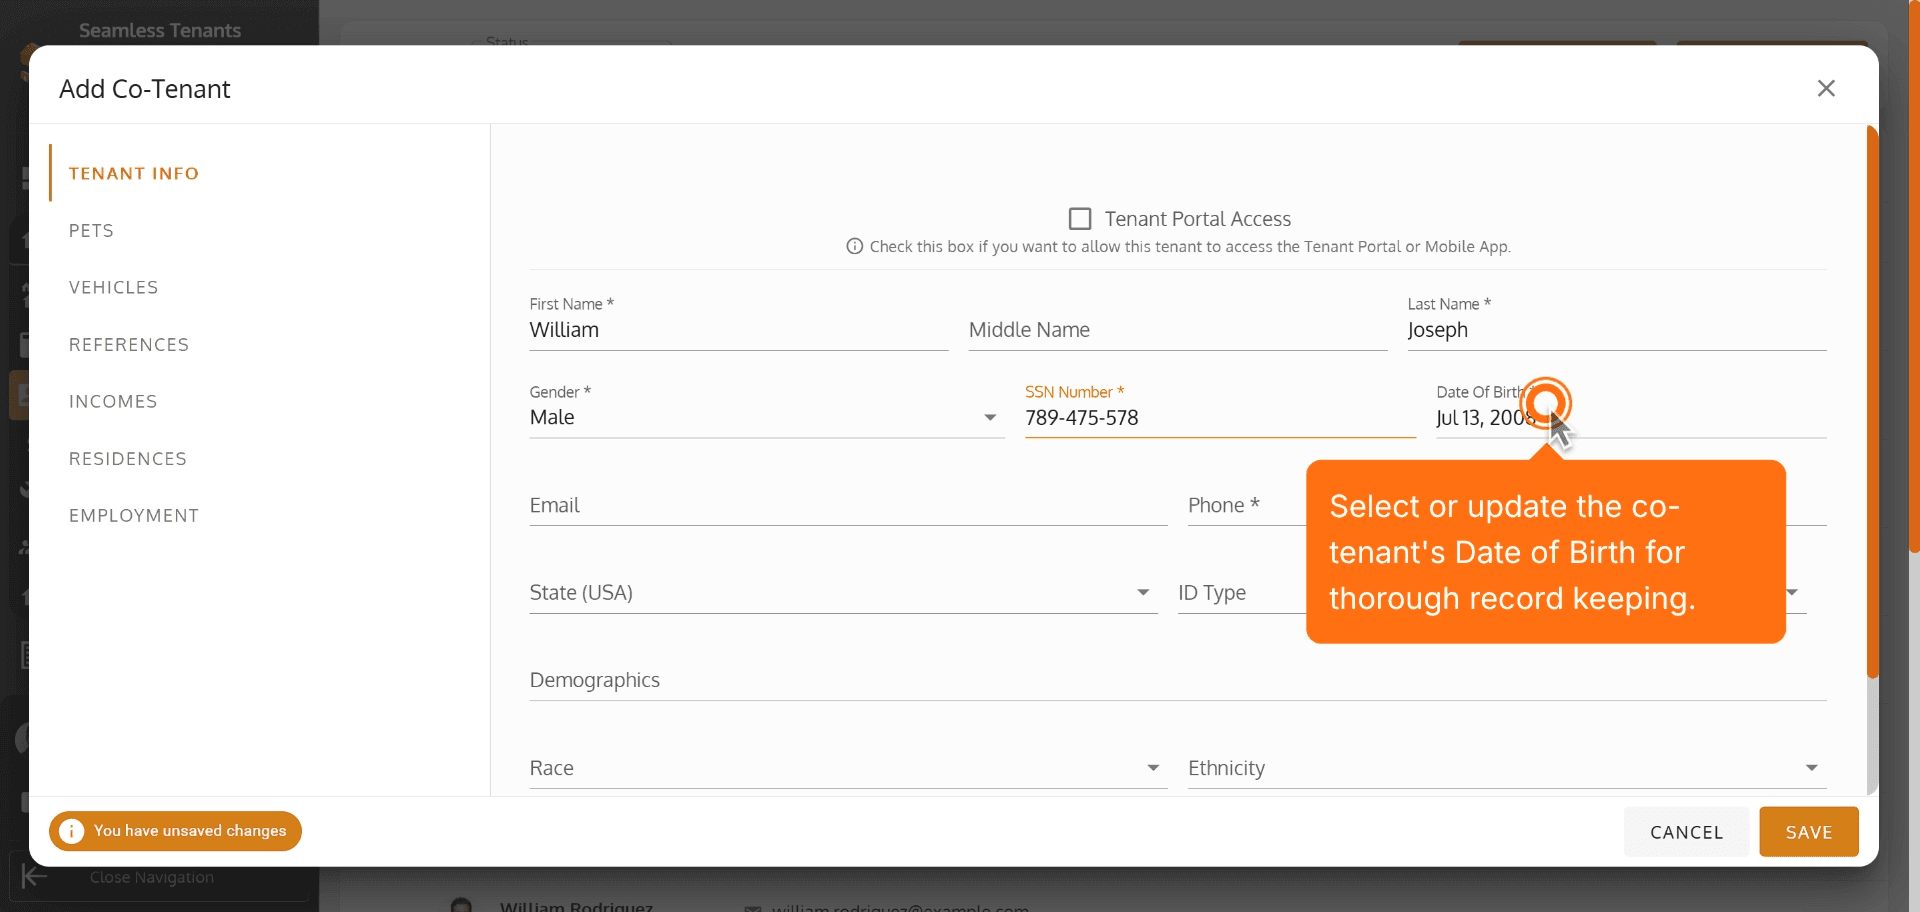
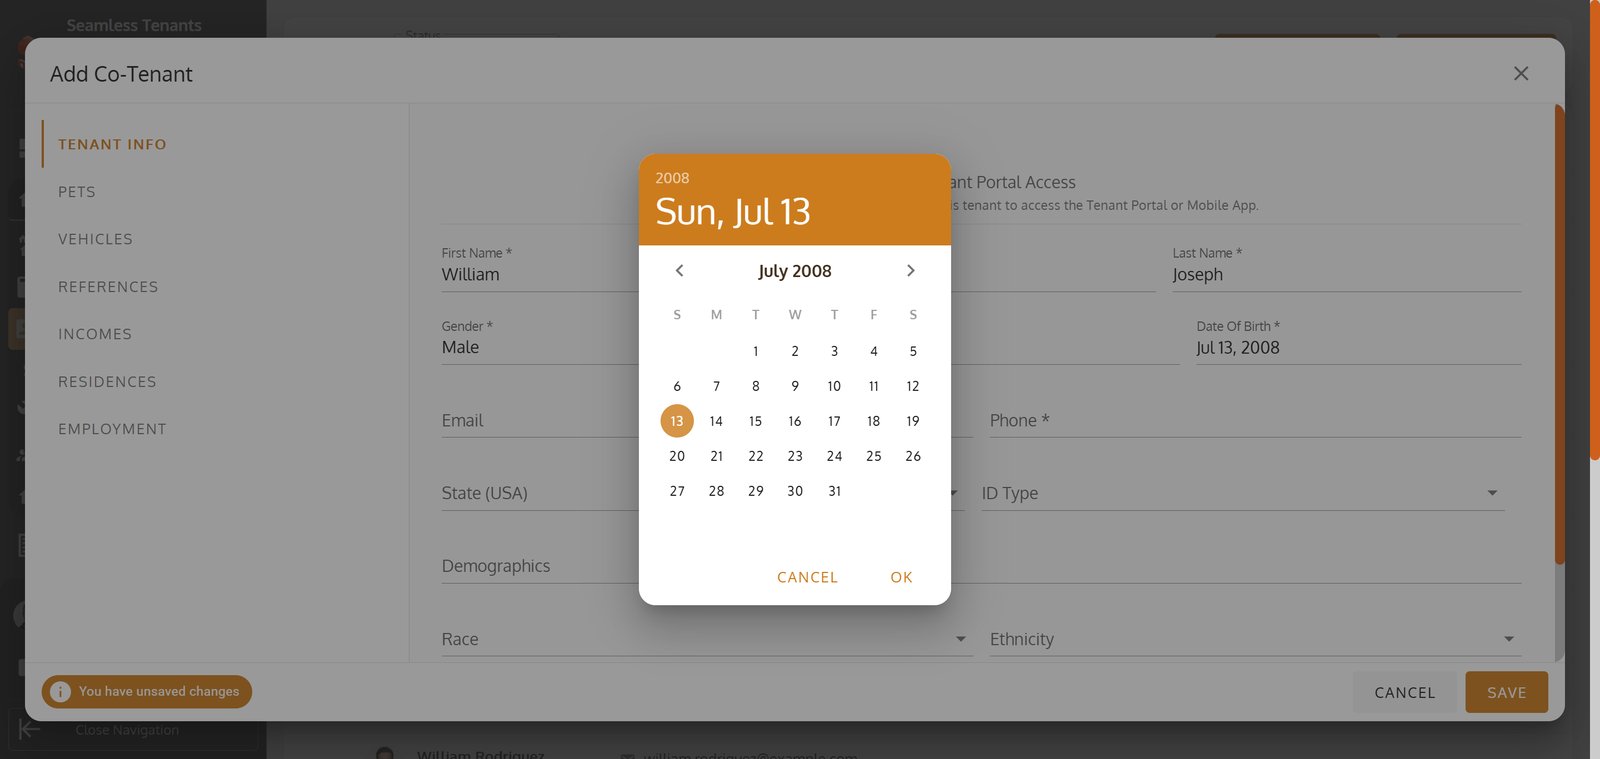
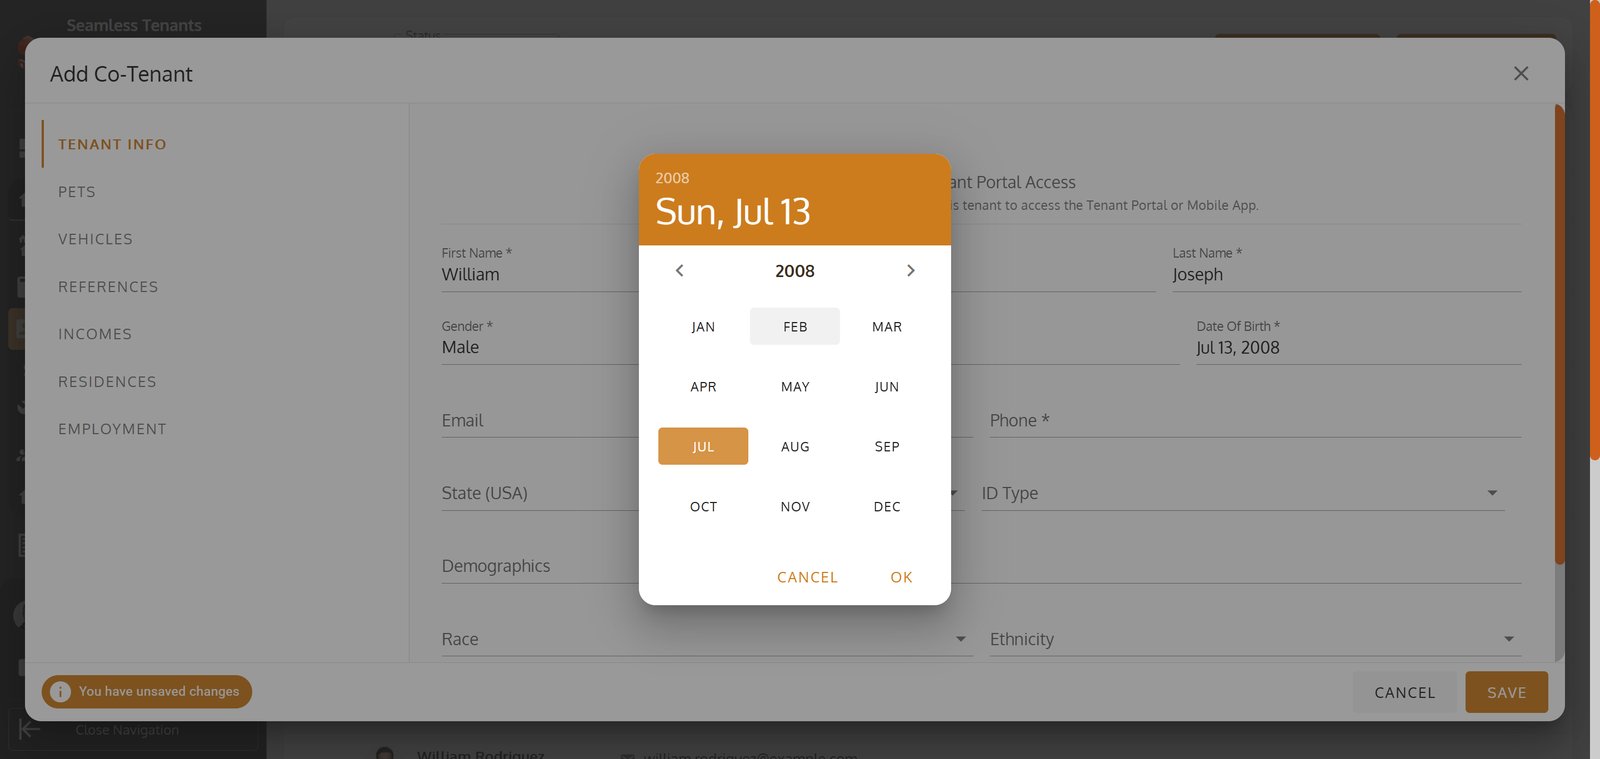
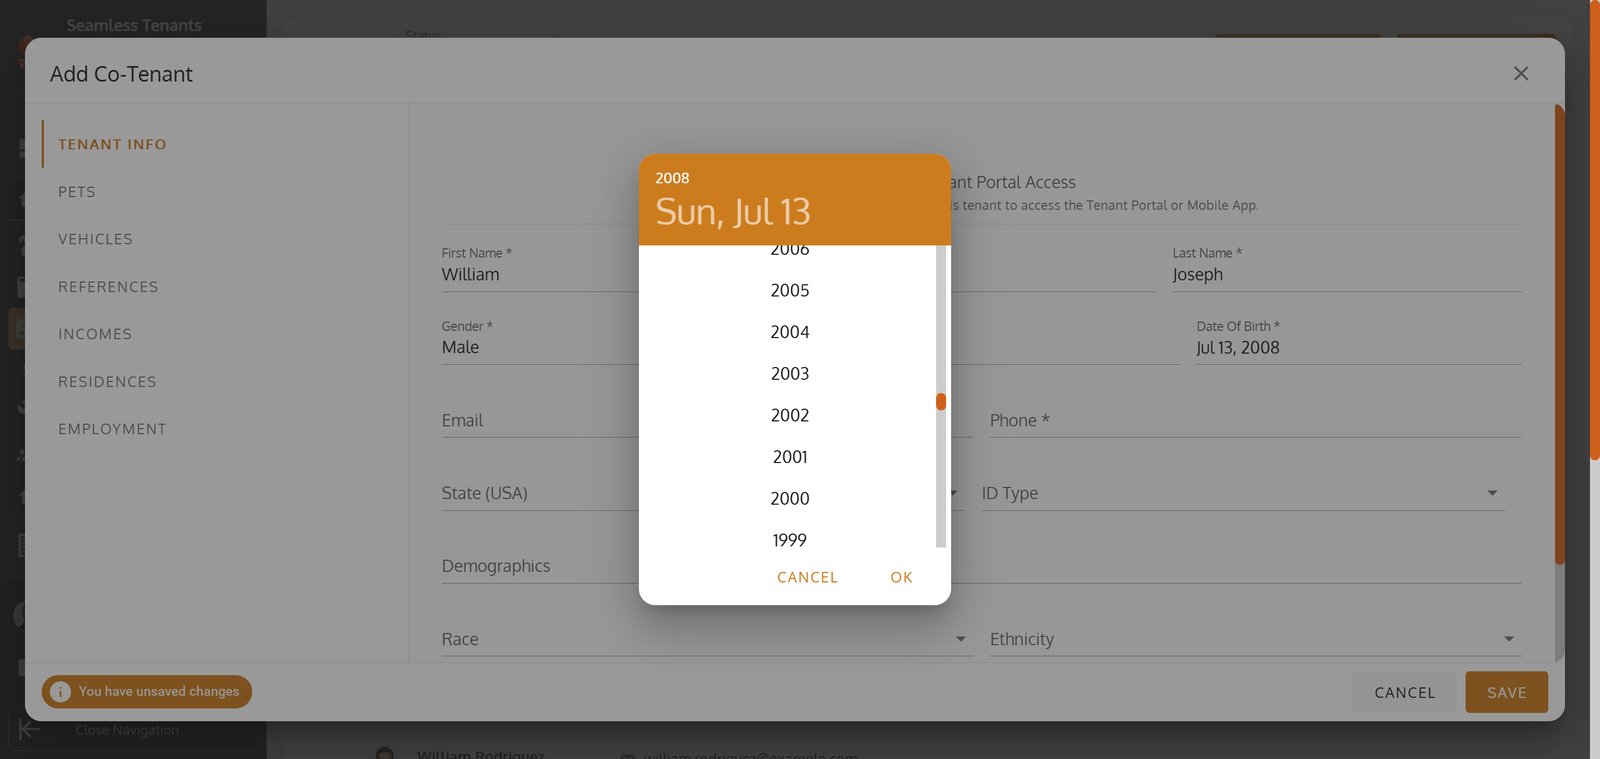
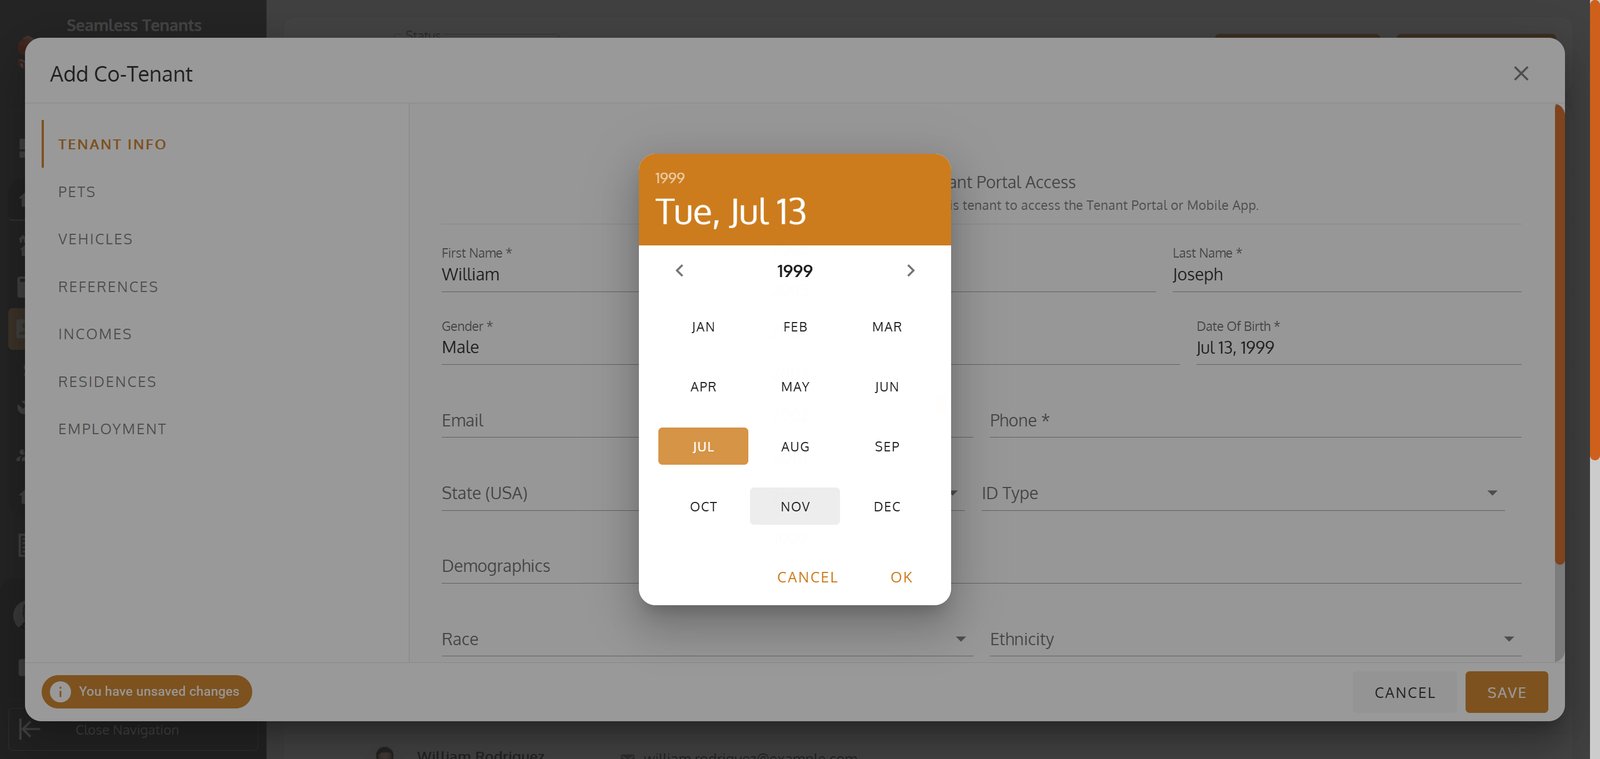
25. Select or update the co-tenant's Date of Birth for thorough record keeping.
26.
27.
28.
29.
30.
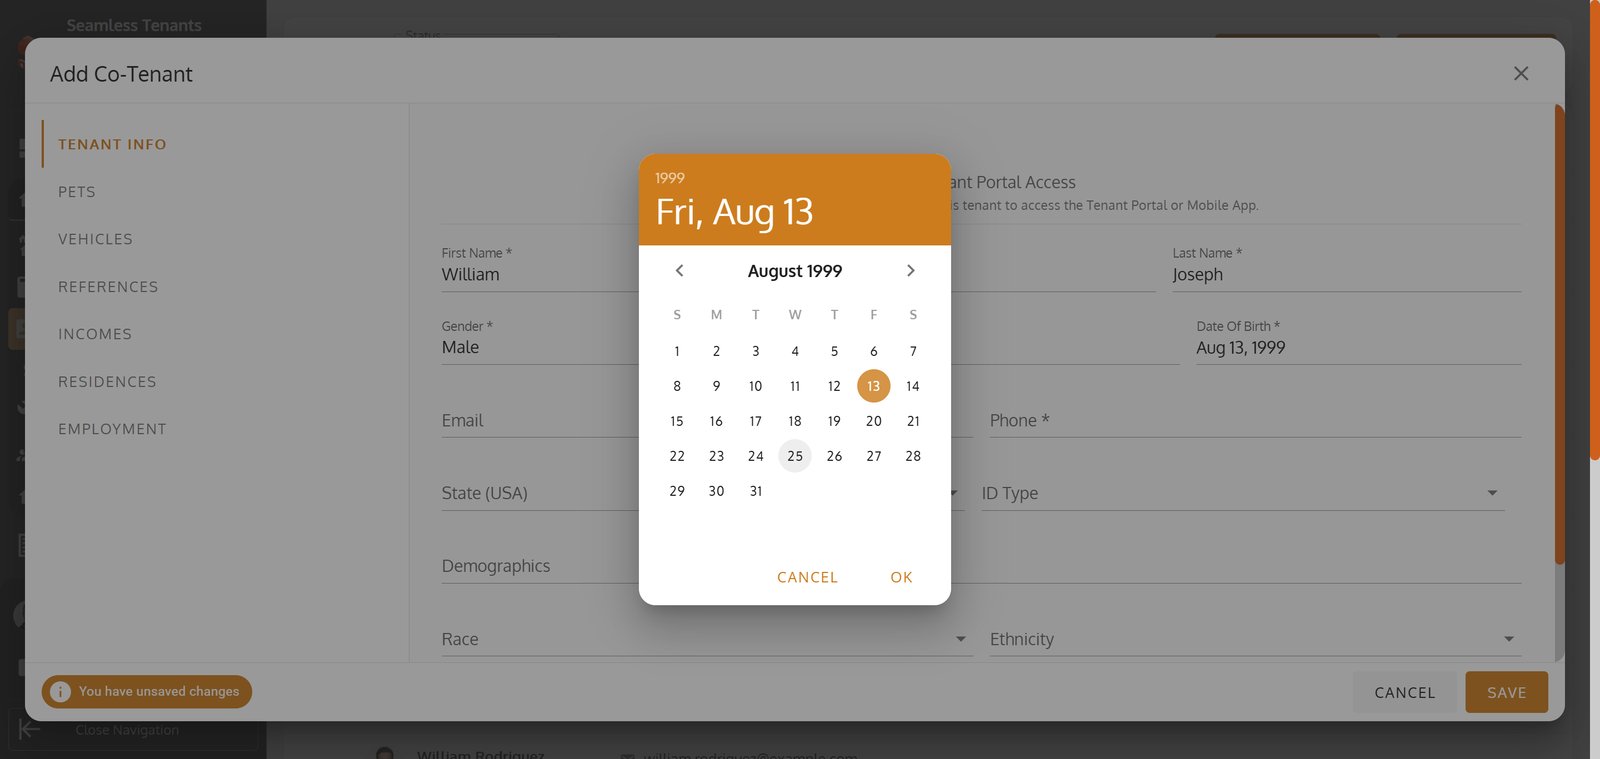
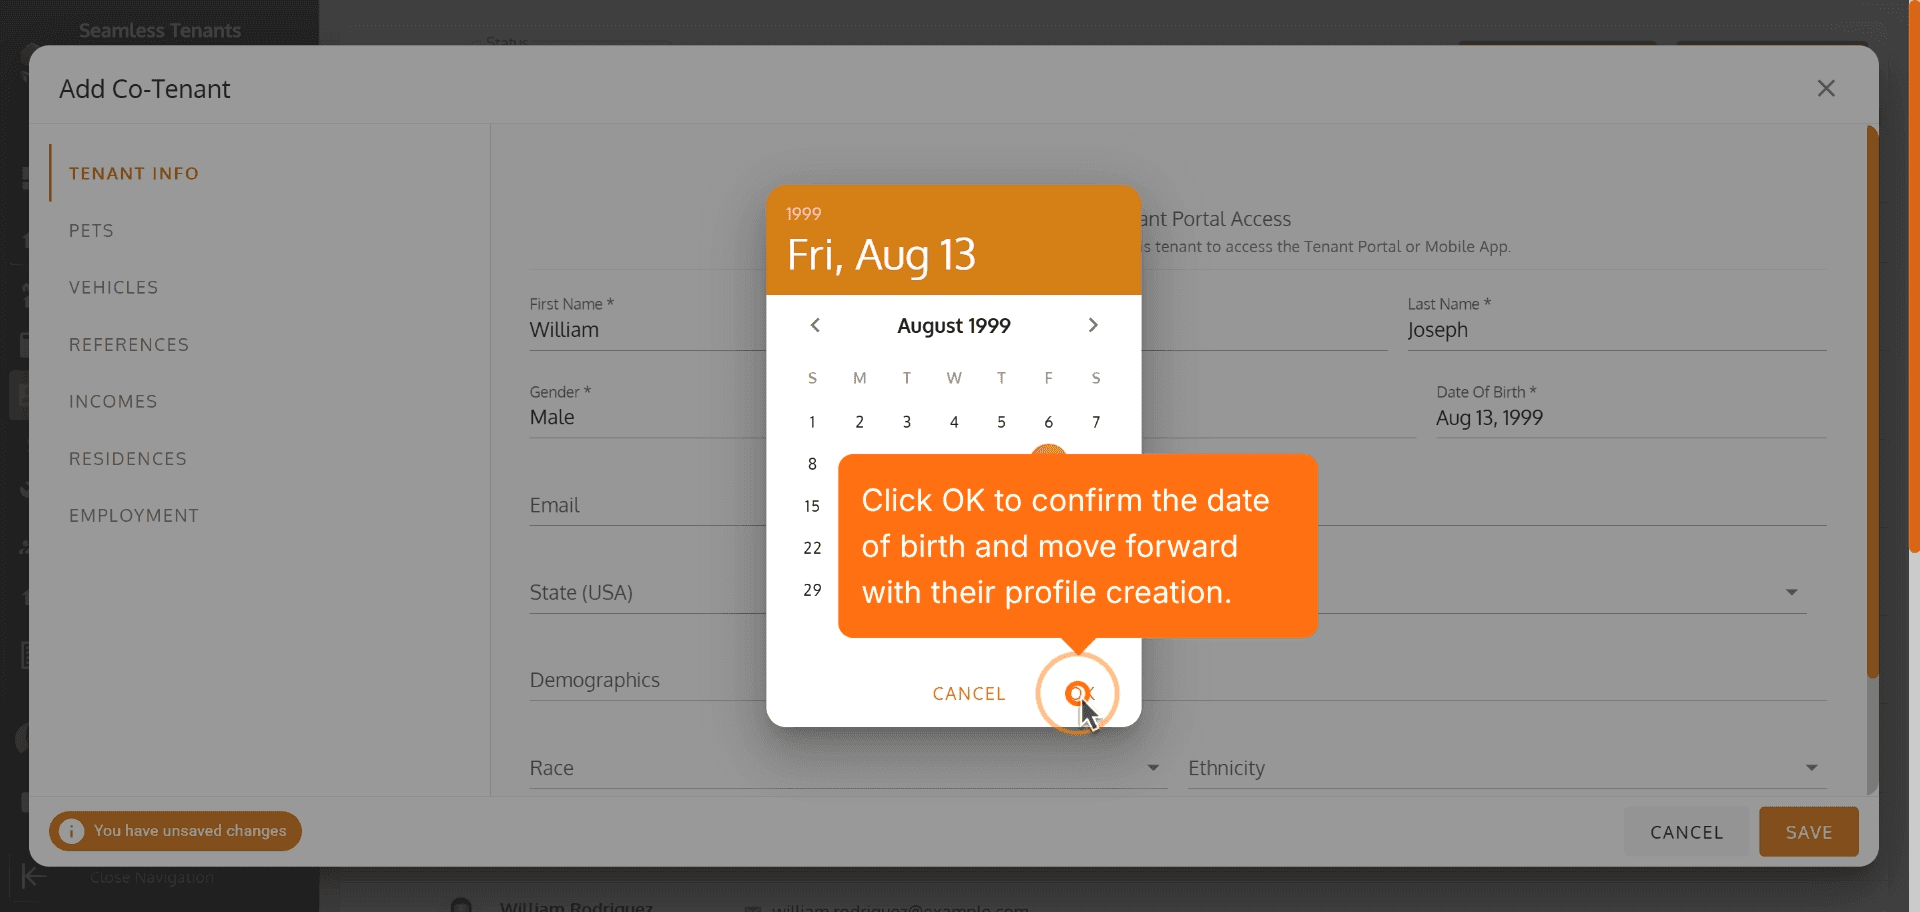
31. Click OK to confirm the date of birth and move forward with their profile creation.
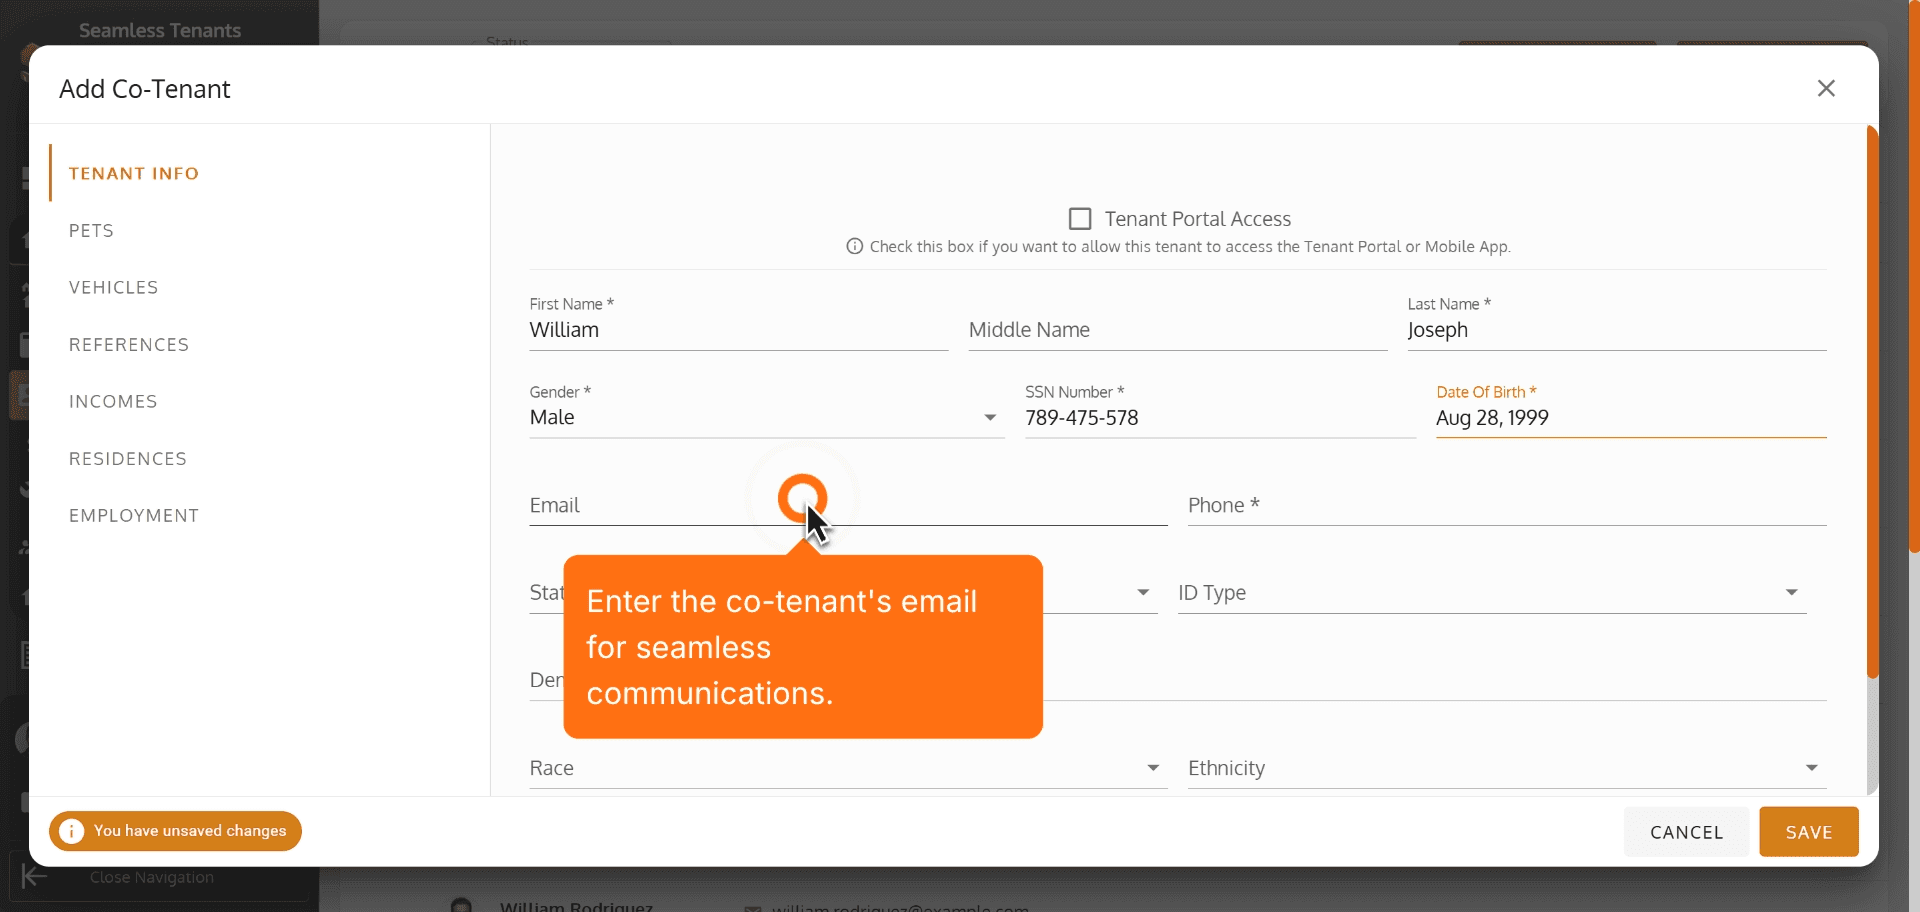
32. Enter the co-tenant's email for seamless communications.
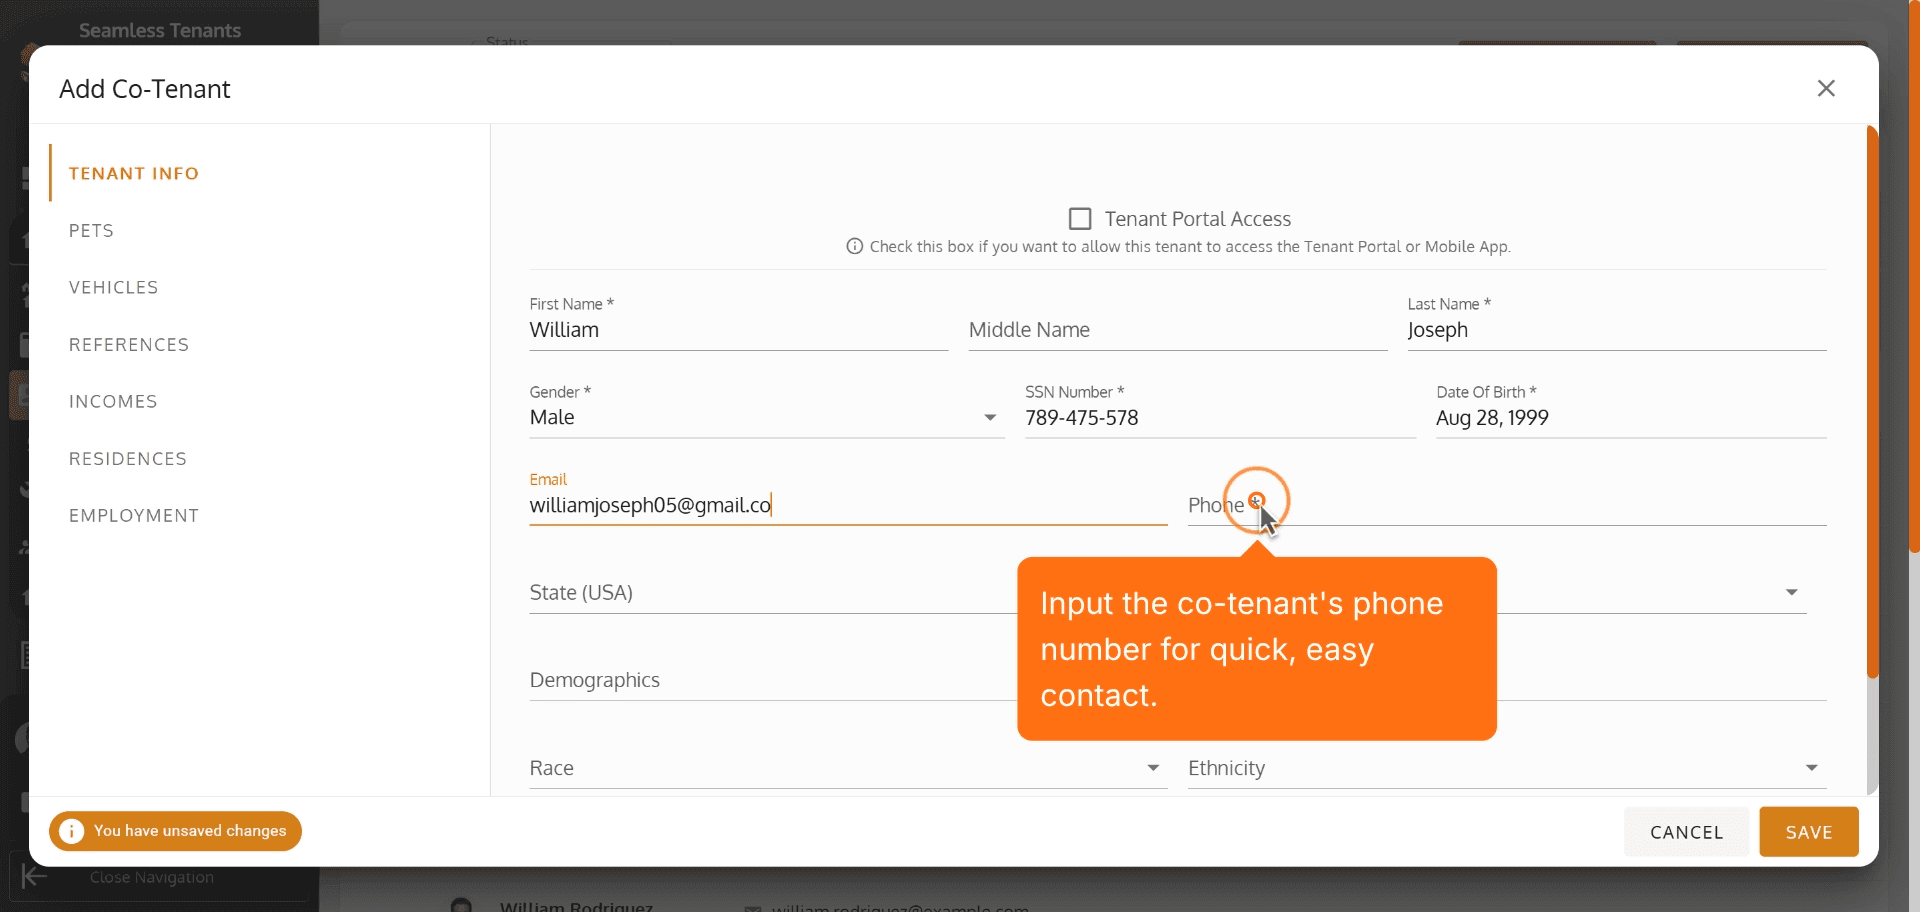
33. Input the co-tenant's phone number for quick, easy contact.
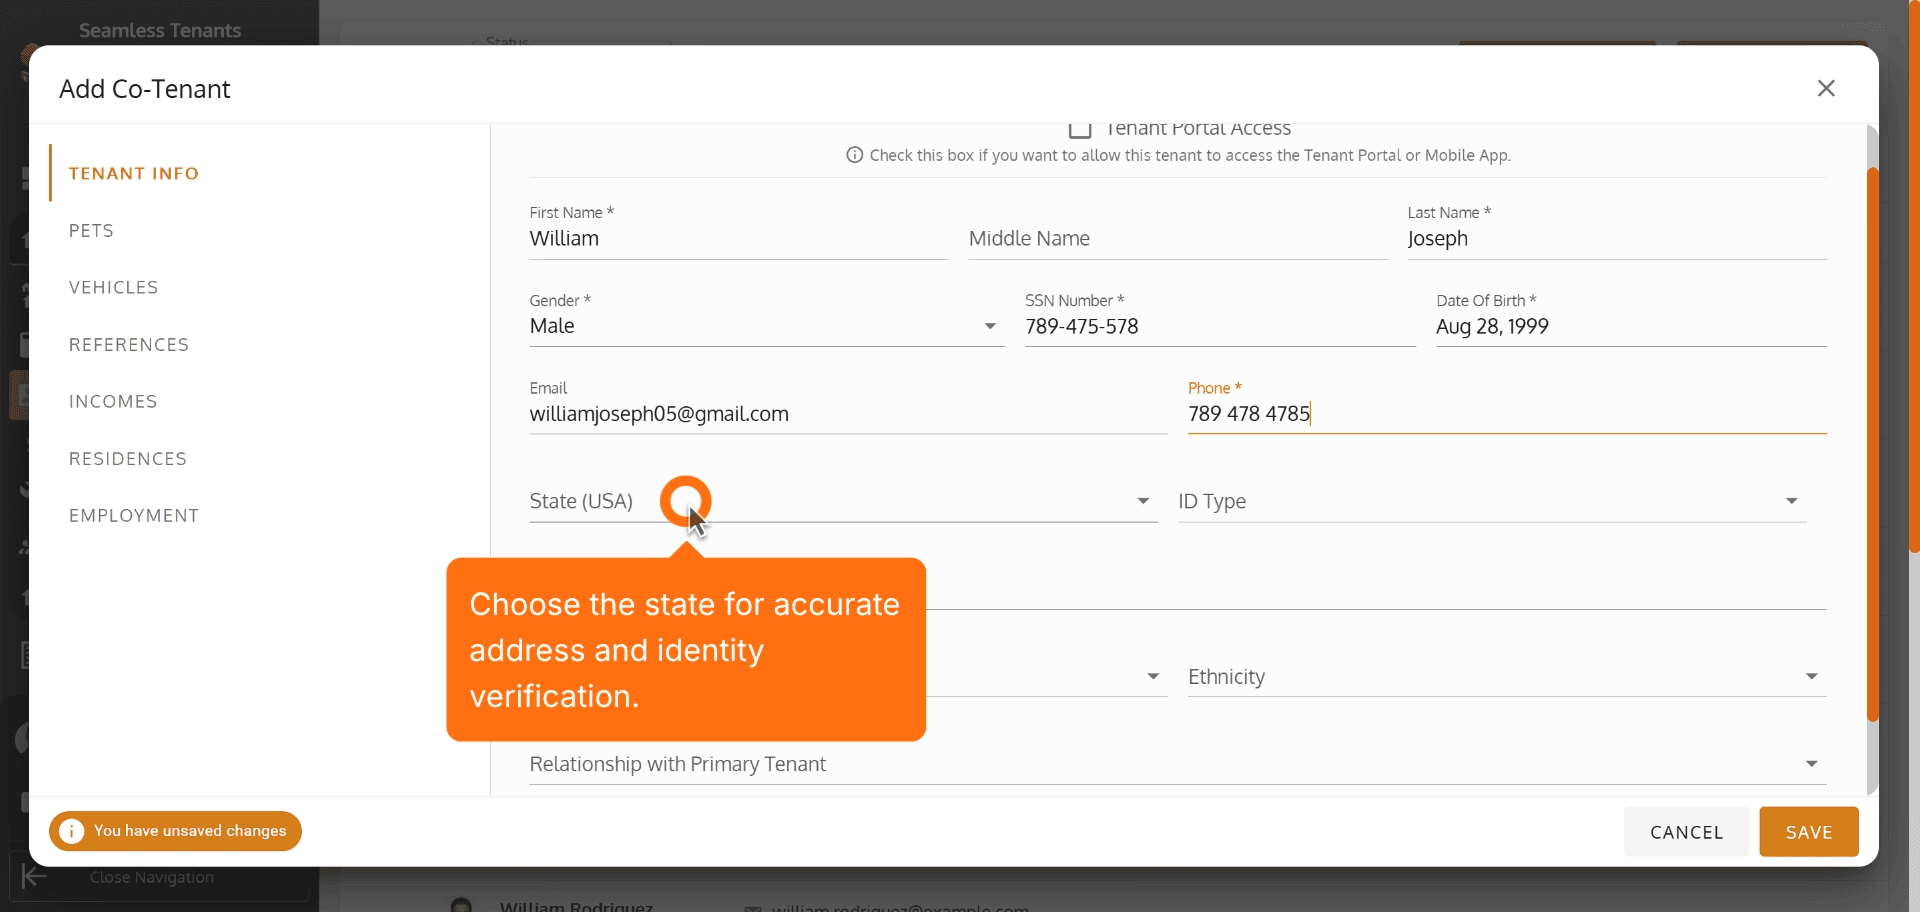
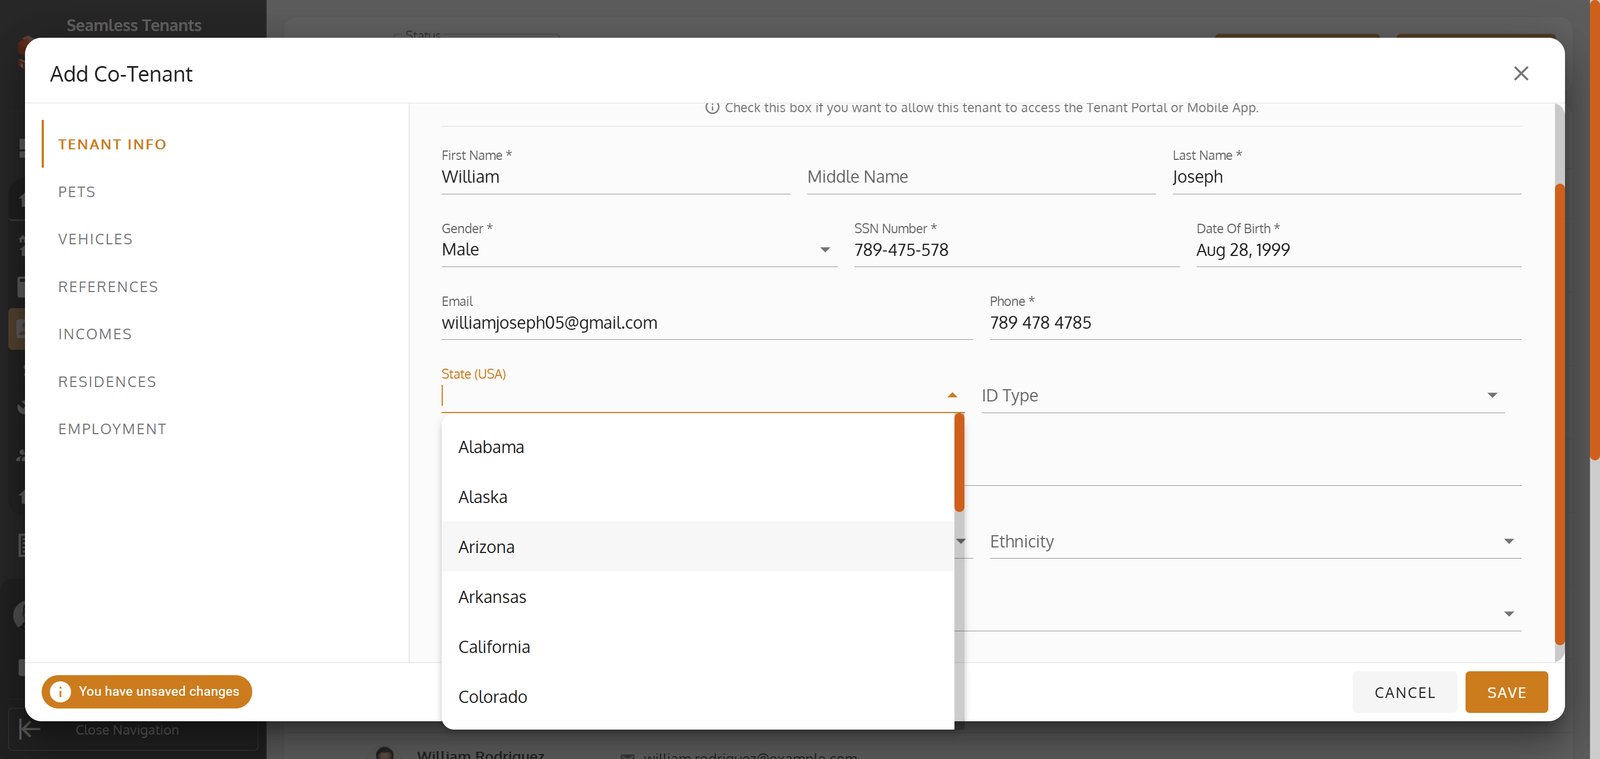
34. Choose the state for accurate address and identity verification.
35.
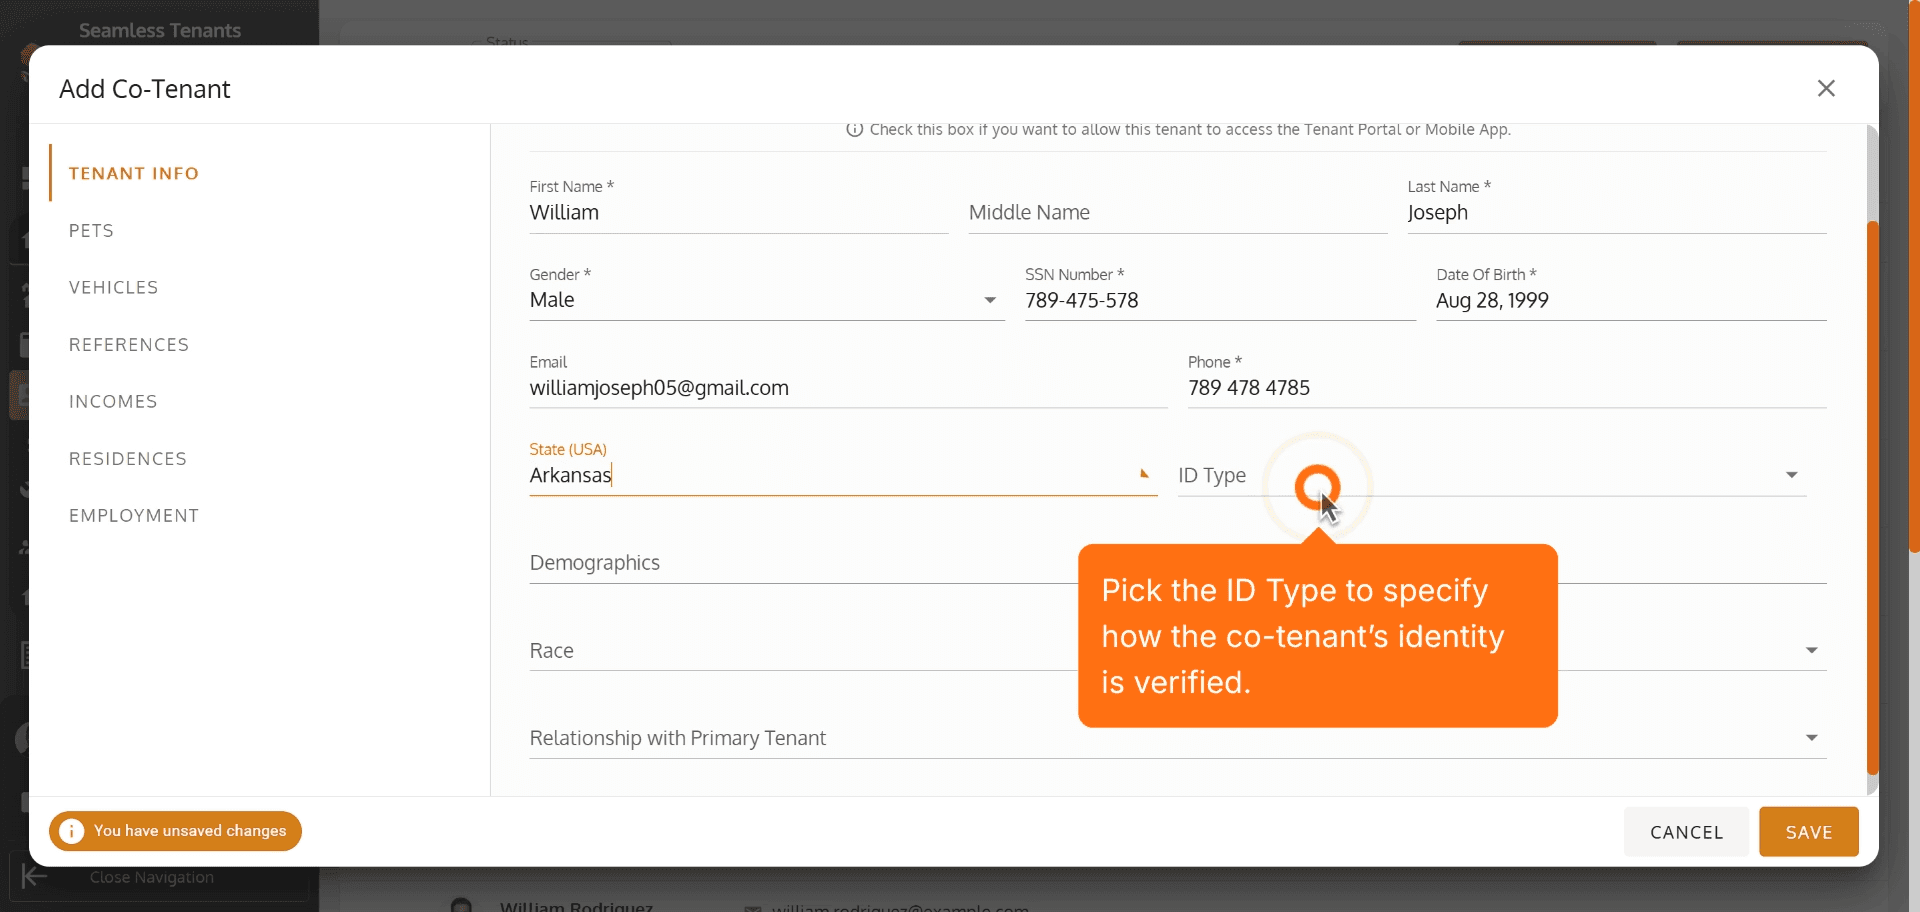
36. Pick the ID Type to specify how the co-tenant’s identity is verified.
37.
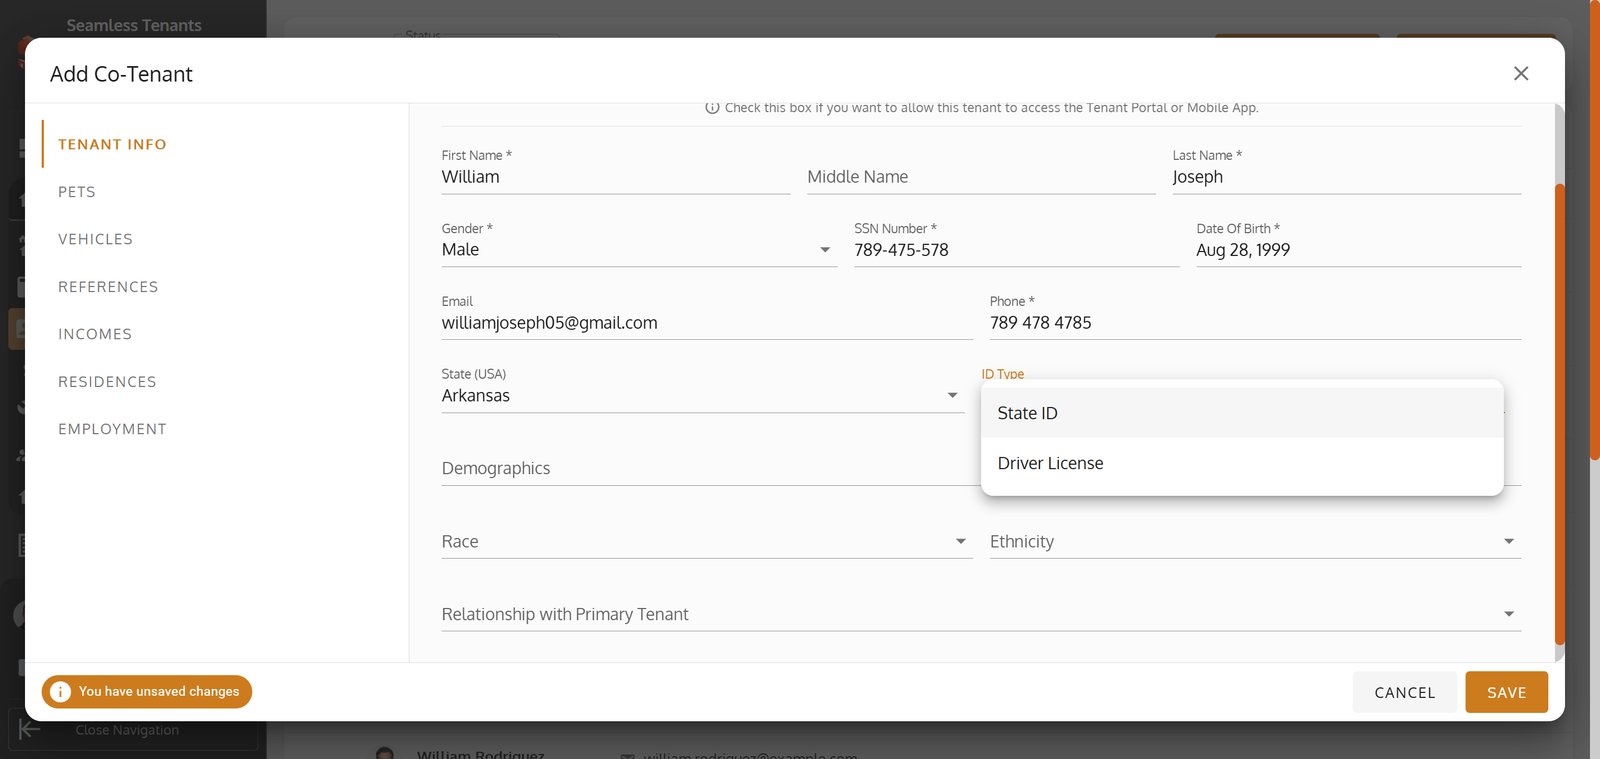
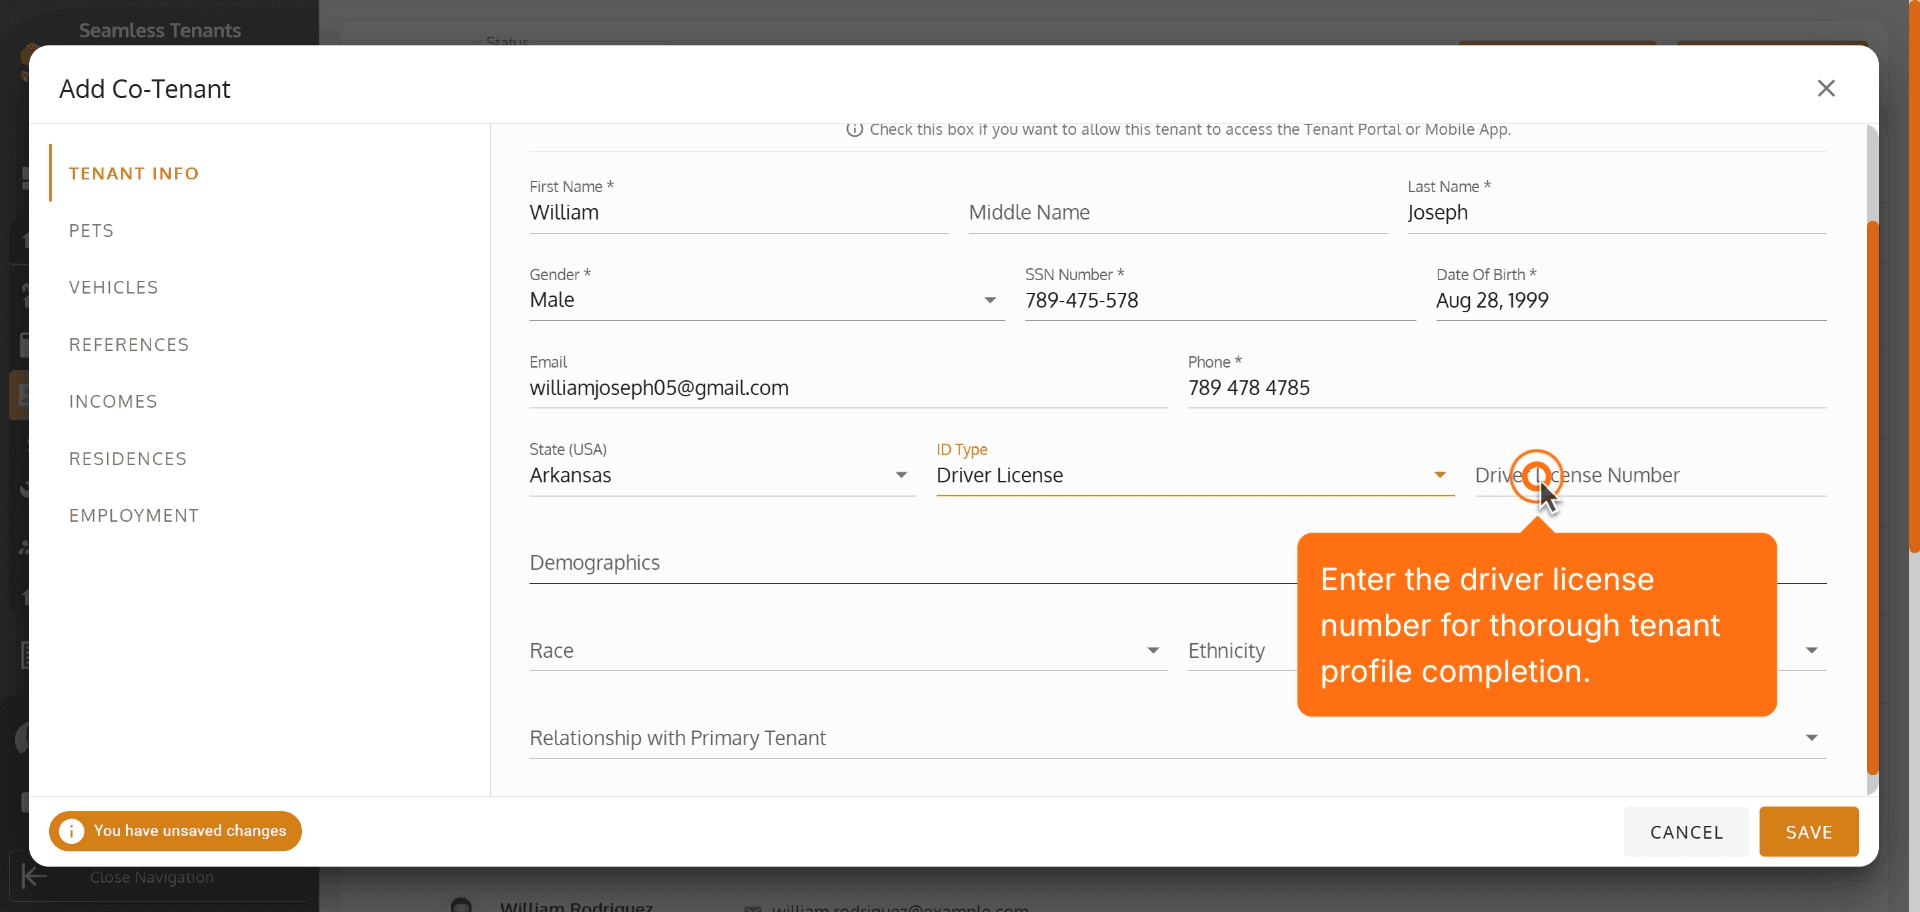
38. Enter the driver license number for thorough tenant profile completion.
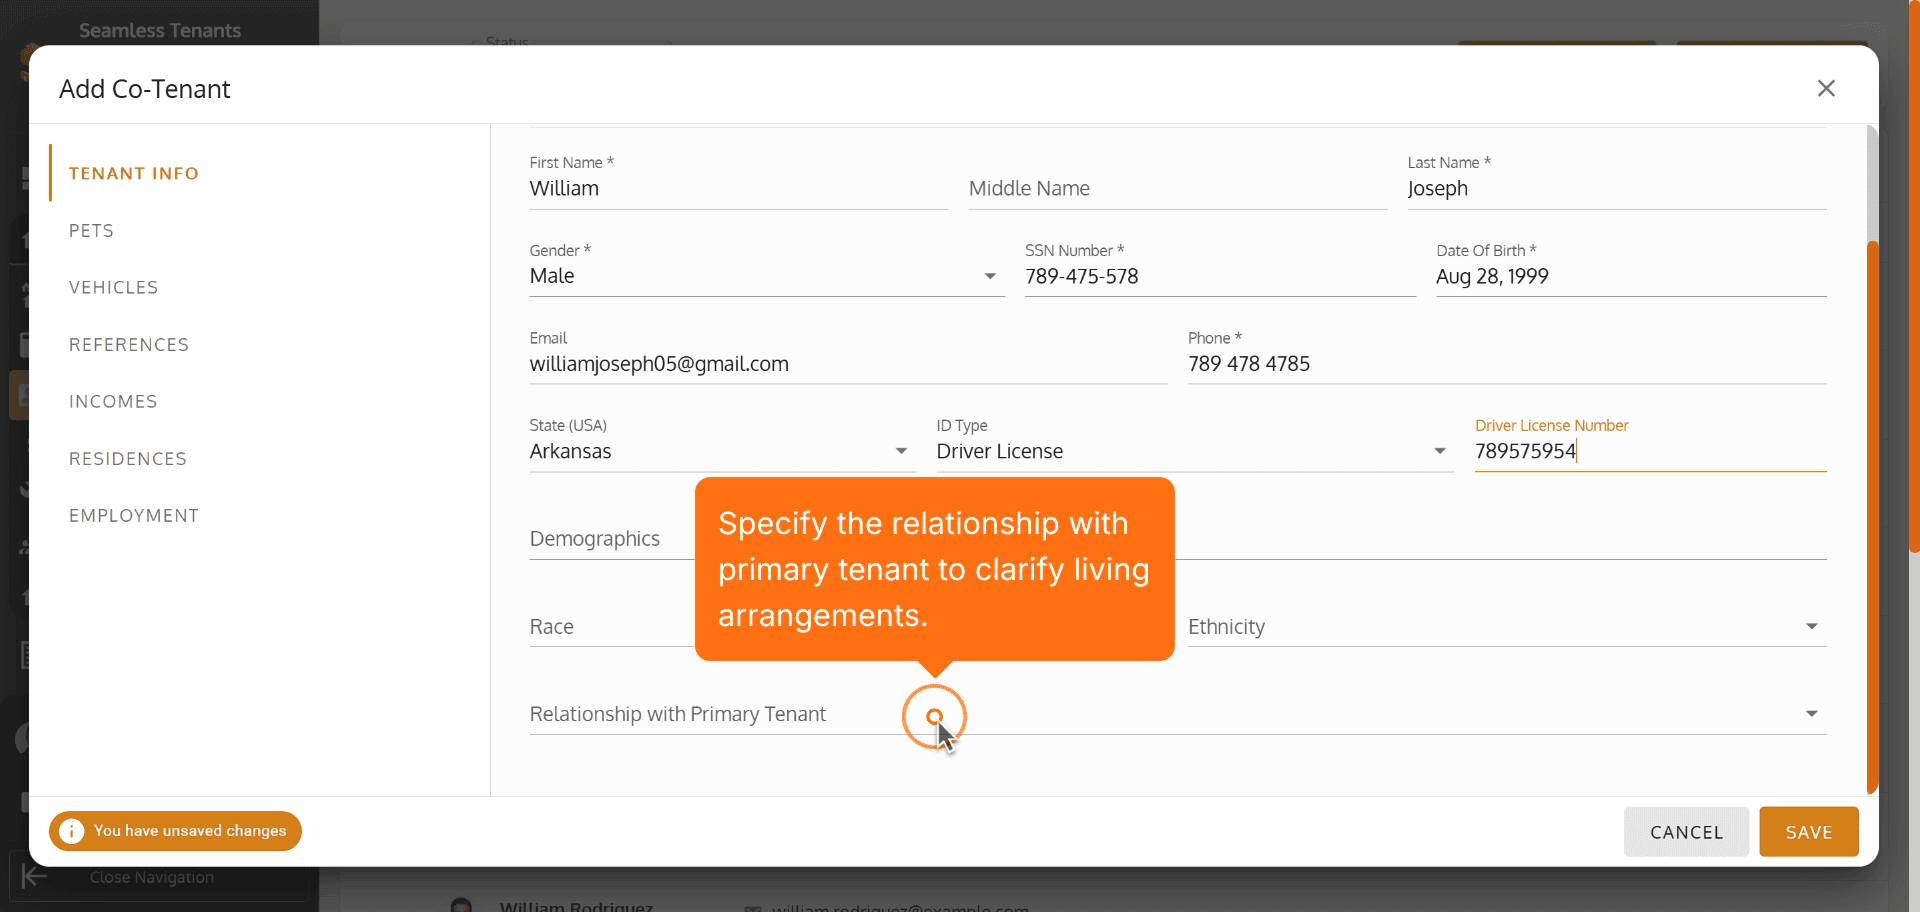
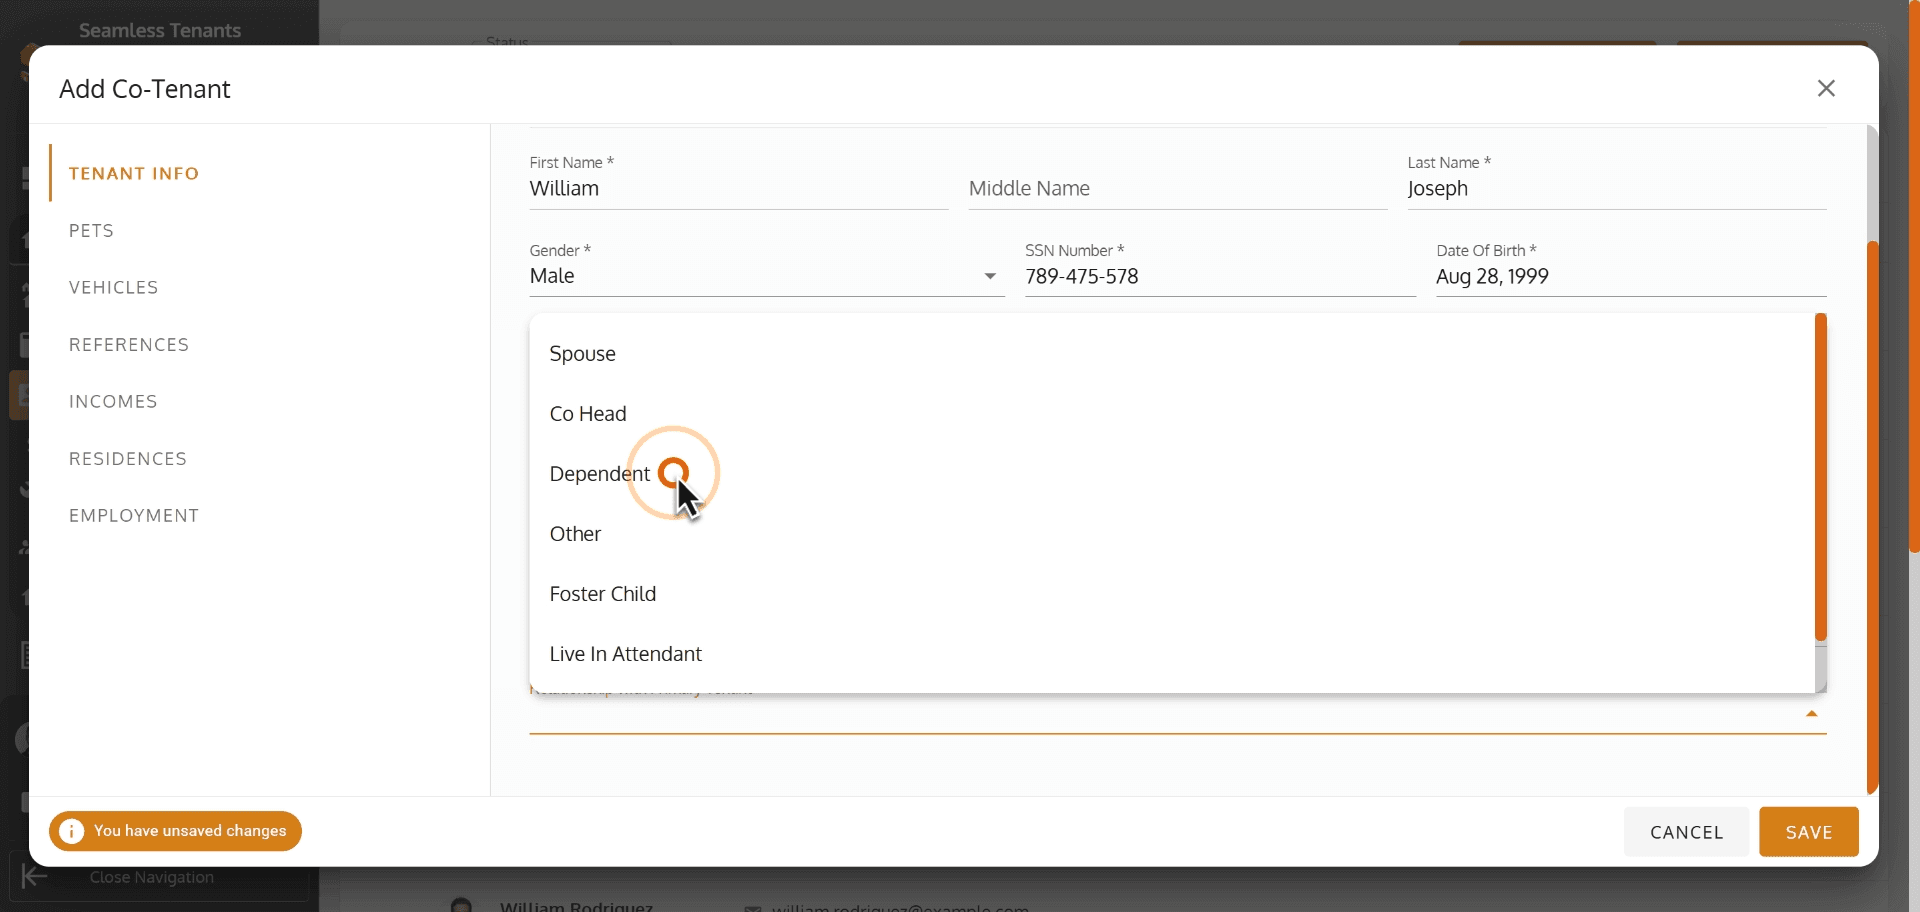
39. Specify the relationship with primary tenant to clarify living arrangements.
40.
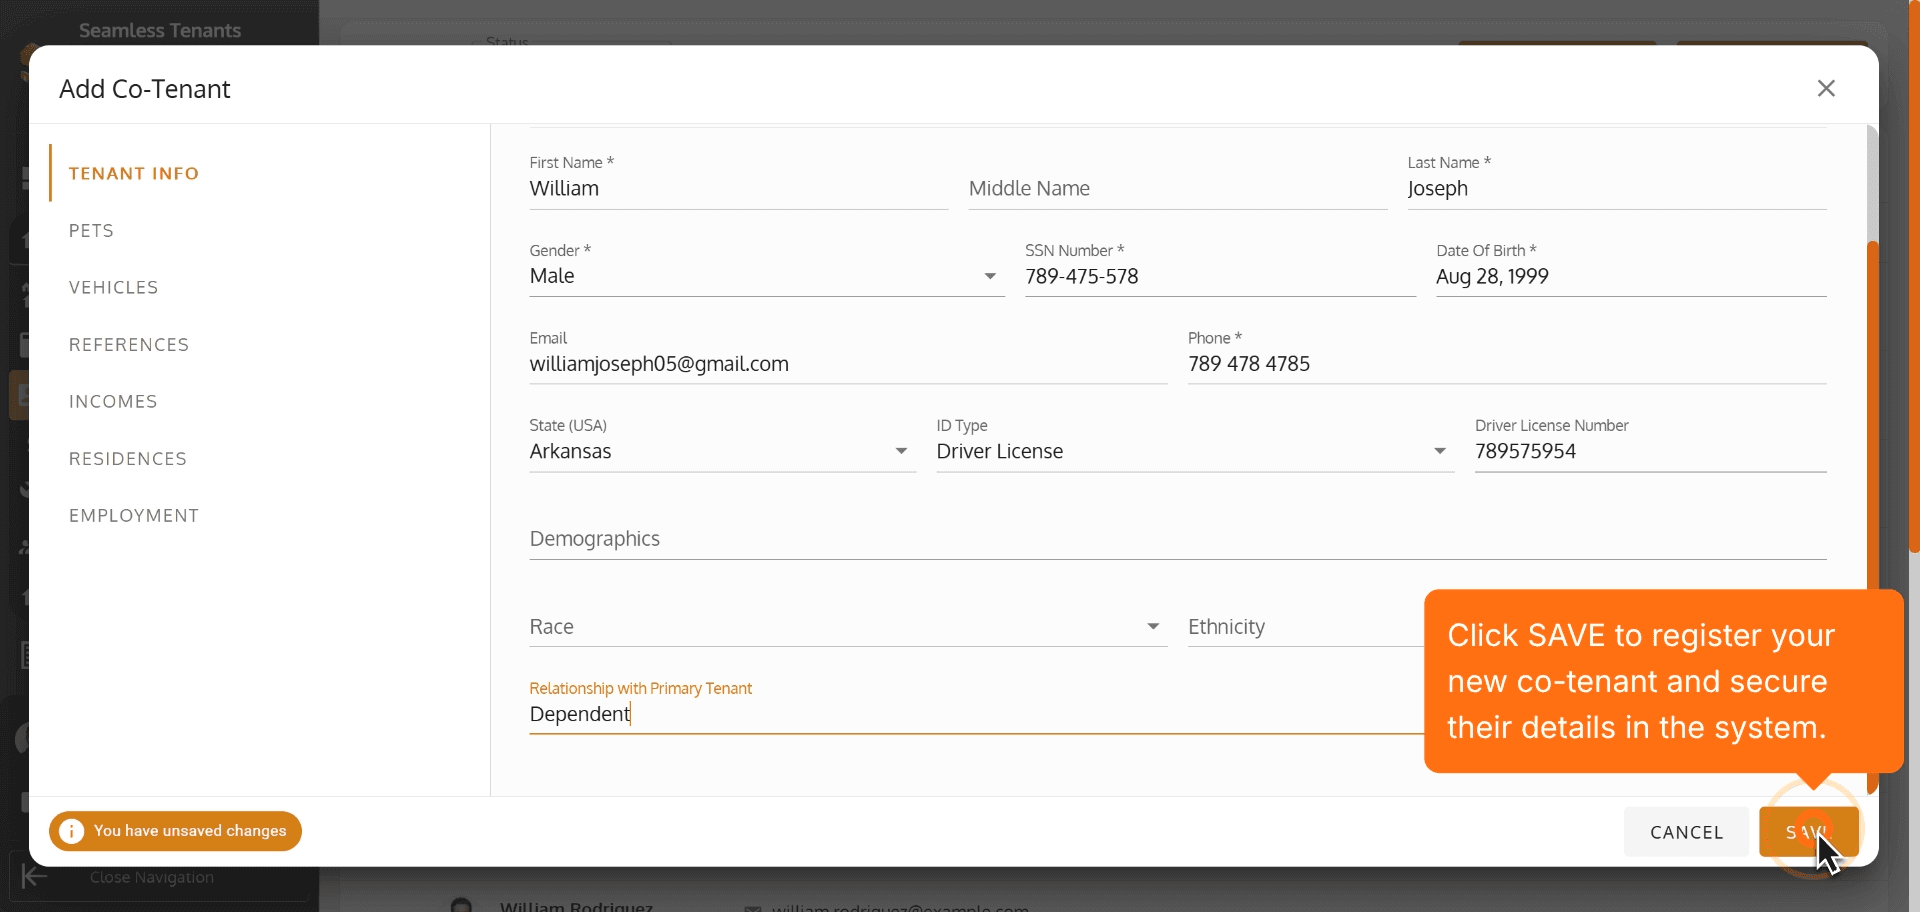
41. Click SAVE to register your new co-tenant and secure their details in the system.
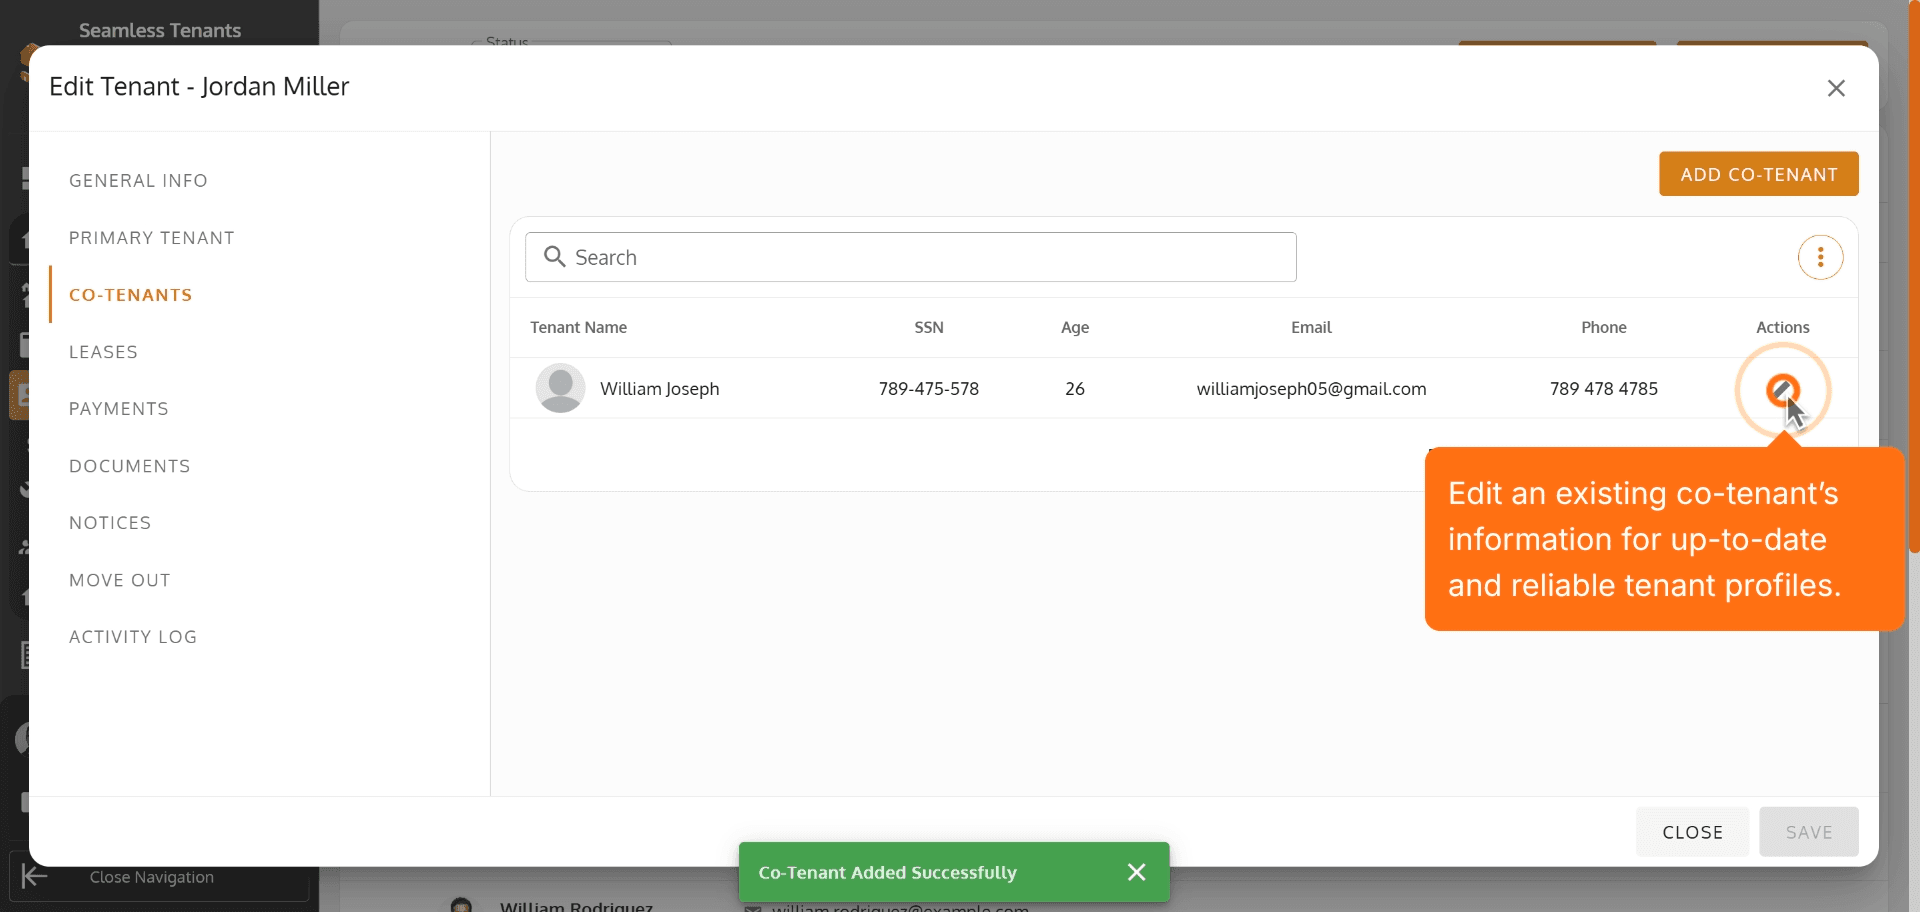
42. Edit an existing co-tenant’s information for up-to-date and reliable tenant profiles.
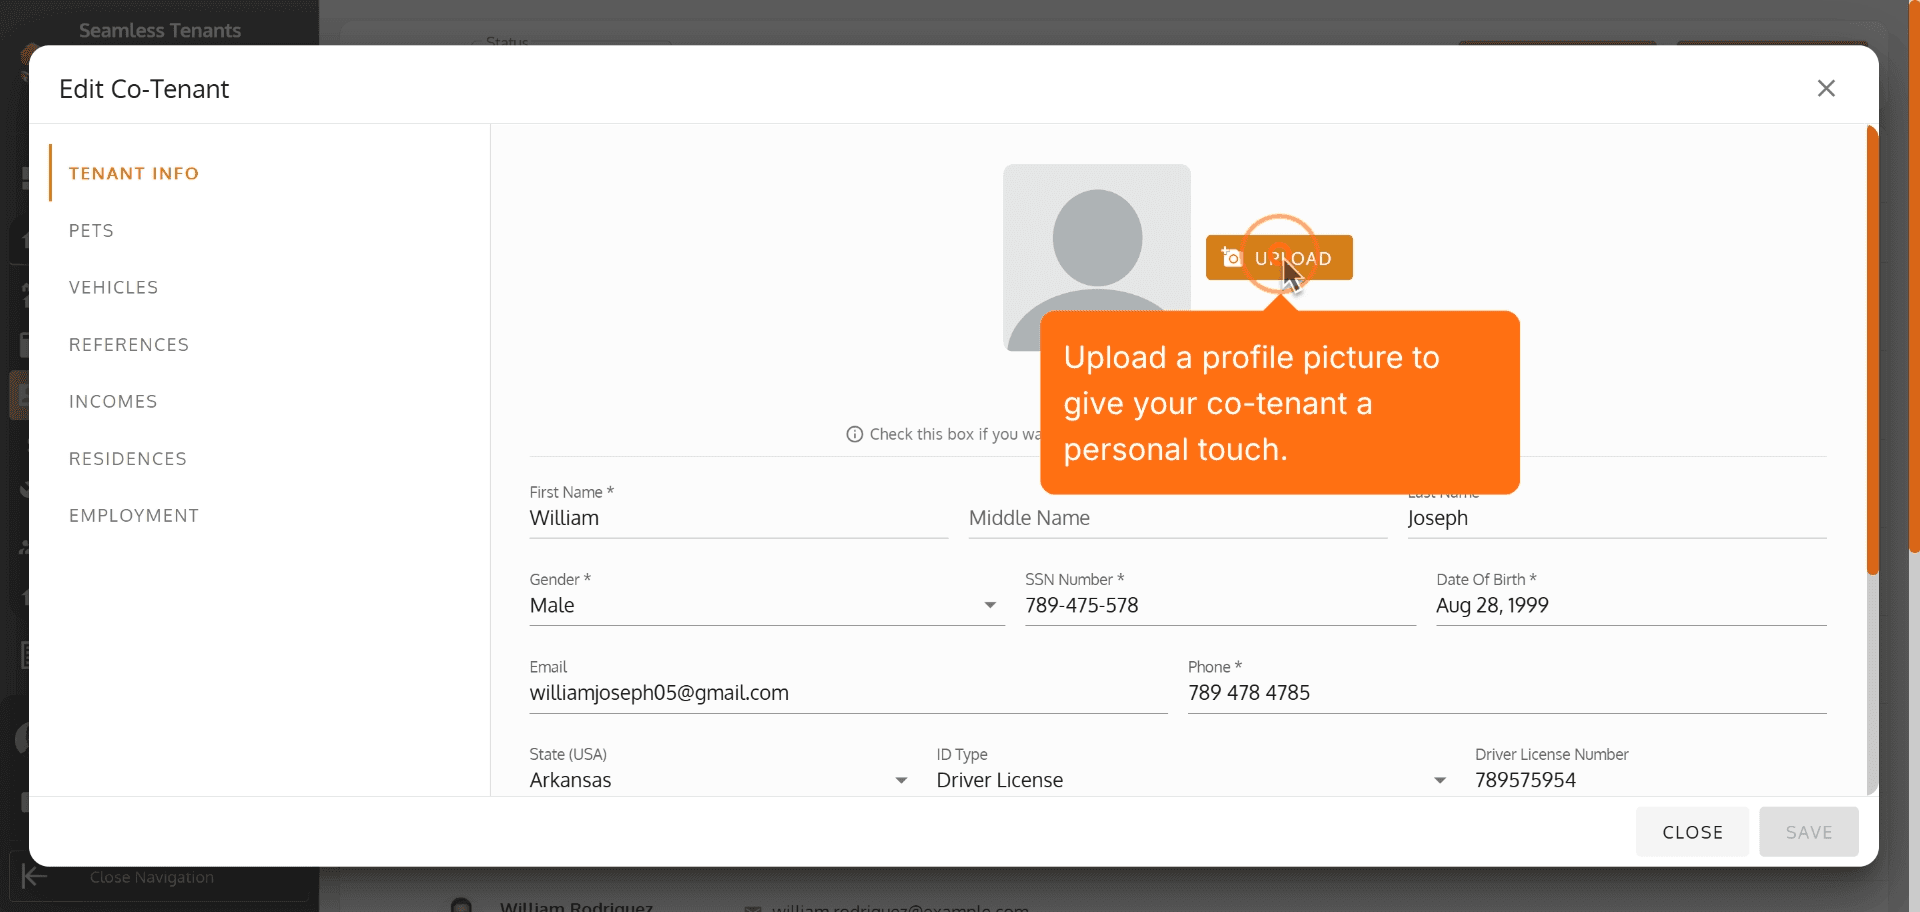
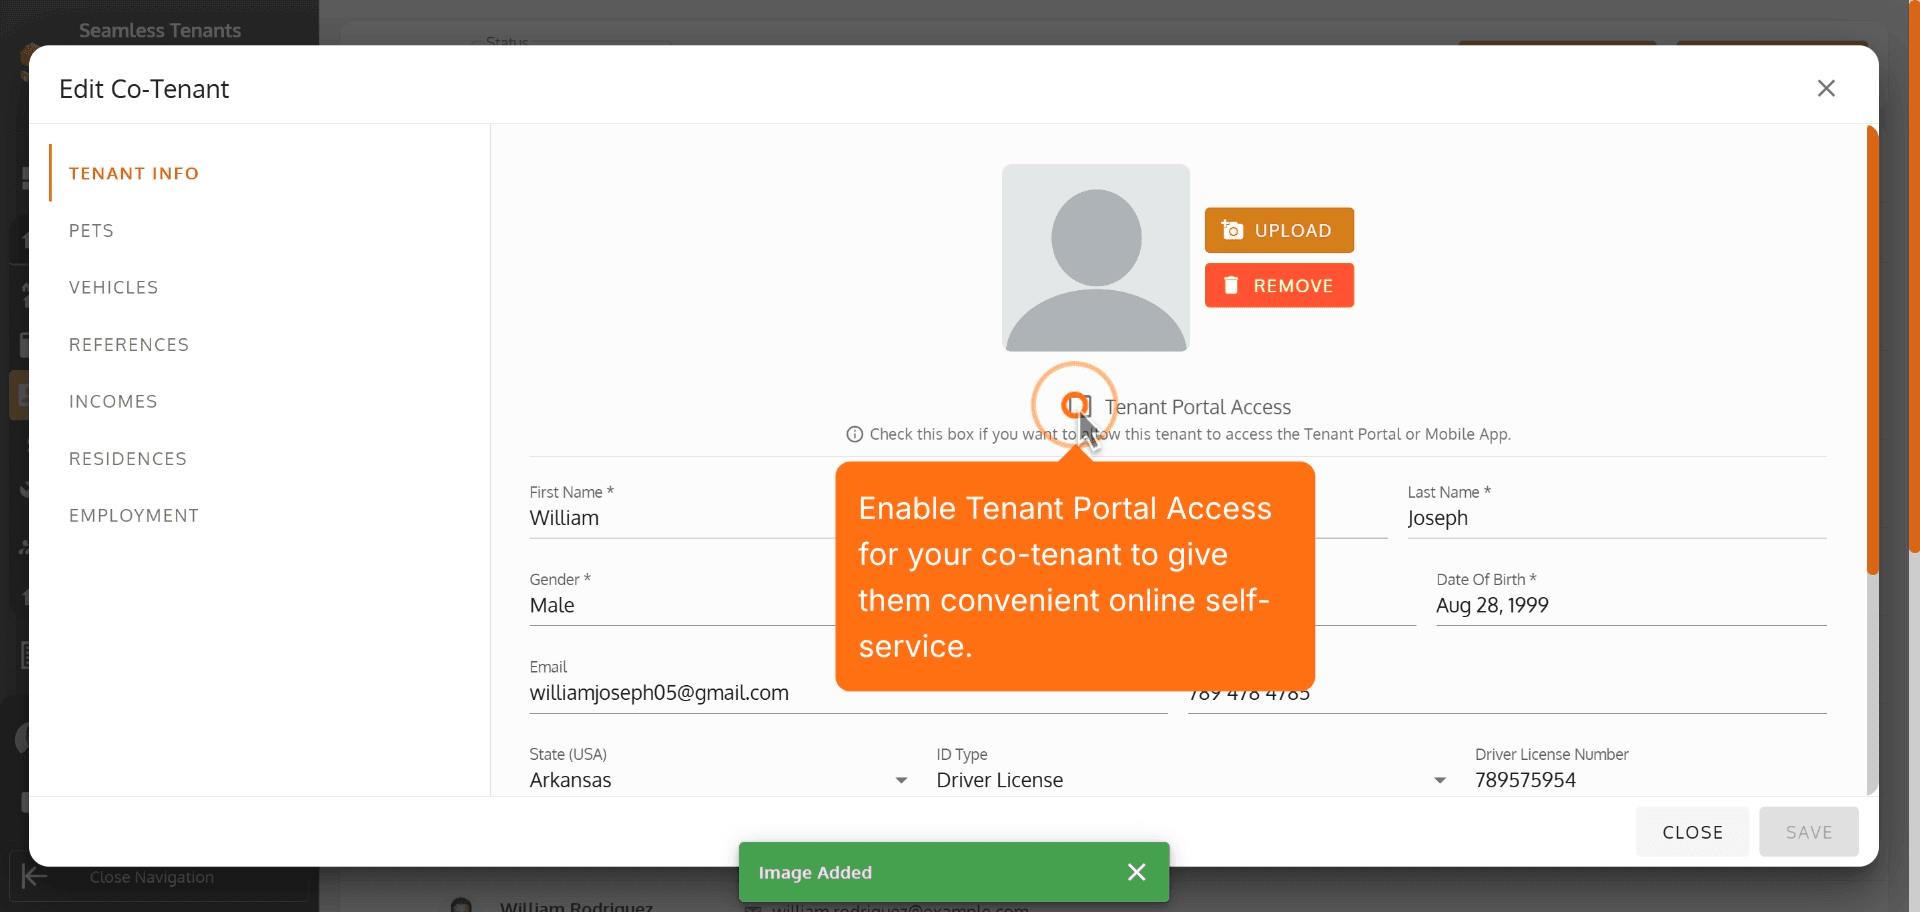
43. Upload a profile picture to give your co-tenant a personal touch.
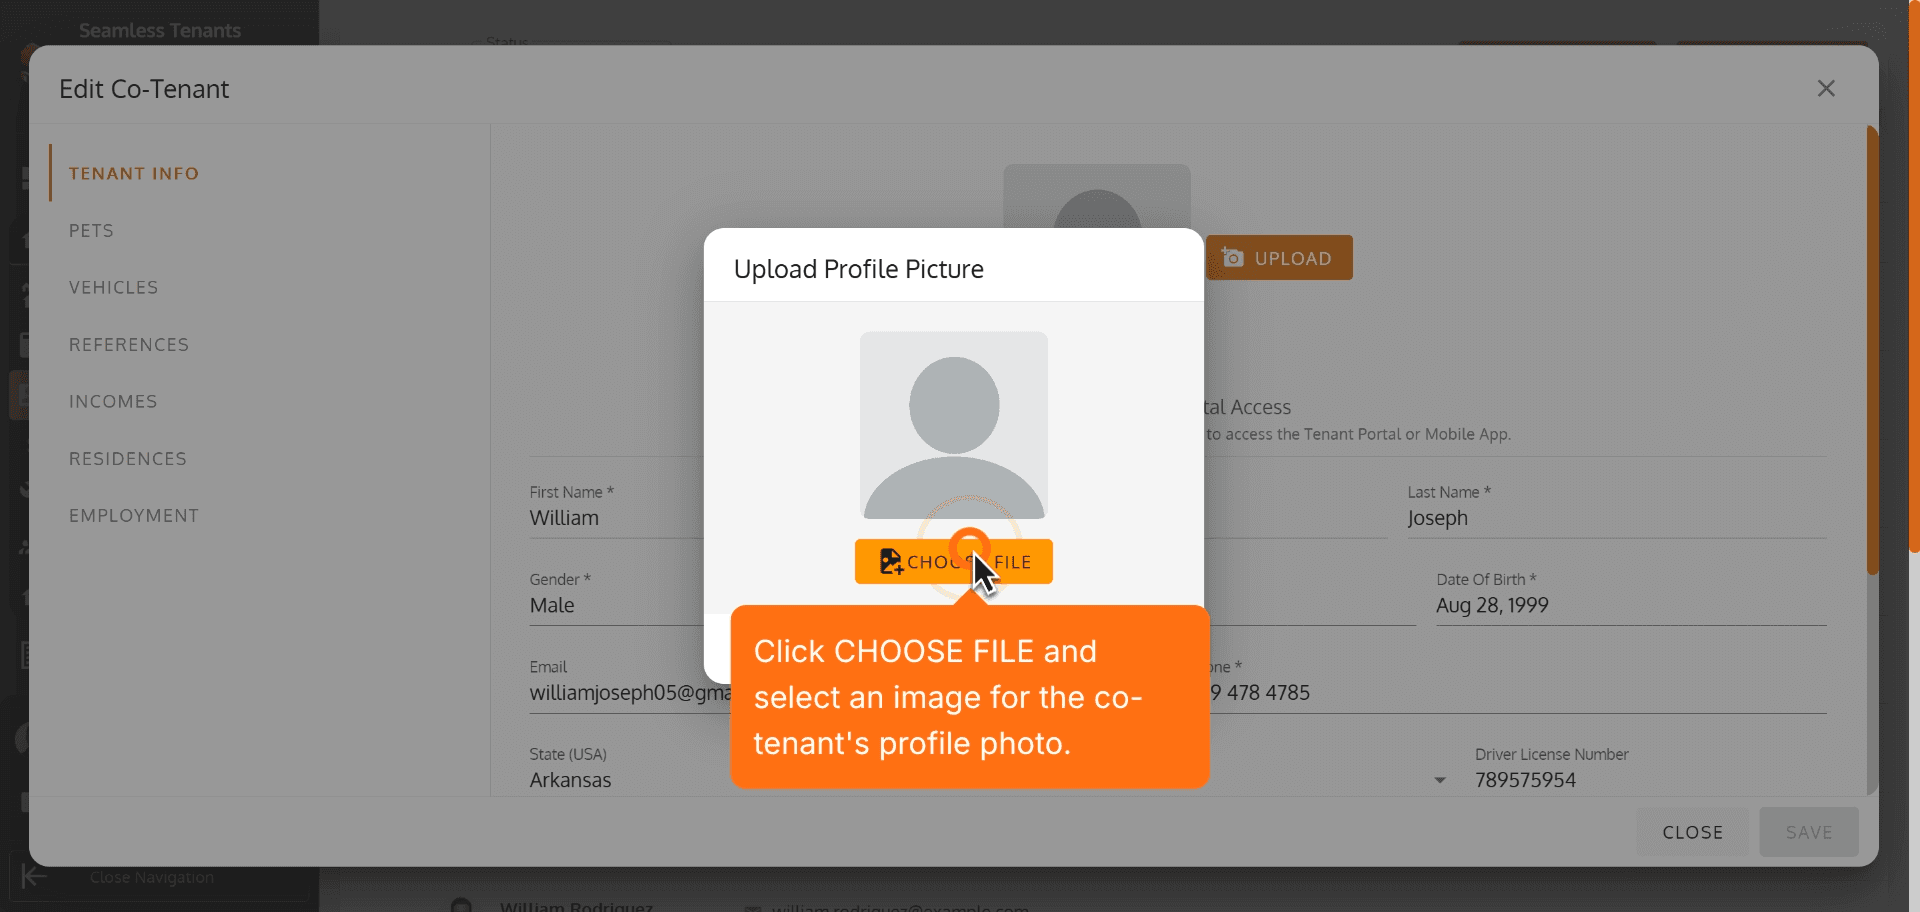
44. Click CHOOSE FILE and select an image for the co-tenant's profile photo.
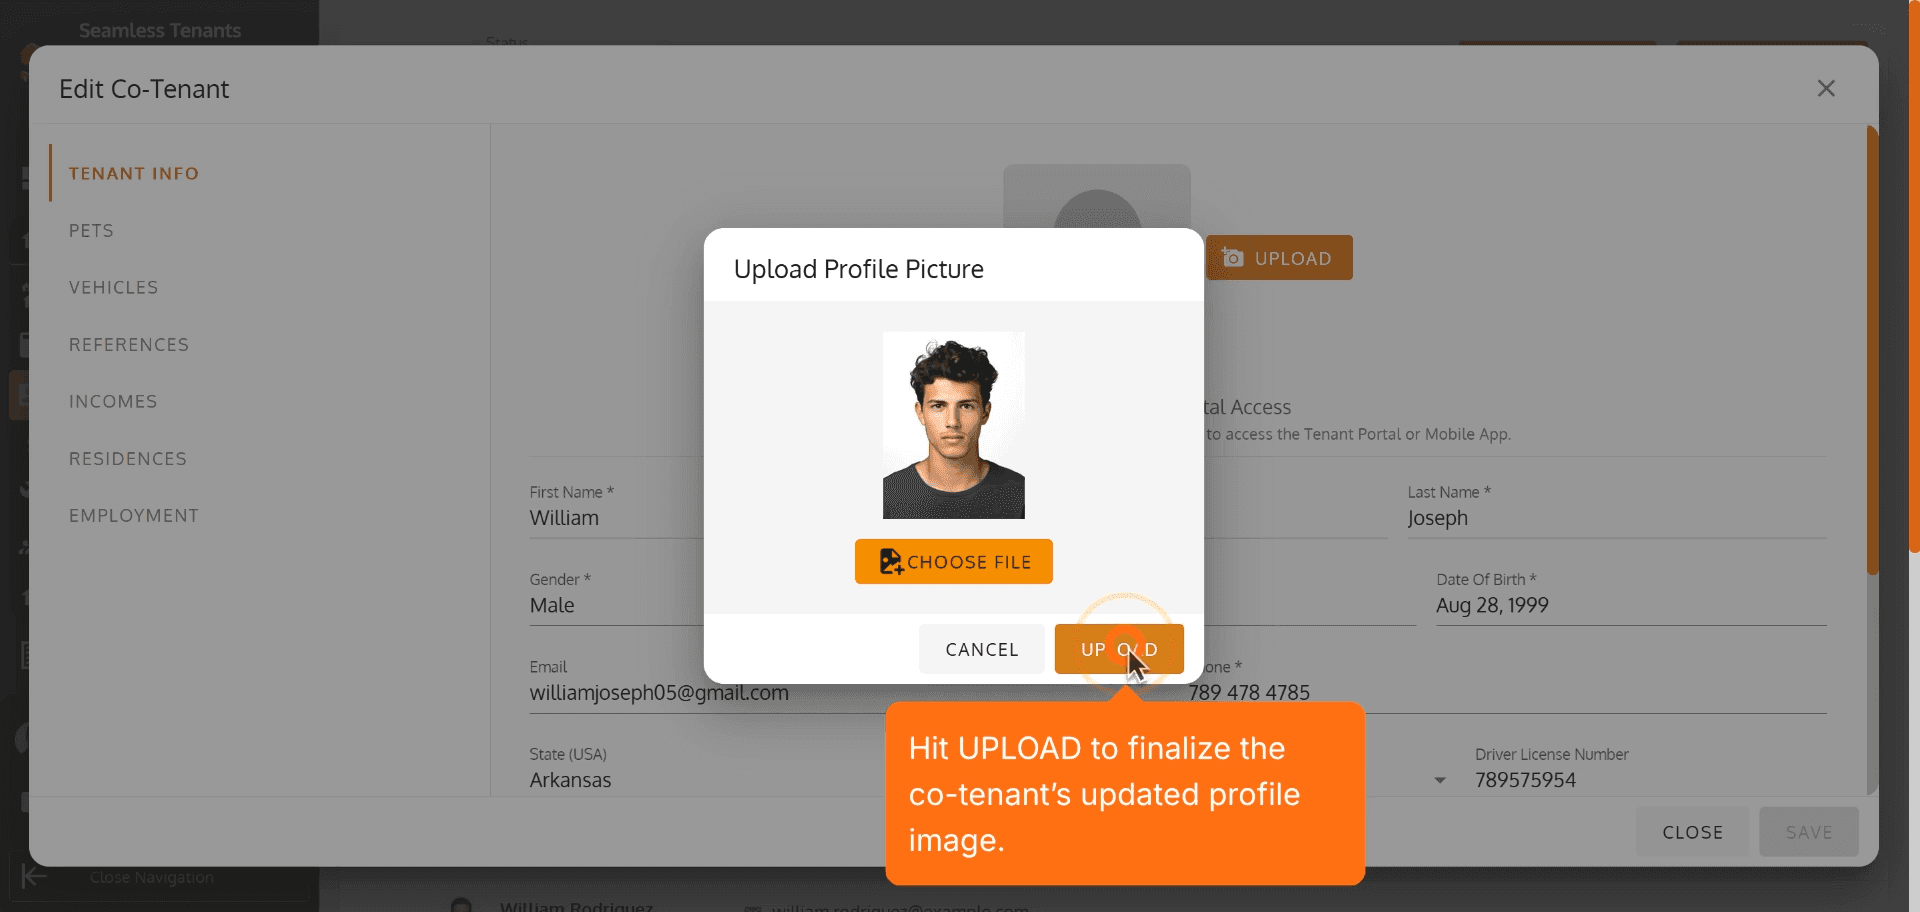
45. Hit UPLOAD to finalize the co-tenant’s updated profile image.
46. Enable Tenant Portal Access for your co-tenant to give them convenient online self-service.
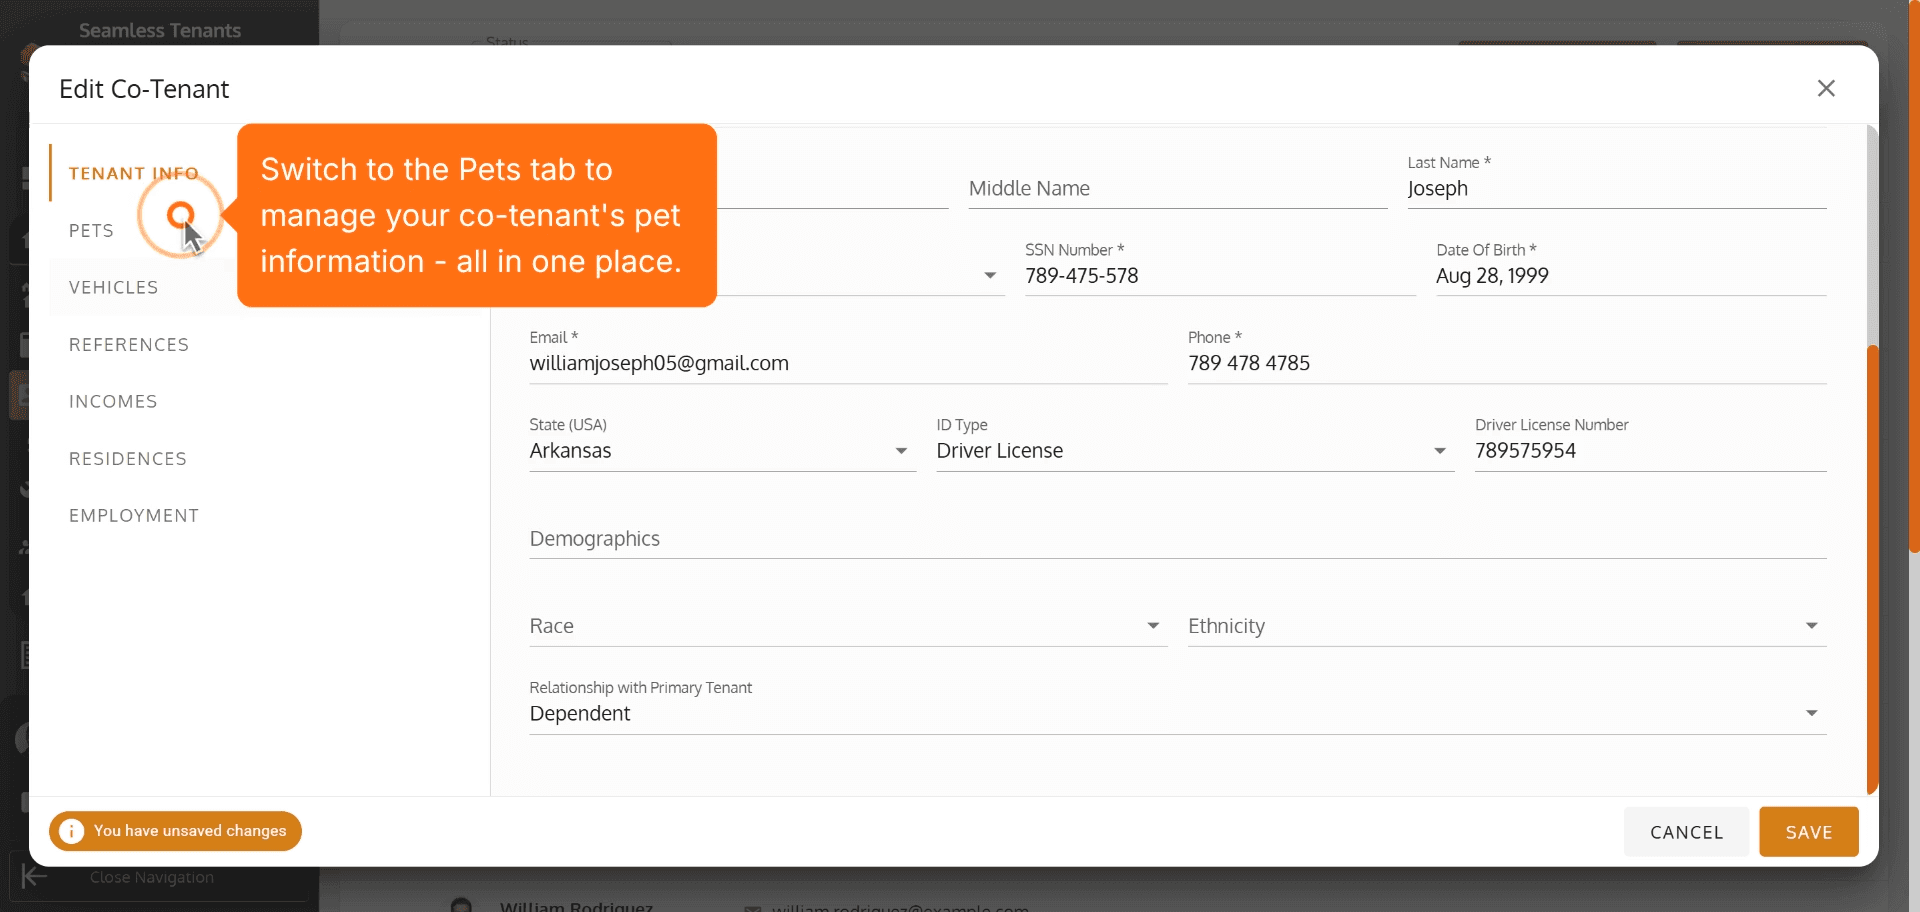
47. Switch to the Pets tab to manage your co-tenant's pet information - all in one place.
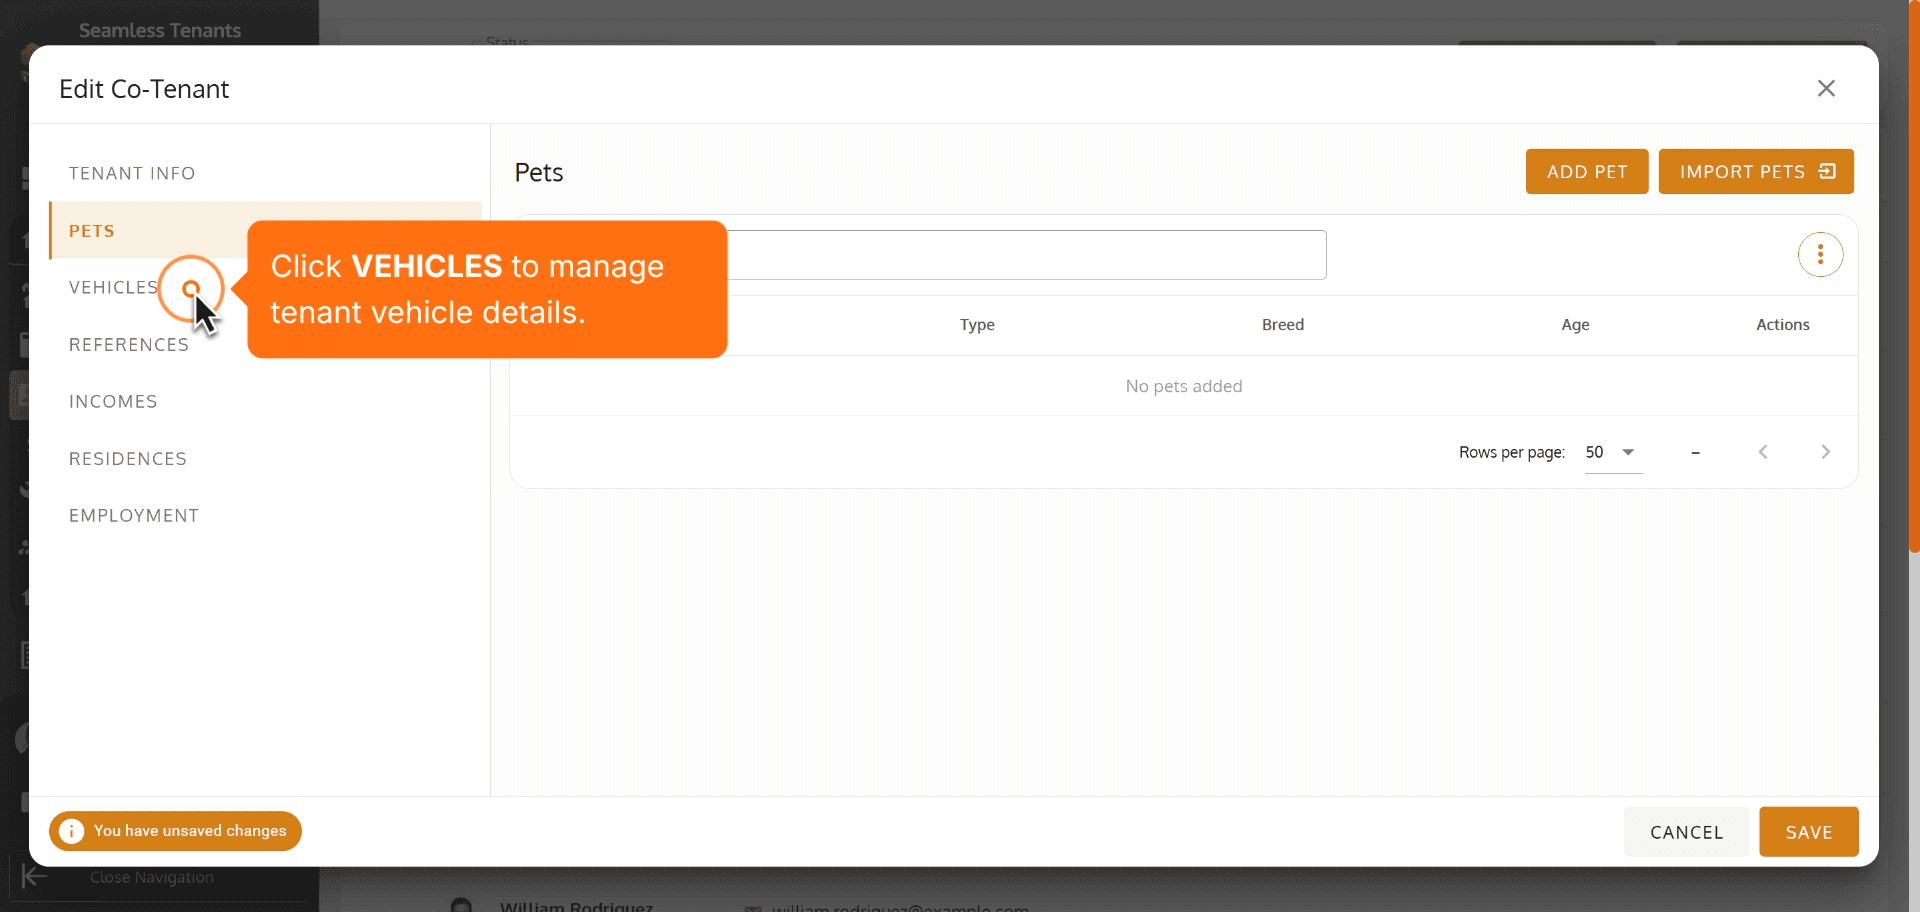
48. Click VEHICLES to manage tenant vehicle details.
Click VEHICLES to manage tenant vehicle details.
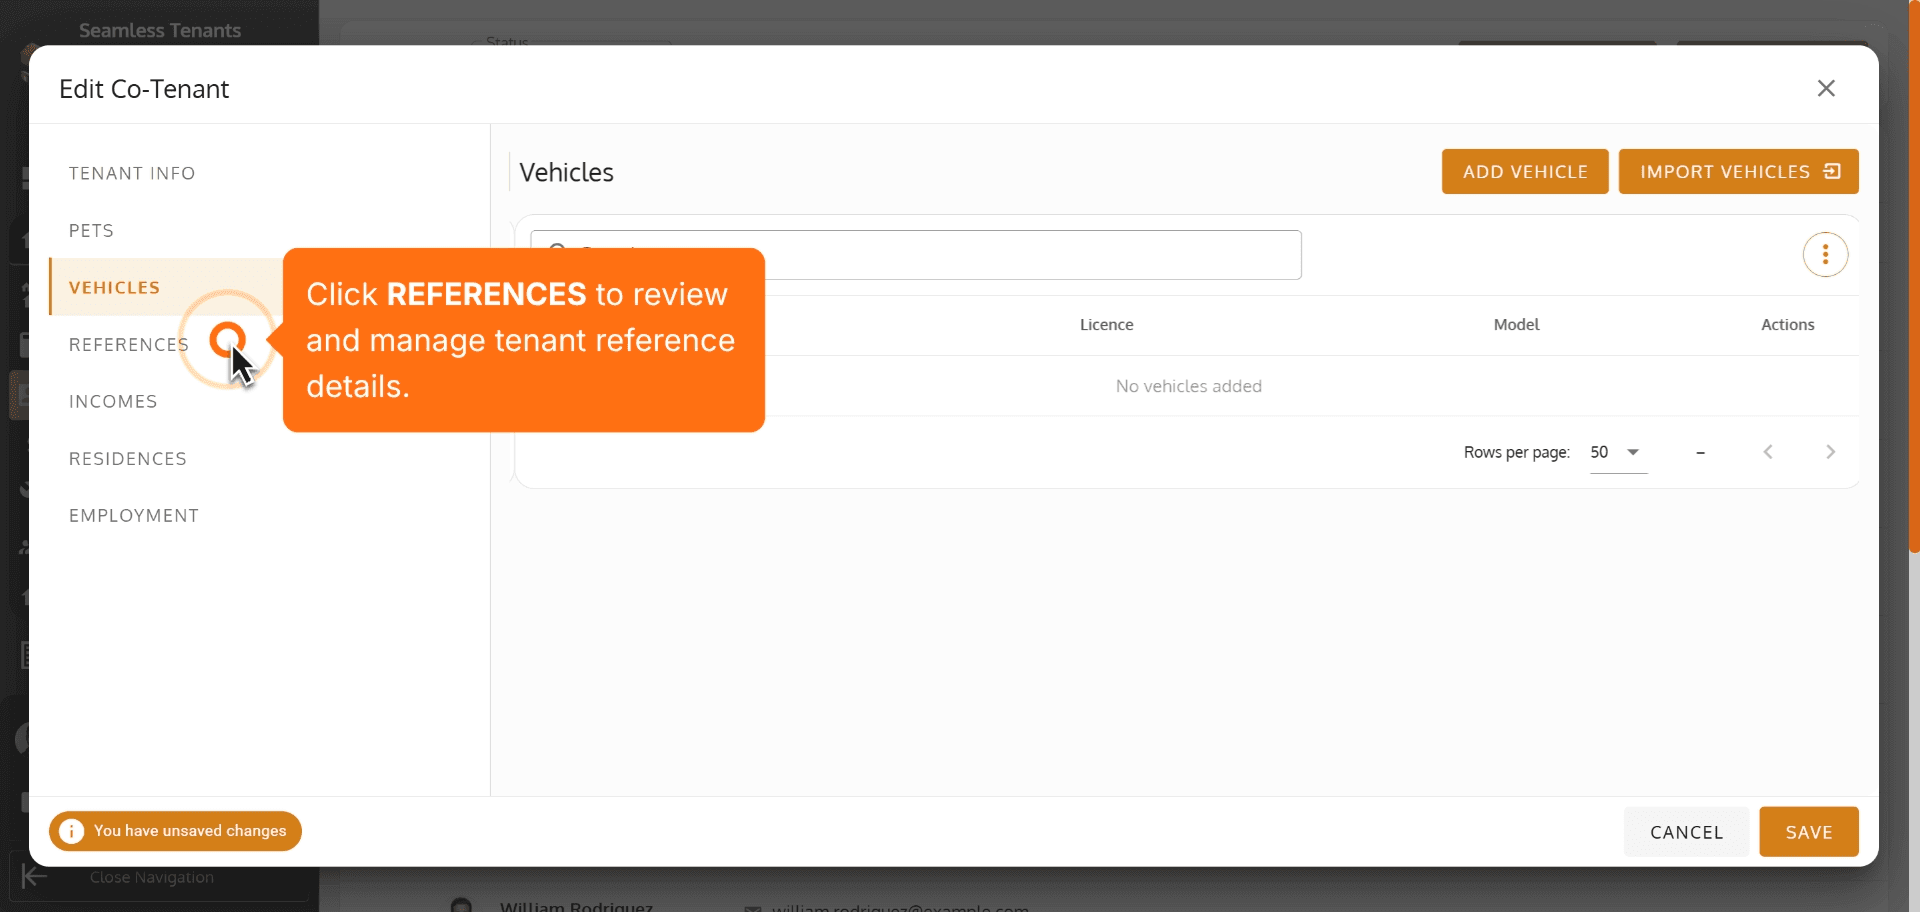
49. Click REFERENCES to review and manage tenant reference details.
Click REFERENCES to review and manage tenant reference details.
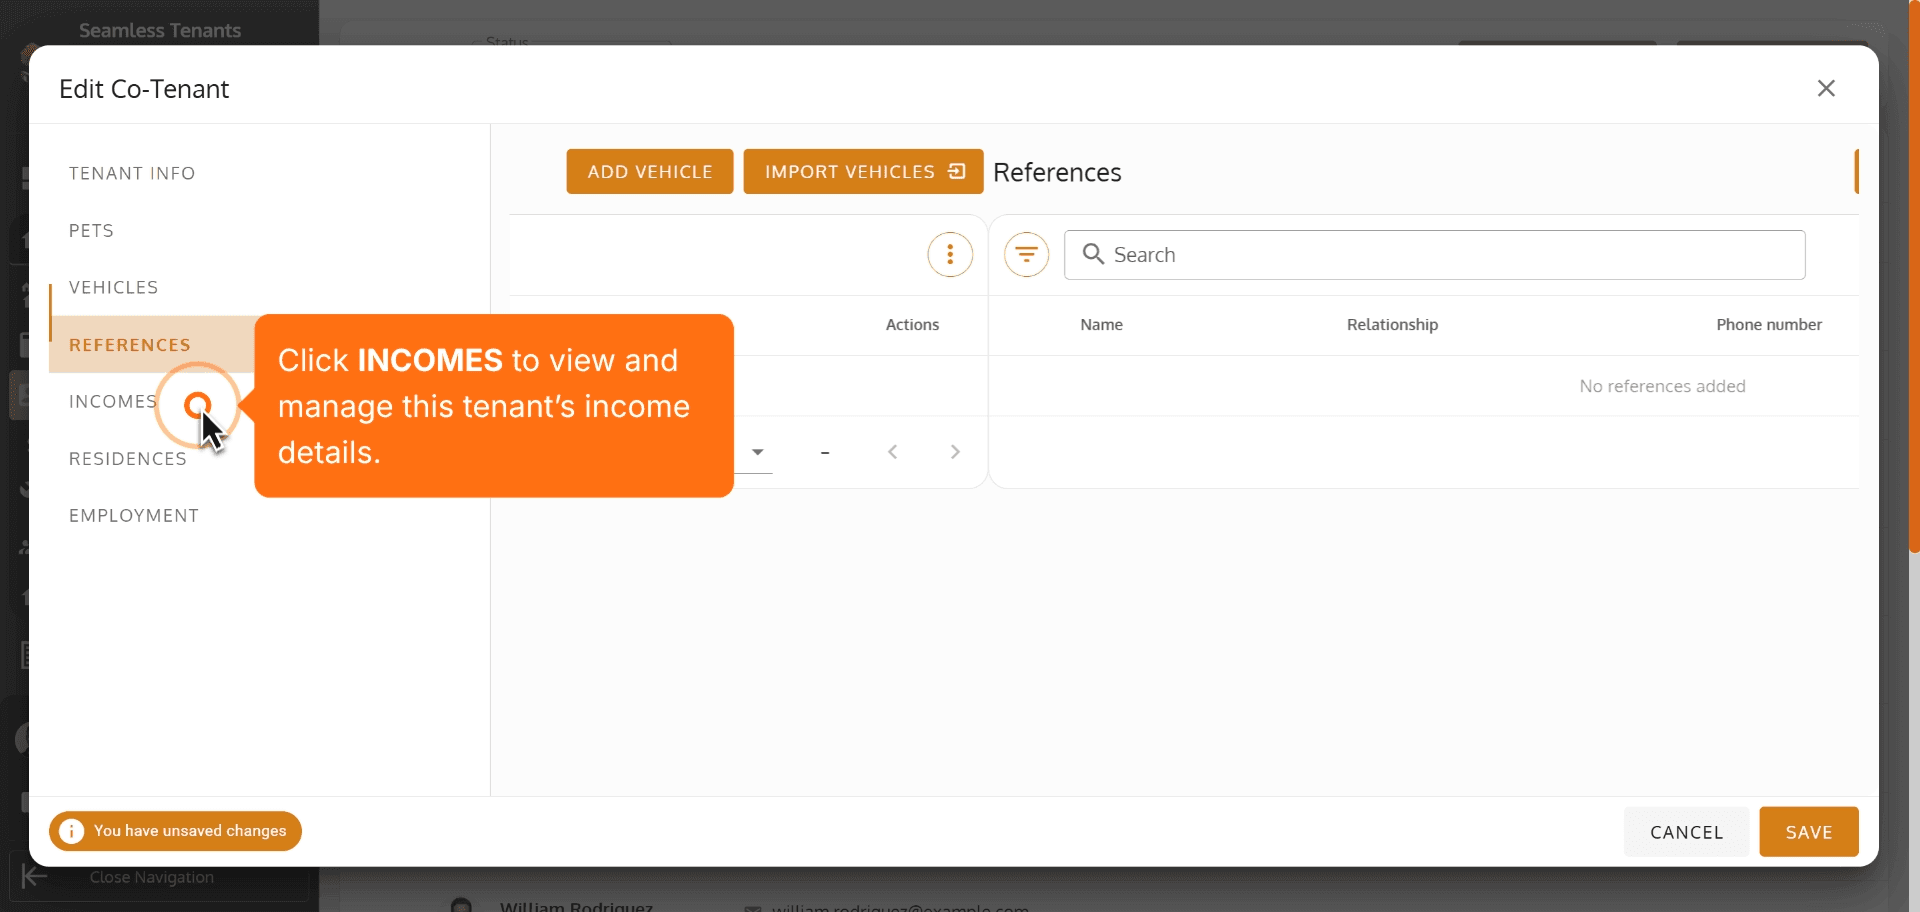
50. Click INCOMES to view and manage this tenant’s income details.
Click INCOMES to view and manage this tenant’s income details.
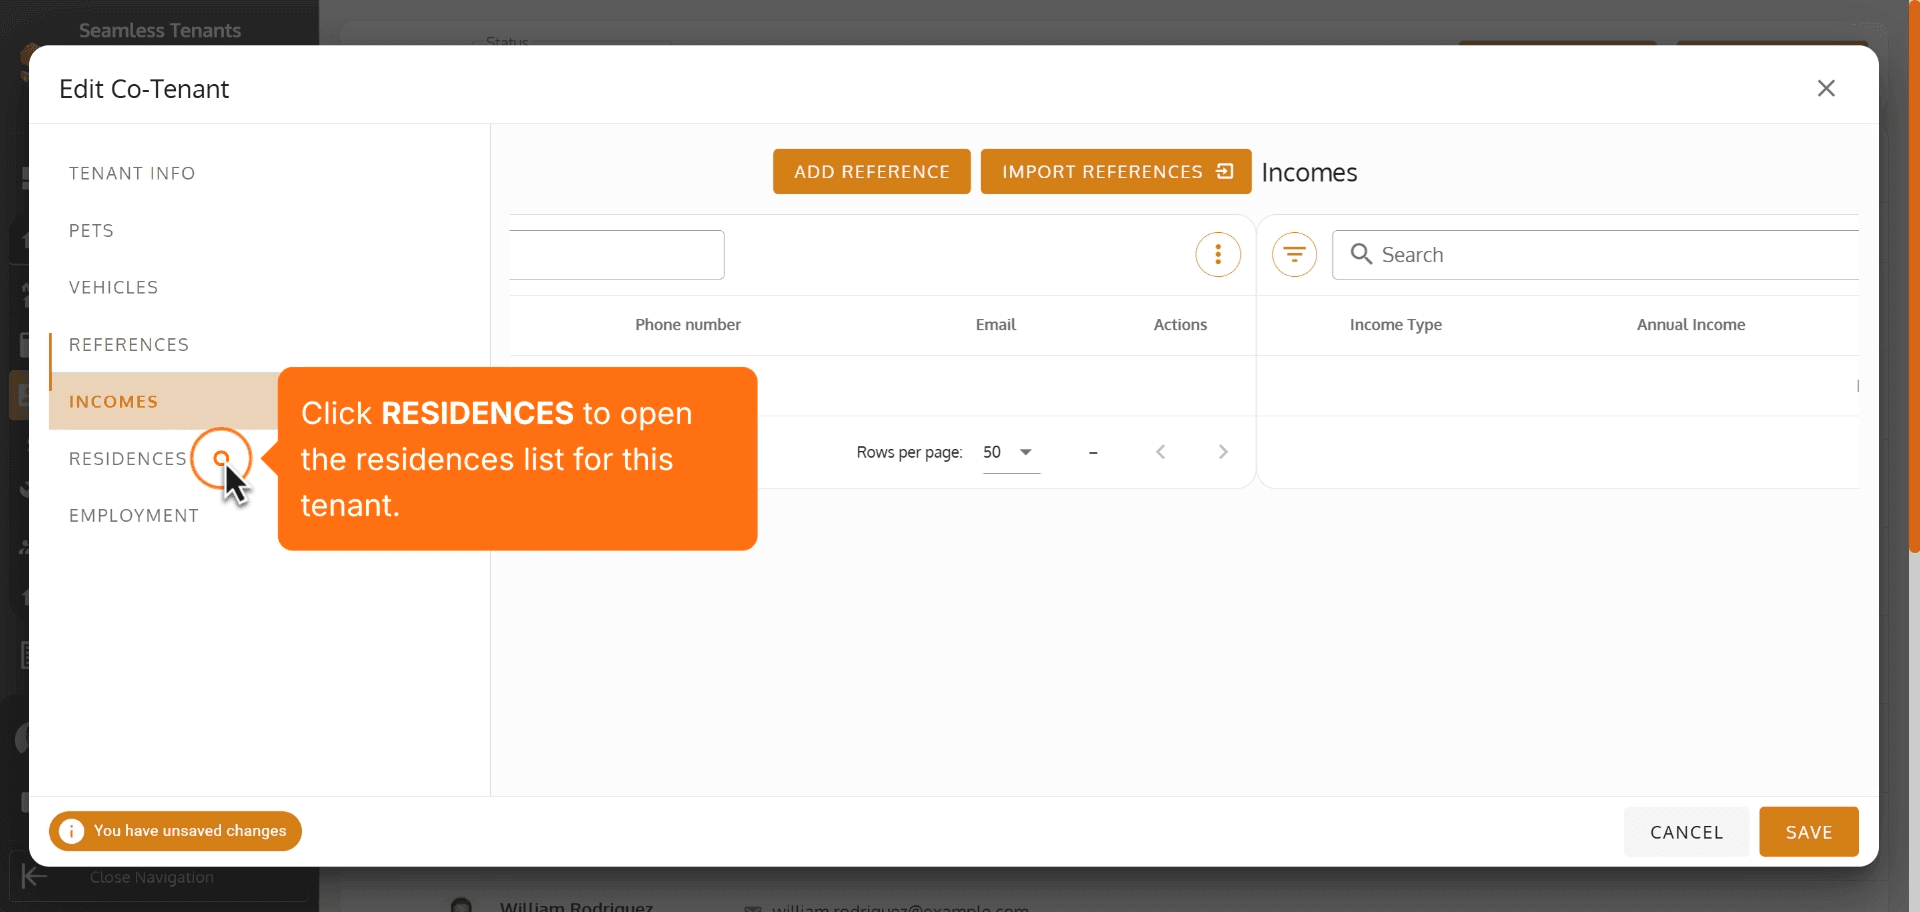
51. Click RESIDENCES to open the residences list for this tenant.
Click RESIDENCES to open the residences list for this tenant.
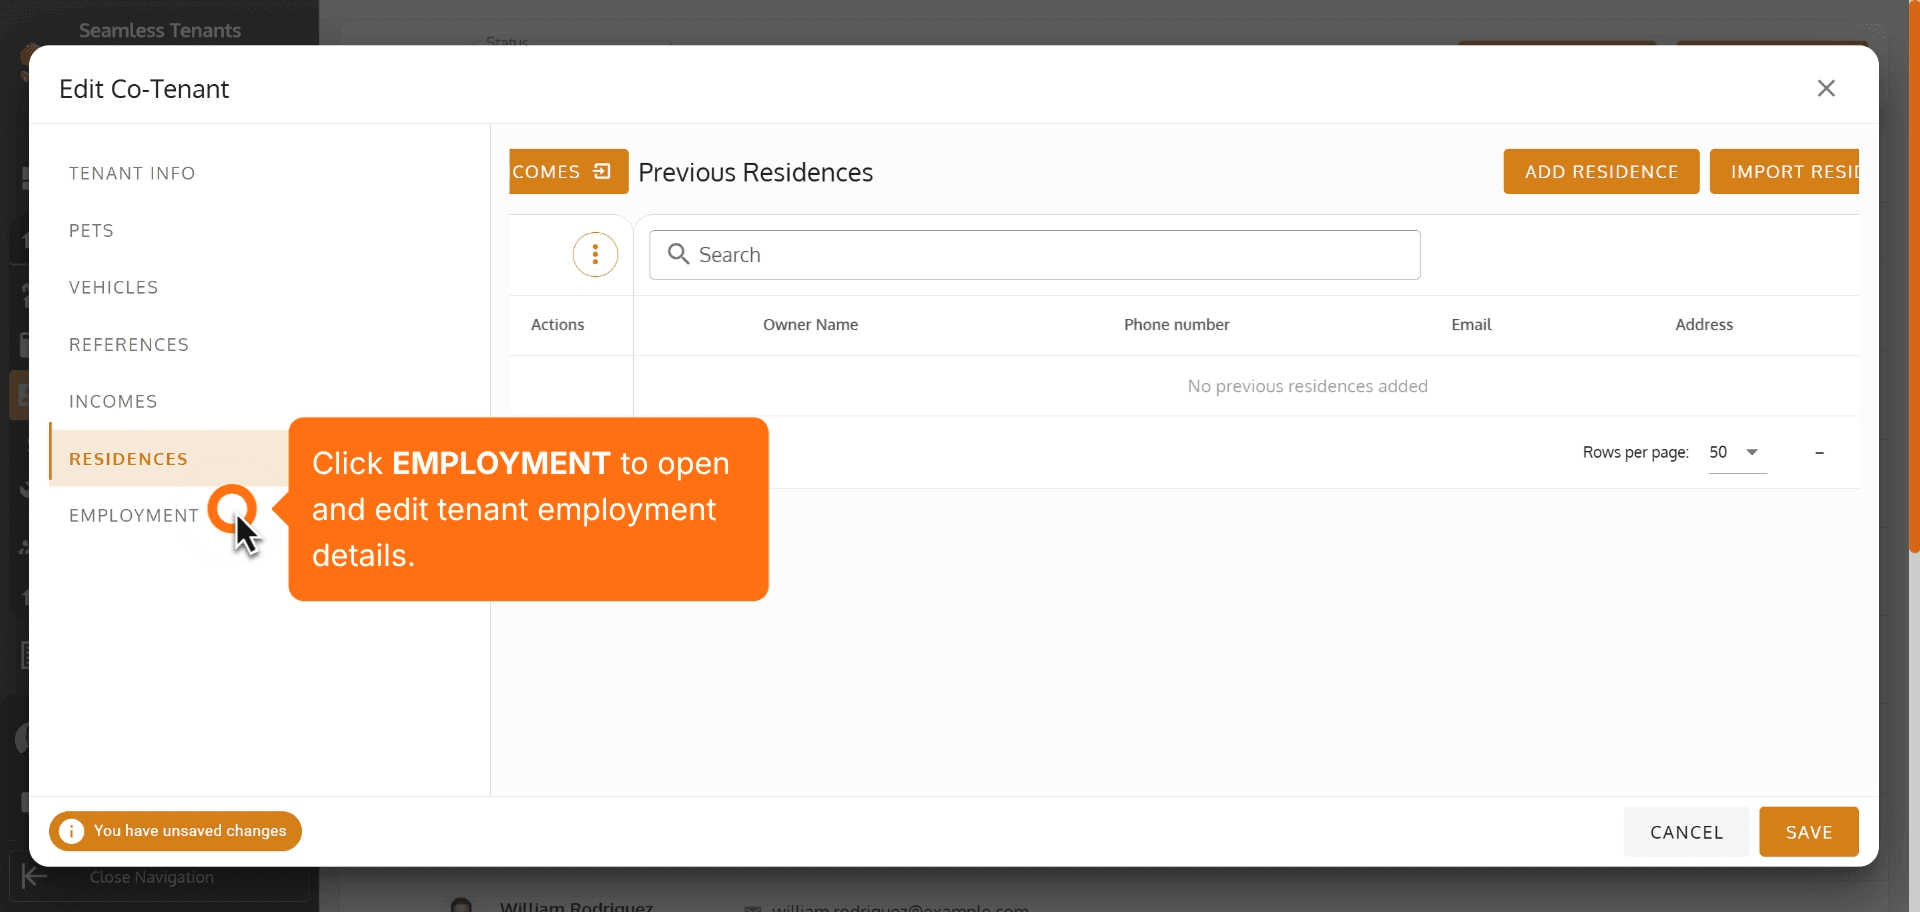
52. Click EMPLOYMENT to open and edit tenant employment details.
Click EMPLOYMENT to open and edit tenant employment details.
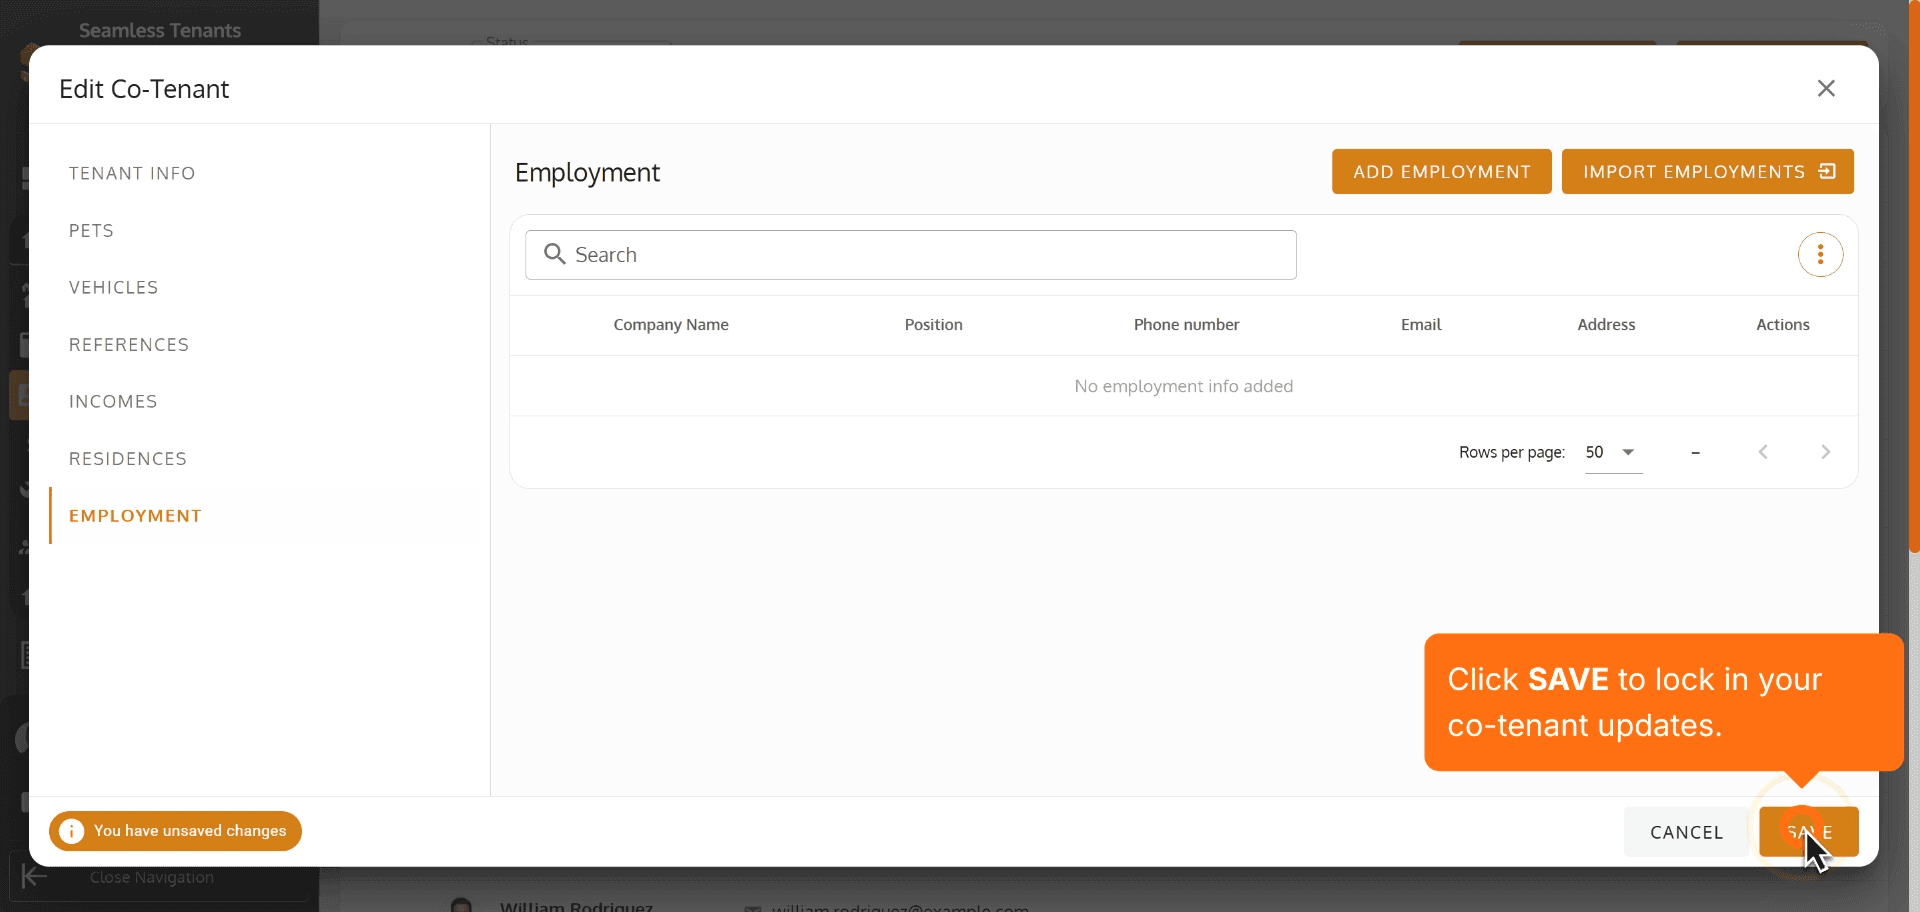
53. Click SAVE to lock in your co-tenant updates.
Click SAVE to lock in your co-tenant updates.
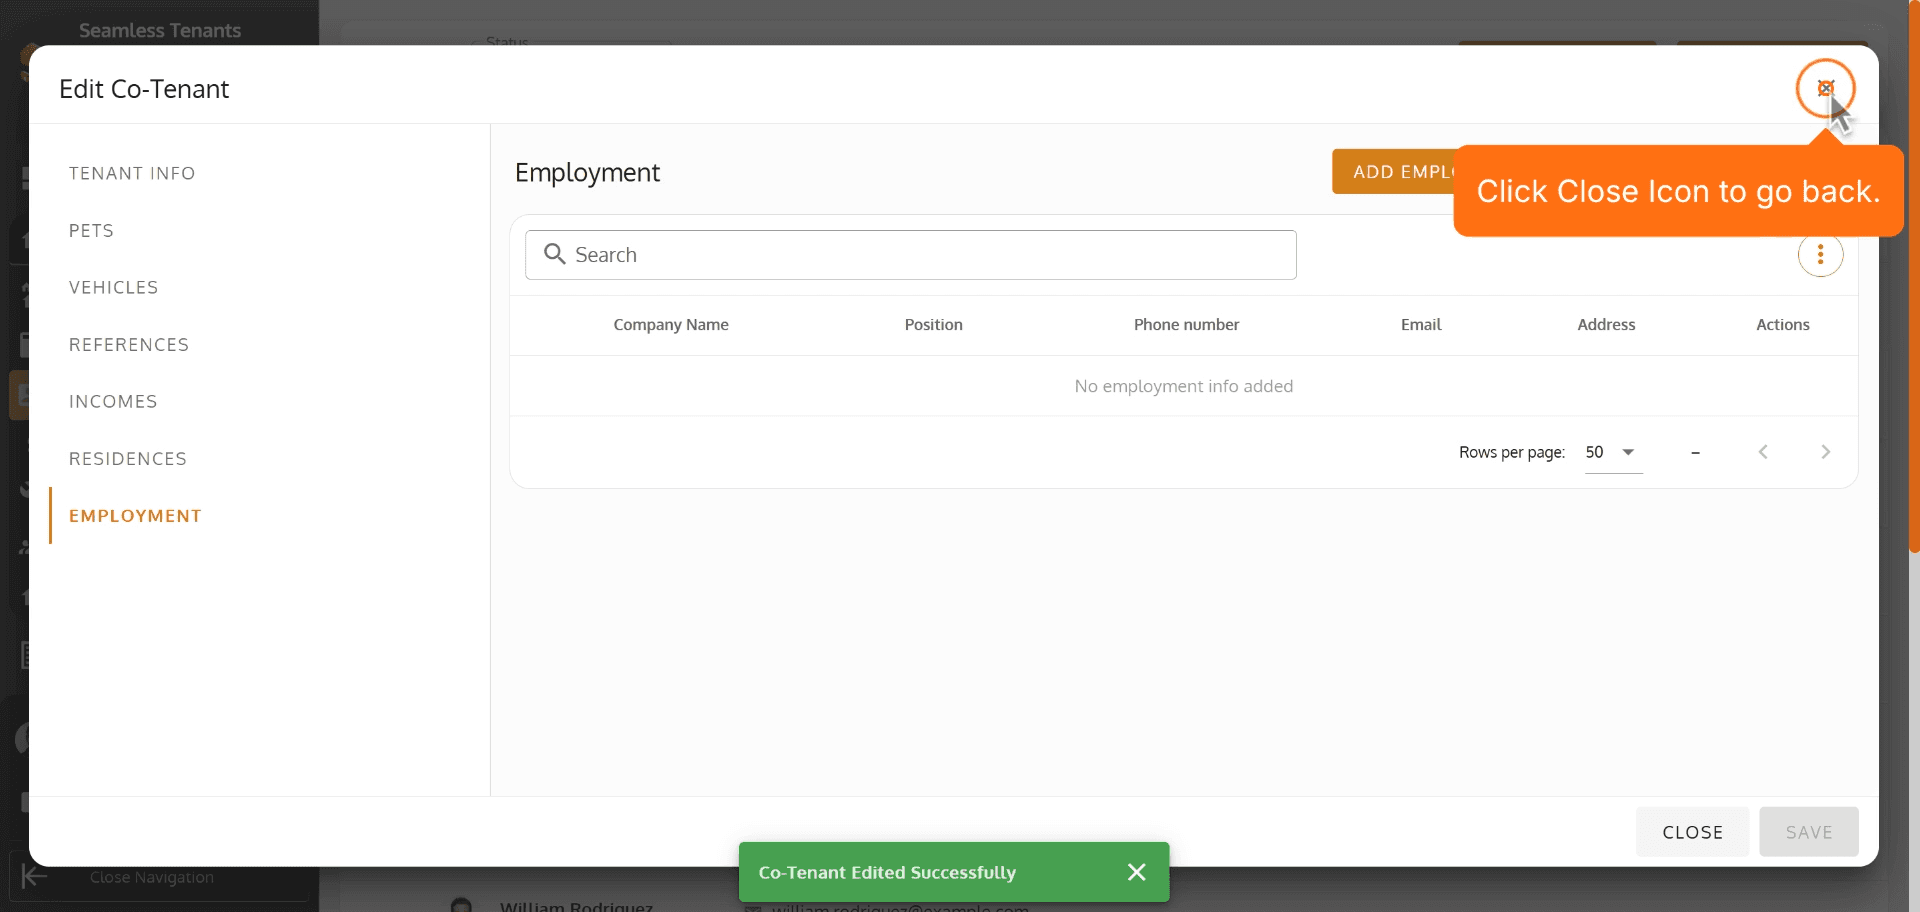
54. Click Close Icon to go back.
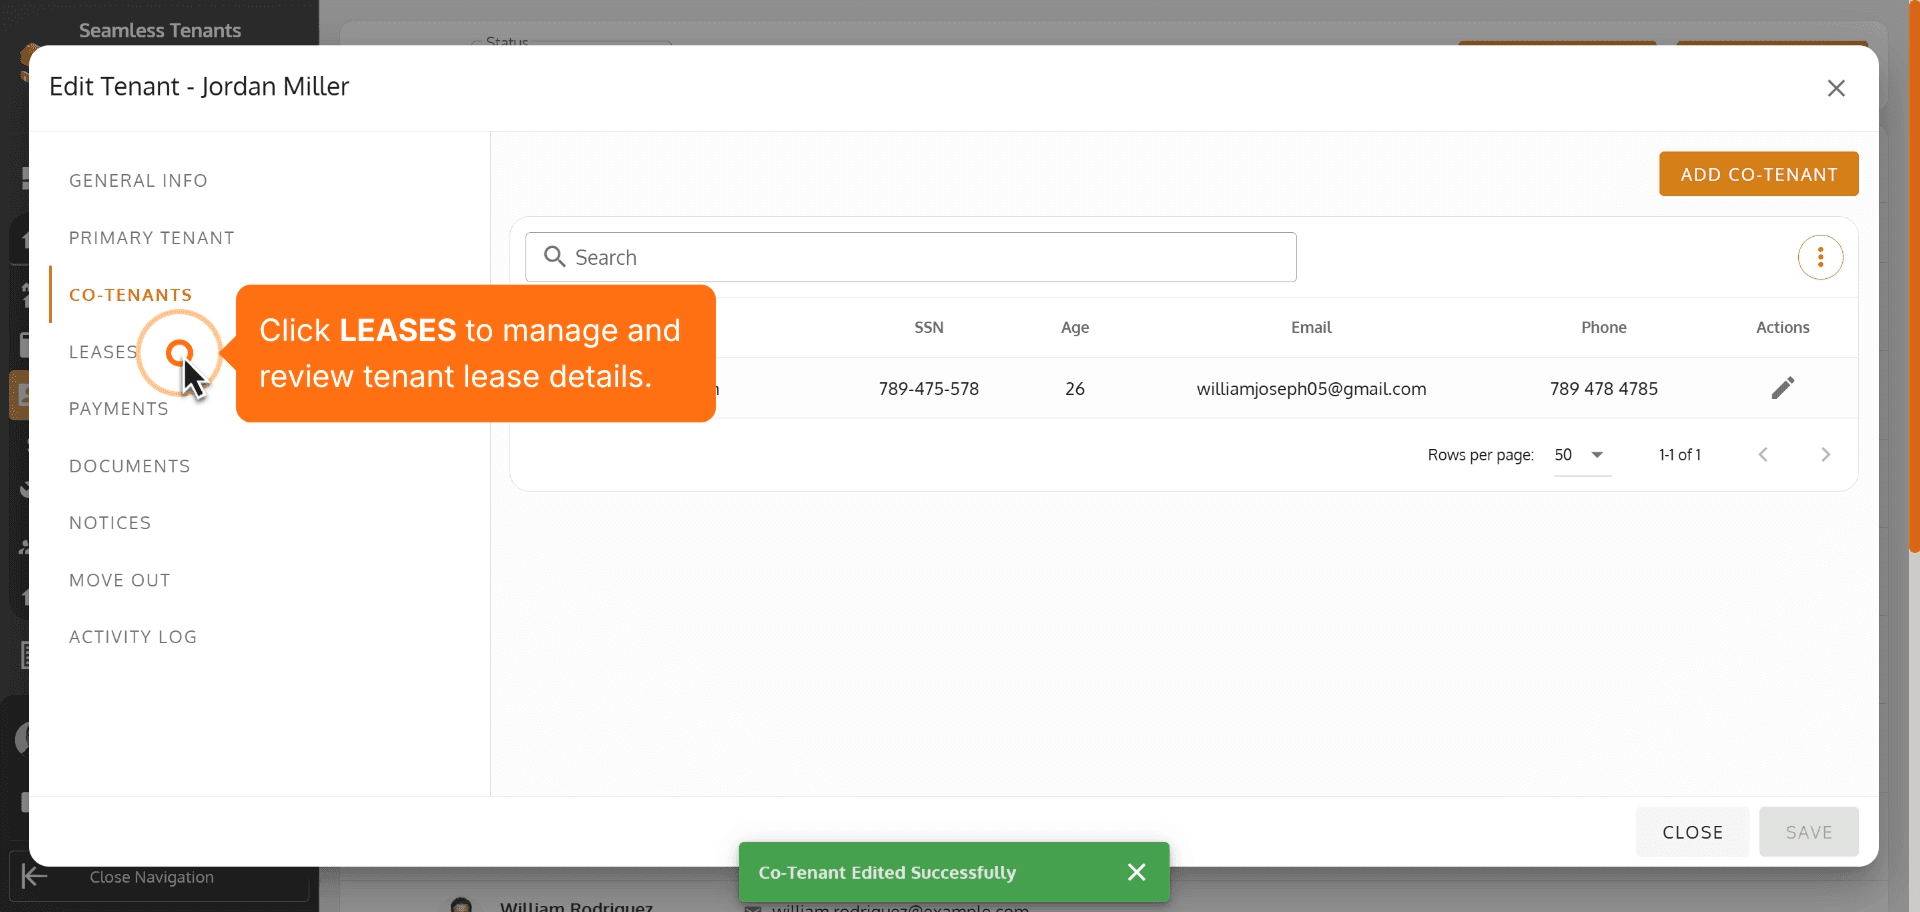
55. Click LEASES to manage and review tenant lease details.
Click LEASES to manage and review tenant lease details.
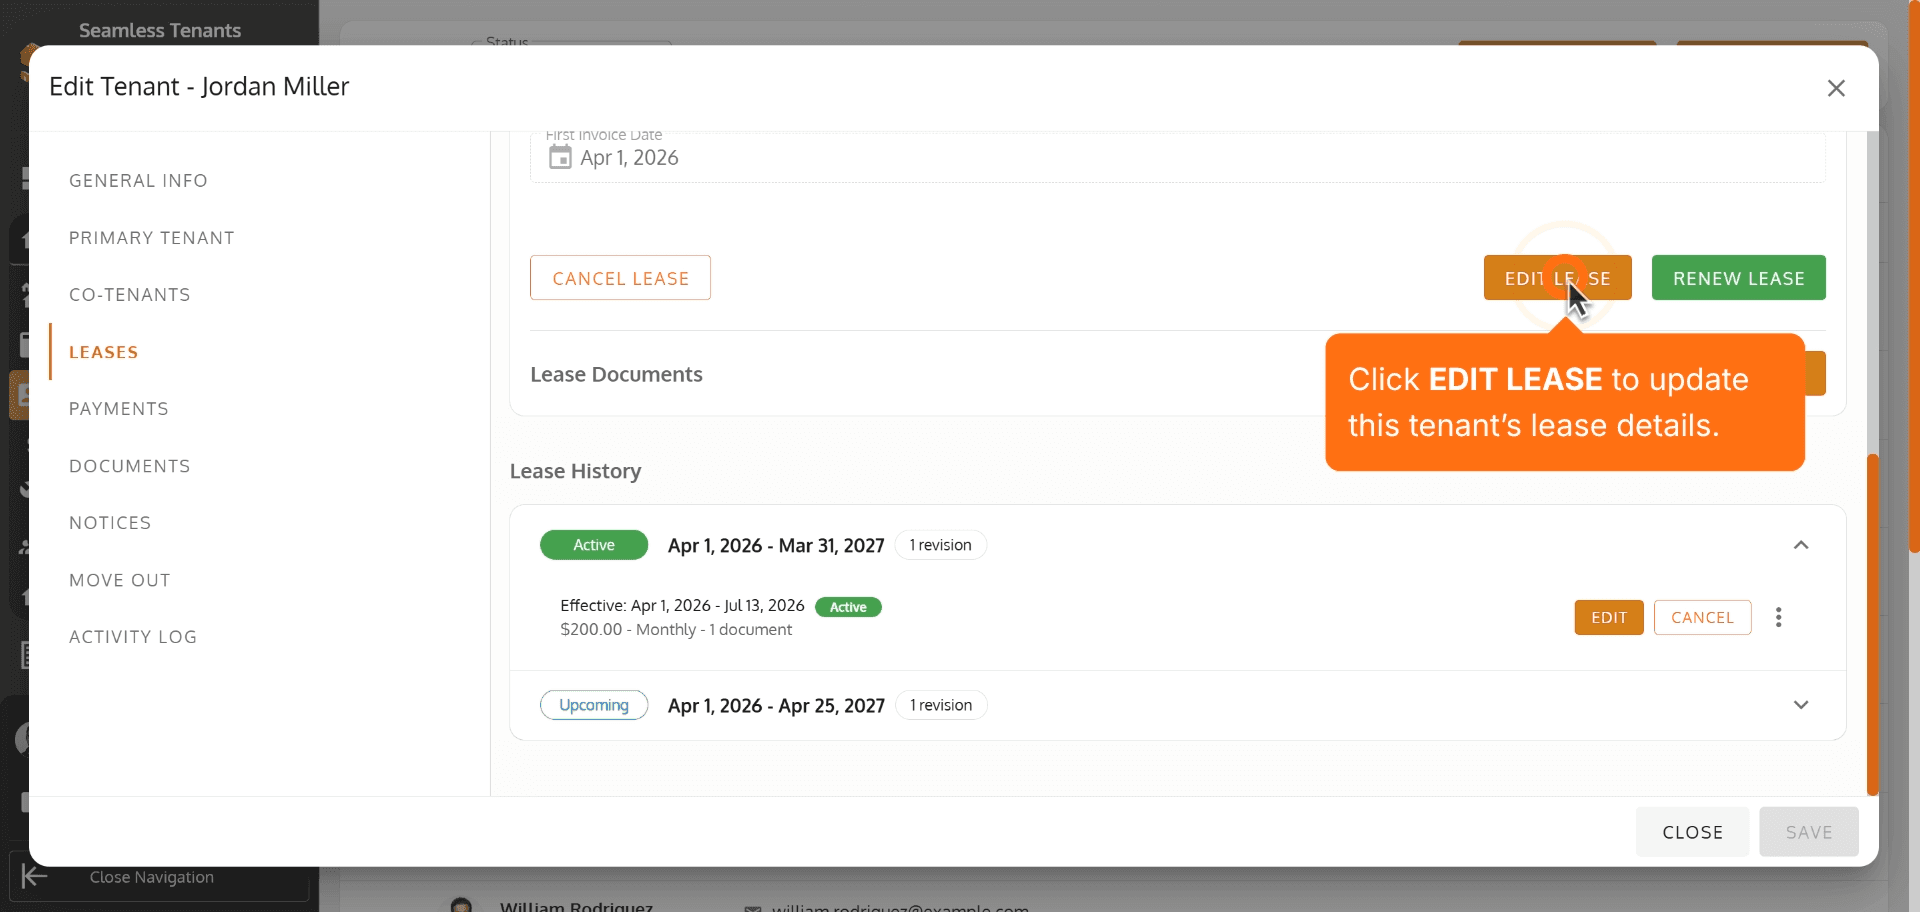
56. Click EDIT LEASE to update this tenant’s lease details.
Click EDIT LEASE to update this tenant’s lease details.
57.
58.
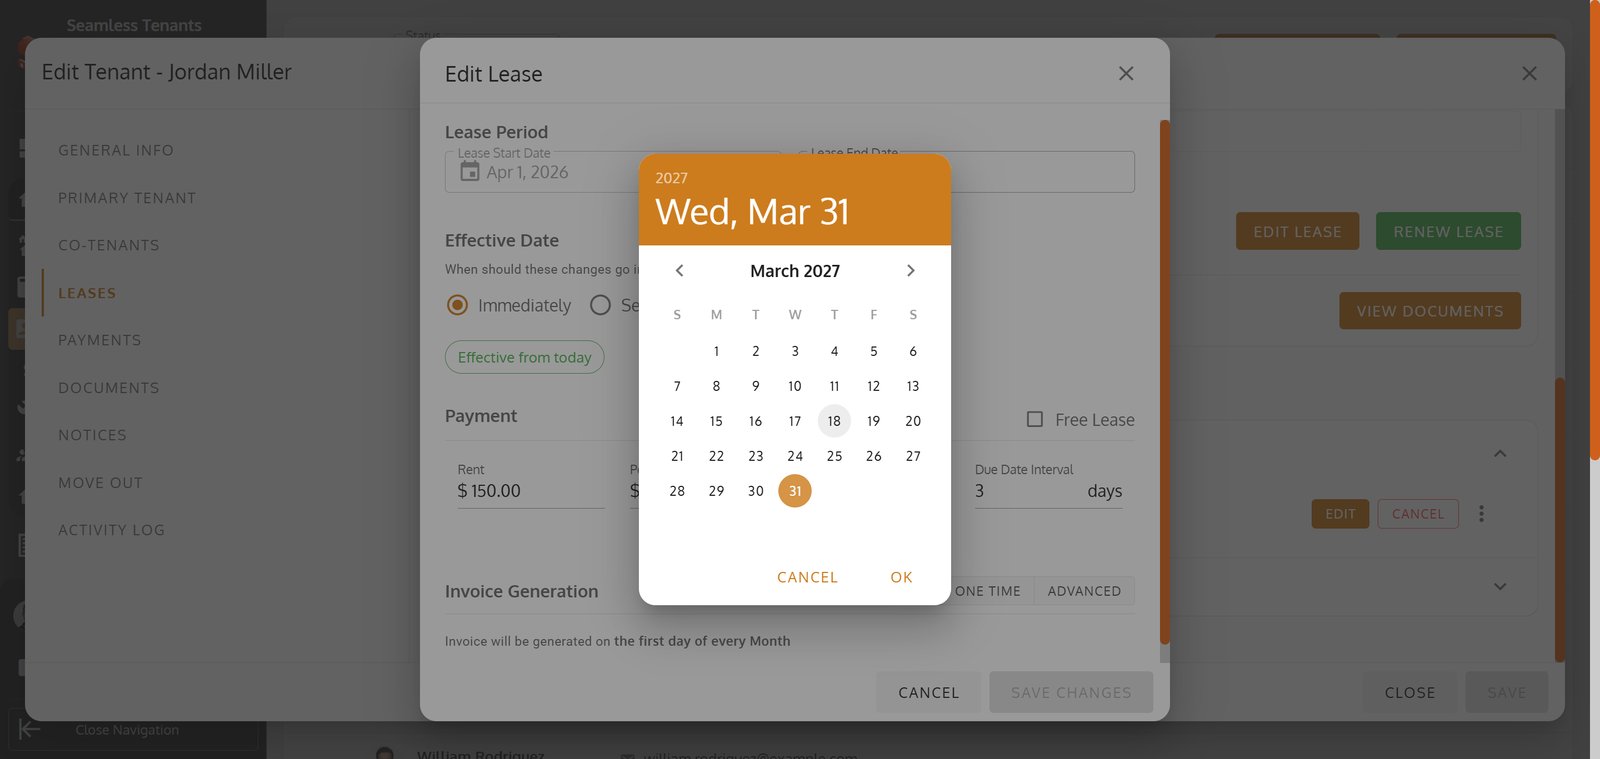
59.
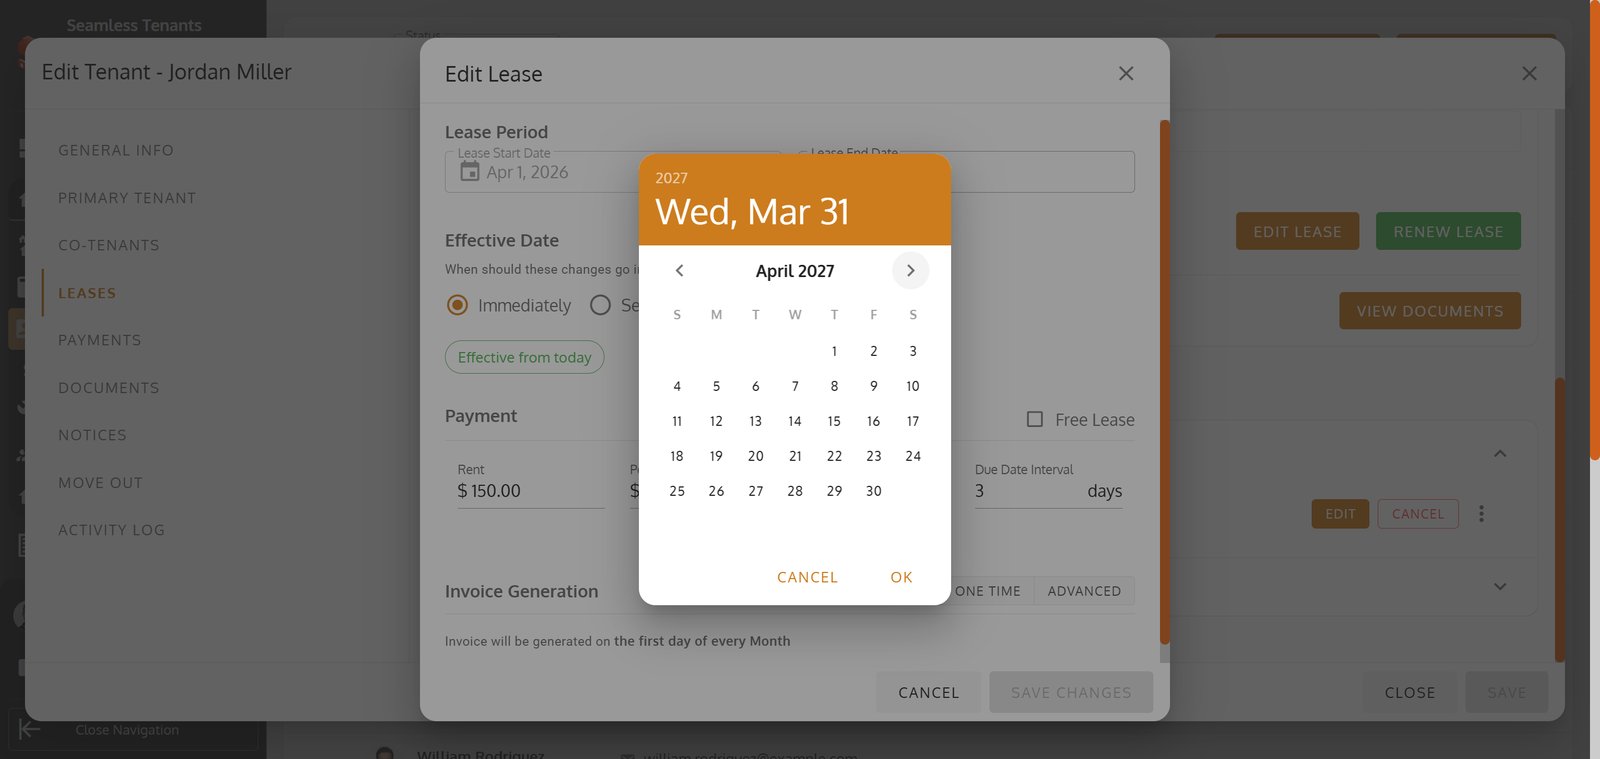
60.
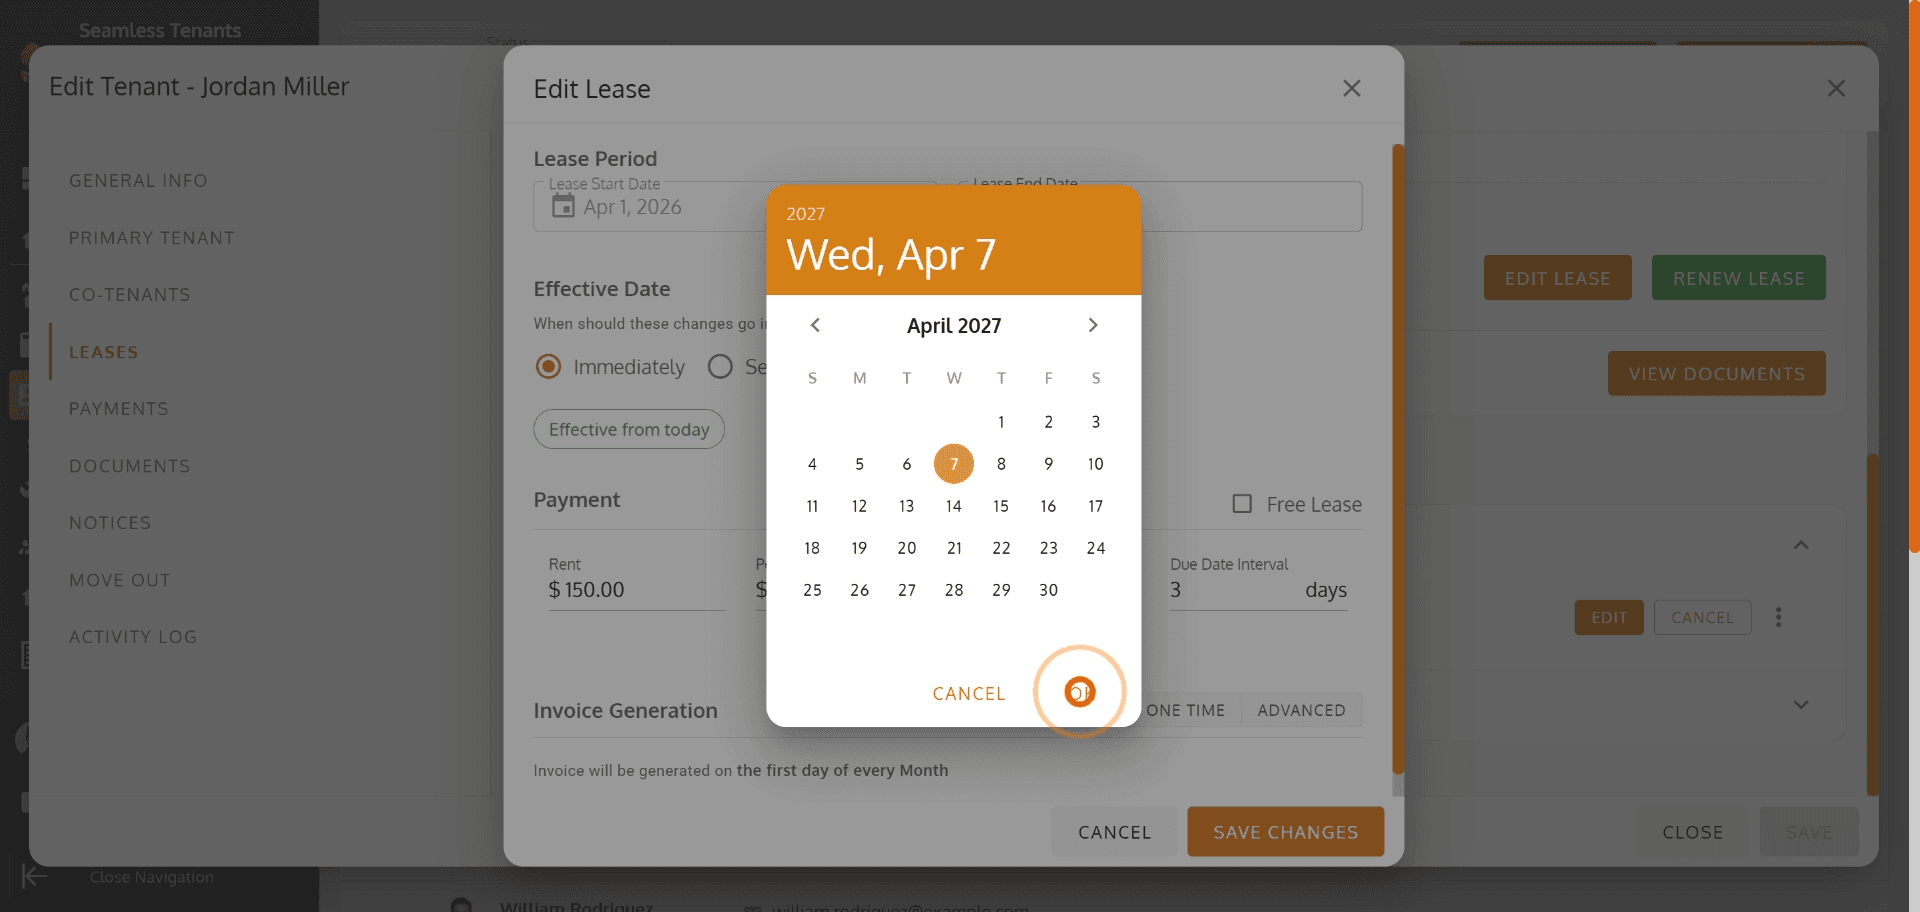
61. Click Select Date to choose the effective date for this tenant update.
Click Select Date to choose the effective date for this tenant update.

62. Click Free Lease under Payment if the lease is free.
Click Free Lease under Payment if the lease is free.
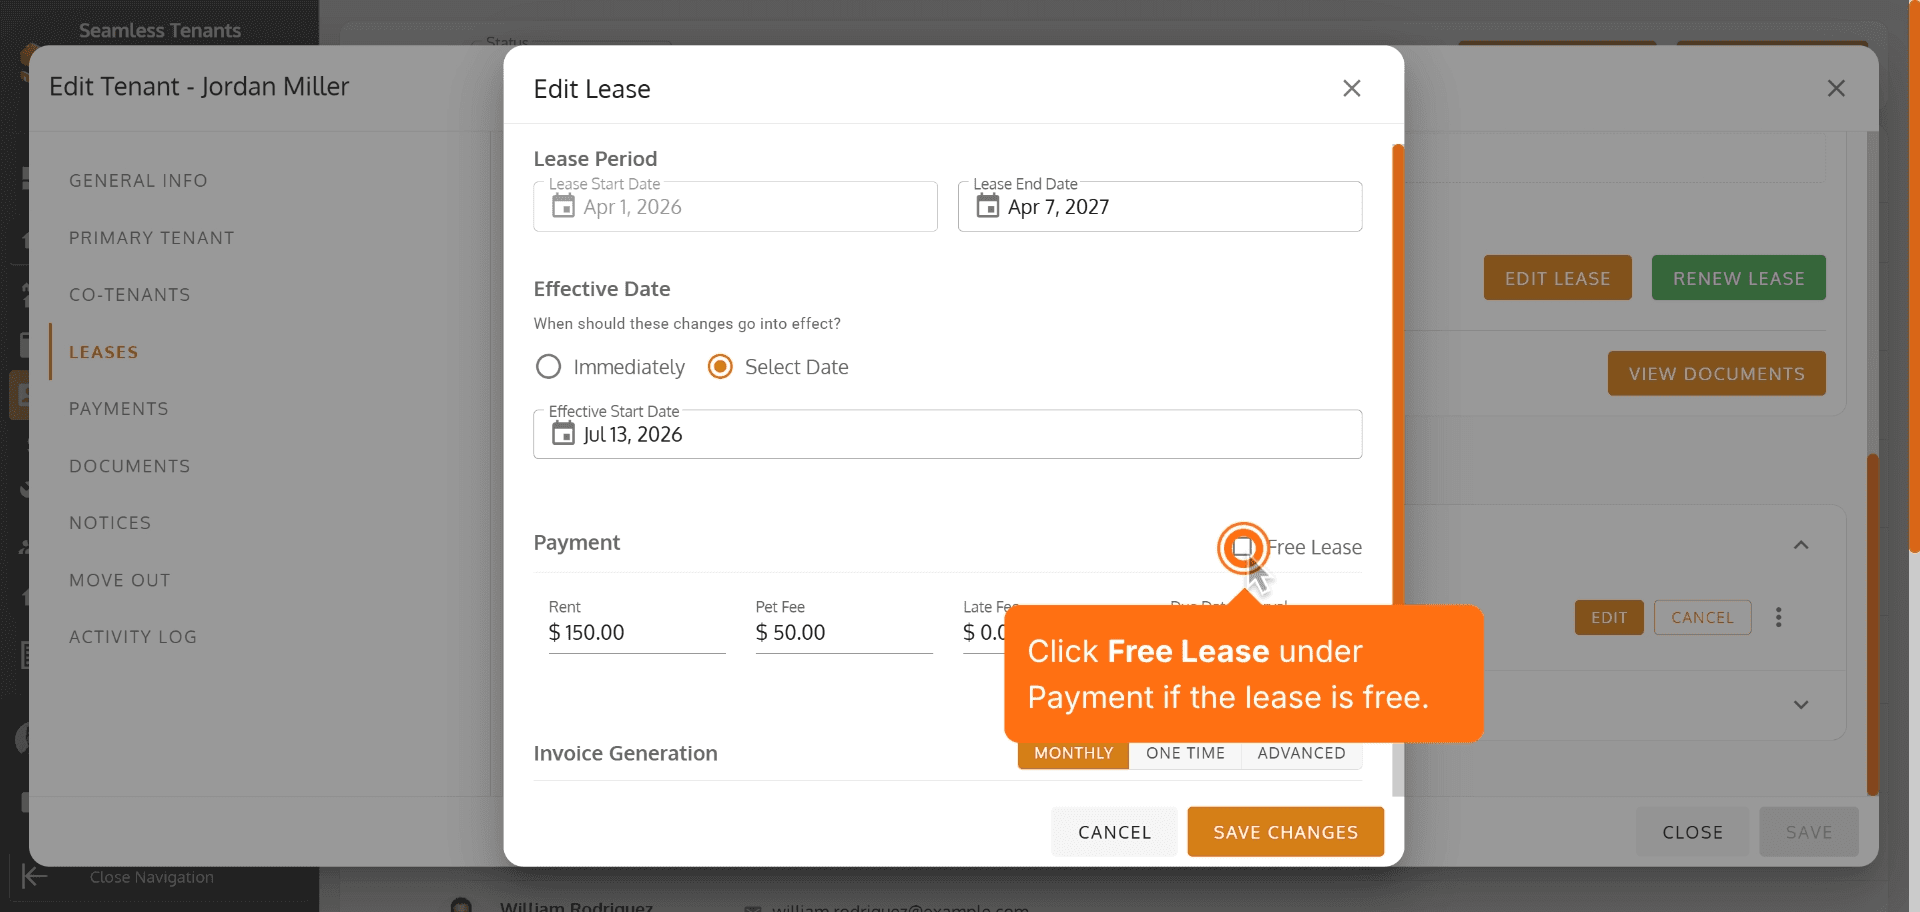
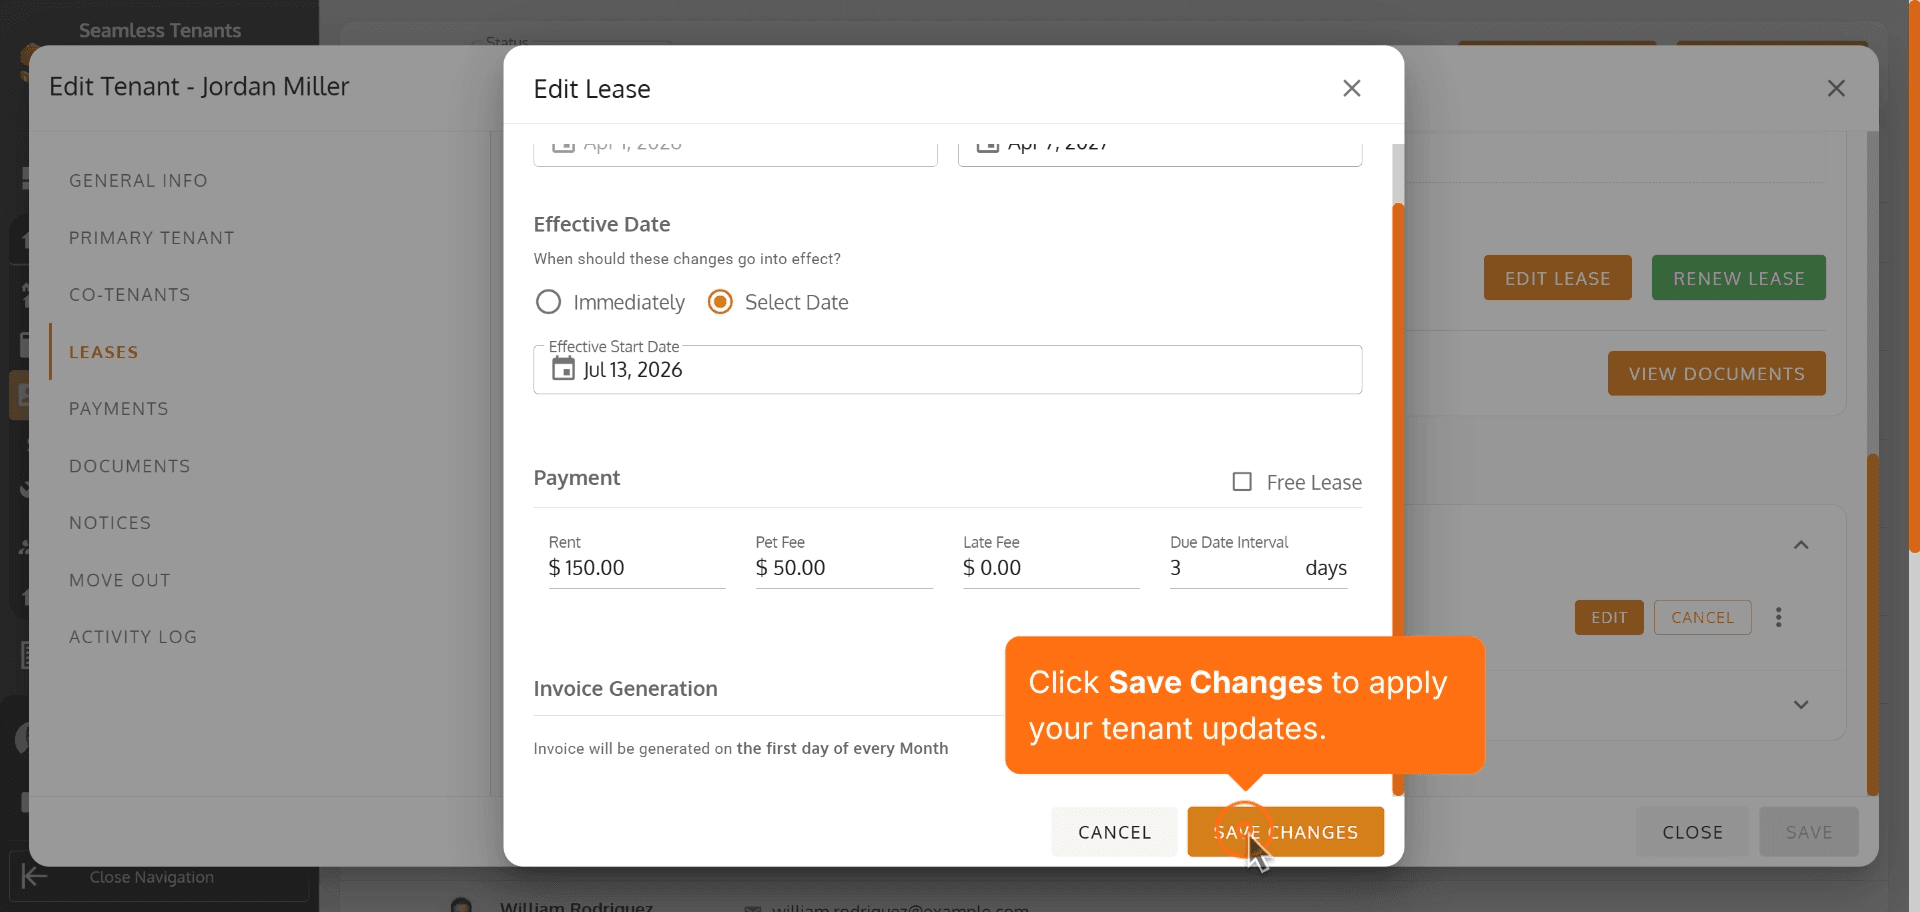
63. Click Save Changes to apply your tenant updates.
Click Save Changes to apply your tenant updates.
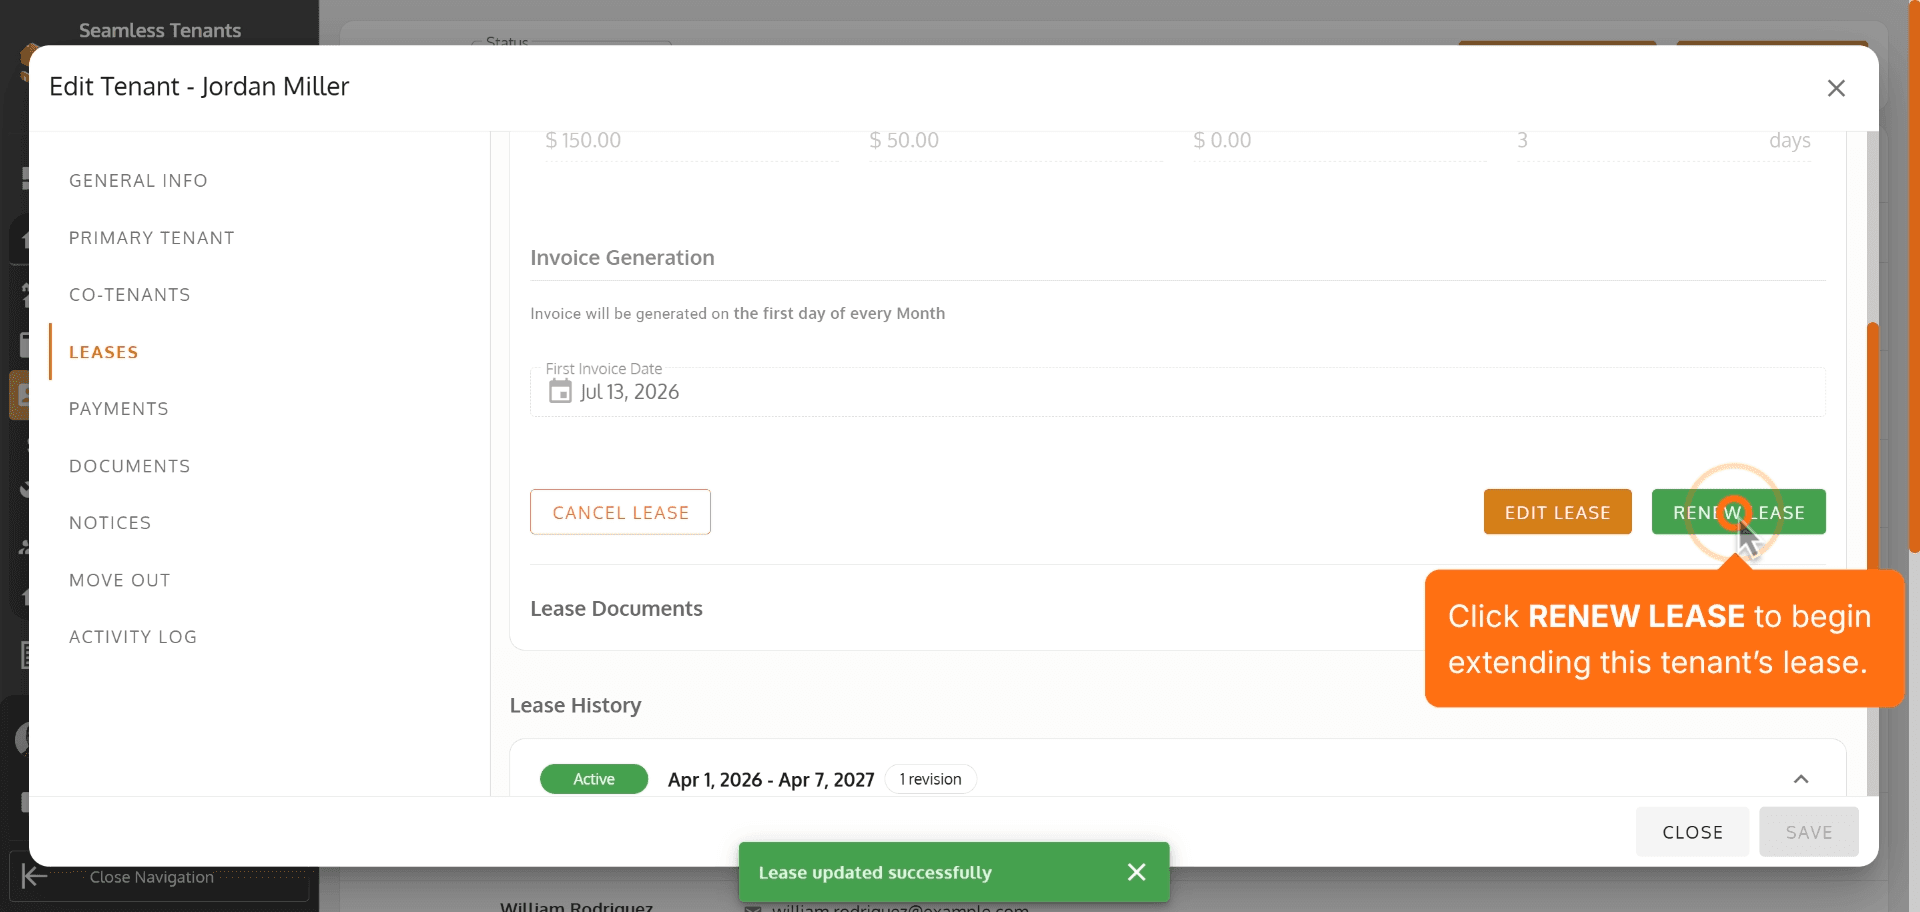
64. Click RENEW LEASE to begin extending this tenant’s lease.
Click RENEW LEASE to begin extending this tenant’s lease.
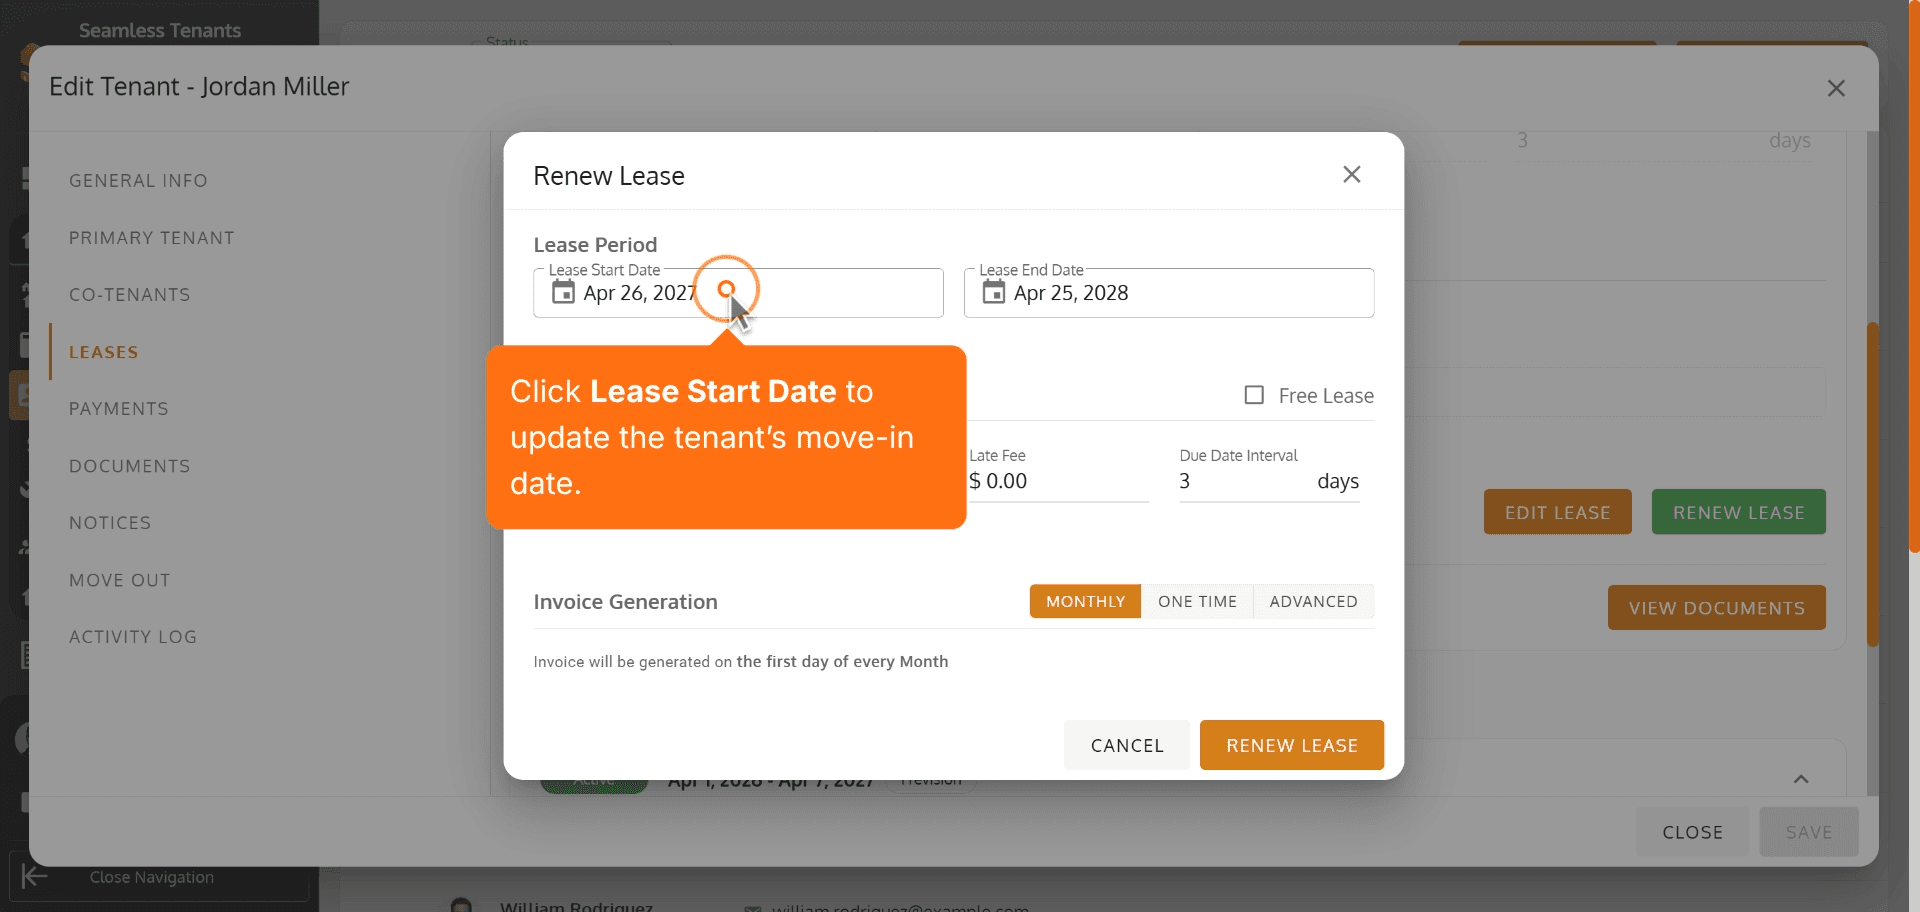
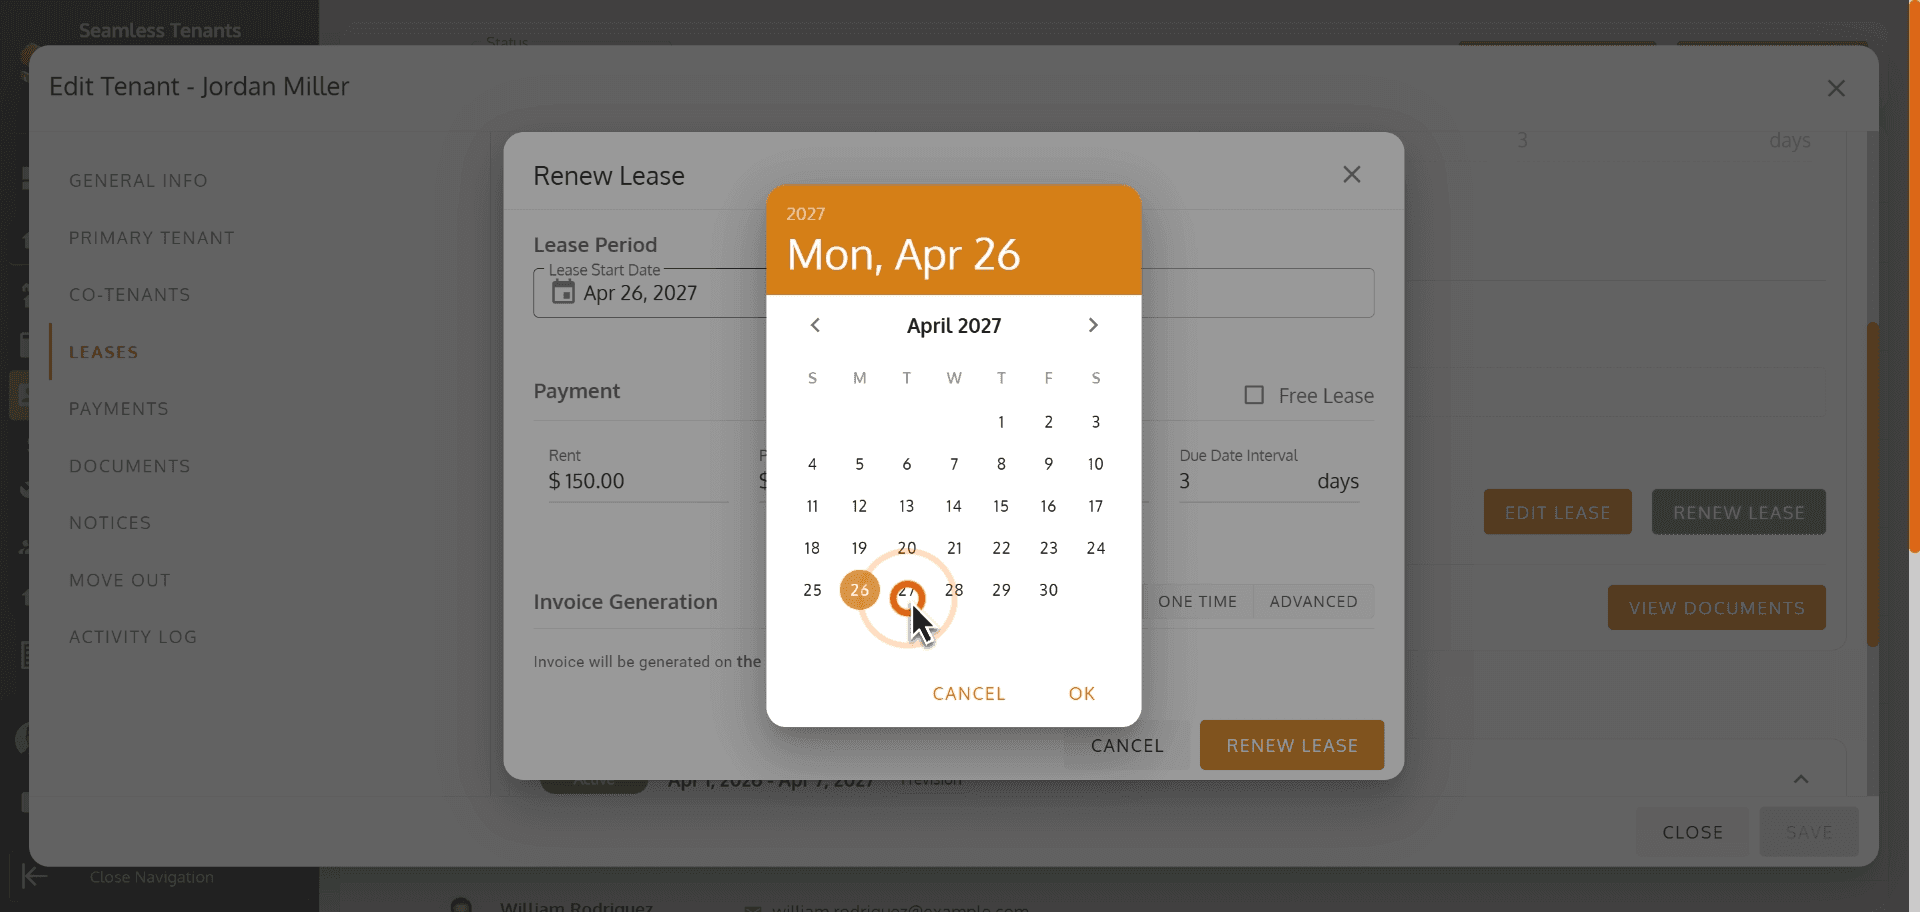
65. Click Lease Start Date to update the tenant’s move-in date.
Click Lease Start Date to update the tenant’s move-in date.
66.
67.

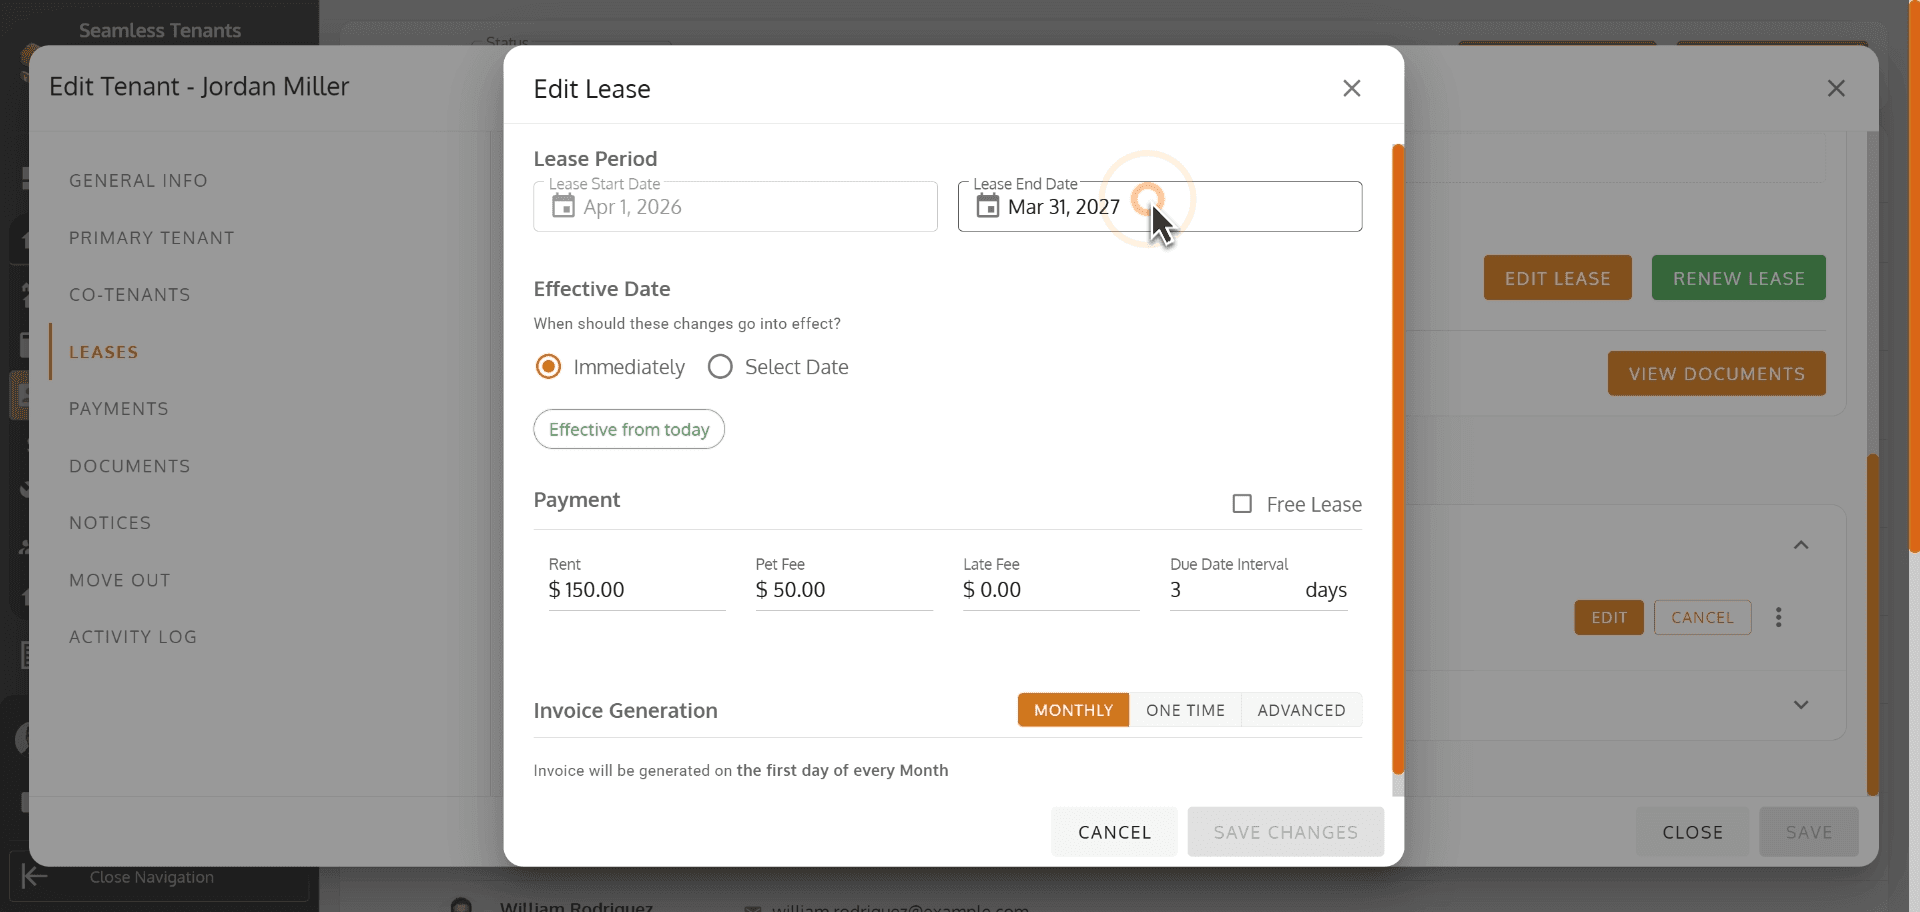
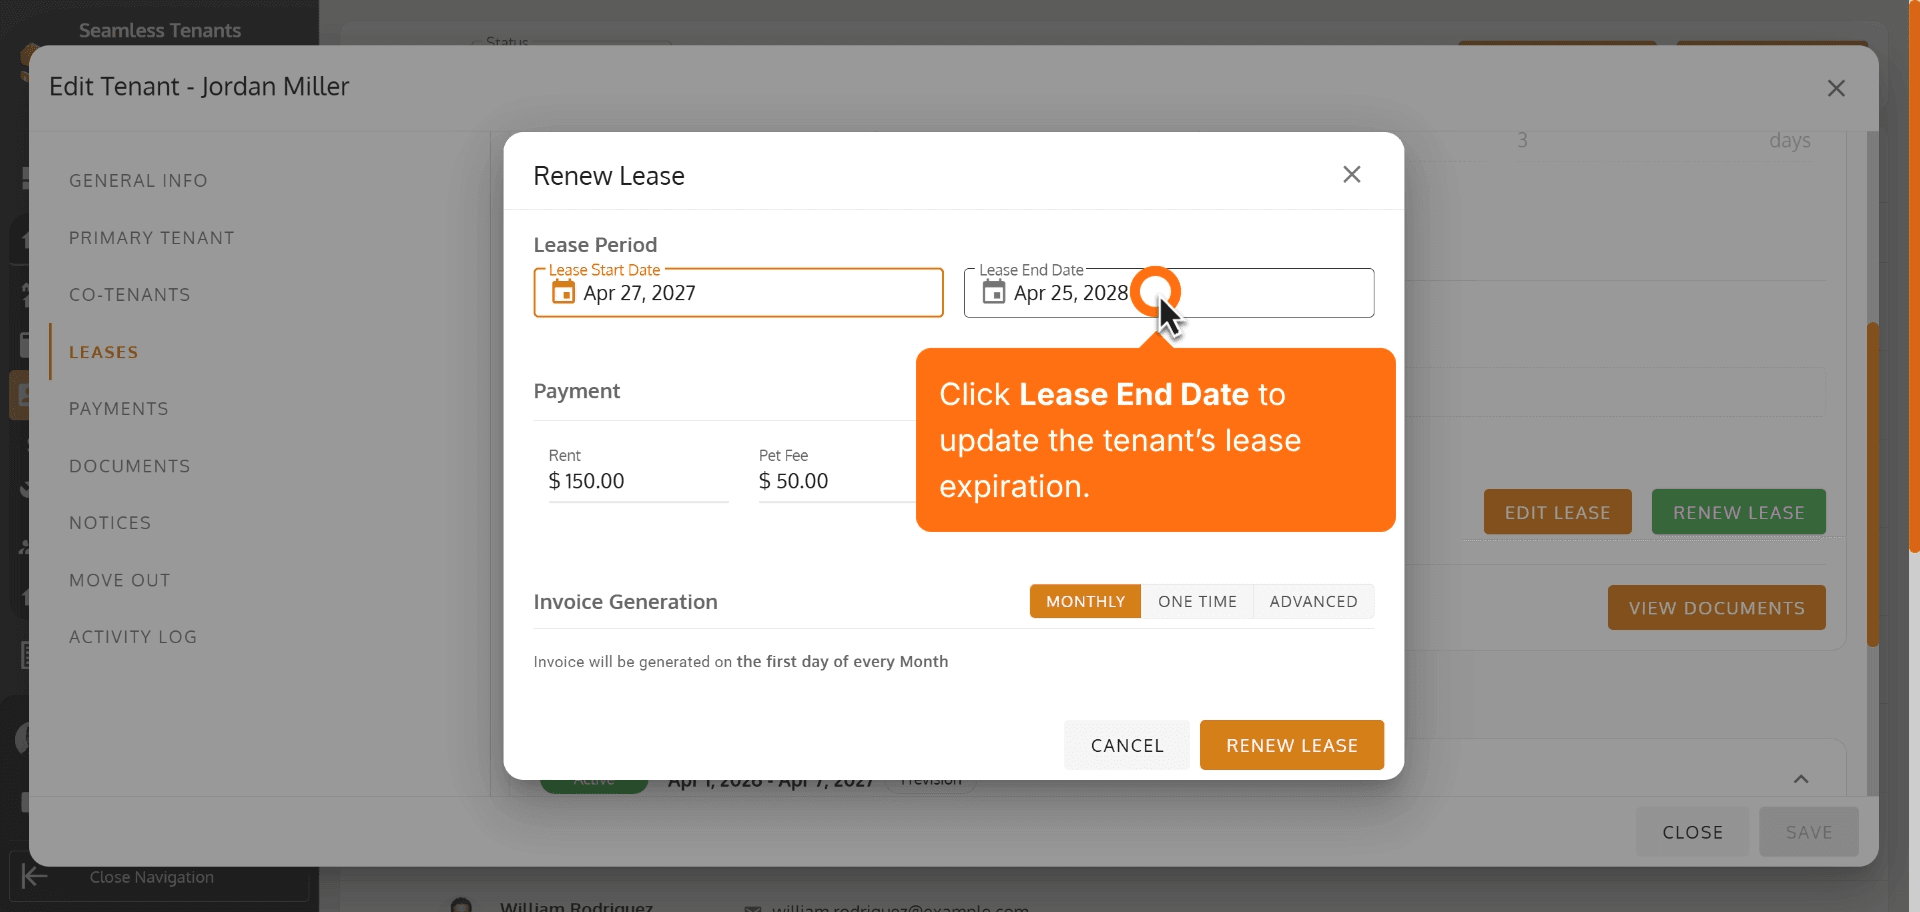
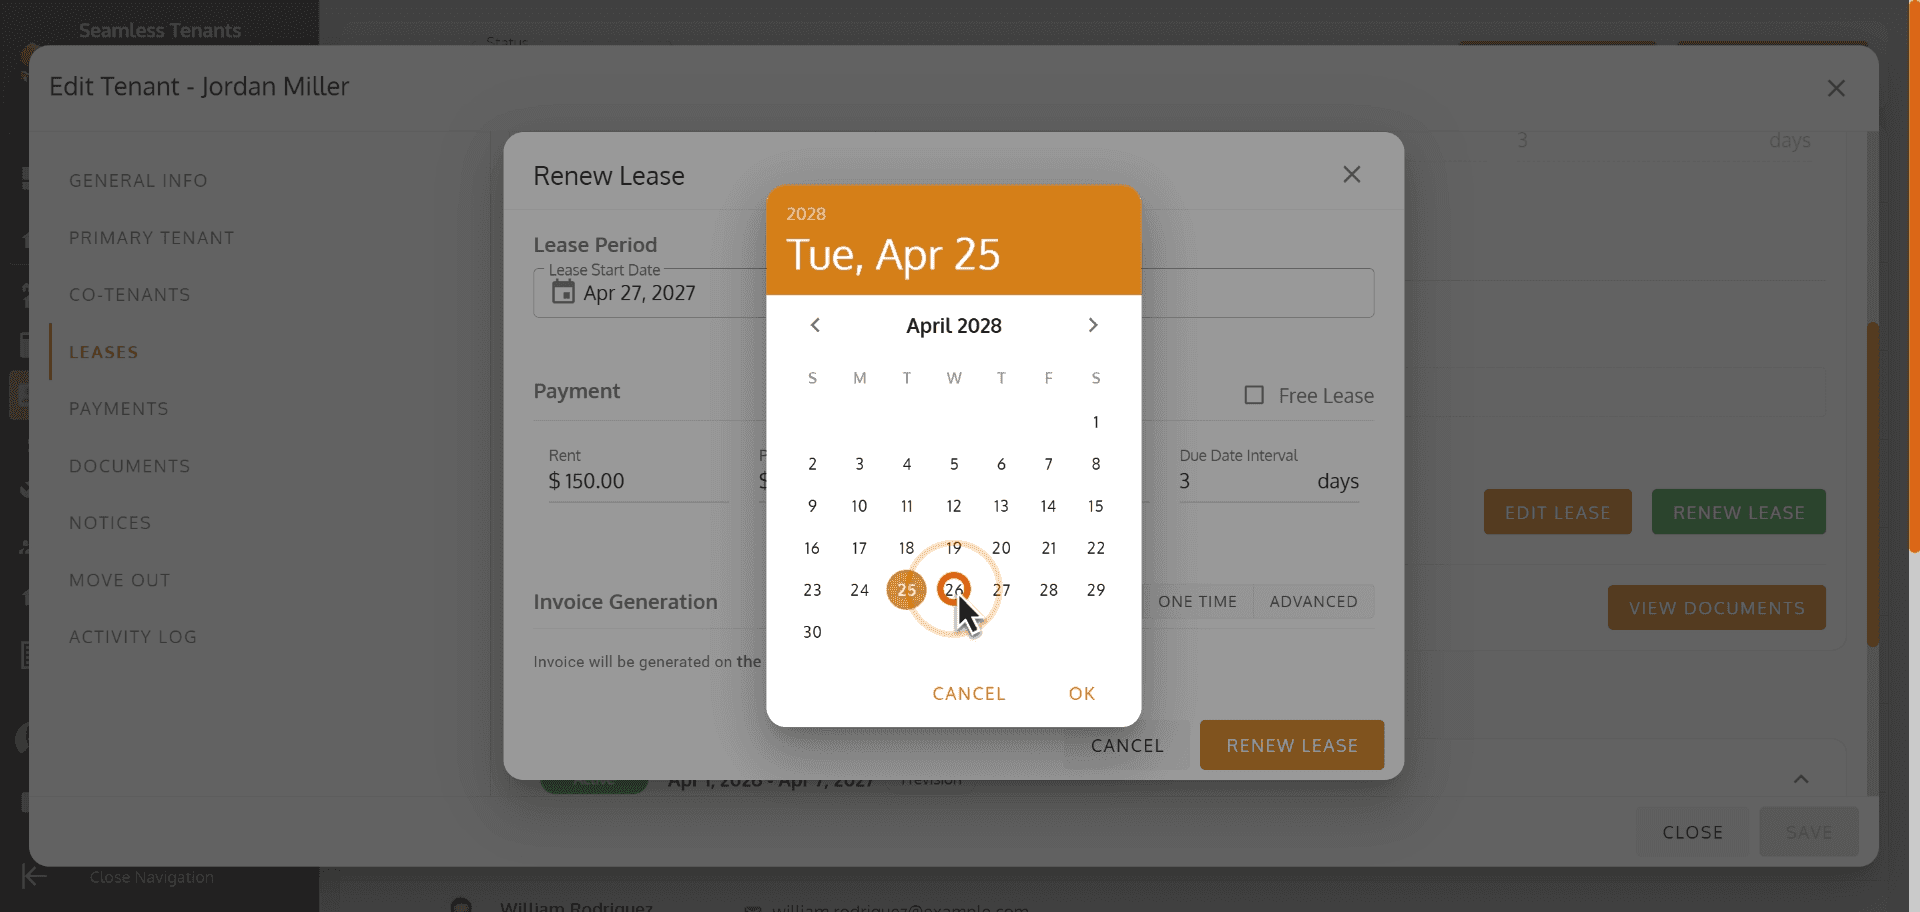
68. Click Lease End Date to update the tenant’s lease expiration.
Click Lease End Date to update the tenant’s lease expiration.
69.
70.
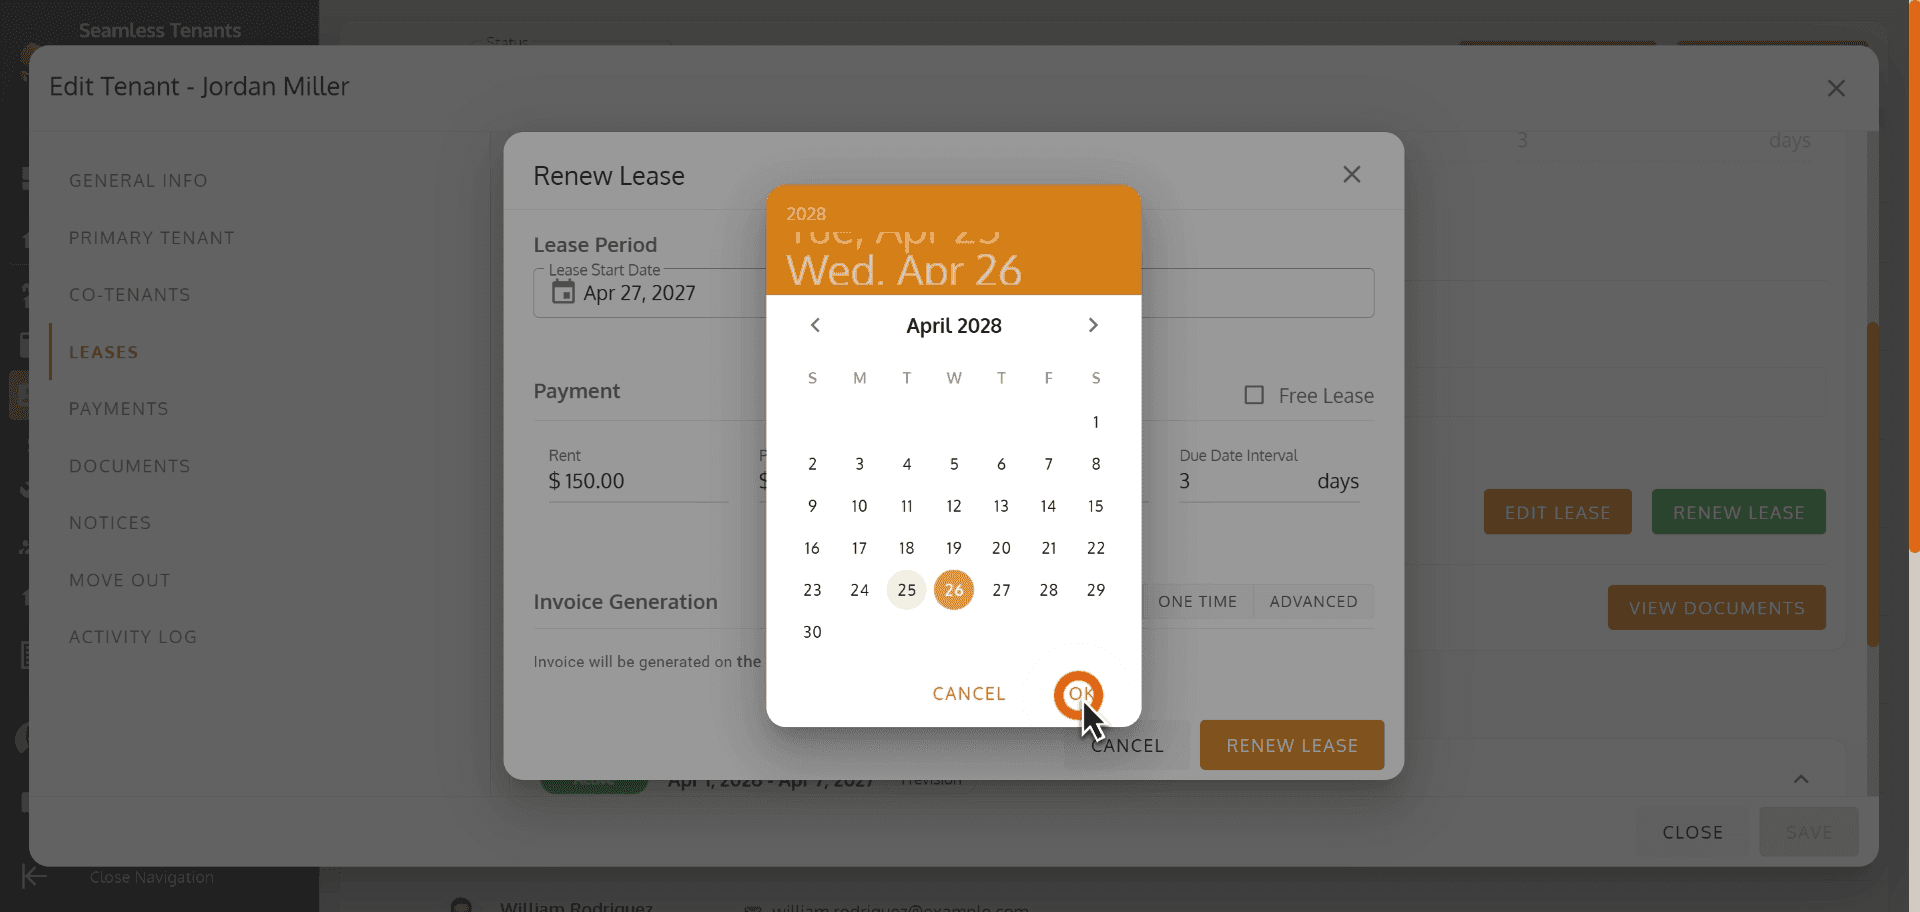
71. Click RENEW LEASE to start extending this tenant’s lease.
Click RENEW LEASE to start extending this tenant’s lease.
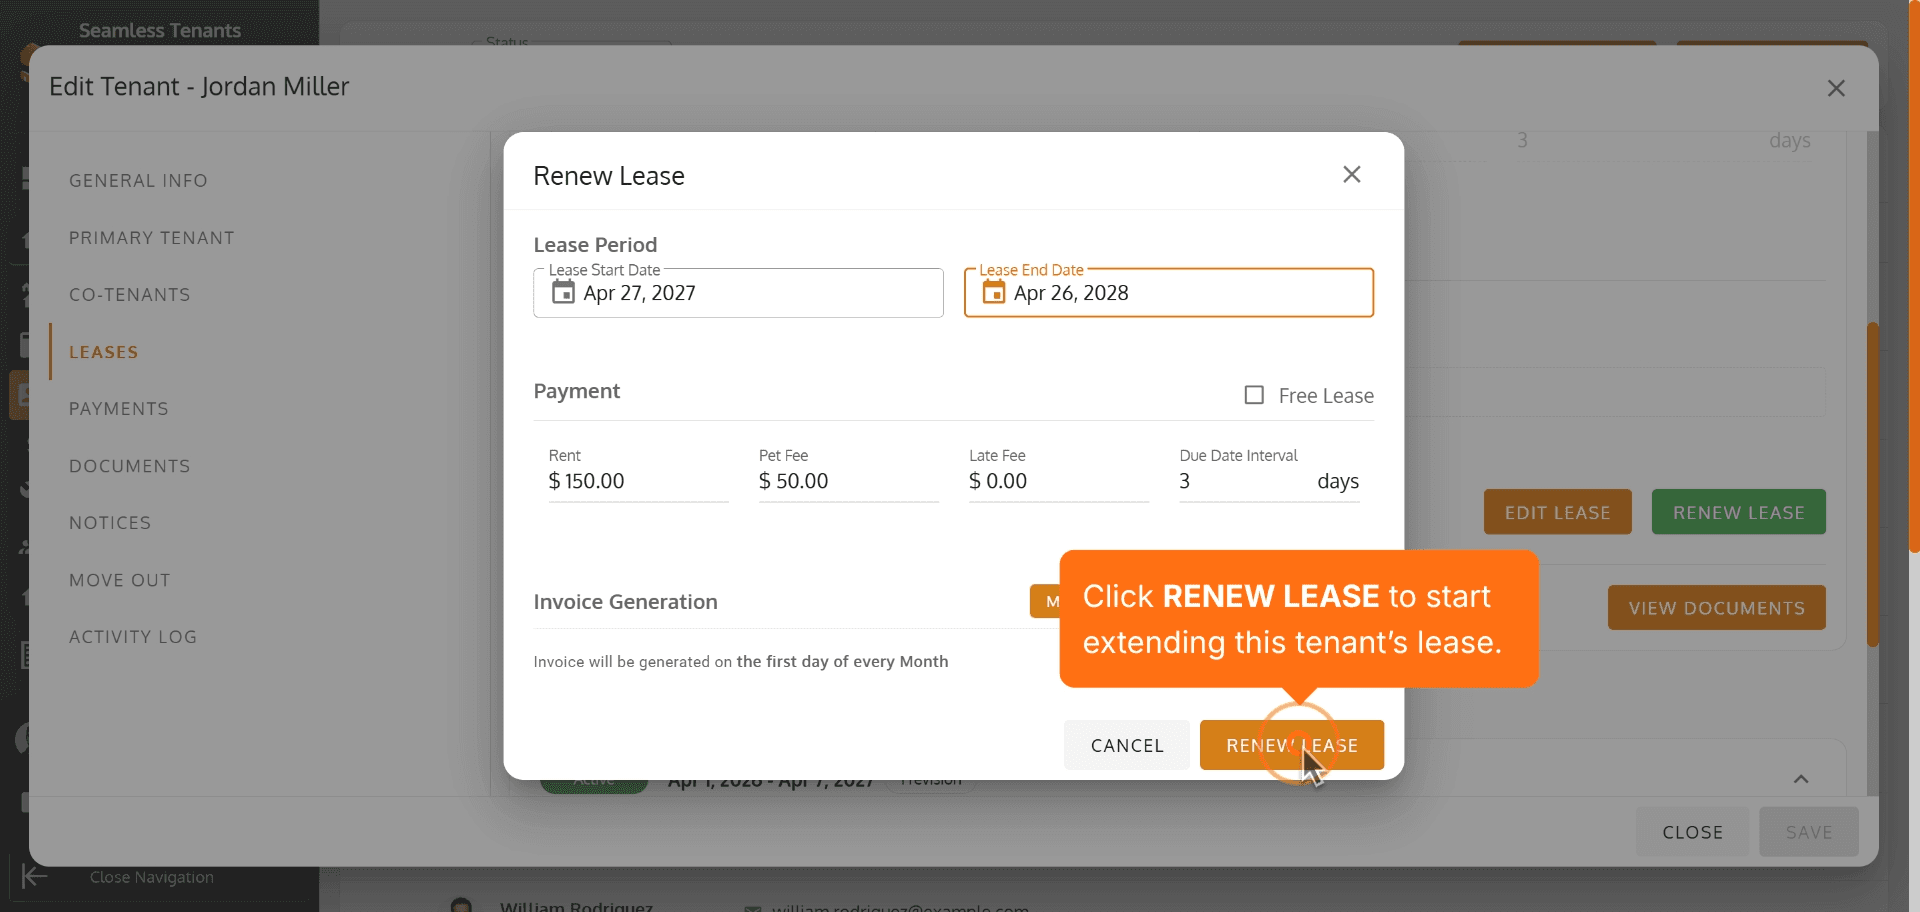
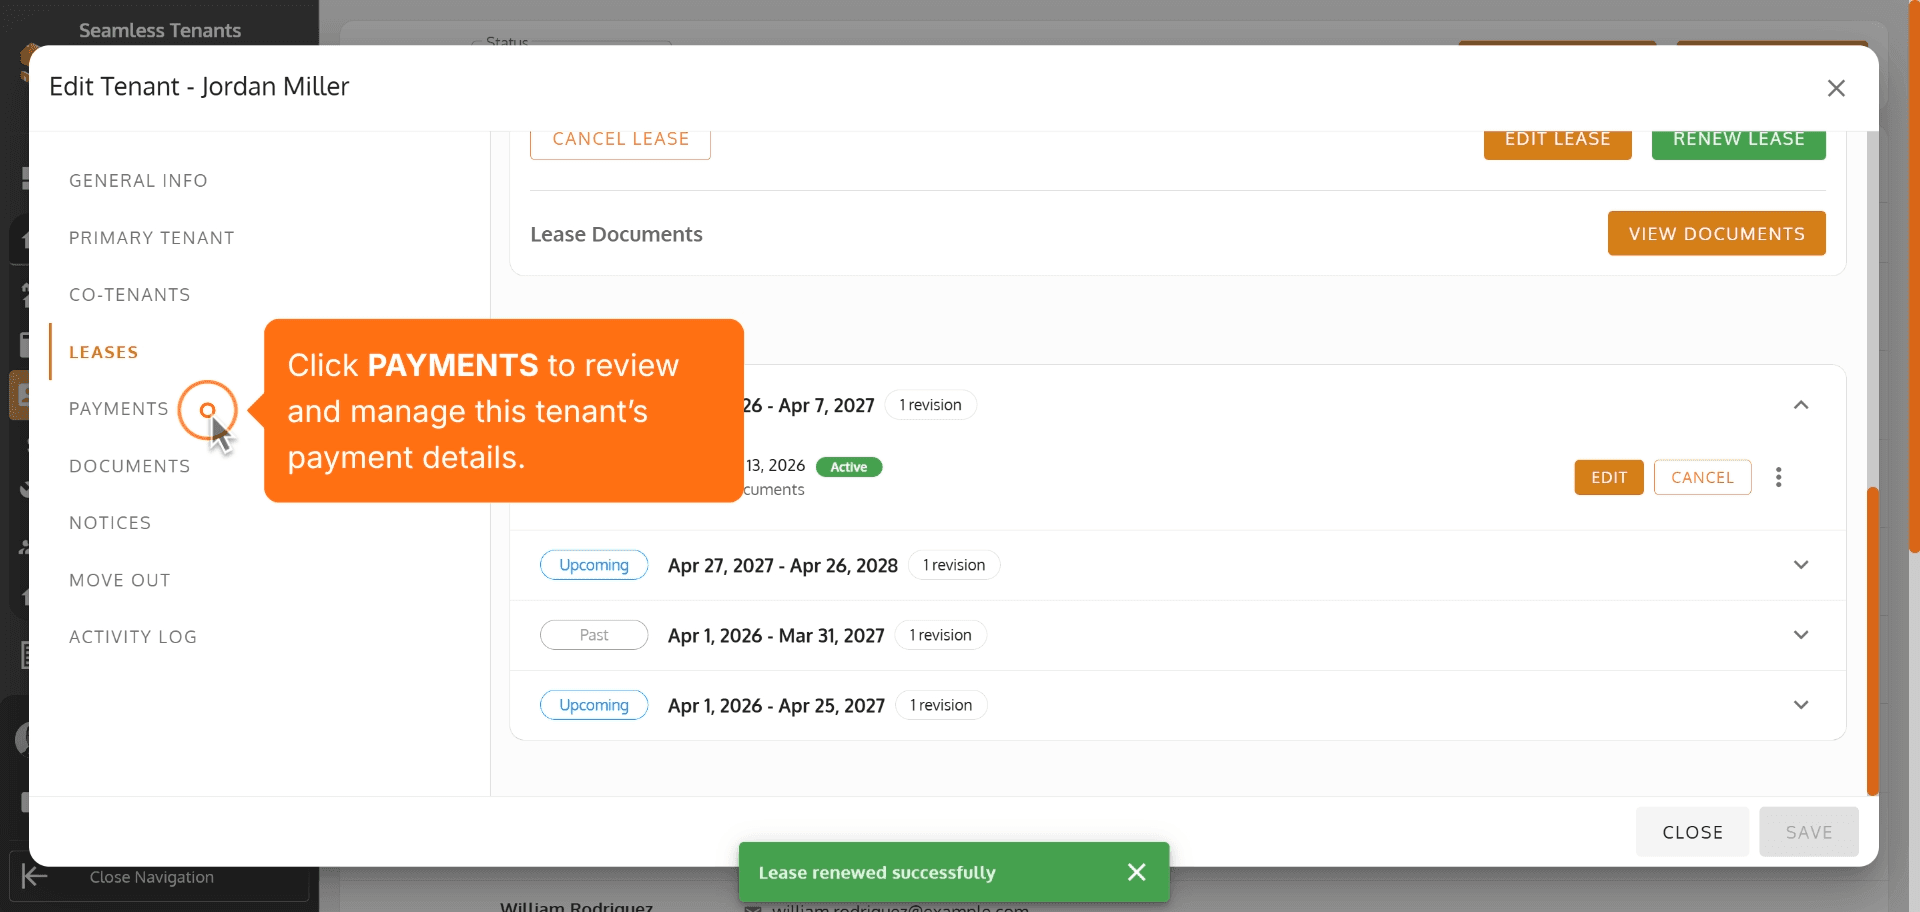
72. Click PAYMENTS to review and manage this tenant’s payment details.
Click PAYMENTS to review and manage this tenant’s payment details.
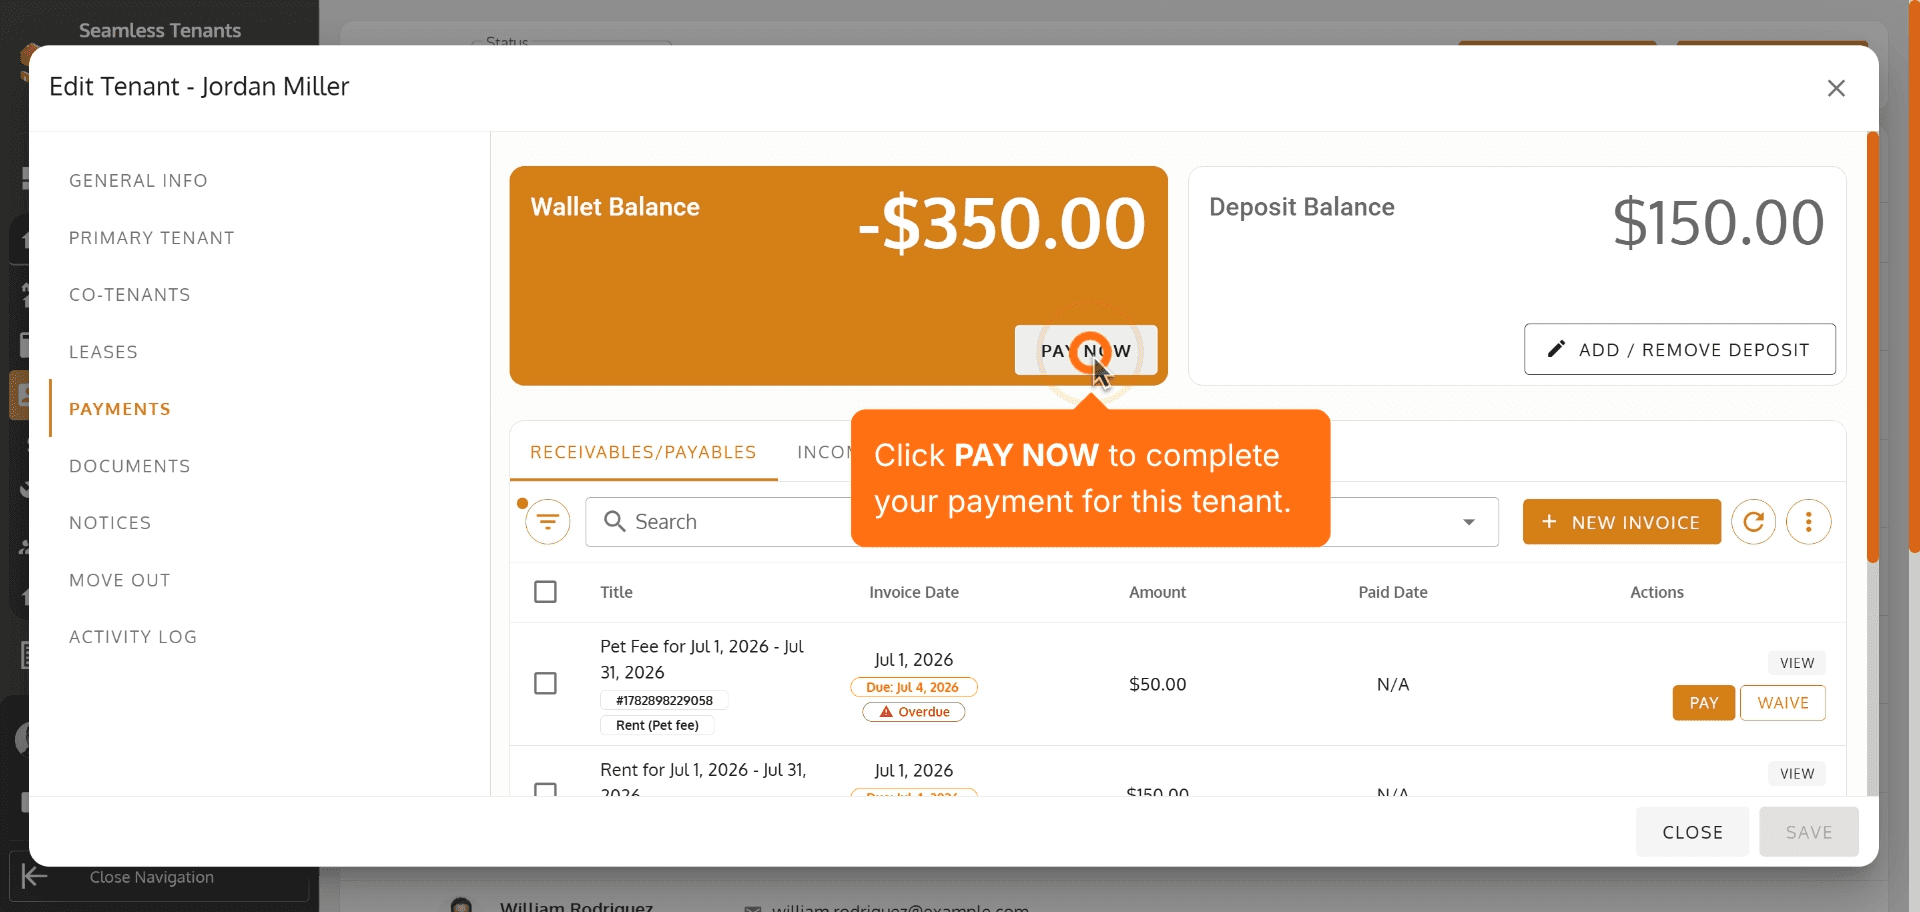
73. Click PAY NOW to complete your payment for this tenant.
Click PAY NOW to complete your payment for this tenant.
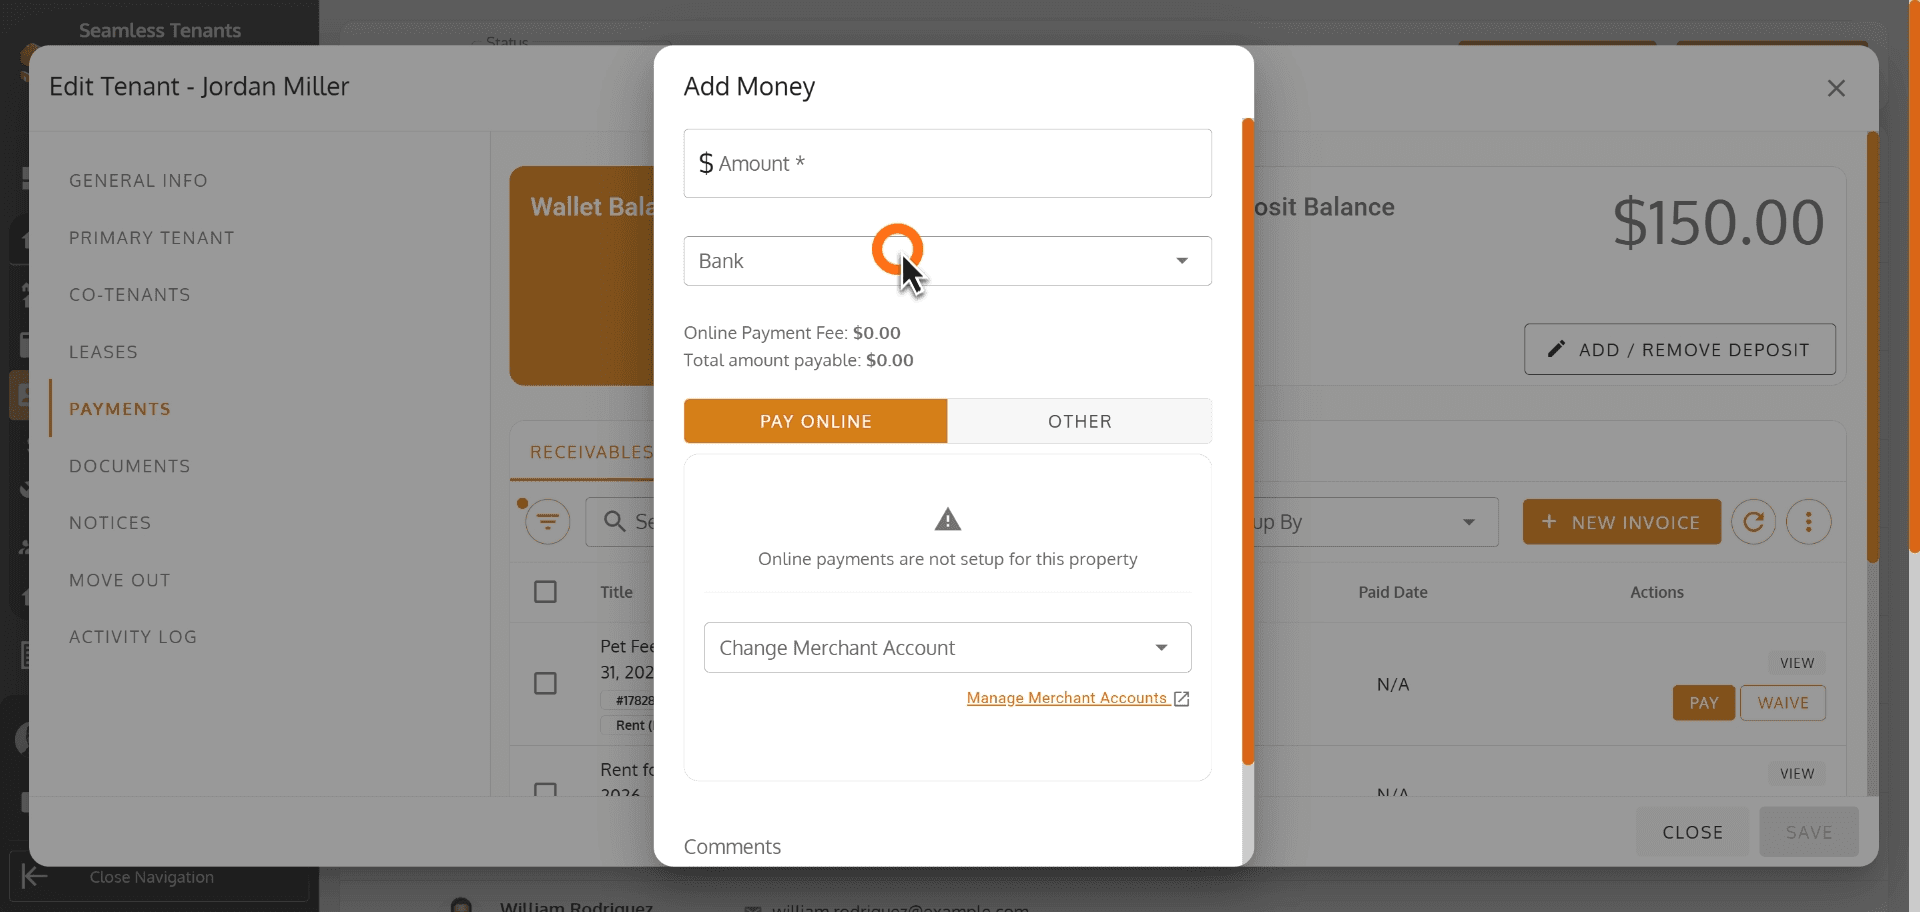
74.
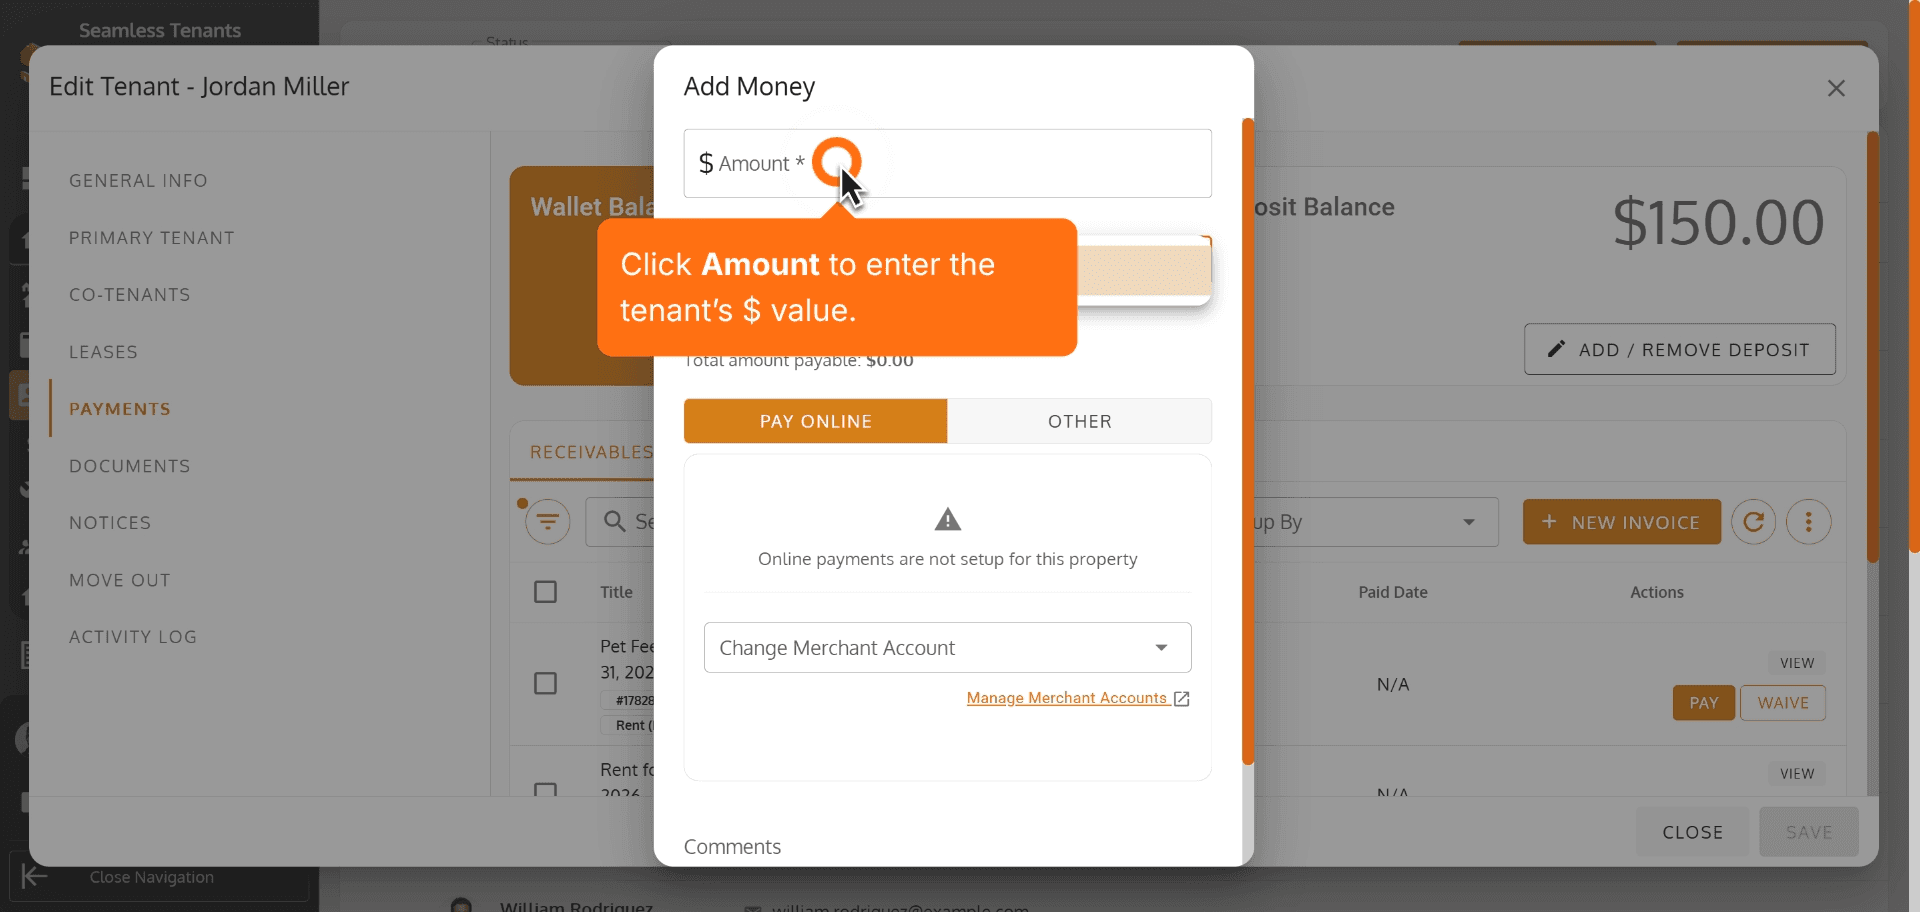
75. Click Amount to enter the tenant’s $ value.
Click Amount to enter the tenant’s $ value.
76.
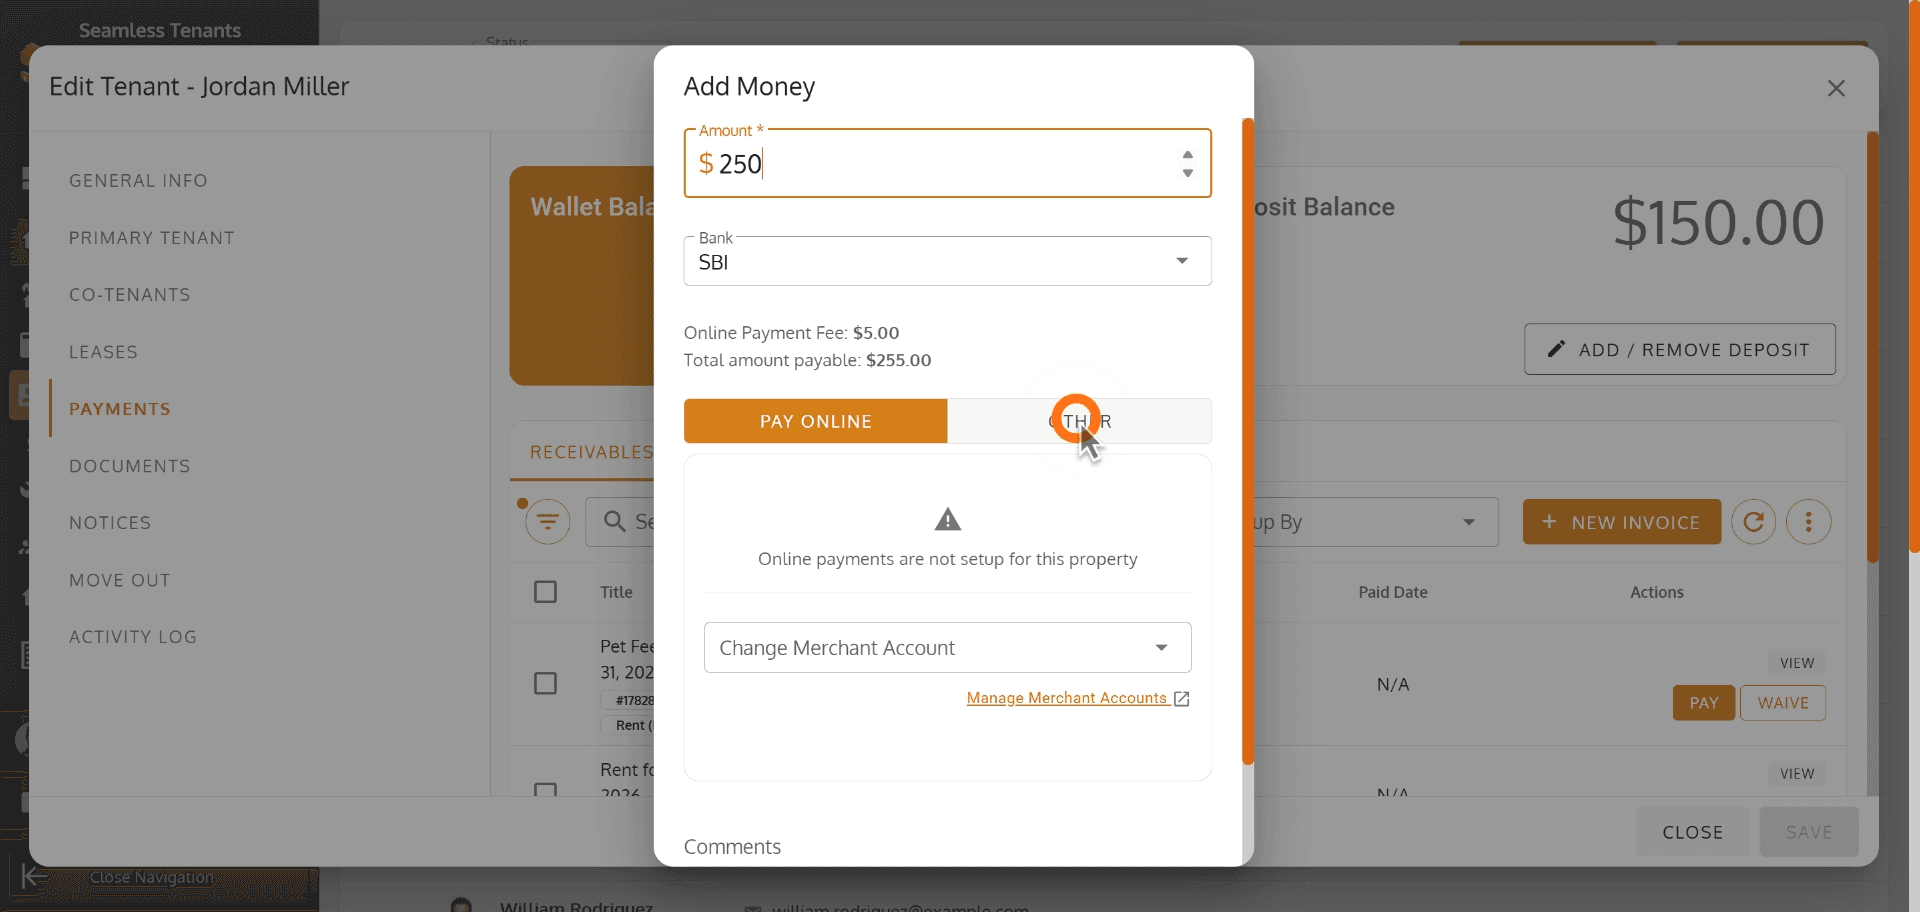
77. Click SUBMIT to save your tenant updates.
Click SUBMIT to save your tenant updates.
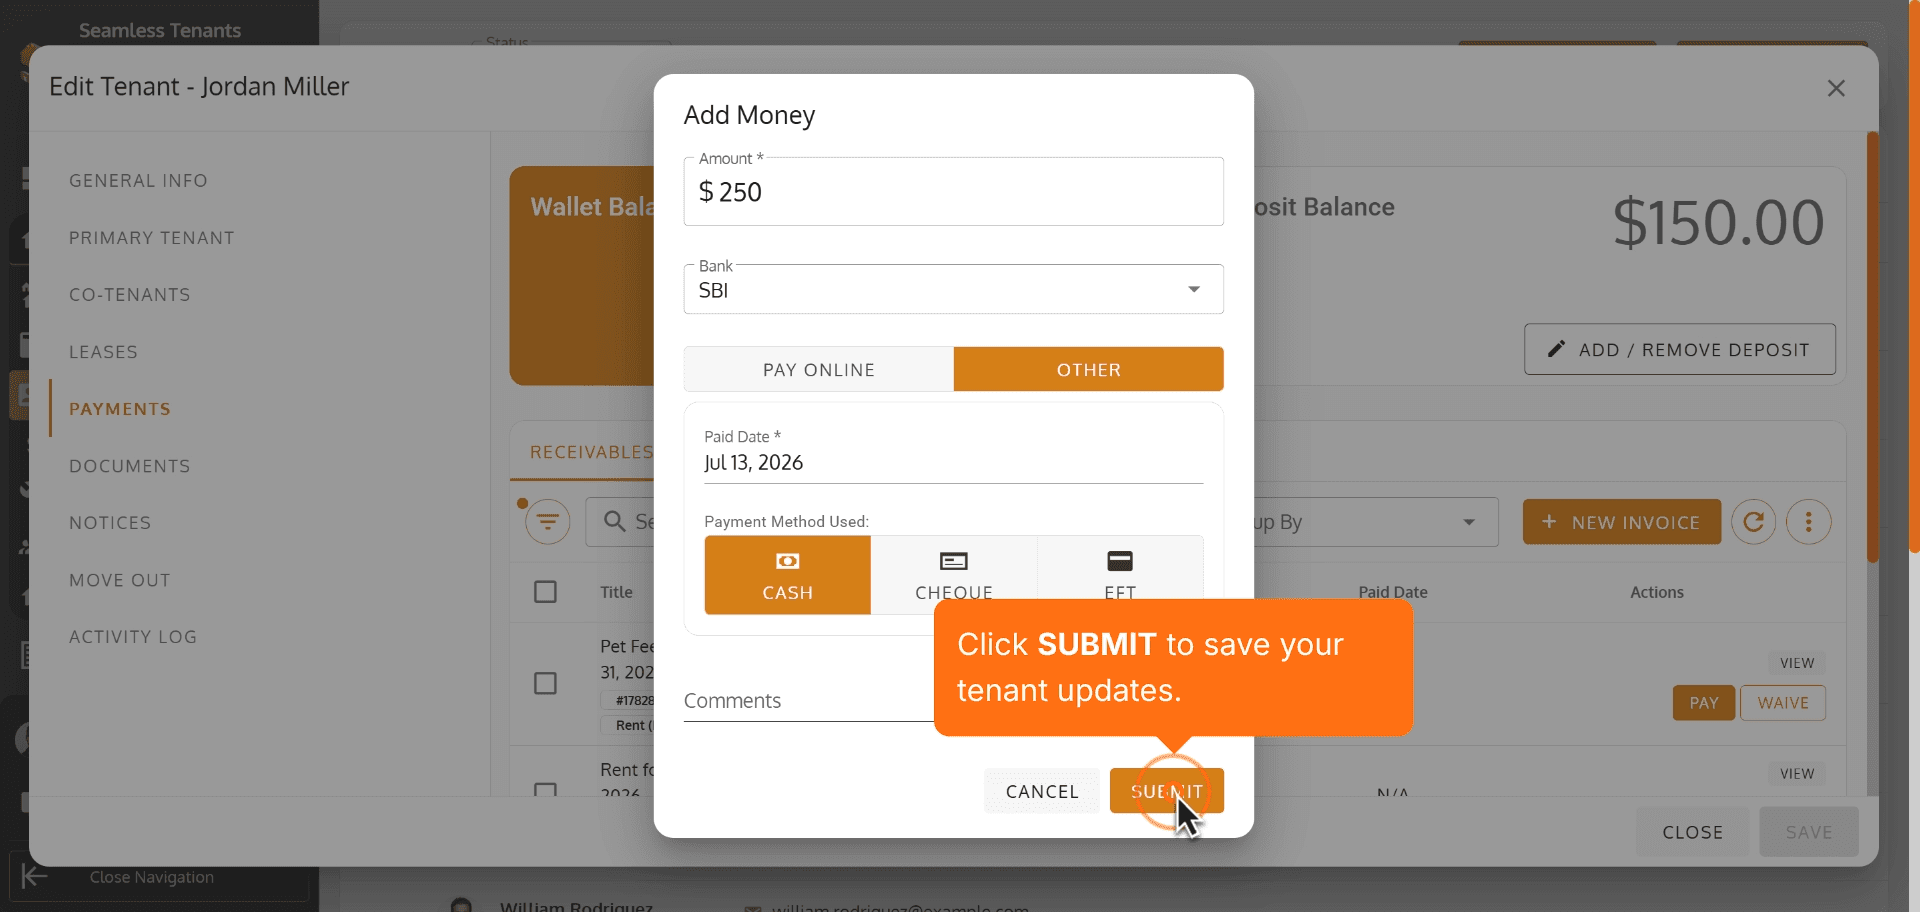
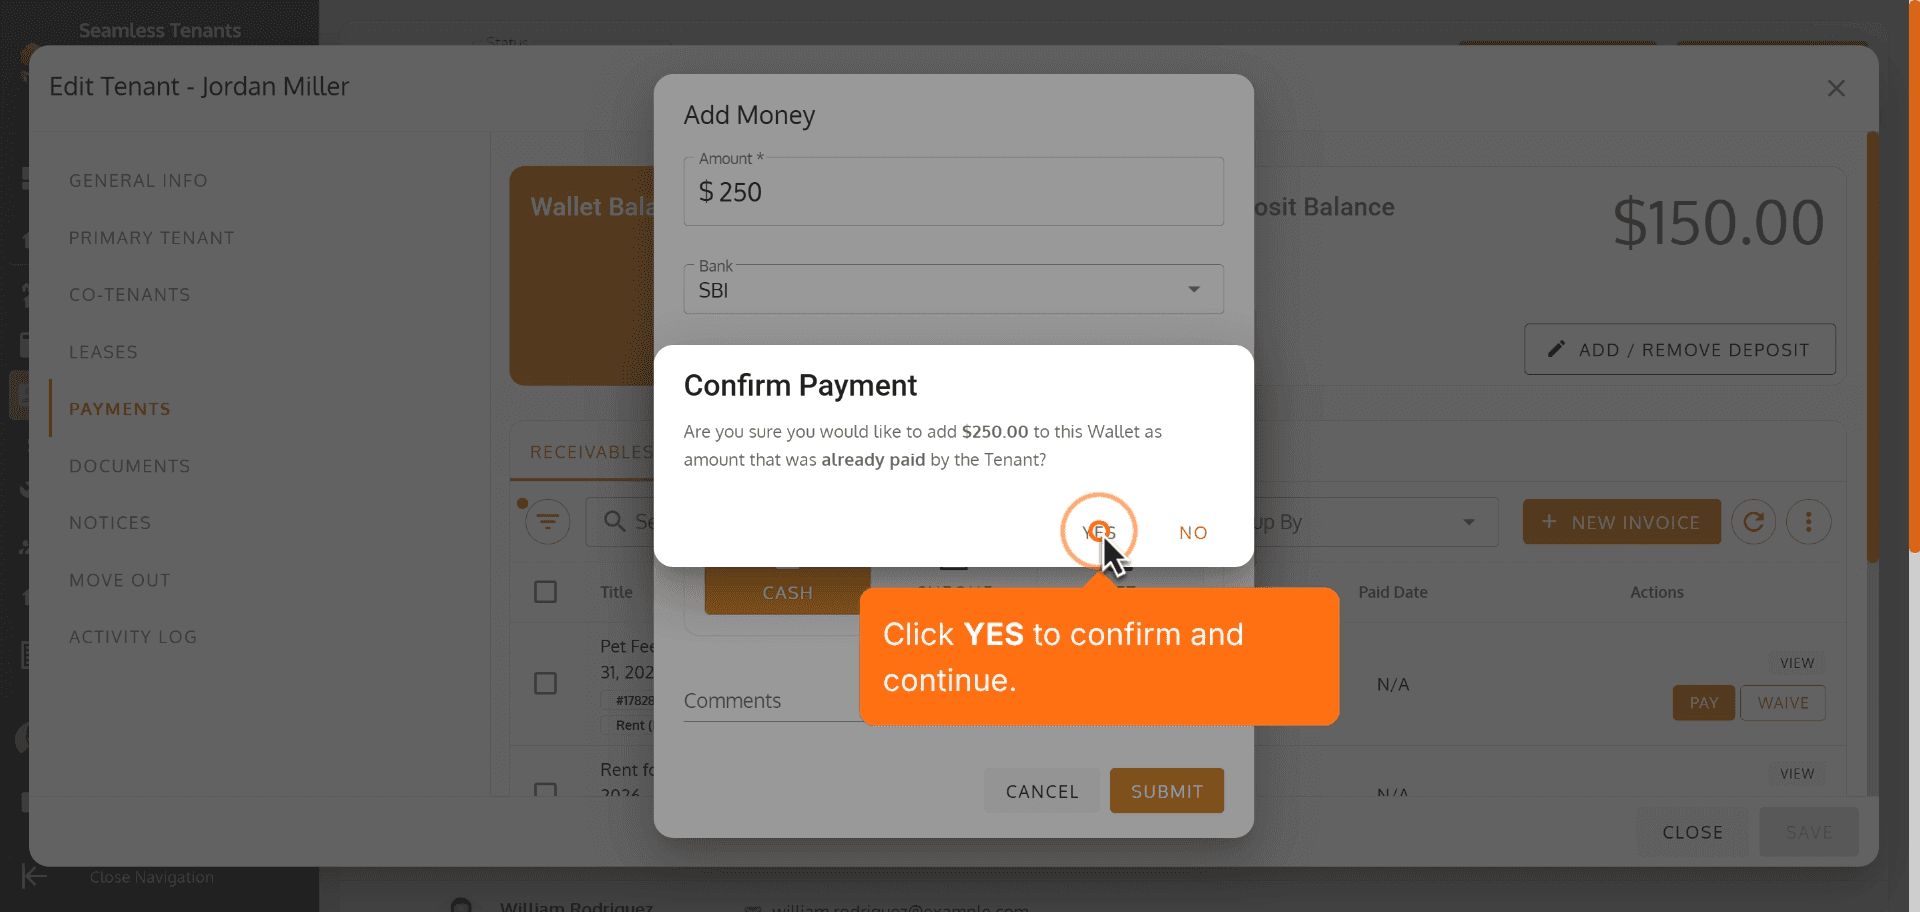
78. Click YES to confirm and continue.
Click YES to confirm and continue.
79.
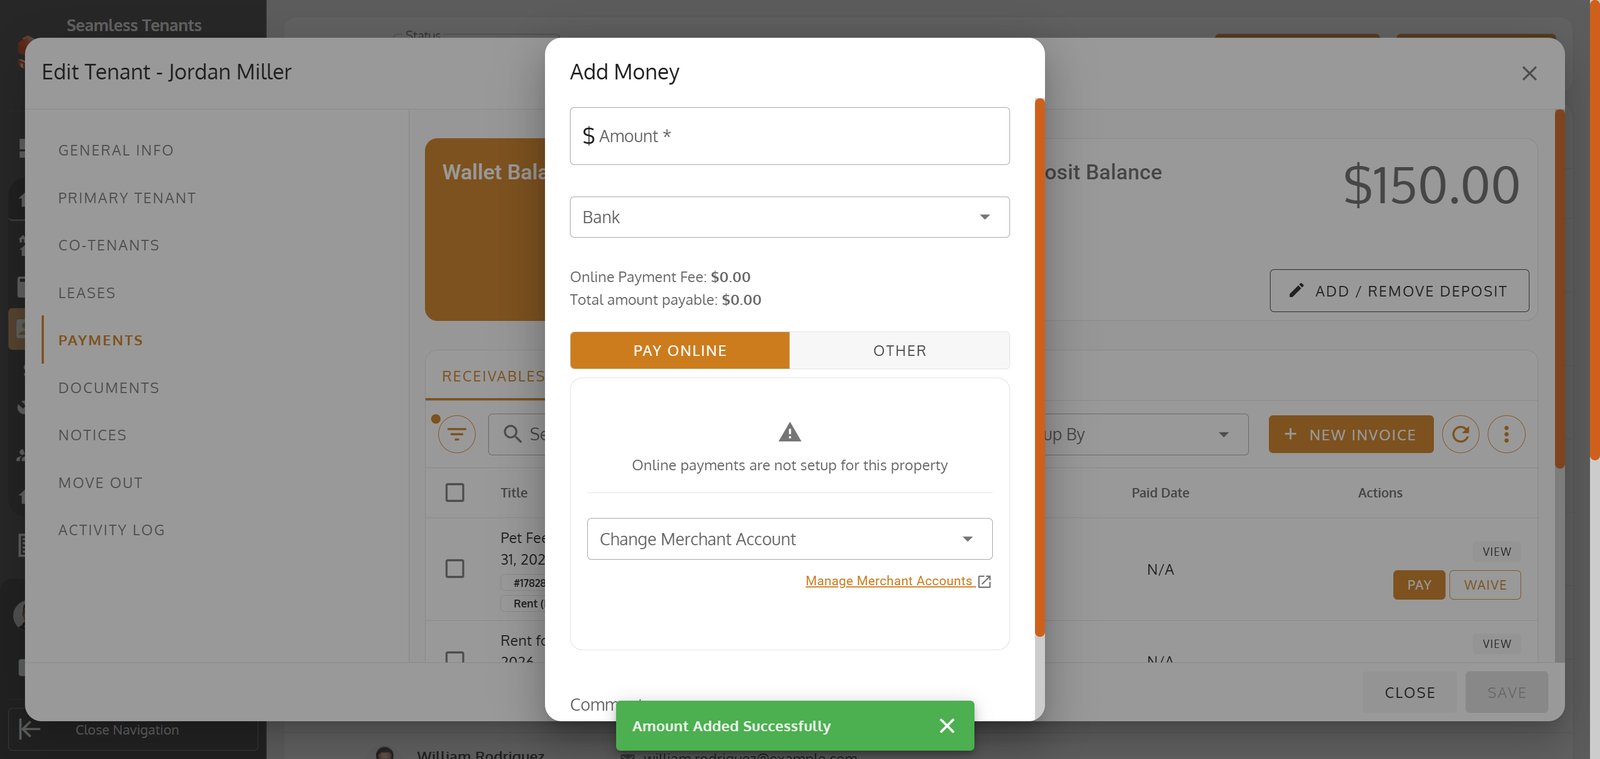
80. Click NEW INVOICE to create a new invoice for this tenant.
Click NEW INVOICE to create a new invoice for this tenant.
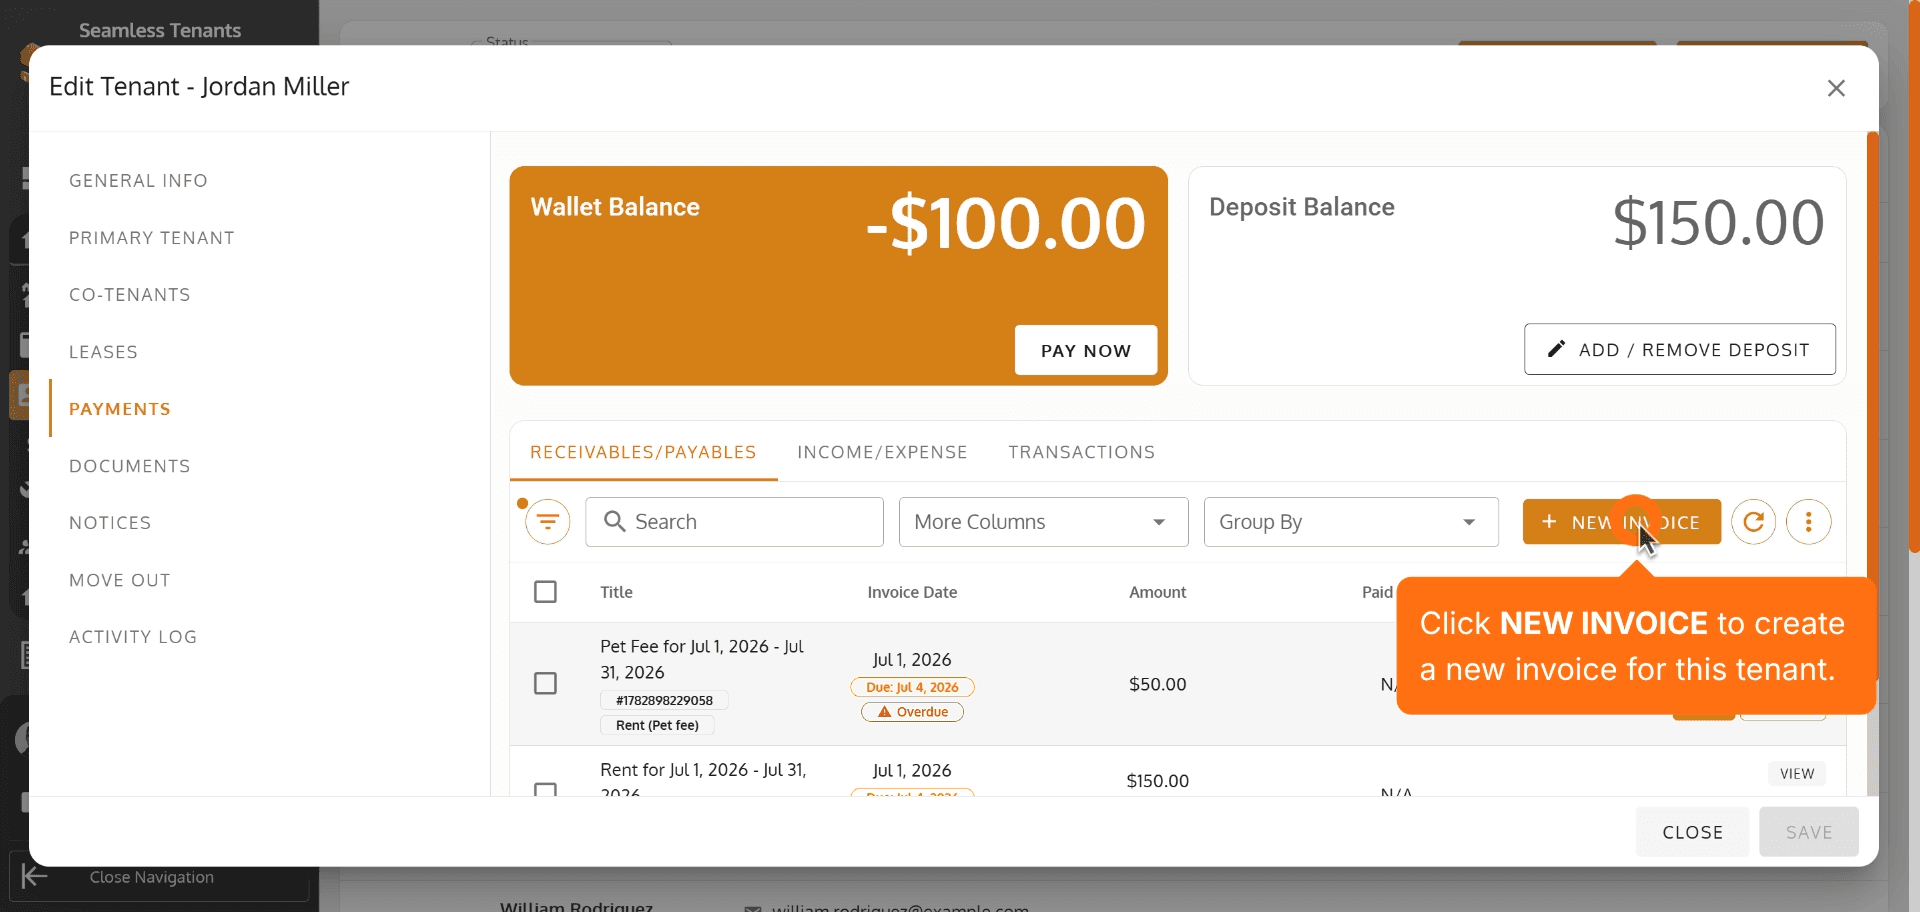
81. Click Save to complete and save the Invoice.
Click Save to complete and save the Invoice.

82. Click INCOME/EXPENSE to review and manage this tenant’s financial details.
Click INCOME/EXPENSE to review and manage this tenant’s financial details.

83. Click TRANSACTIONS to review tenant activity and transaction details.
Click TRANSACTIONS to review tenant activity and transaction details.
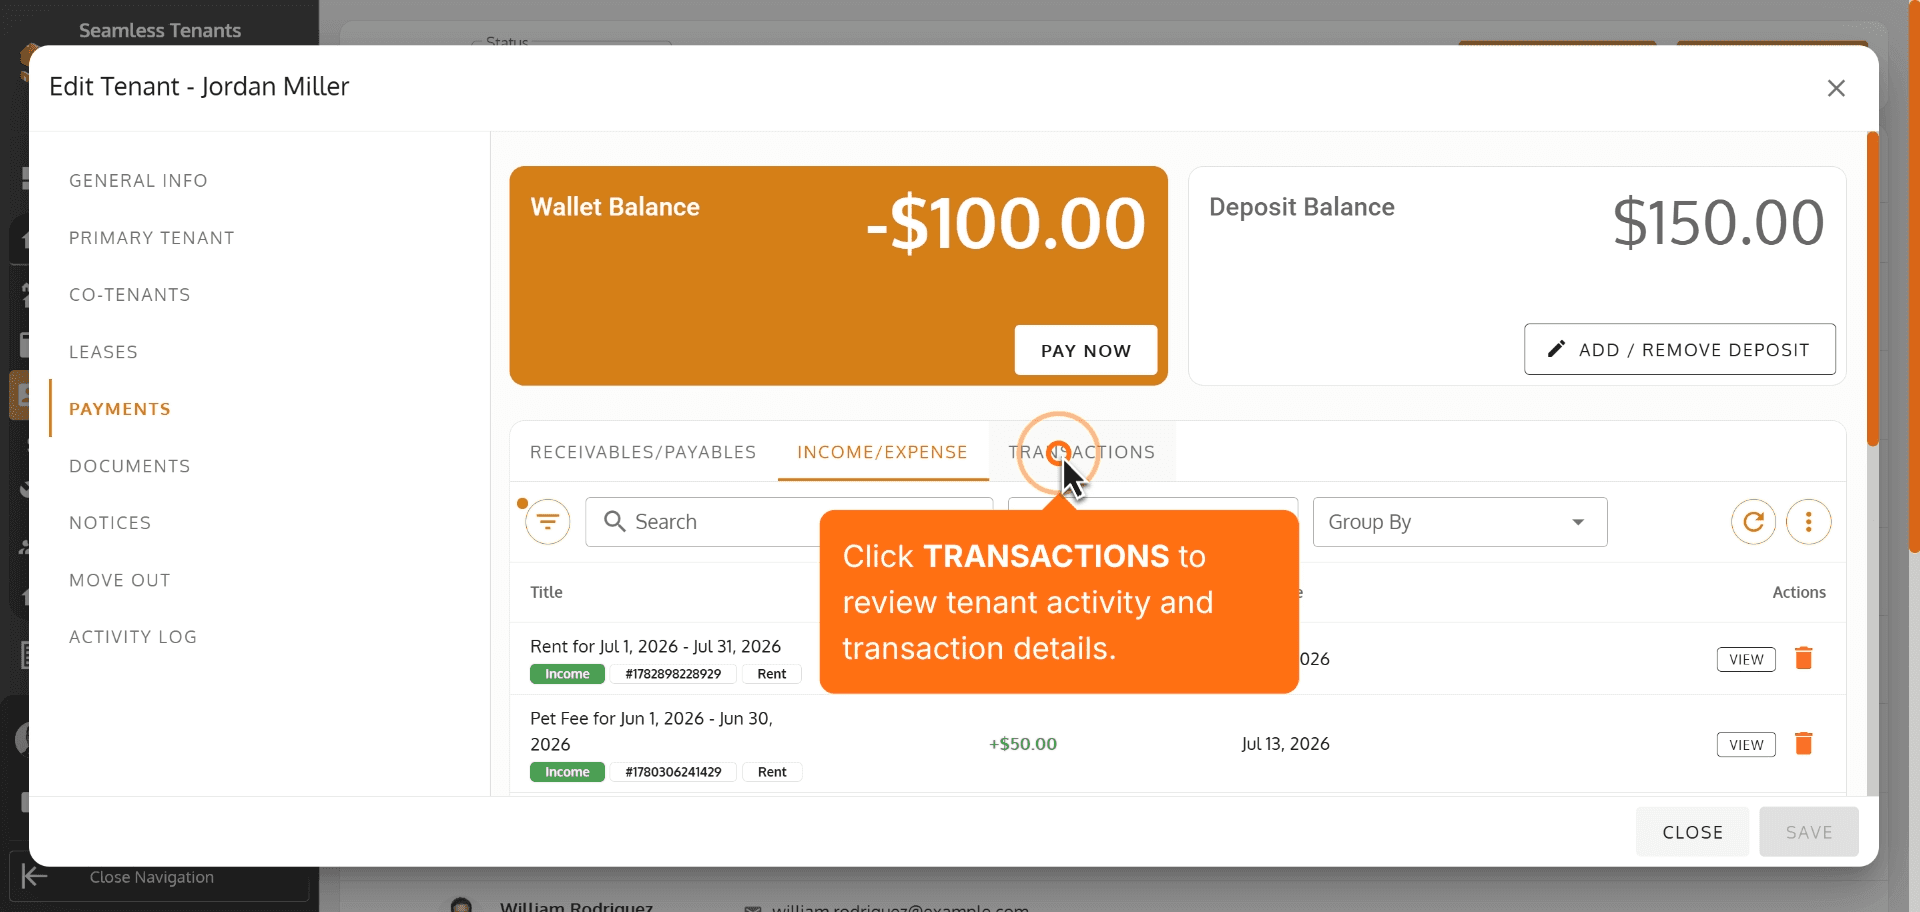
84. Click DOCUMENTS to open and manage this tenant’s files.
Click DOCUMENTS to open and manage this tenant’s files.
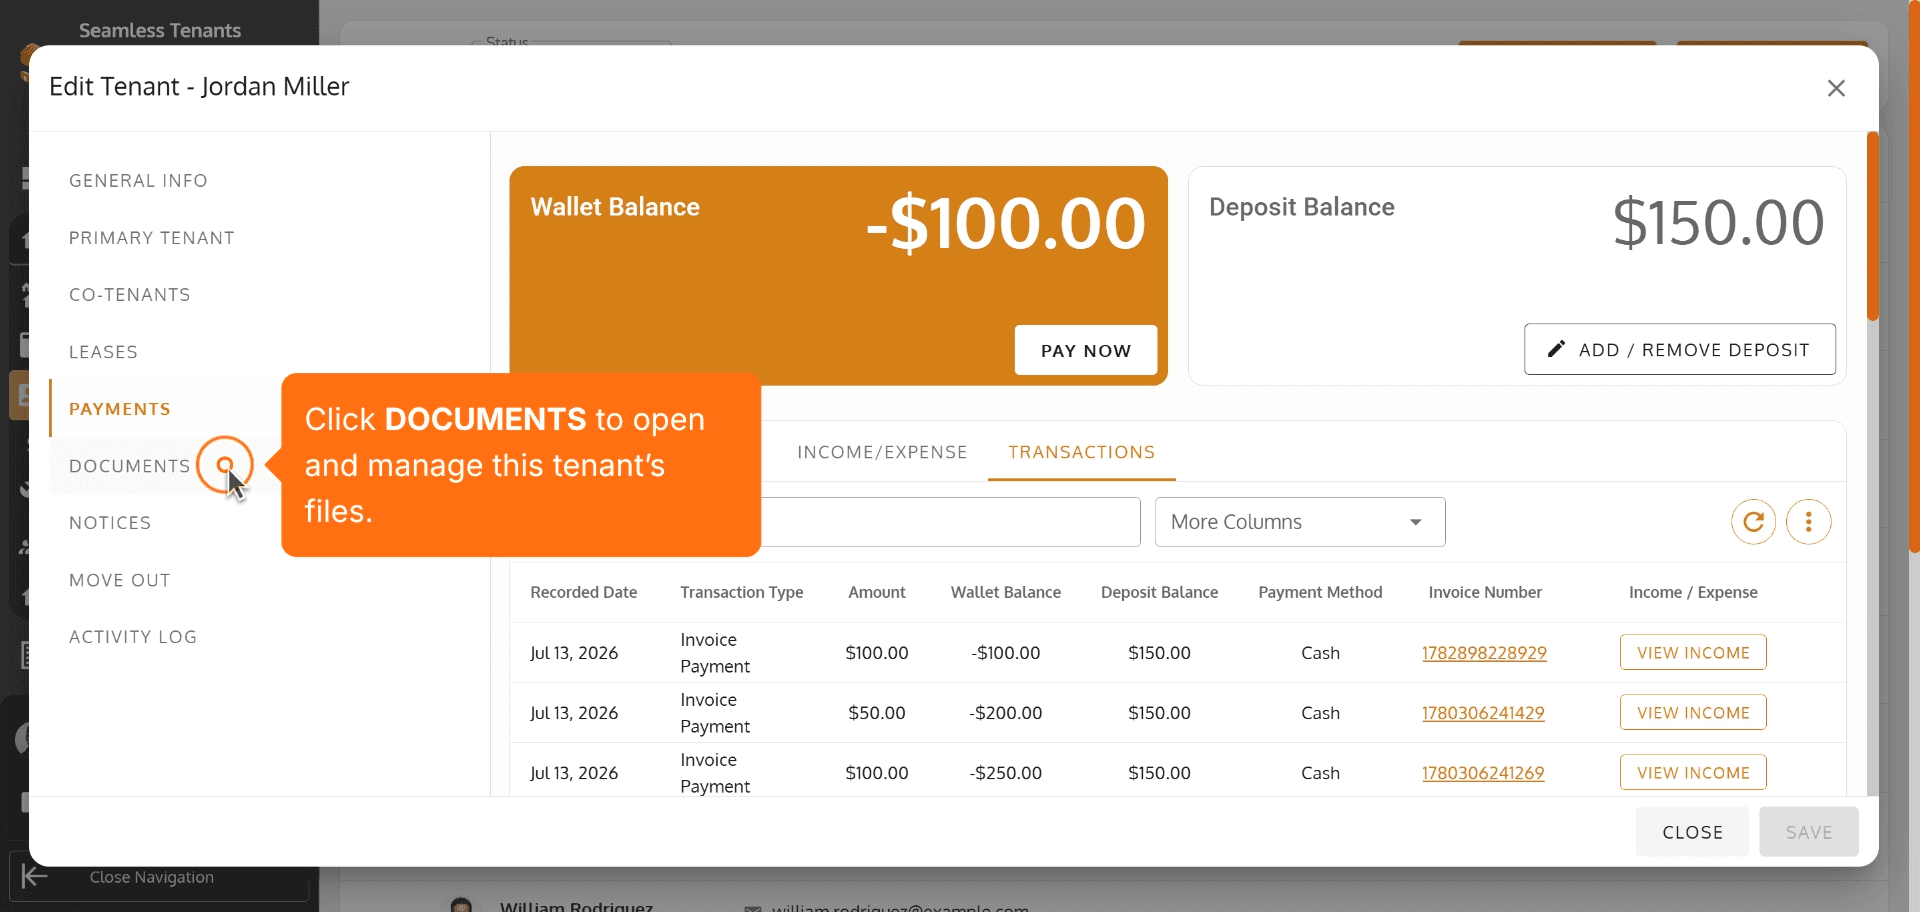
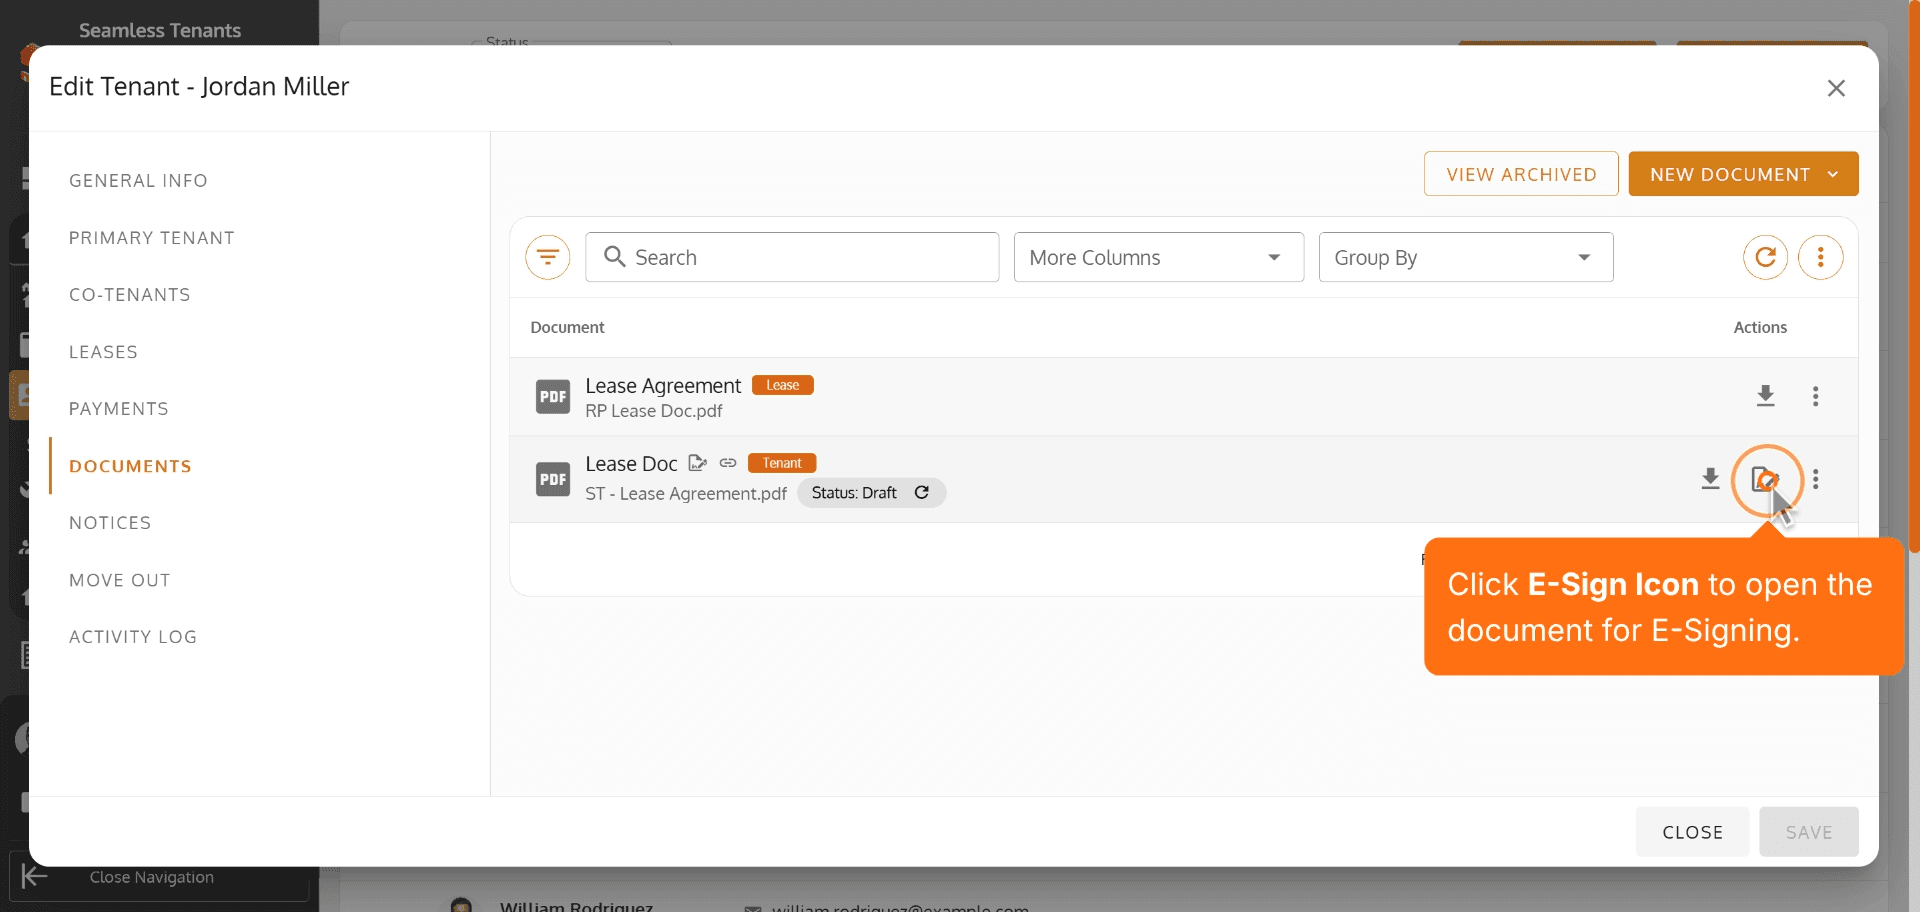
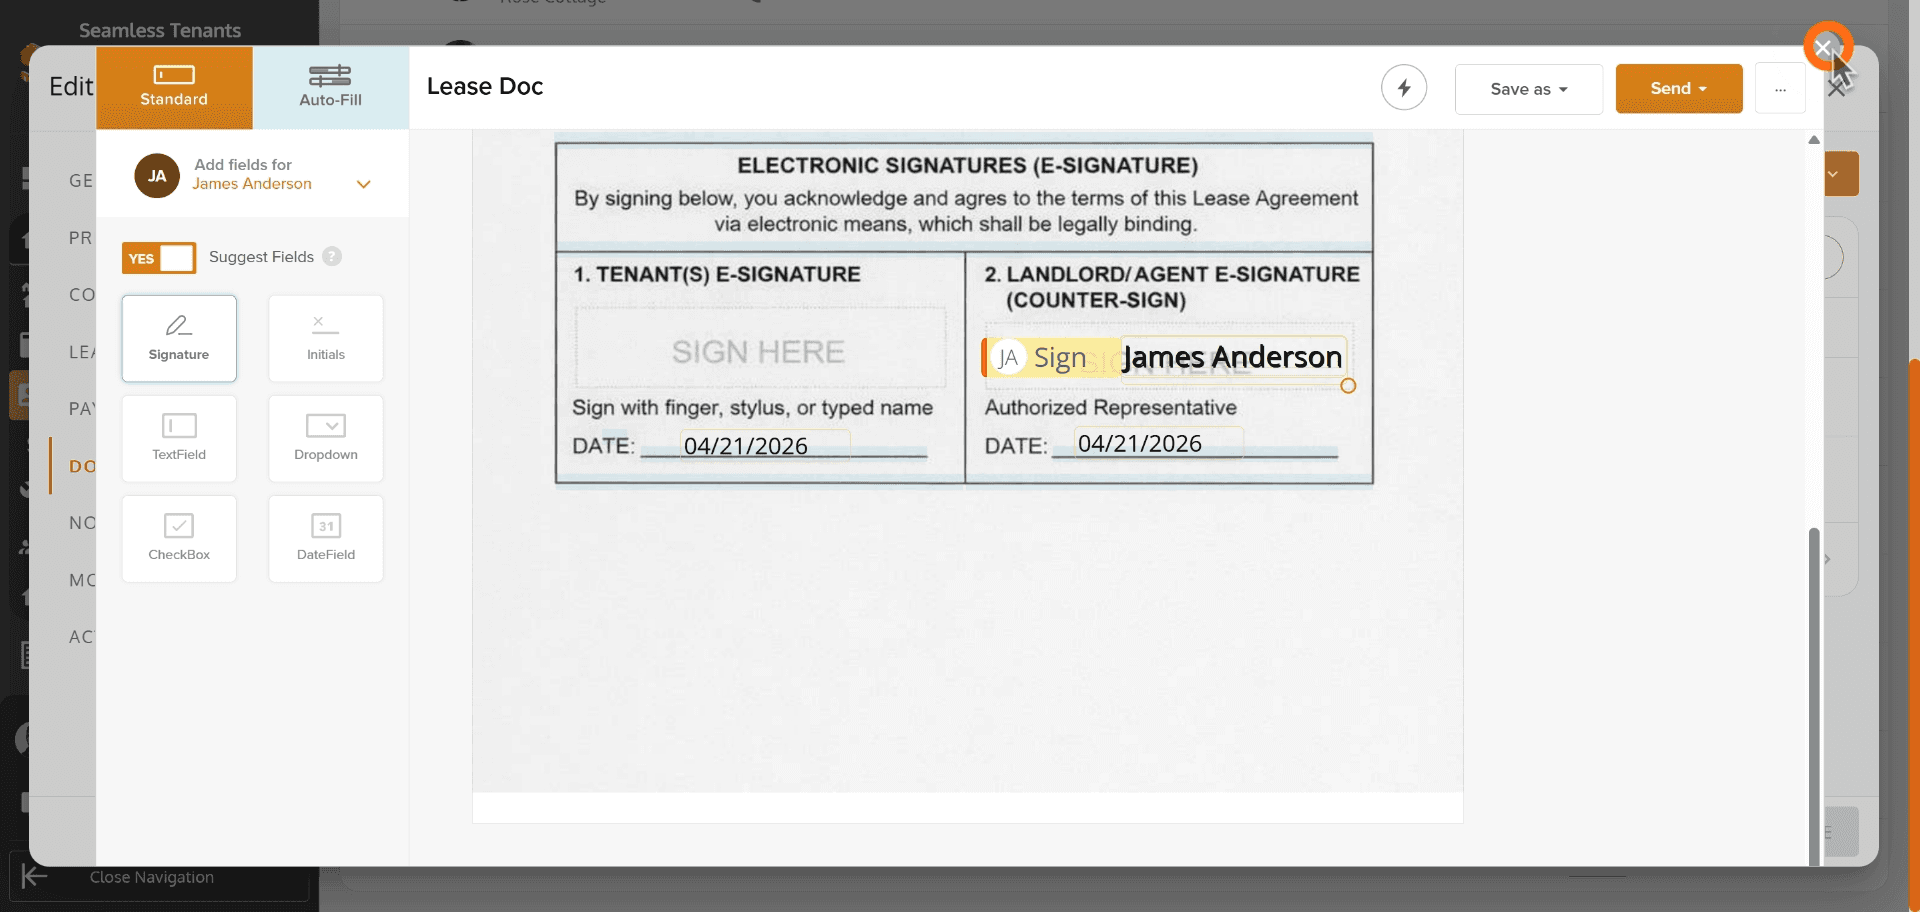
85. Click E-Sign Icon to open the document for E-Signing.
Click E-Sign Icon to open the document for E-Signing.
86.
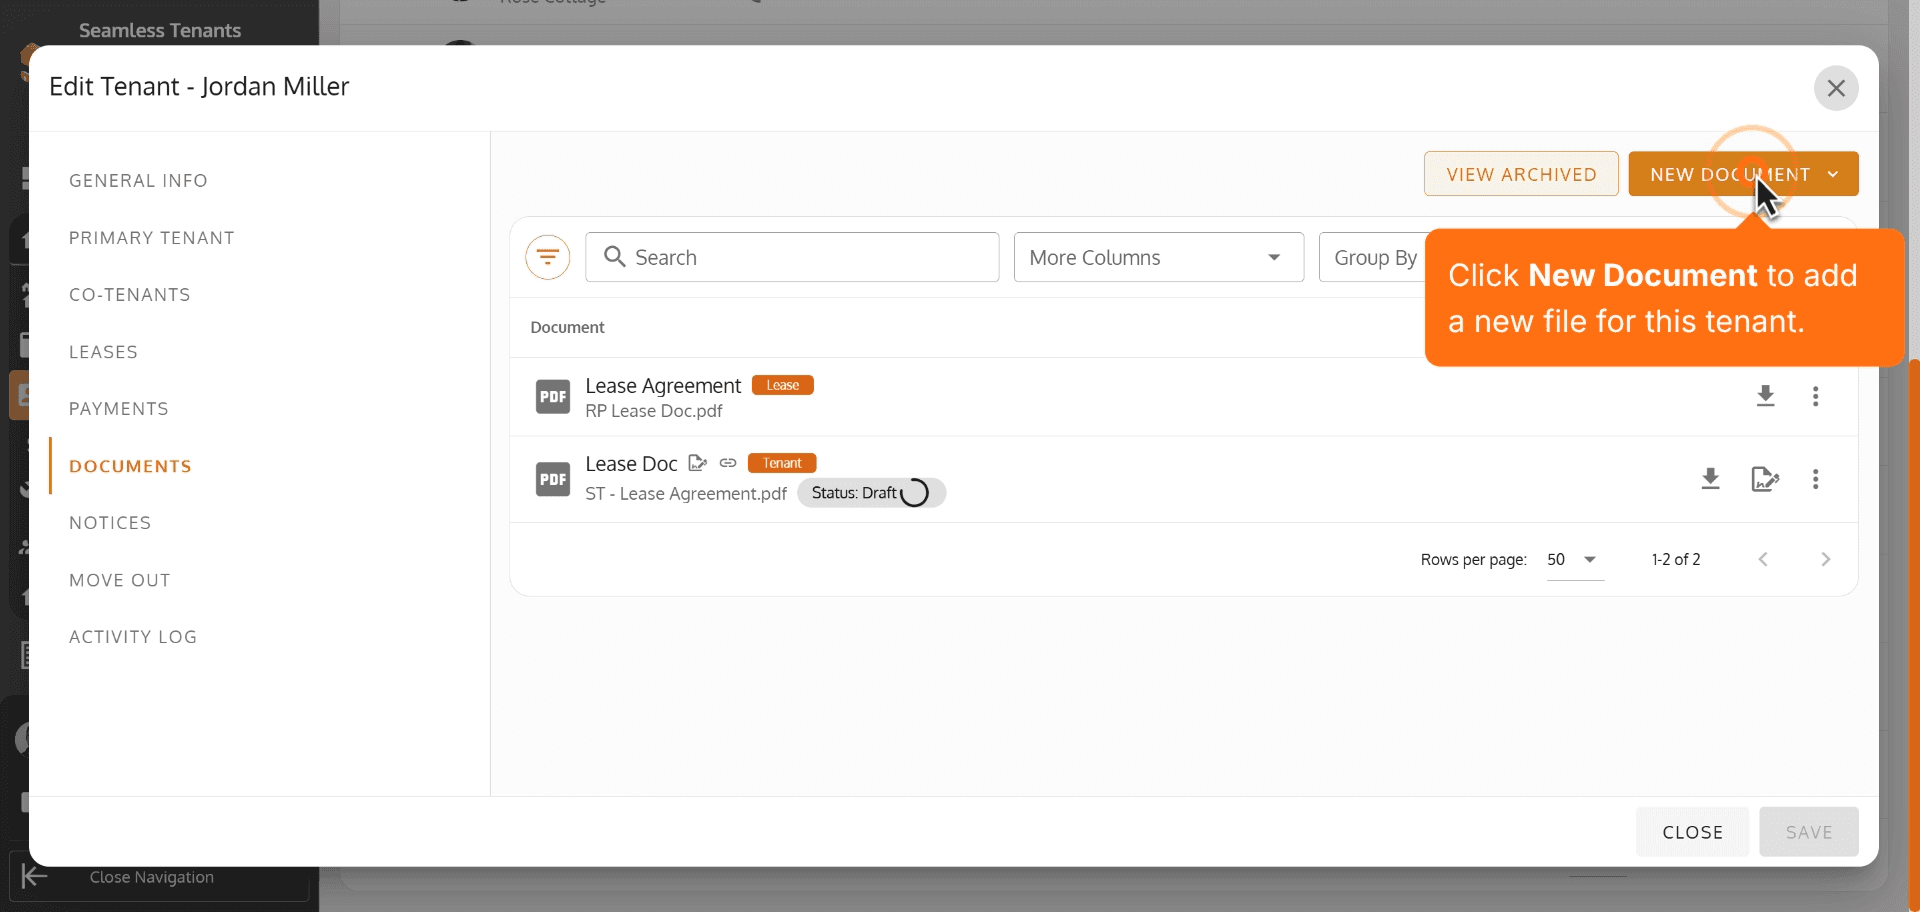
87. Click New Document to add a new file for this tenant.
Click New Document to add a new file for this tenant.
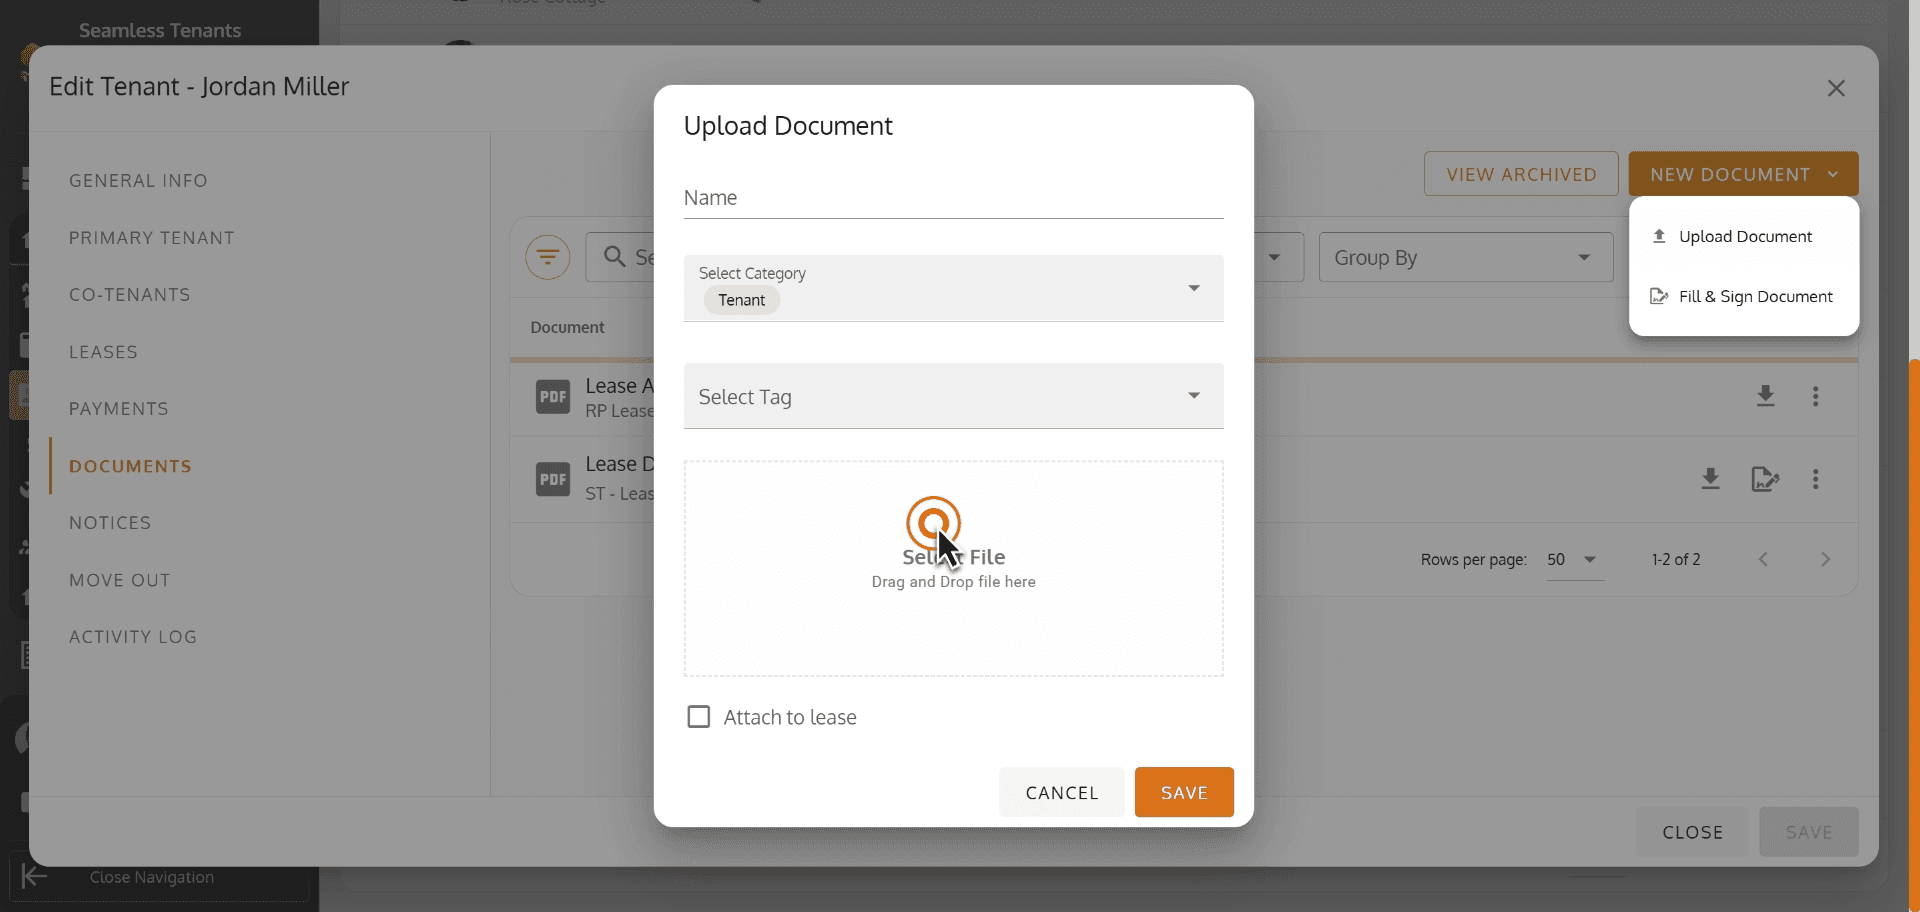
88.
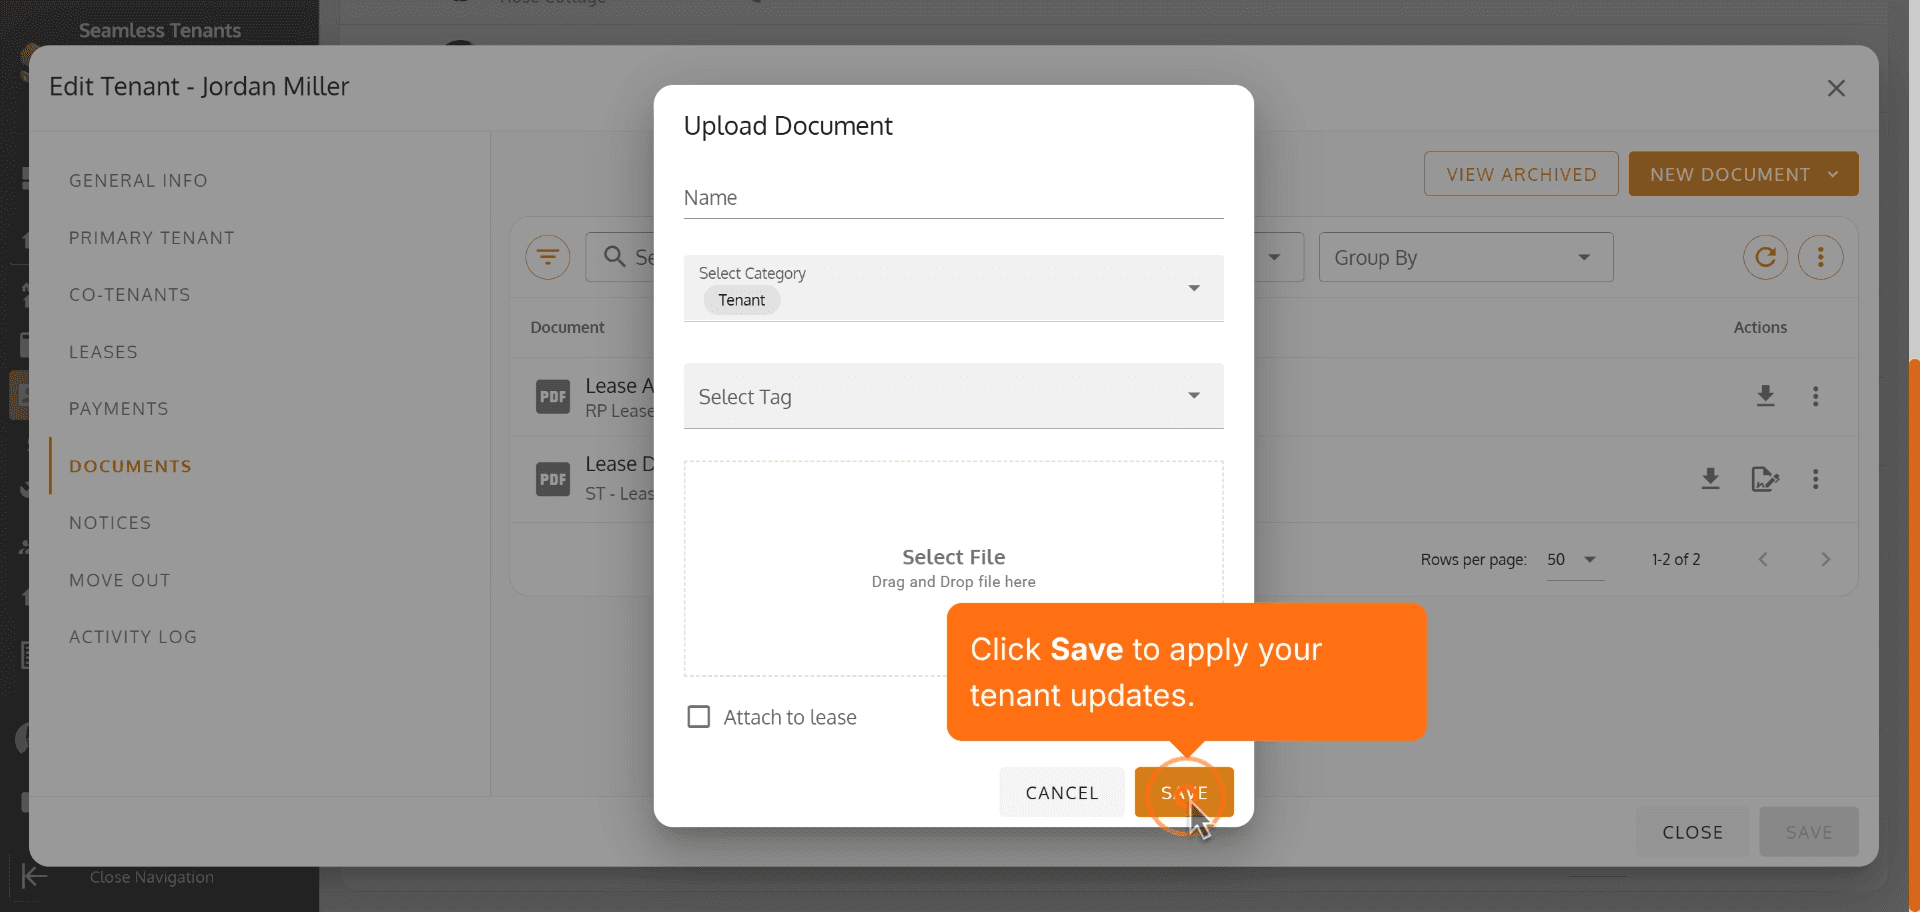
89. Click Save to apply your tenant updates.
Click Save to apply your tenant updates.
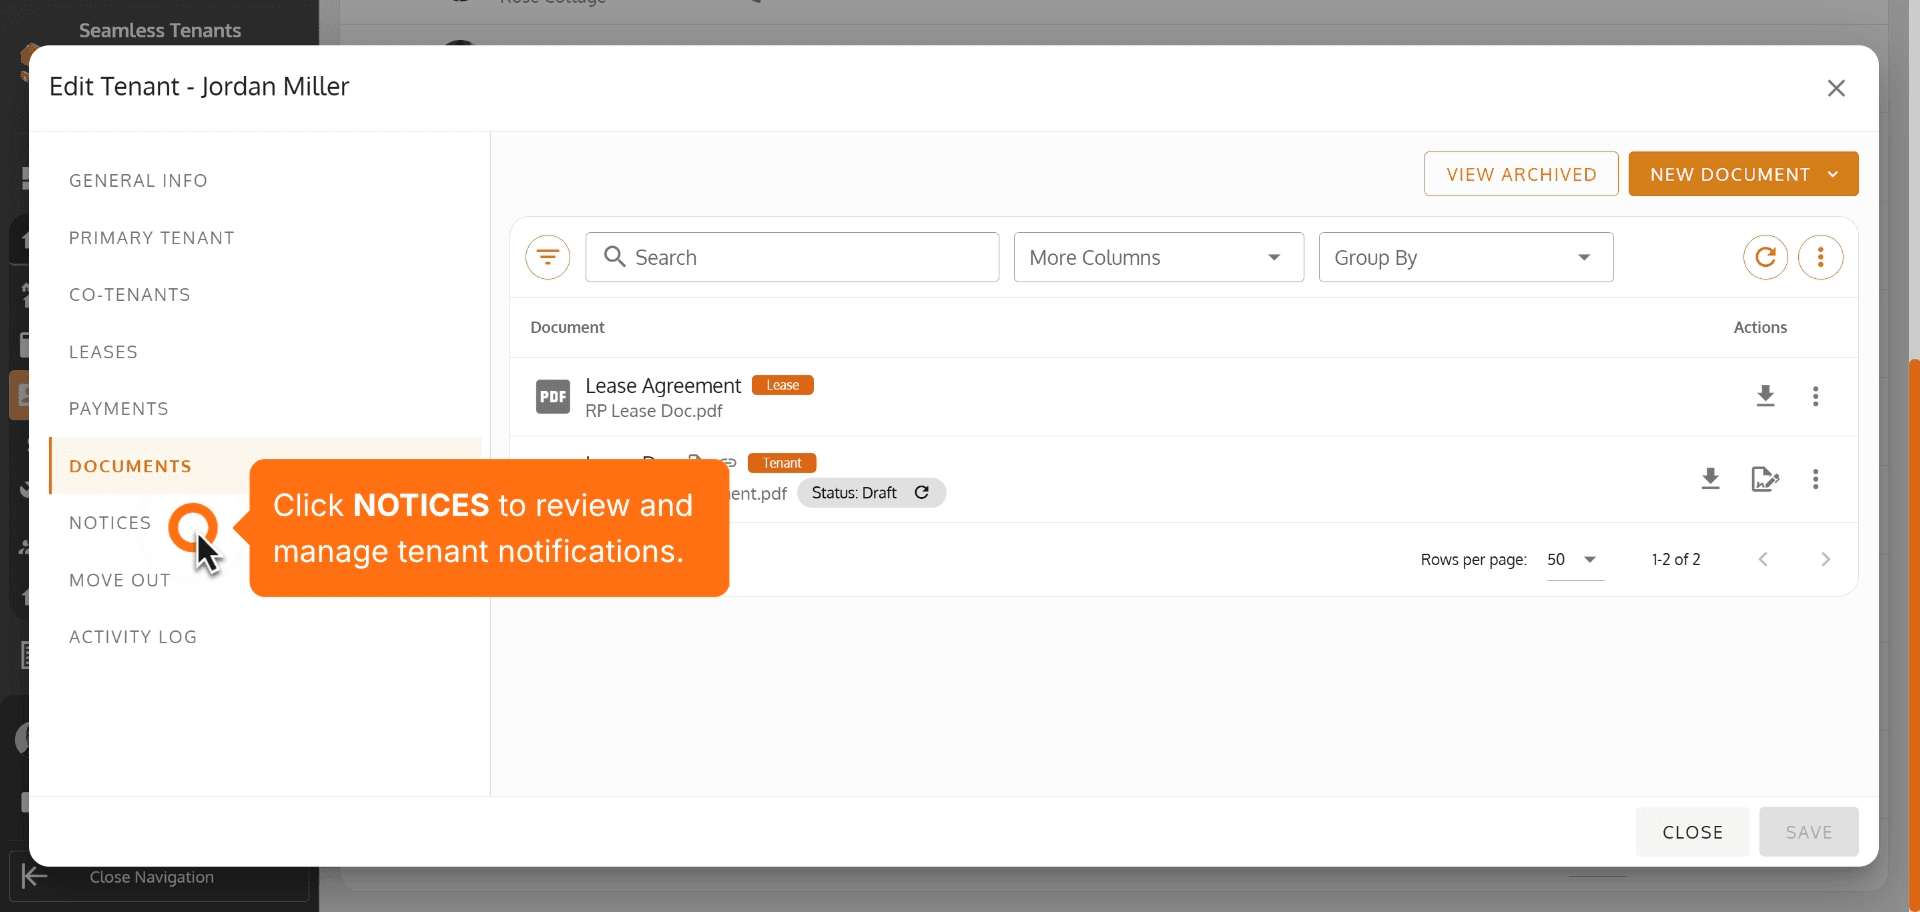
90. Click NOTICES to review and manage tenant notifications.
Click NOTICES to review and manage tenant notifications.
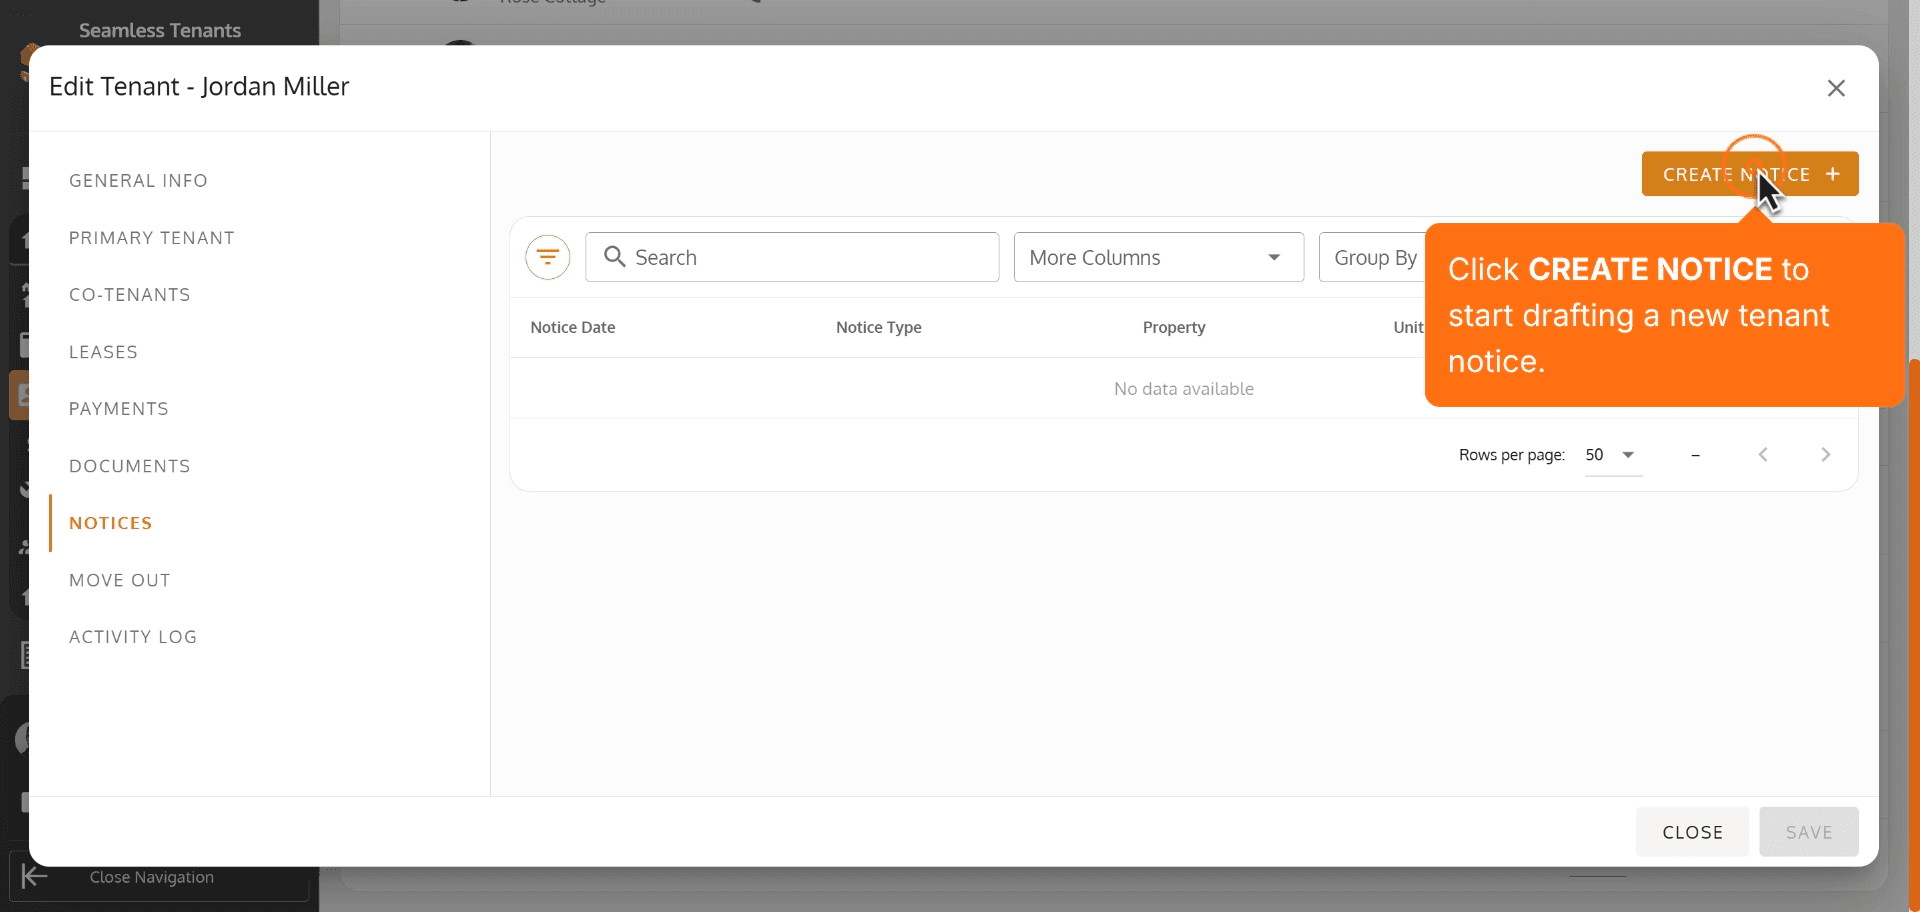
91. Click CREATE NOTICE to start drafting a new tenant notice.
Click CREATE NOTICE to start drafting a new tenant notice.
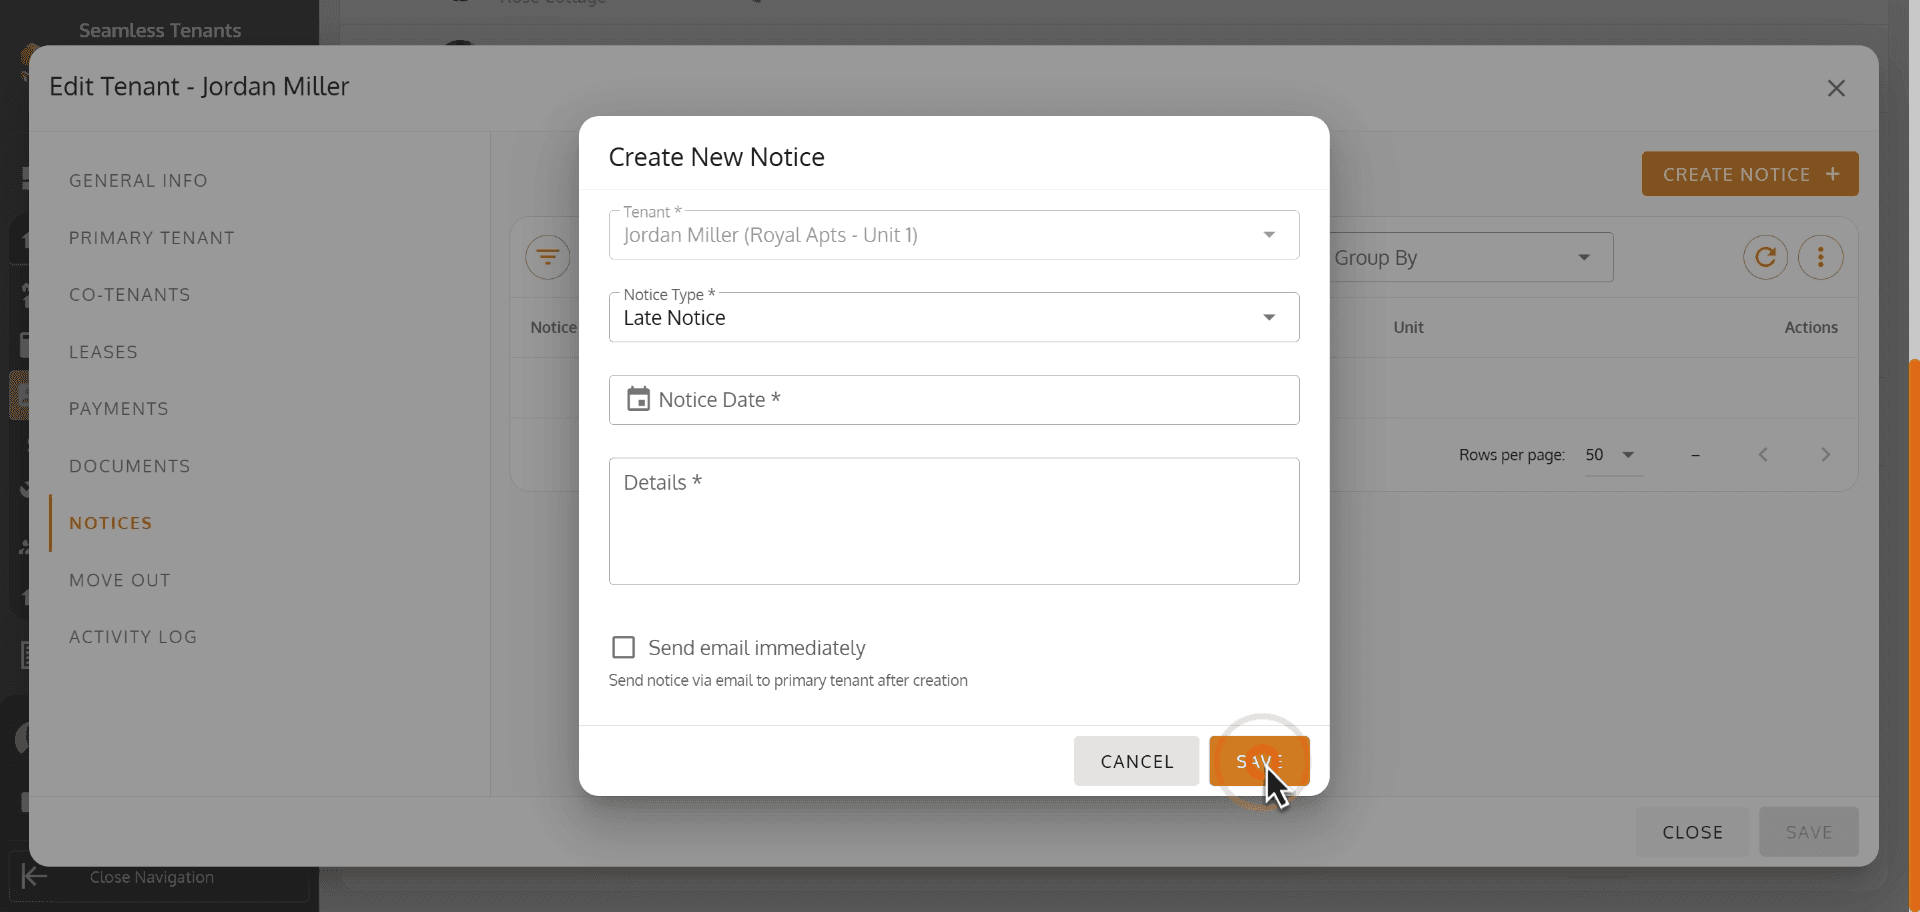
92.
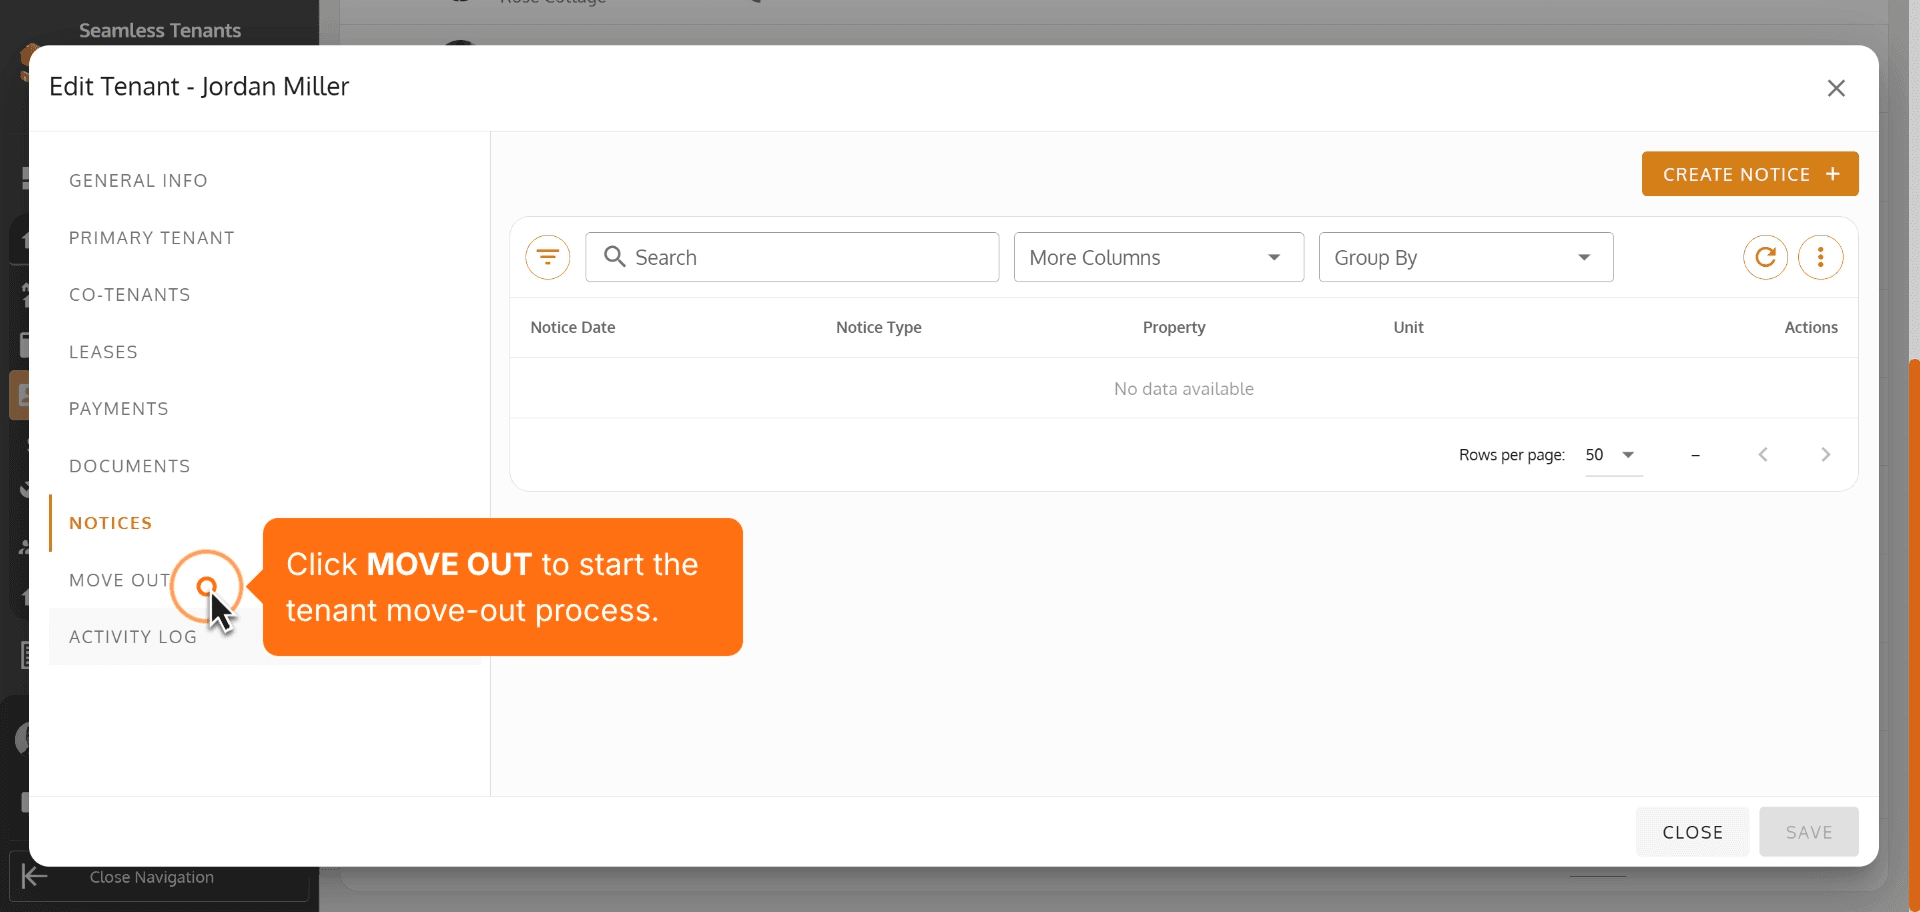
93. Click MOVE OUT to start the tenant move-out process.
Click MOVE OUT to start the tenant move-out process.
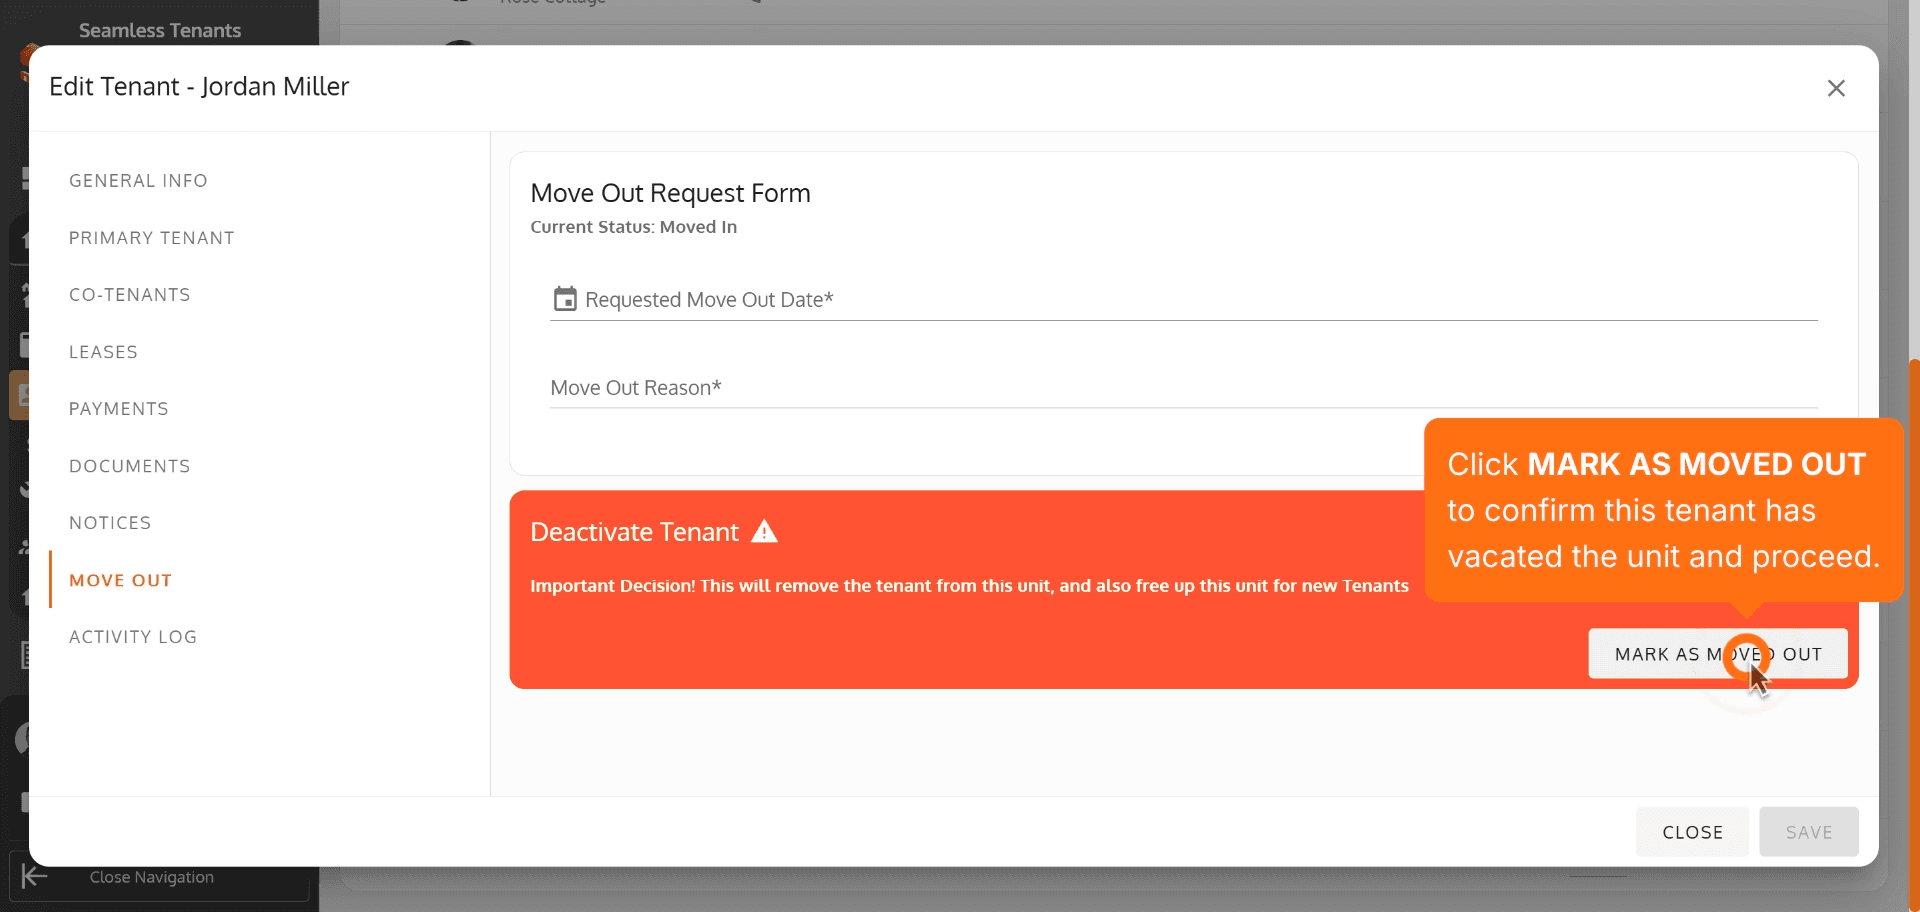
94. Click MARK AS MOVED OUT to confirm this tenant has vacated the unit and proceed.
Click MARK AS MOVED OUT to confirm this tenant has vacated the unit and proceed.
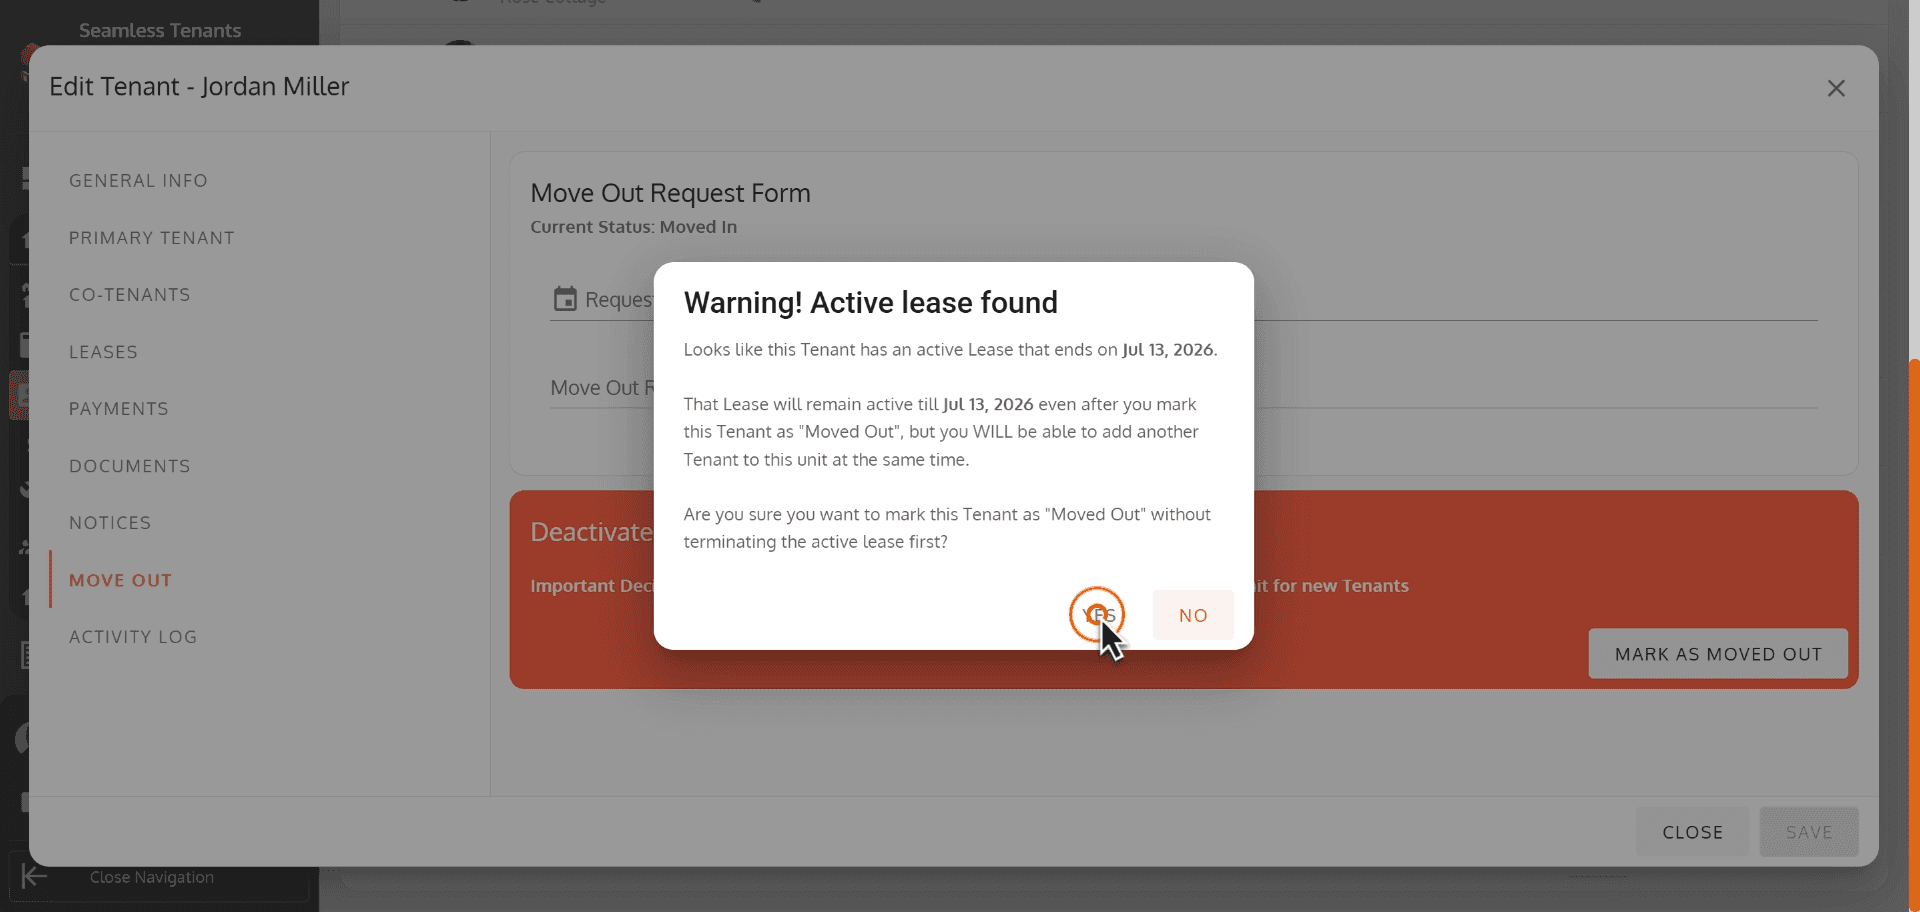
95.
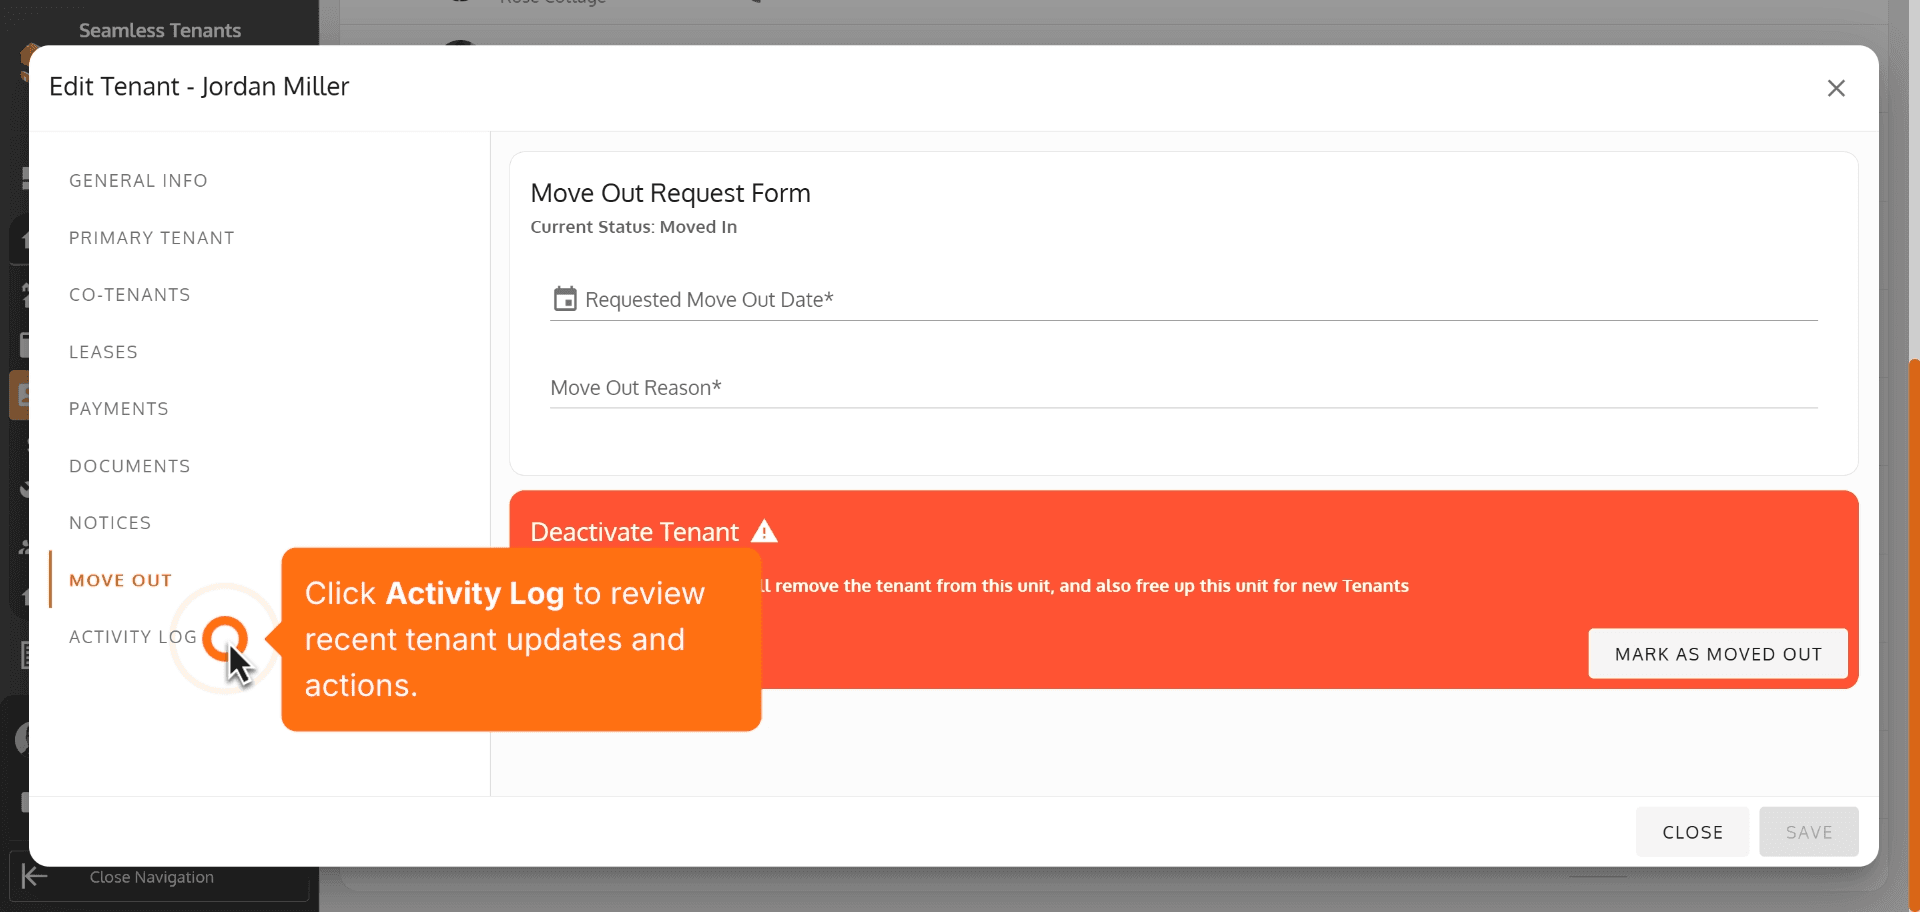
96. Click Activity Log to review tenant activity history and actions.
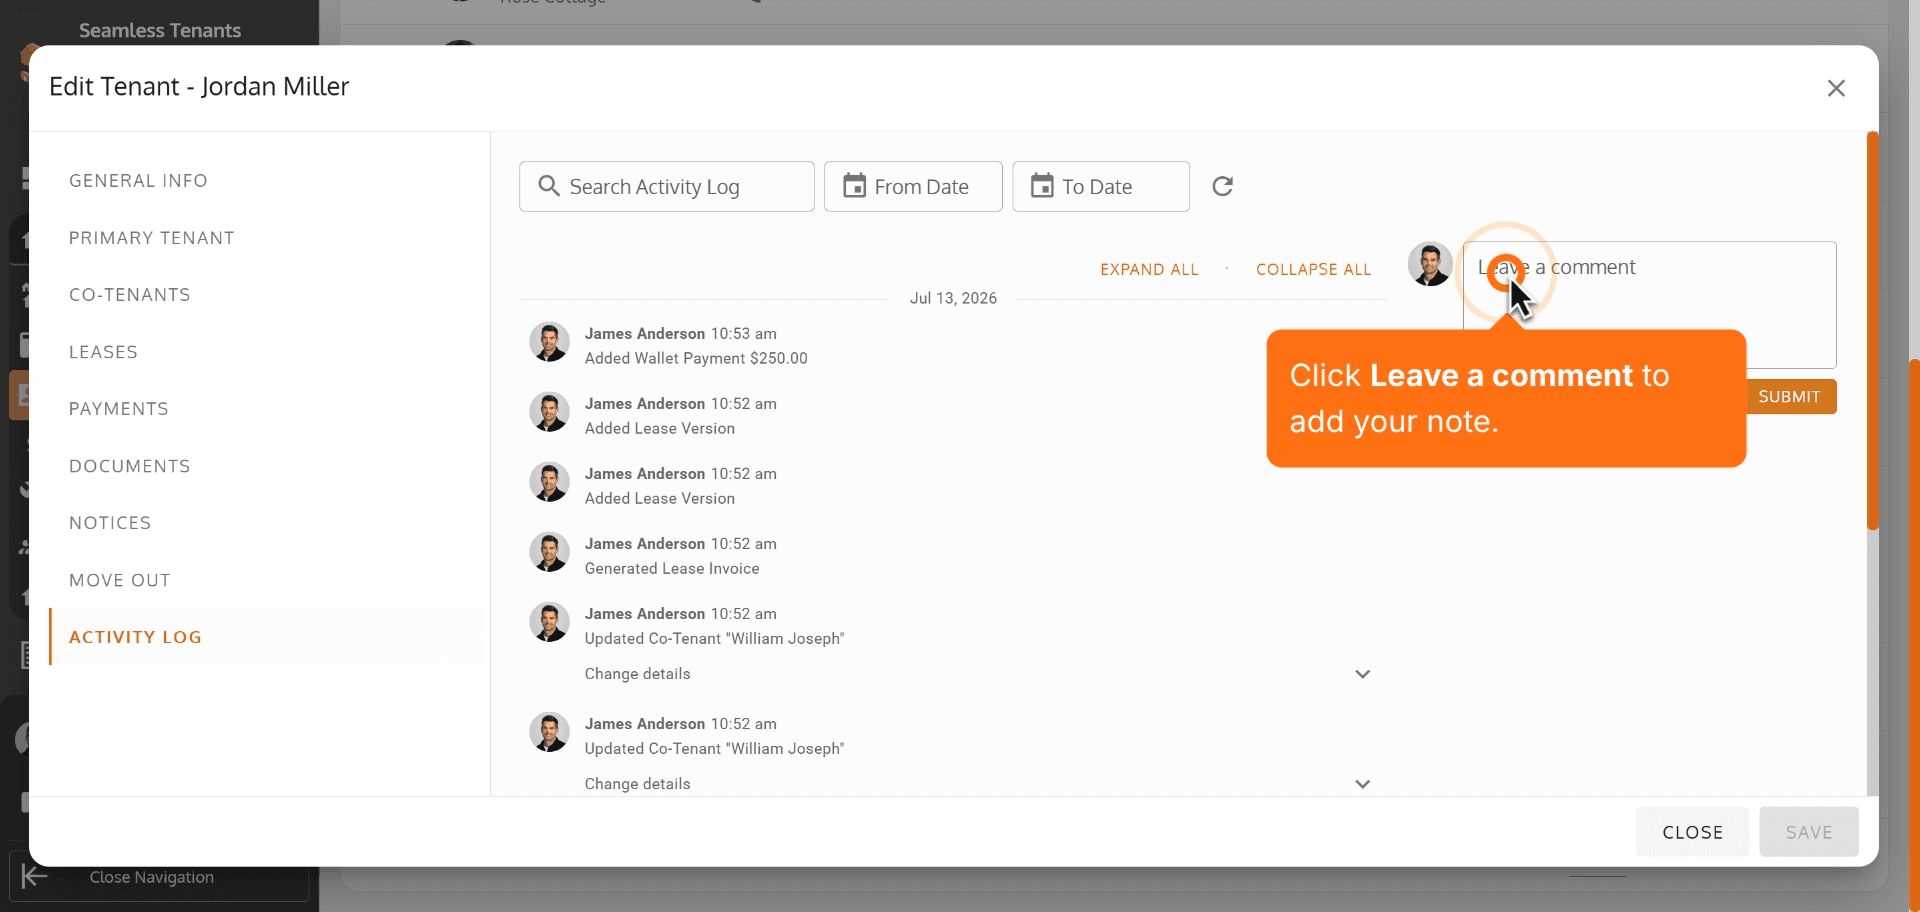
97. Click Leave a comment to add your note.
Click Leave a comment to add your note.
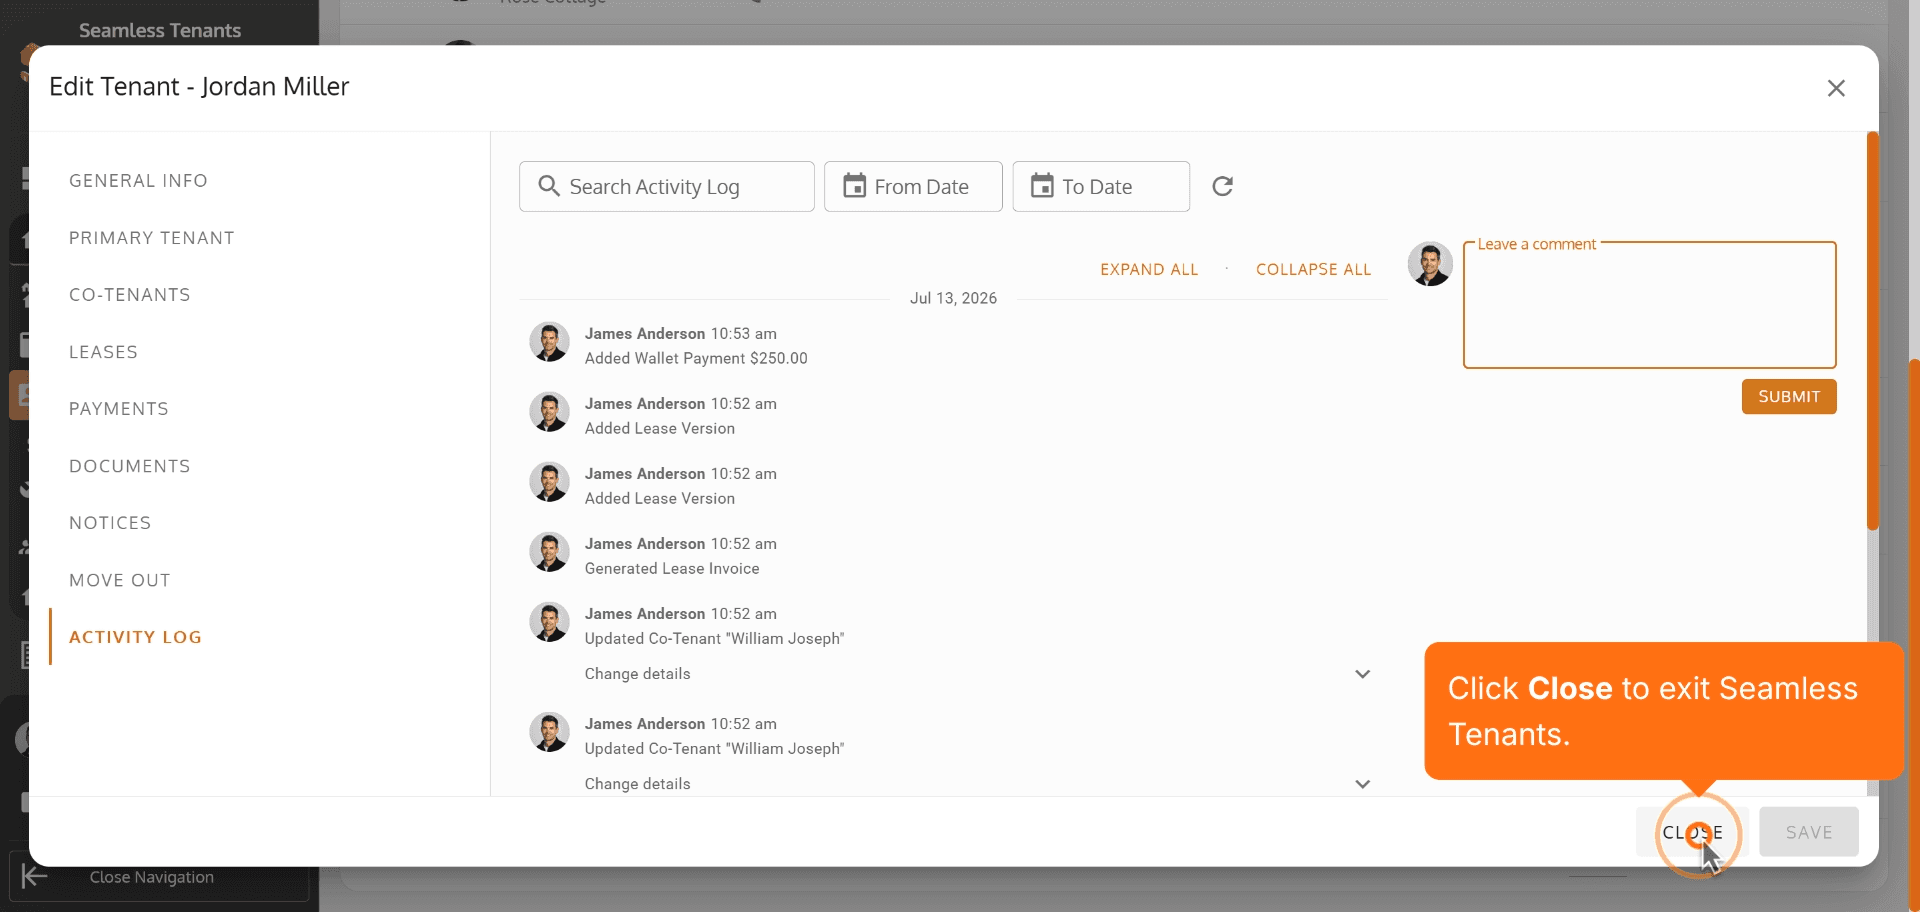
98. Click Close to exit Seamless Tenants.
Click Close to exit Seamless Tenants.
99.
Property added successfully!
You can now add units, tenants, and start managing your operations.
Was this article helpful?
Help us improve our documentation