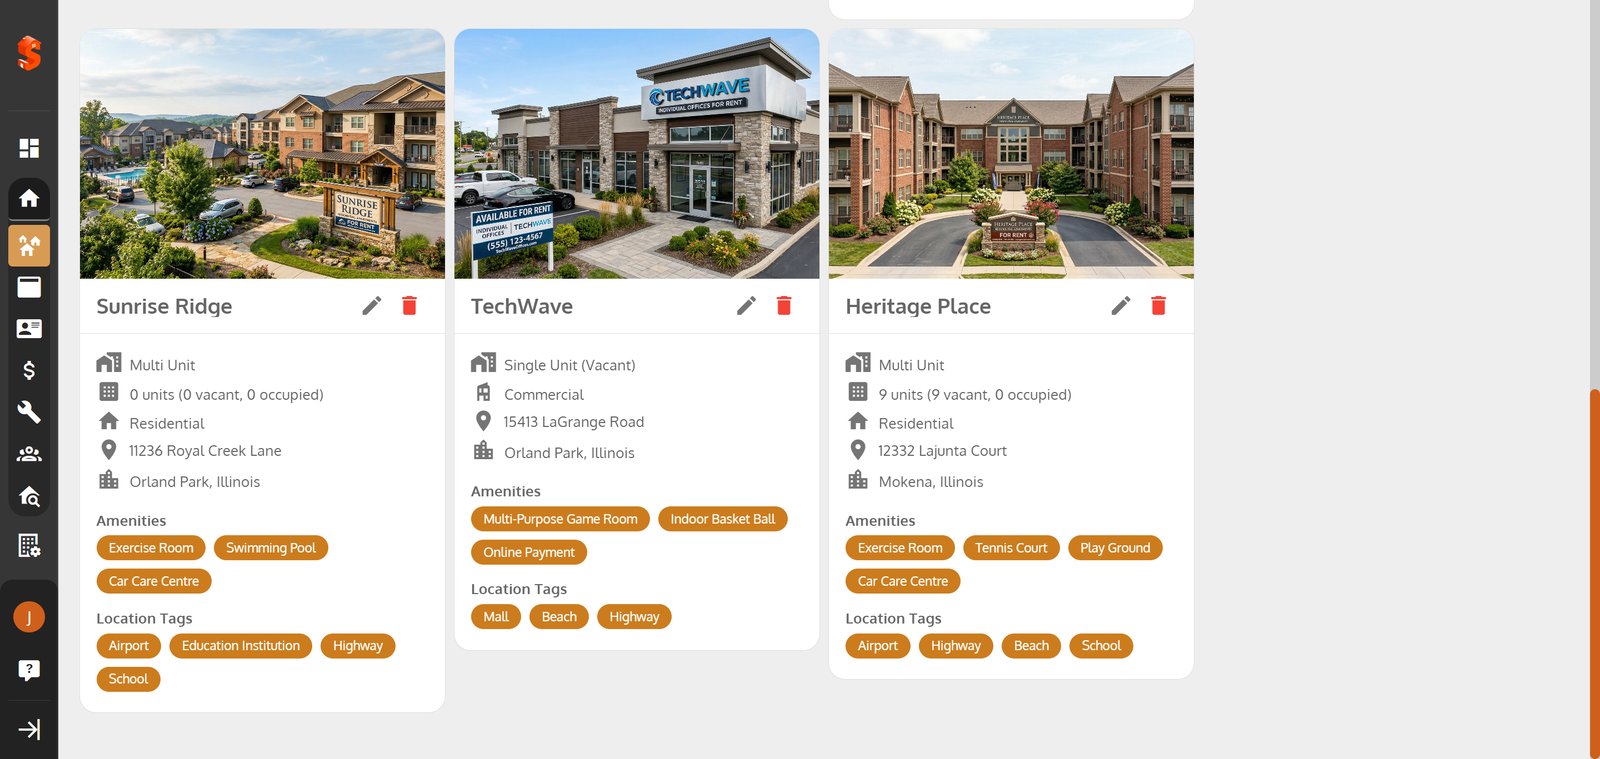
Property Management
Add/Import/Edit/ Delete Units to Properties
Learn how to import or add unit data, edit the unit details, delete the unit to properties.
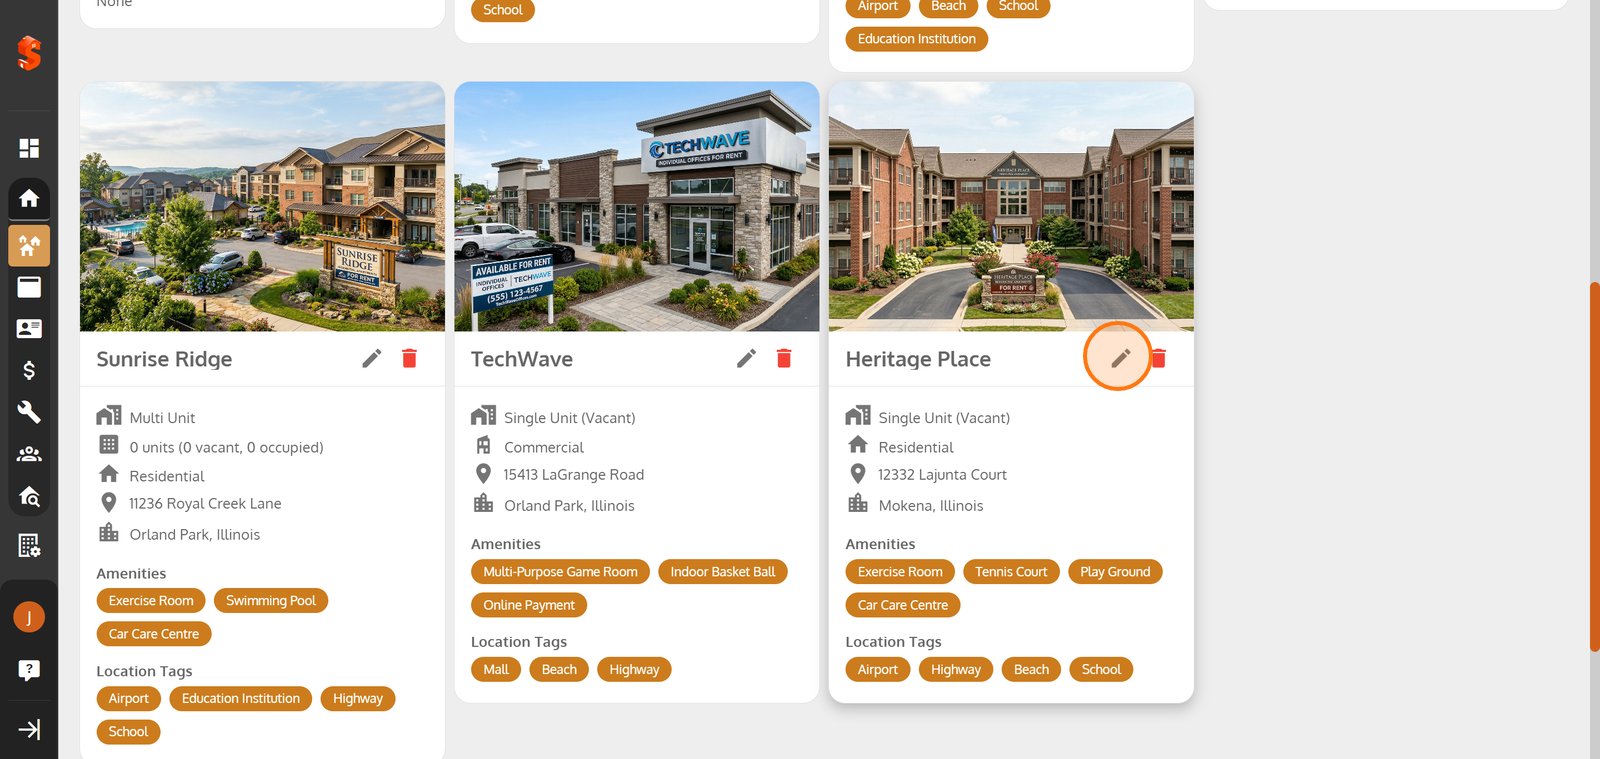
1. Select the edit icon to update or modify property details for a specific property
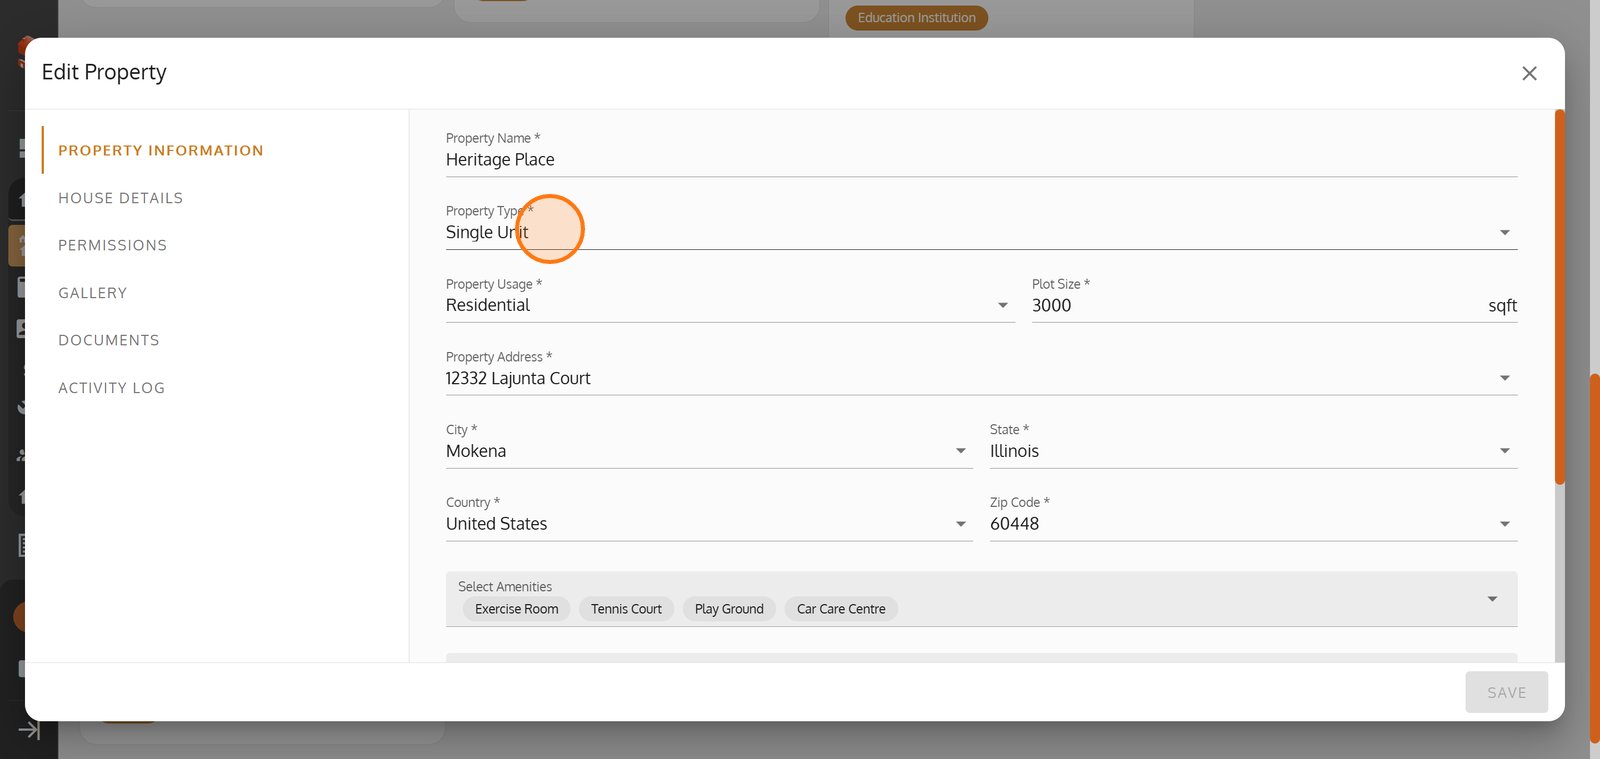
2. Go to the 'Property Information' tab for a full overview of your property's core details.
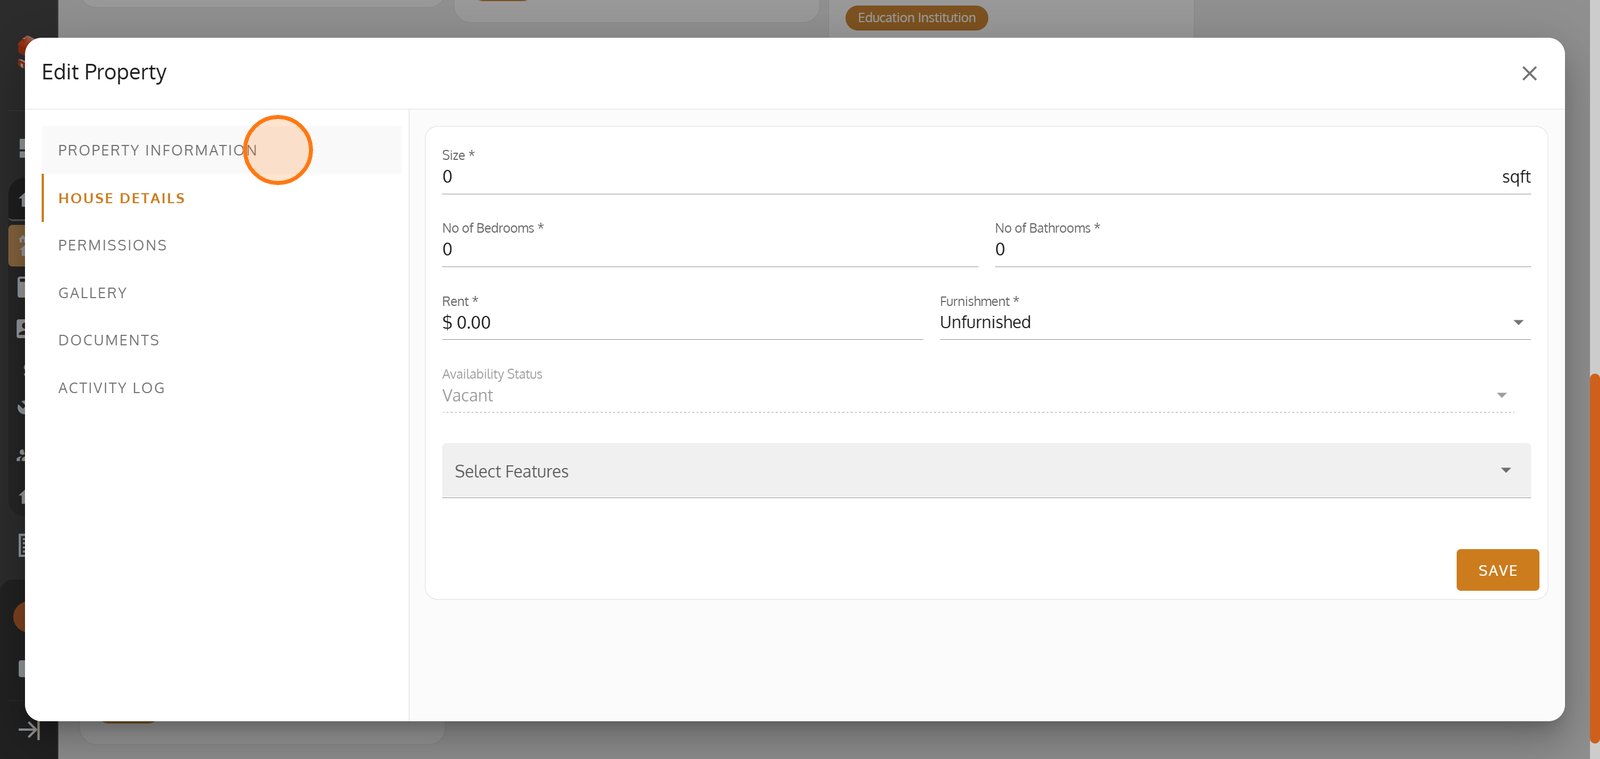
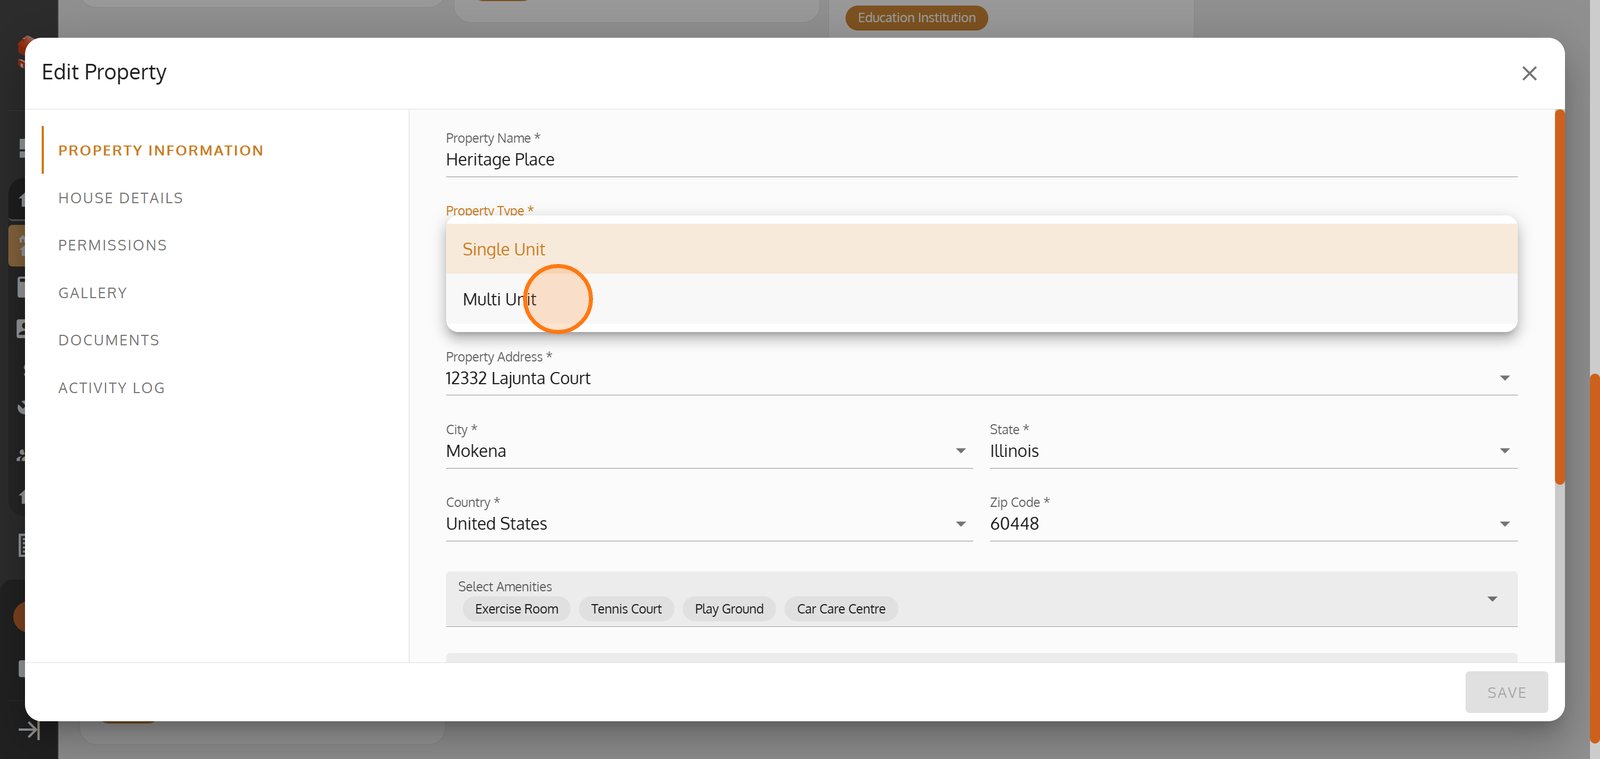
3. Open the 'Property Type' dropdown to select if this is a single or multi-unit property.
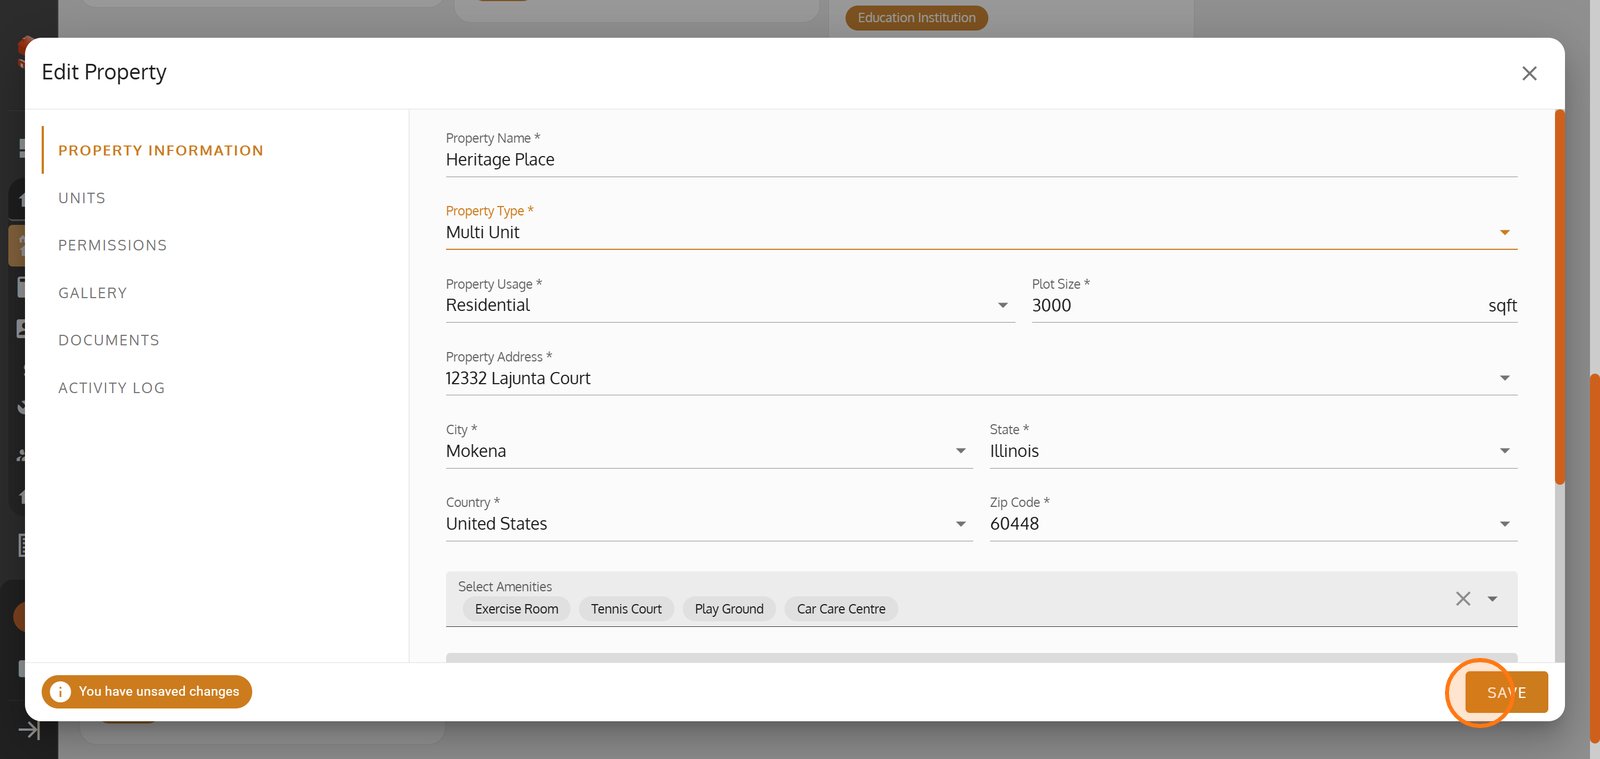
4. Choose 'Multi Unit' to manage and track multiple units within the same property.
5. Click 'SAVE' to apply your property type changes instantly.
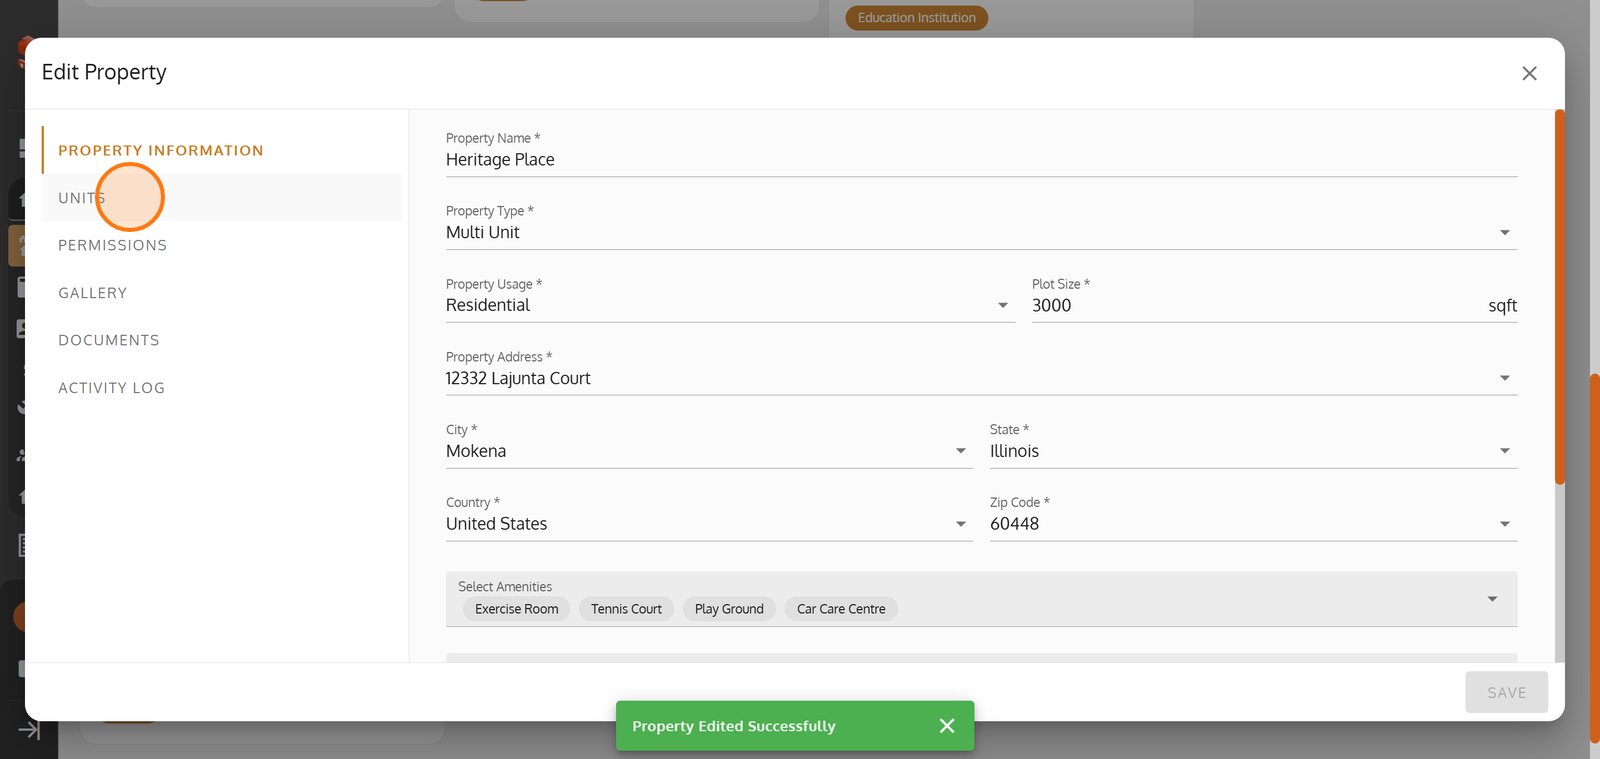
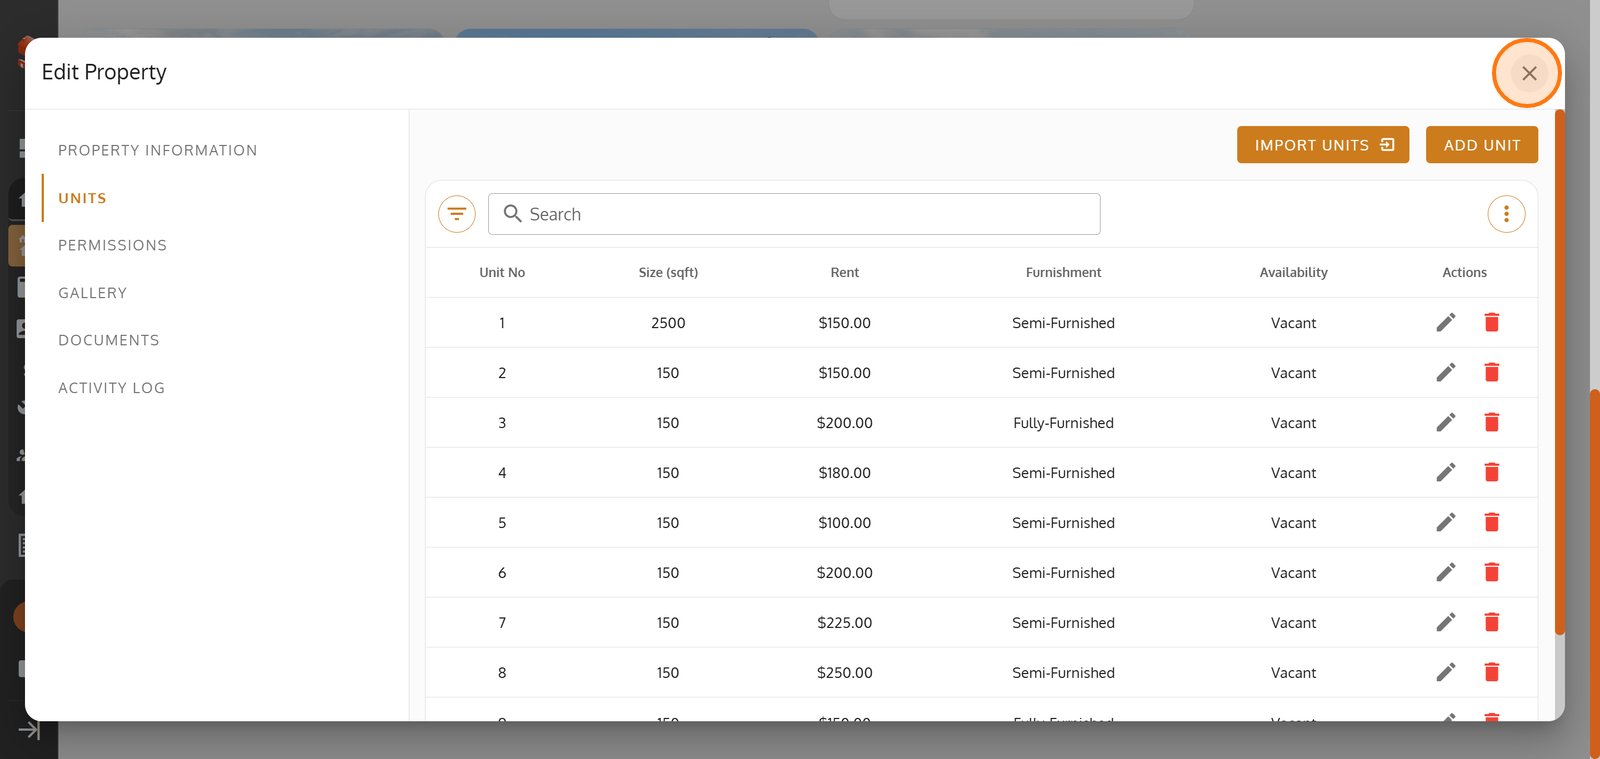
6. Switch to the 'Units' tab to manage the individual units for Heritage Place.
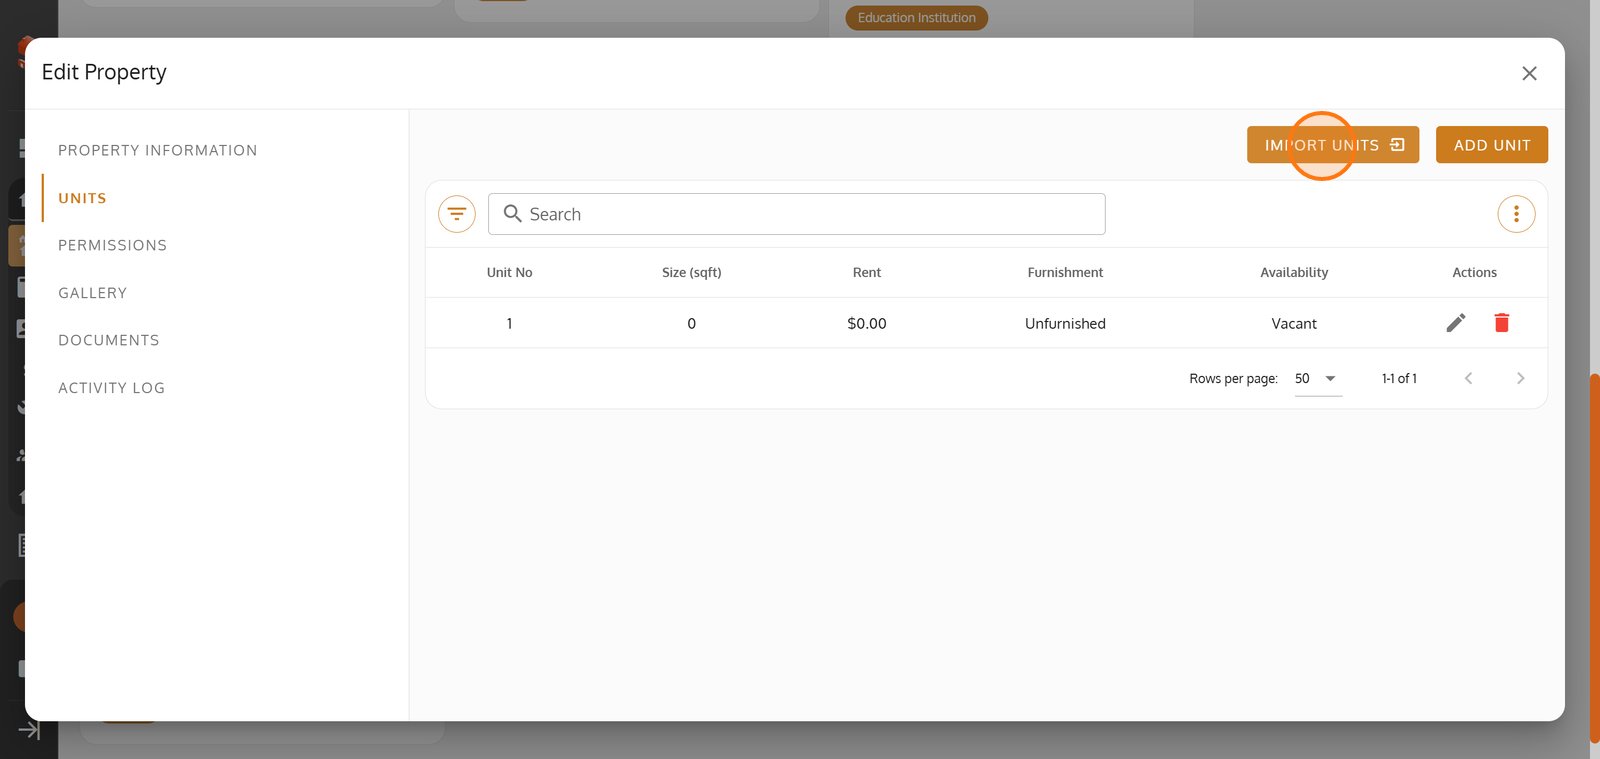
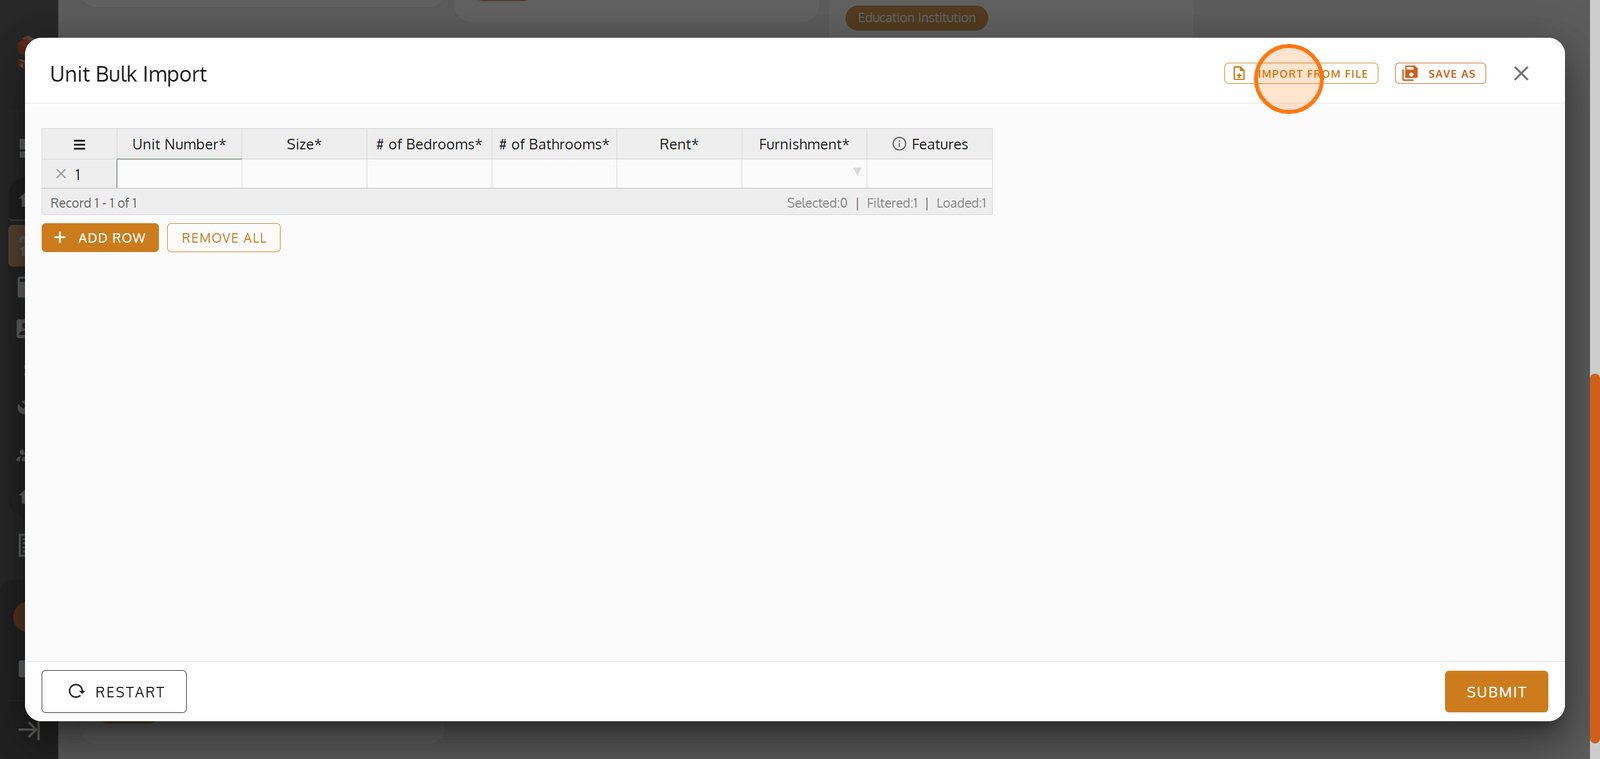
7. Tap 'Import Units' for rapid bulk entry of multiple property units.
8. Hit 'Import from File' if you want to upload unit data in one step from an external file.
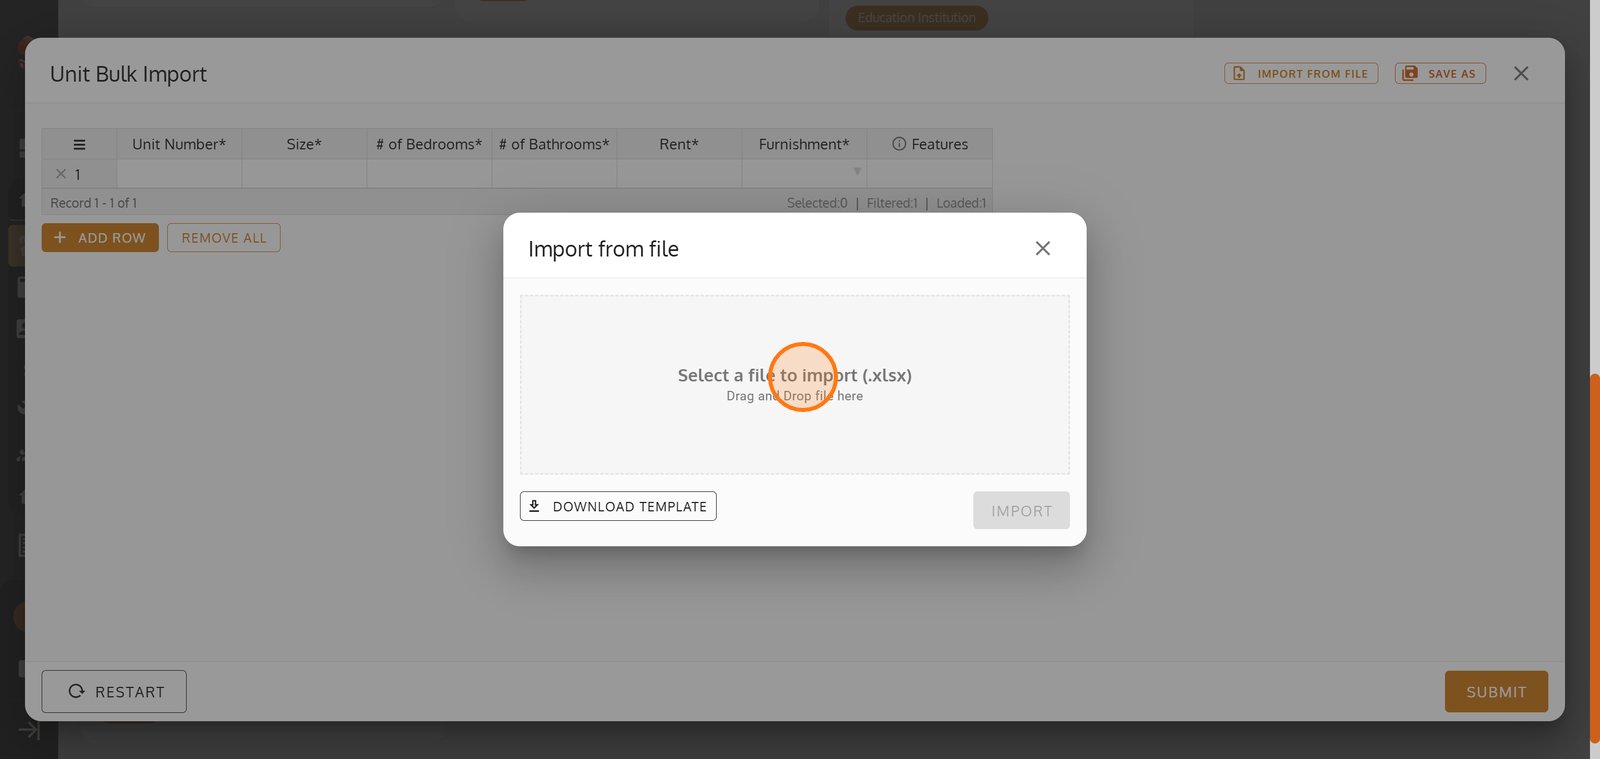
9. Select your prepared Excel file for a fast and effortless unit import.
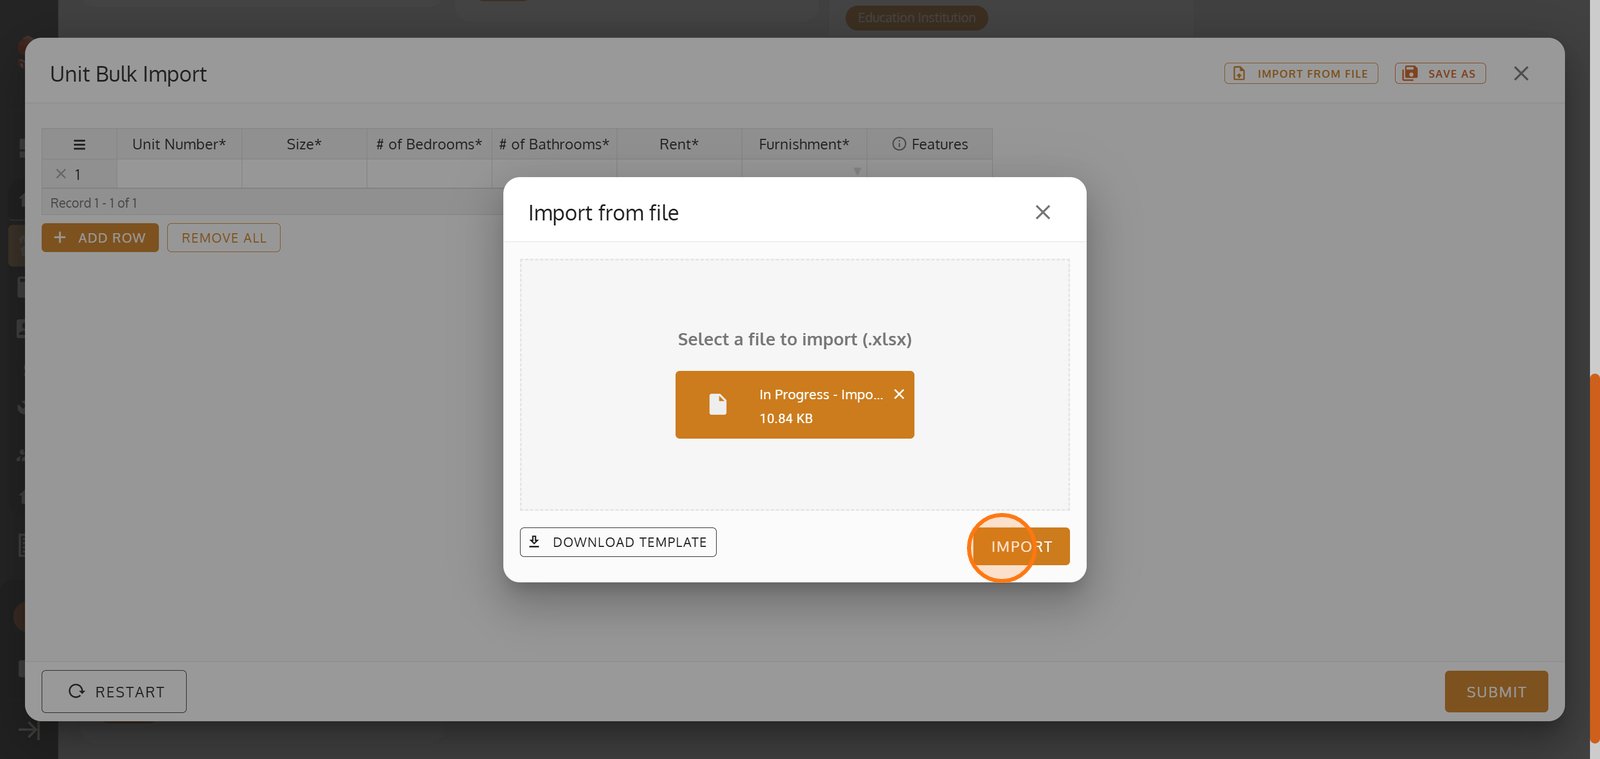
10. Click 'IMPORT' to start transferring your bulk unit data directly into the system.
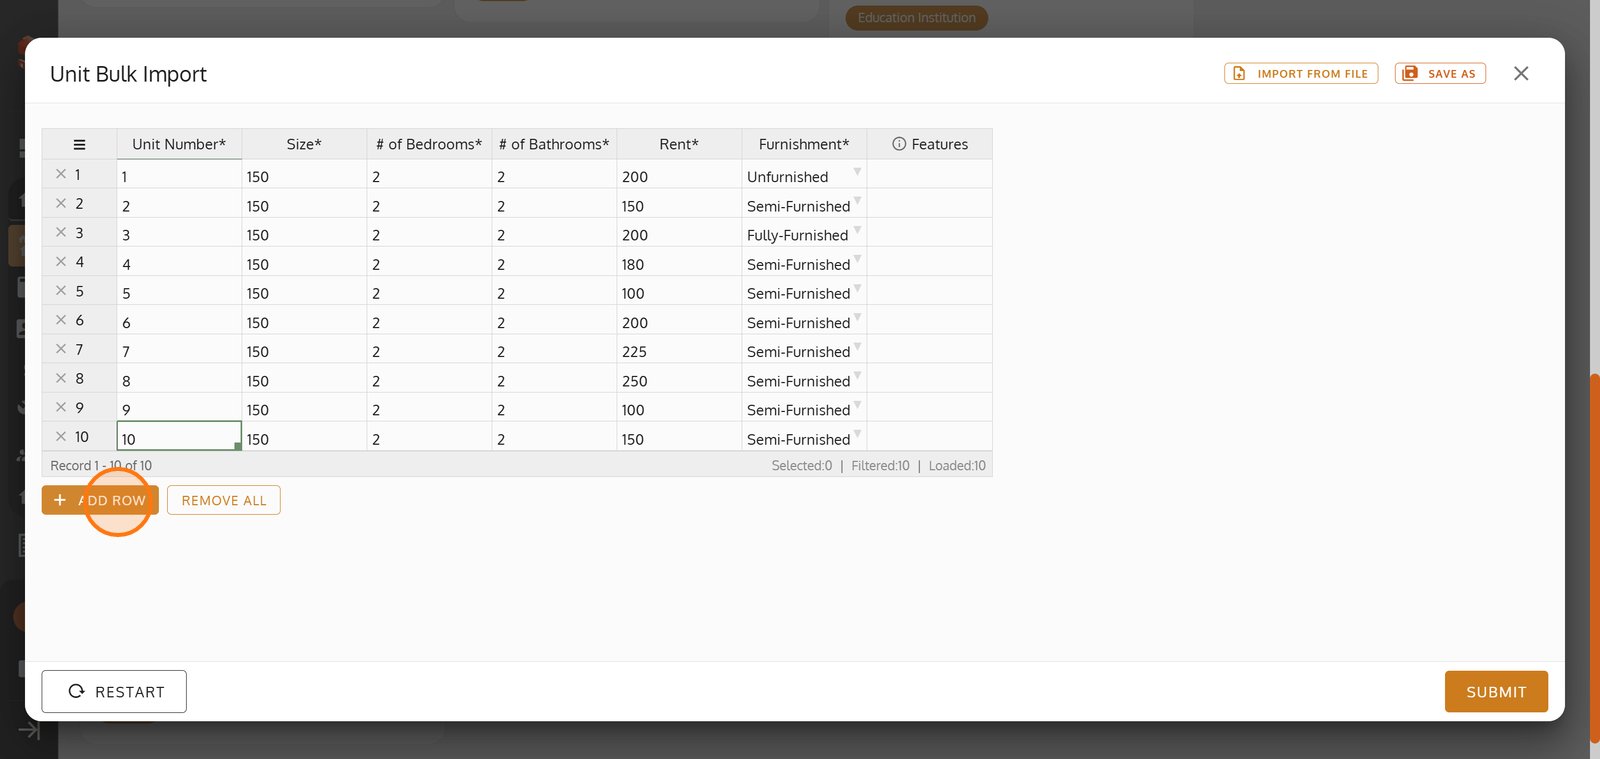
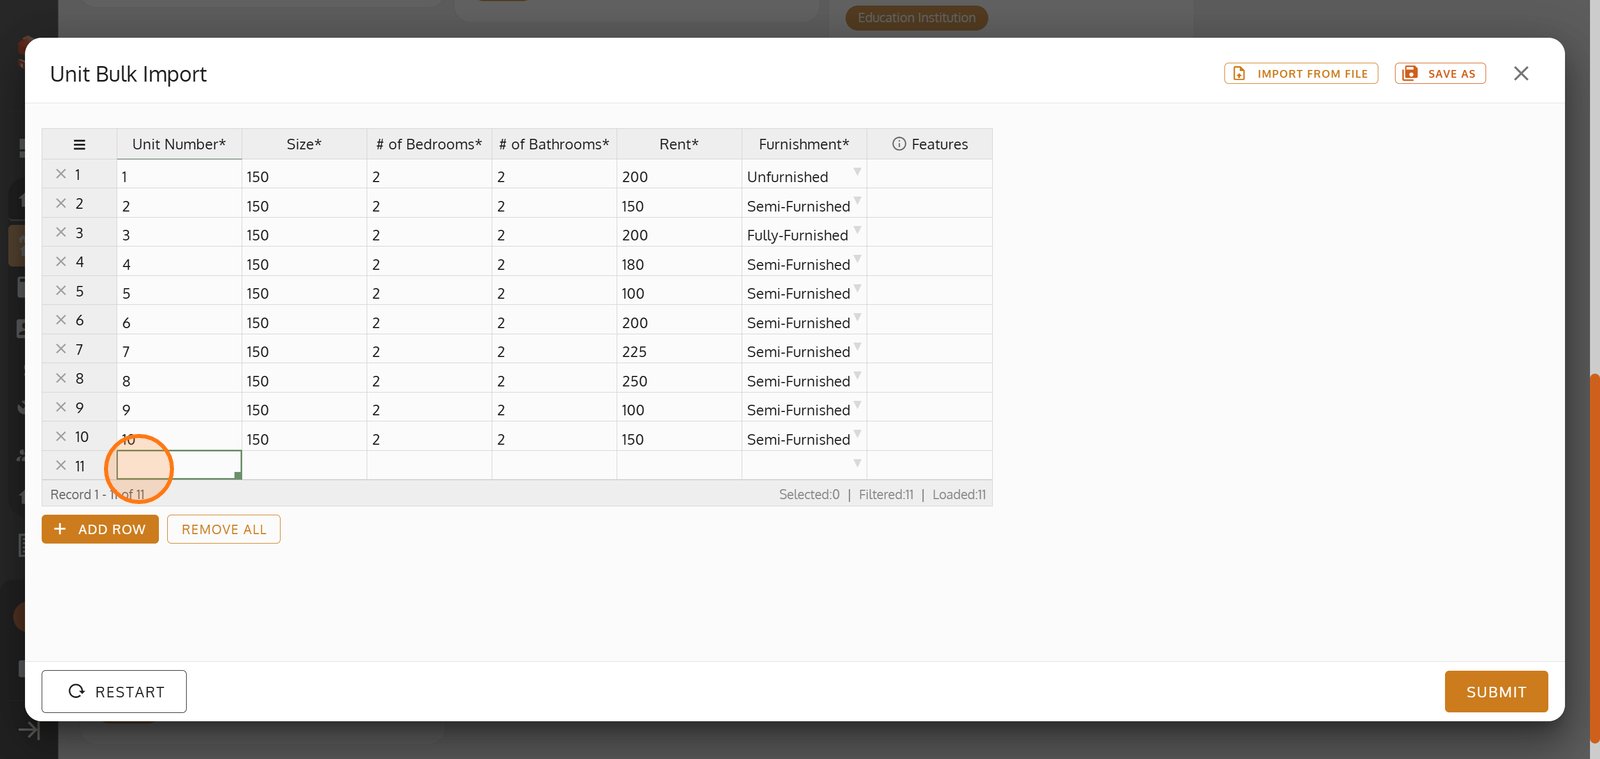
11. Add a new row if you wish to input additional unit information manually.
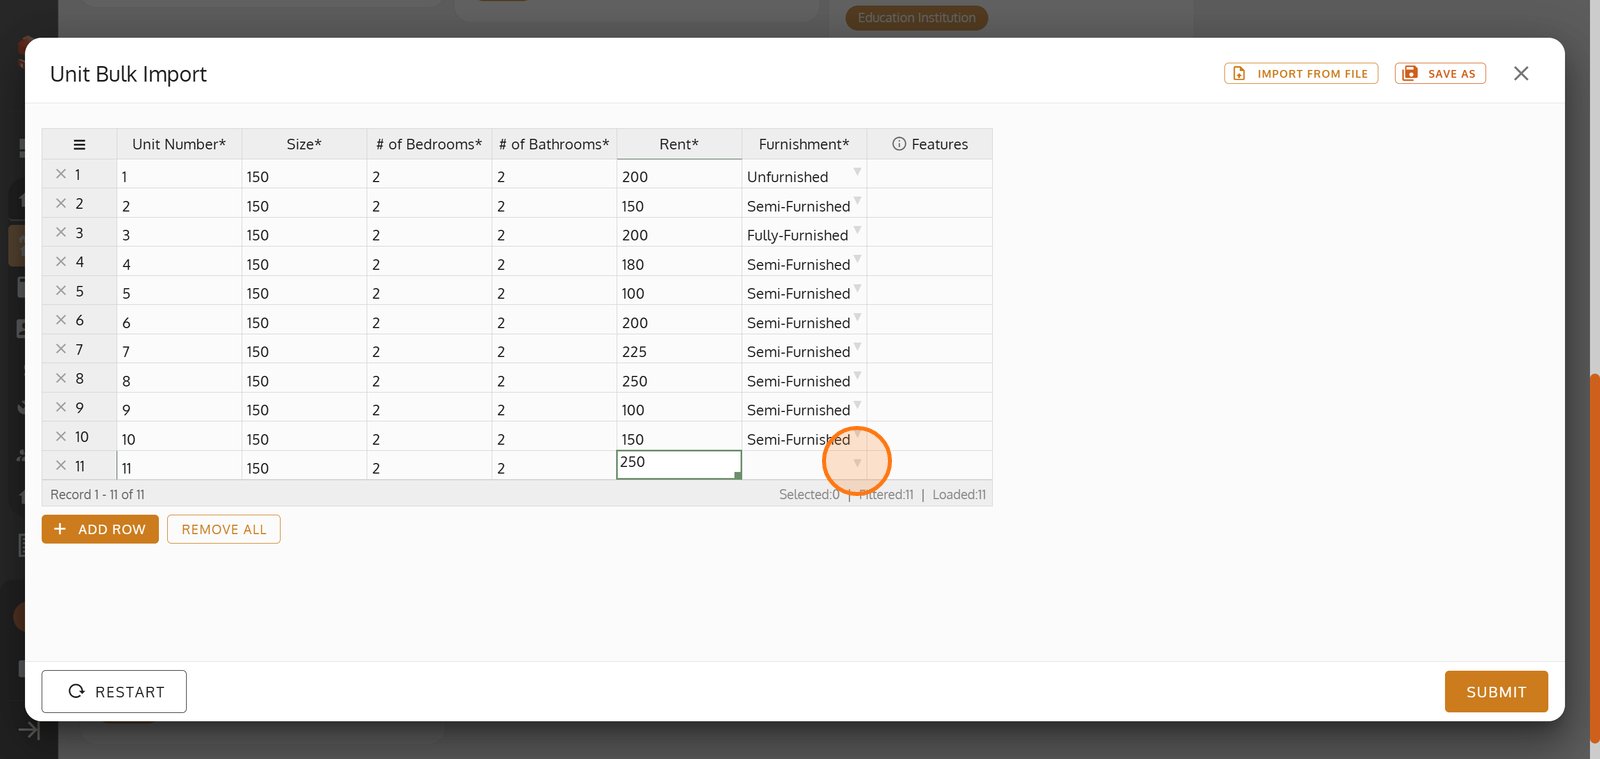
12. Start entering the unit number in the table for the new row.
13. Choose from the furnishment dropdown.
14.

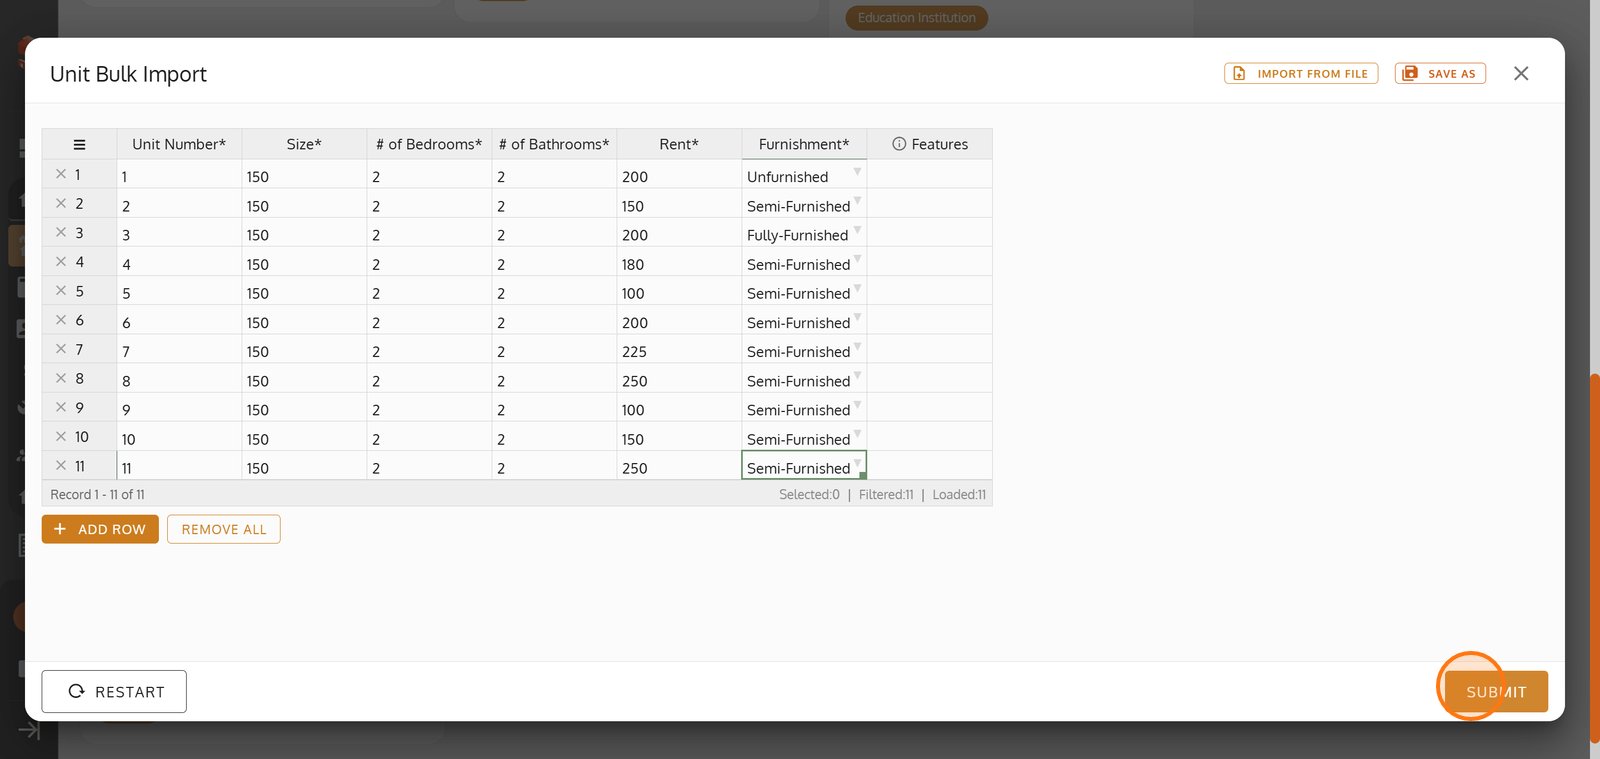
15. Hit 'SUBMIT' to seamlessly save all unit entries into your property database.
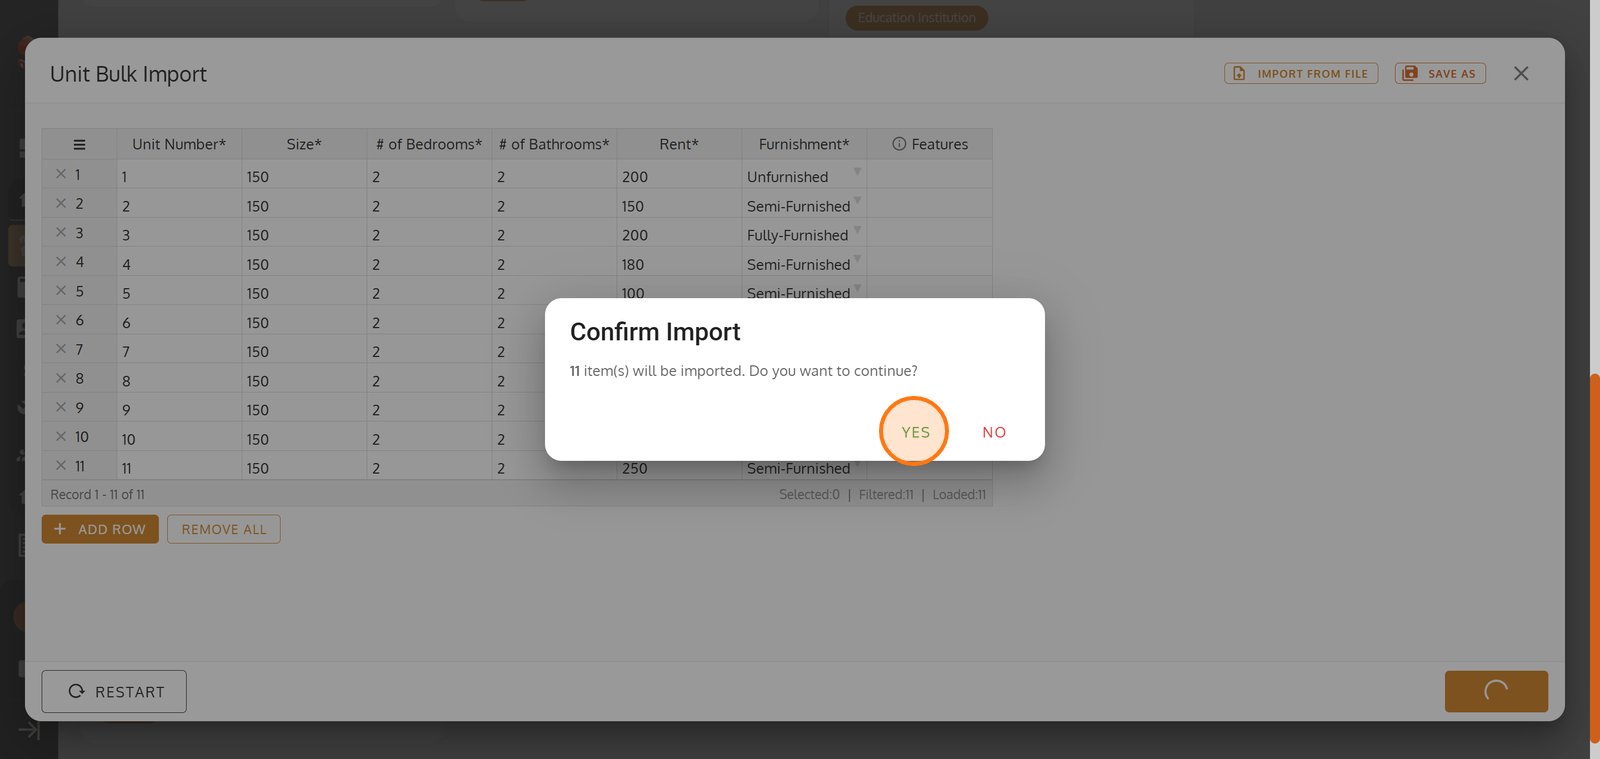
16. Confirm your submission to import multiple property units at once.
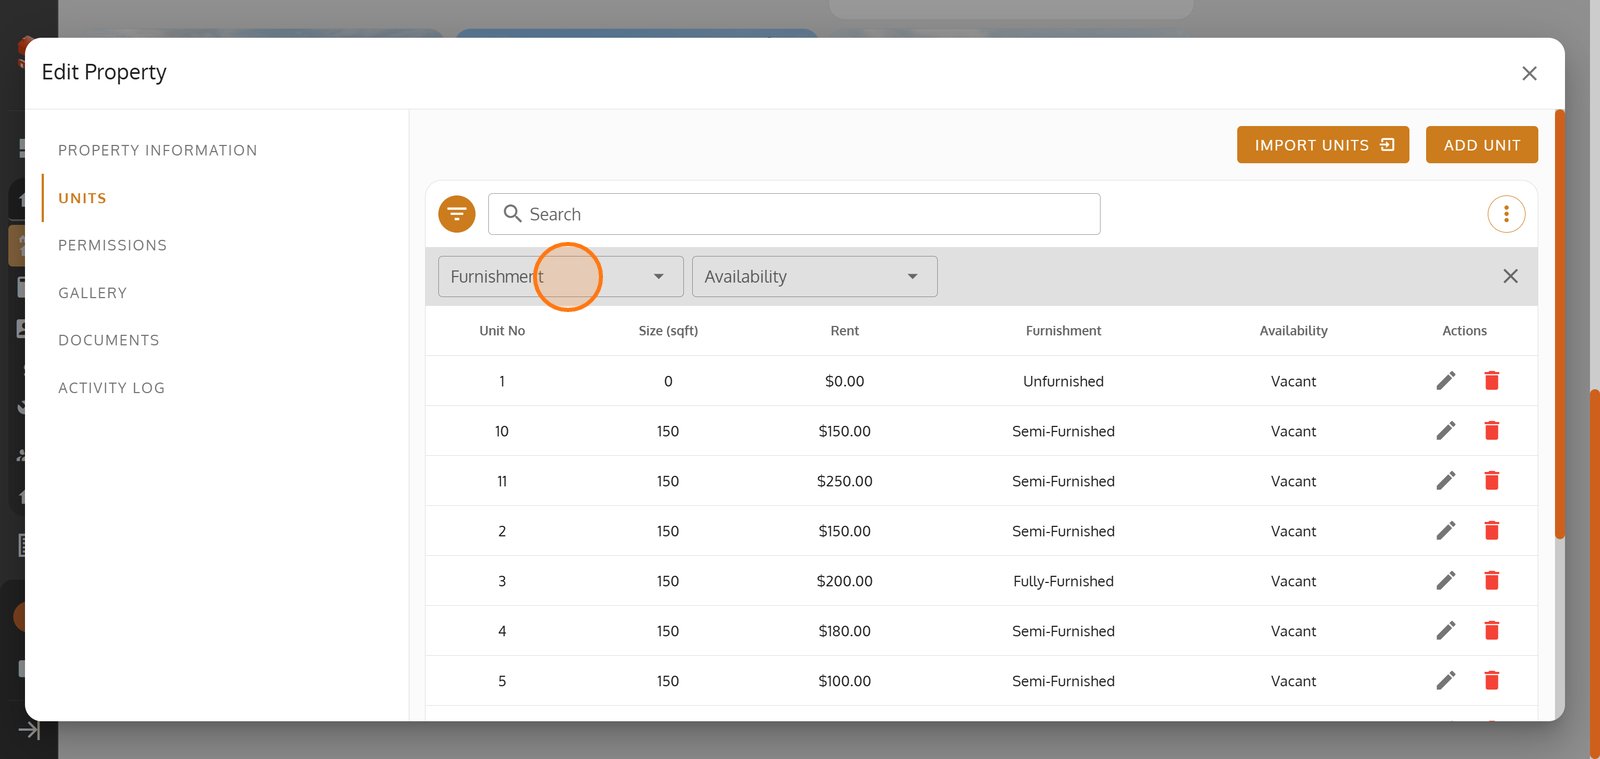
17. Click the filter icon to fine-tune the unit list with advanced filtering options.
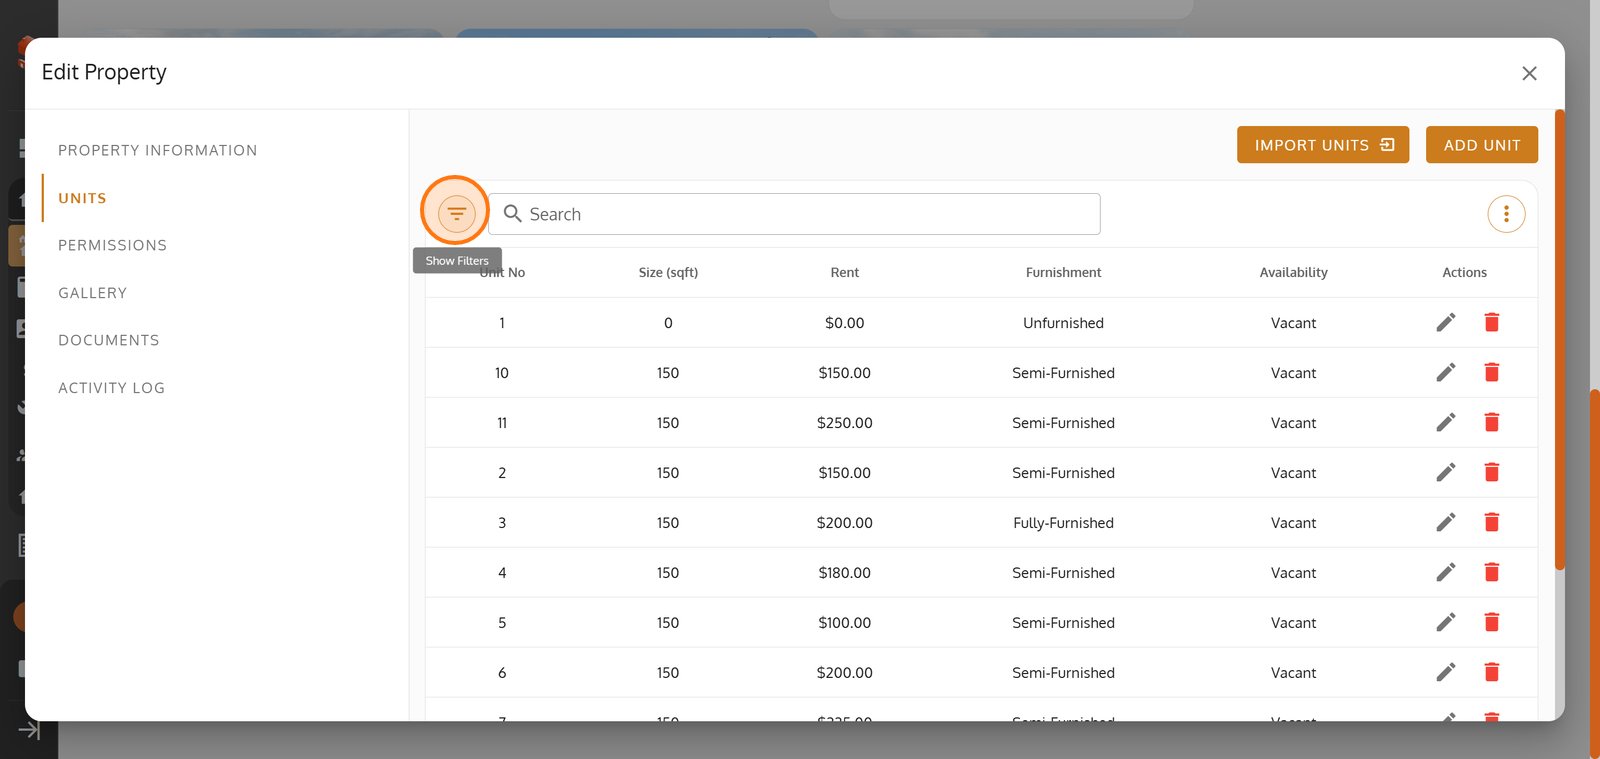
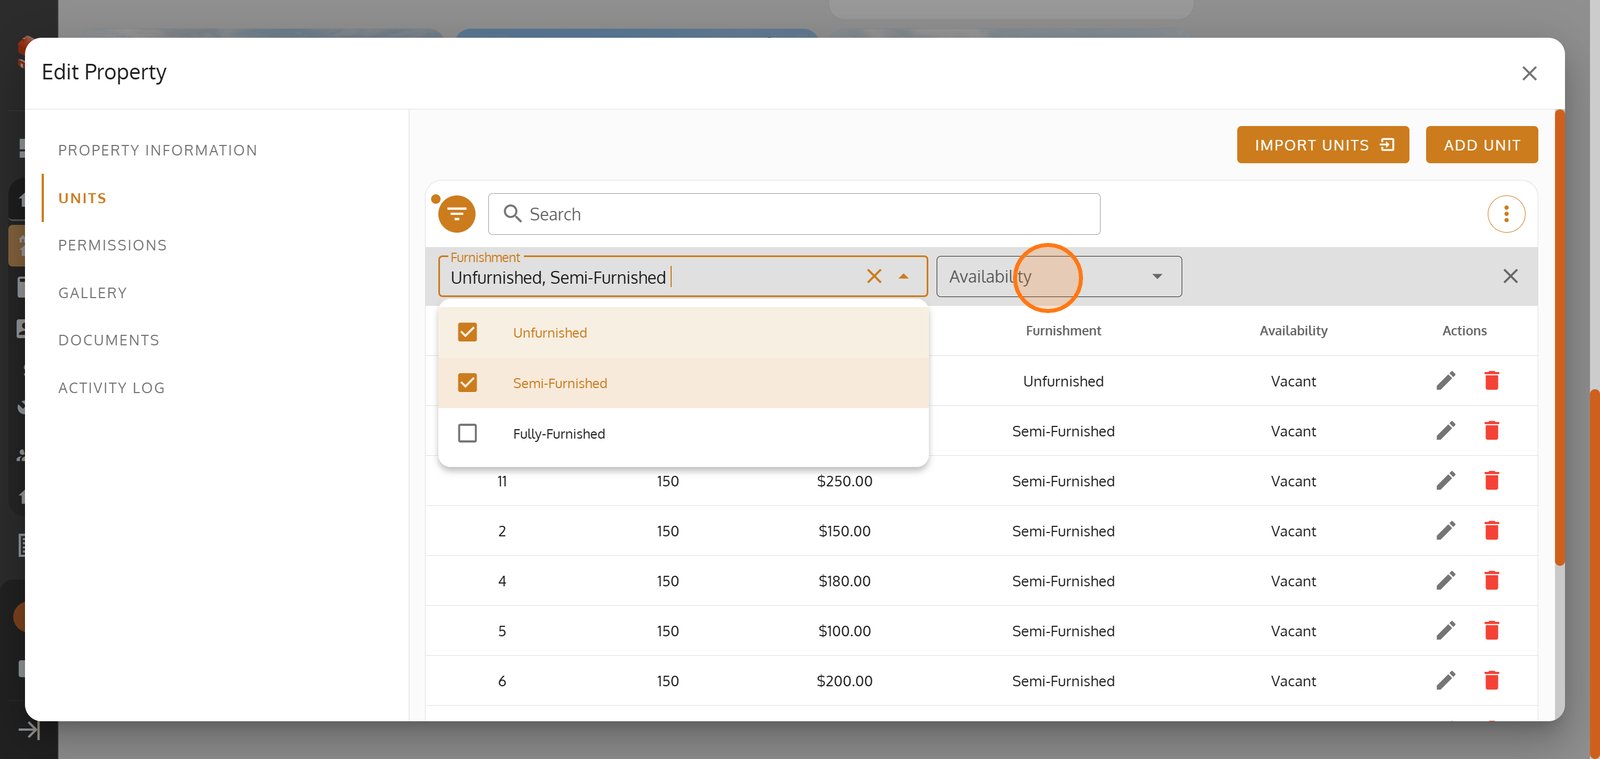
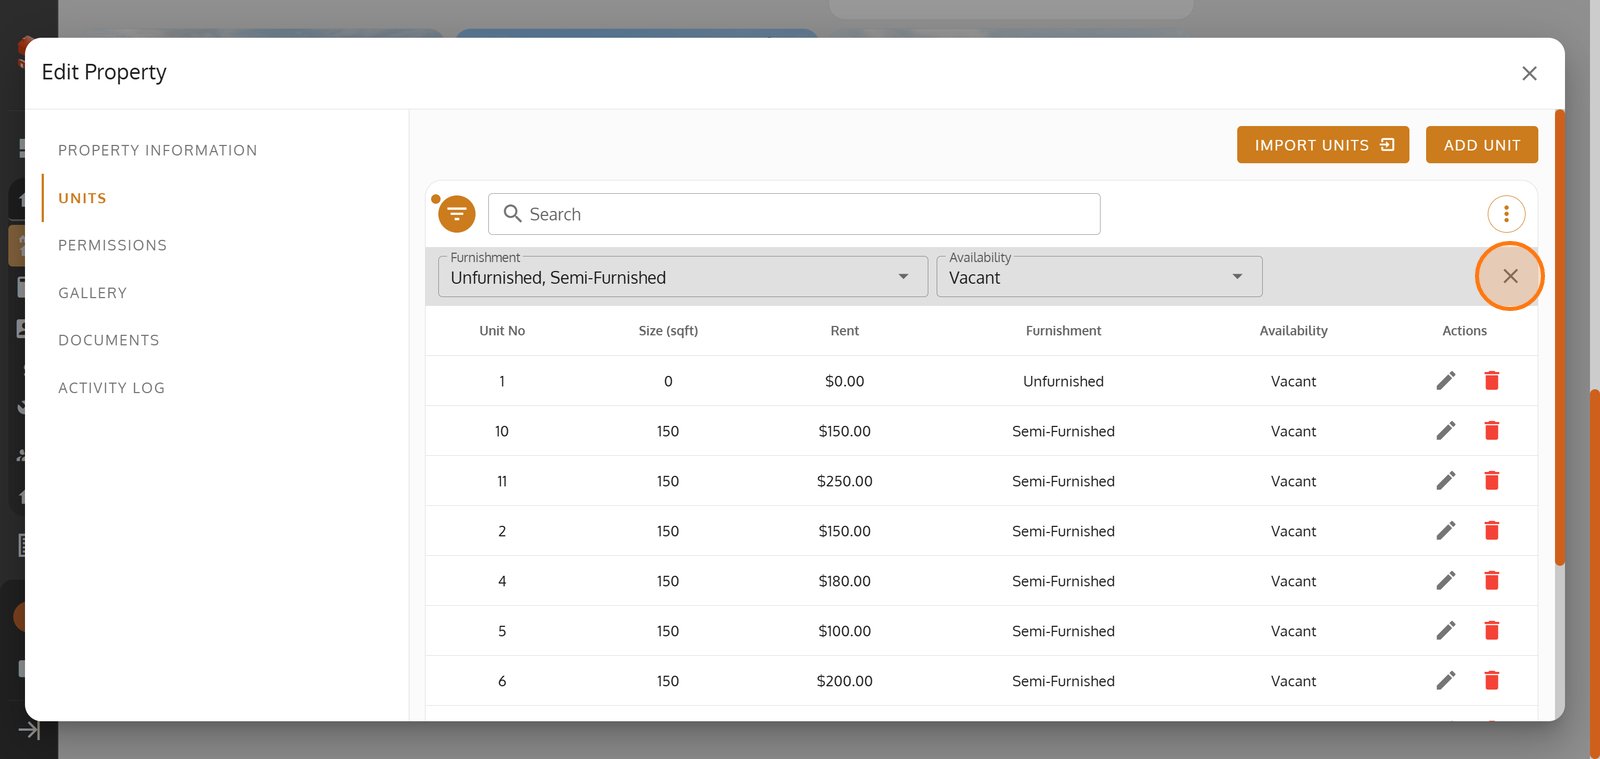
18. Use the 'Furnishment' dropdown to view units by their furnishing status - filter with ease.
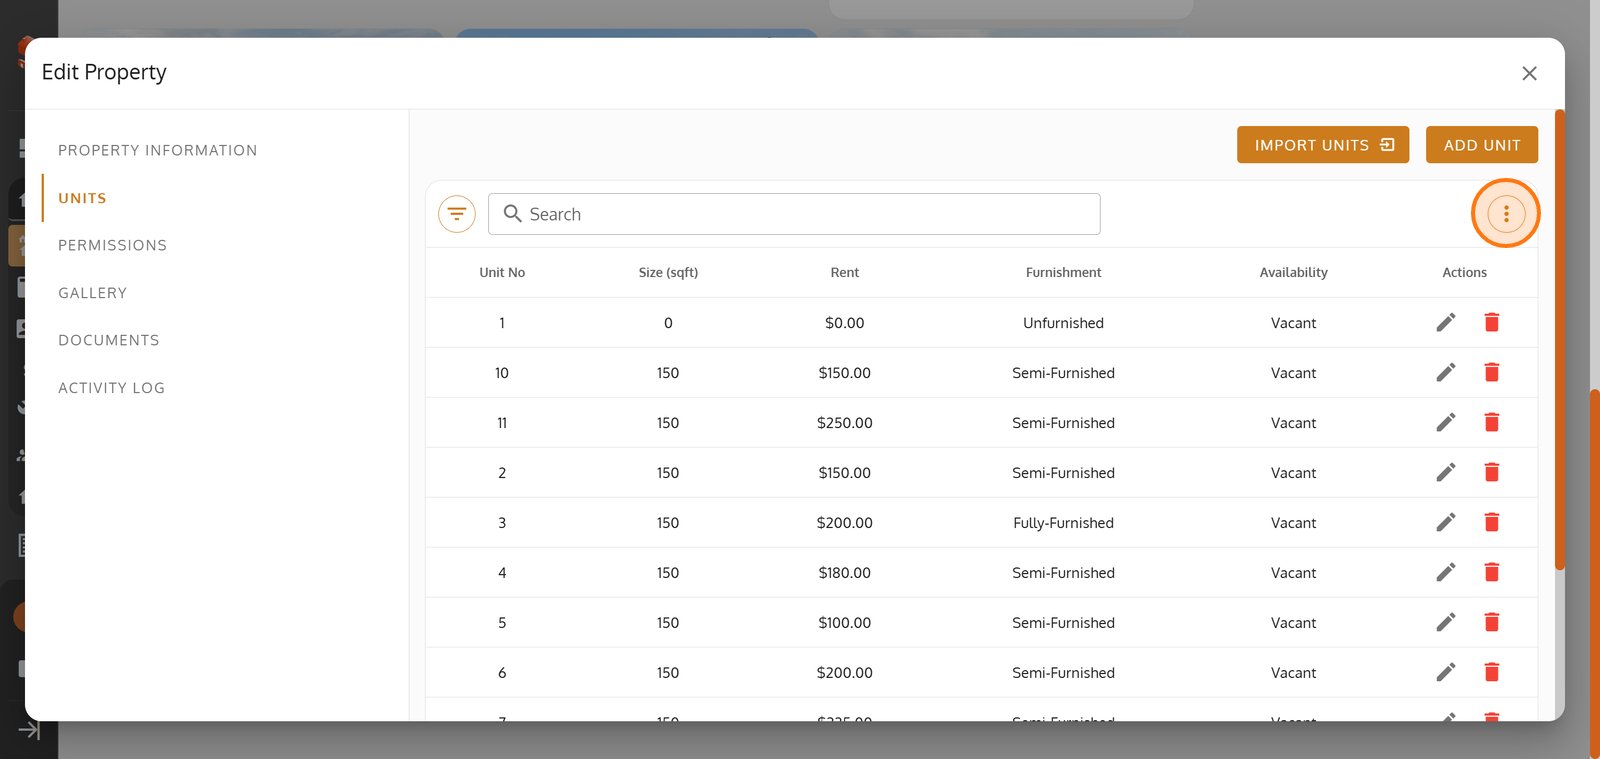
19. Open the 'Availability' dropdown to instantly filter units by occupancy status.
20. Clear all filters for a complete overview of every unit at your property.
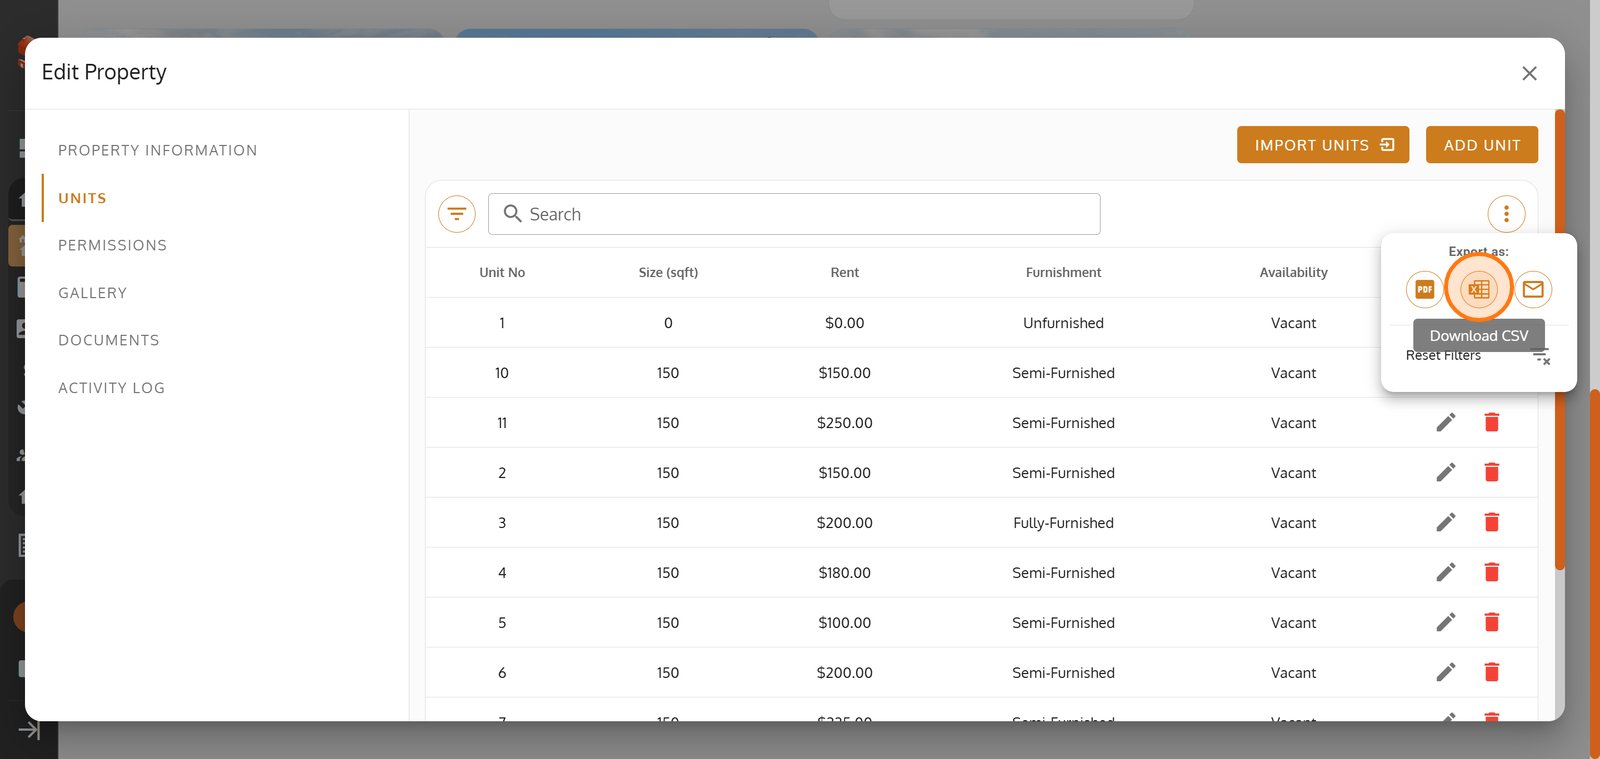
21. Click 'more options' for extra actions on any individual unit entry.
22. Export your filtered property units list to PDF for easy reporting and sharing.

23. Download units data as CSV for quick editing or external record-keeping.
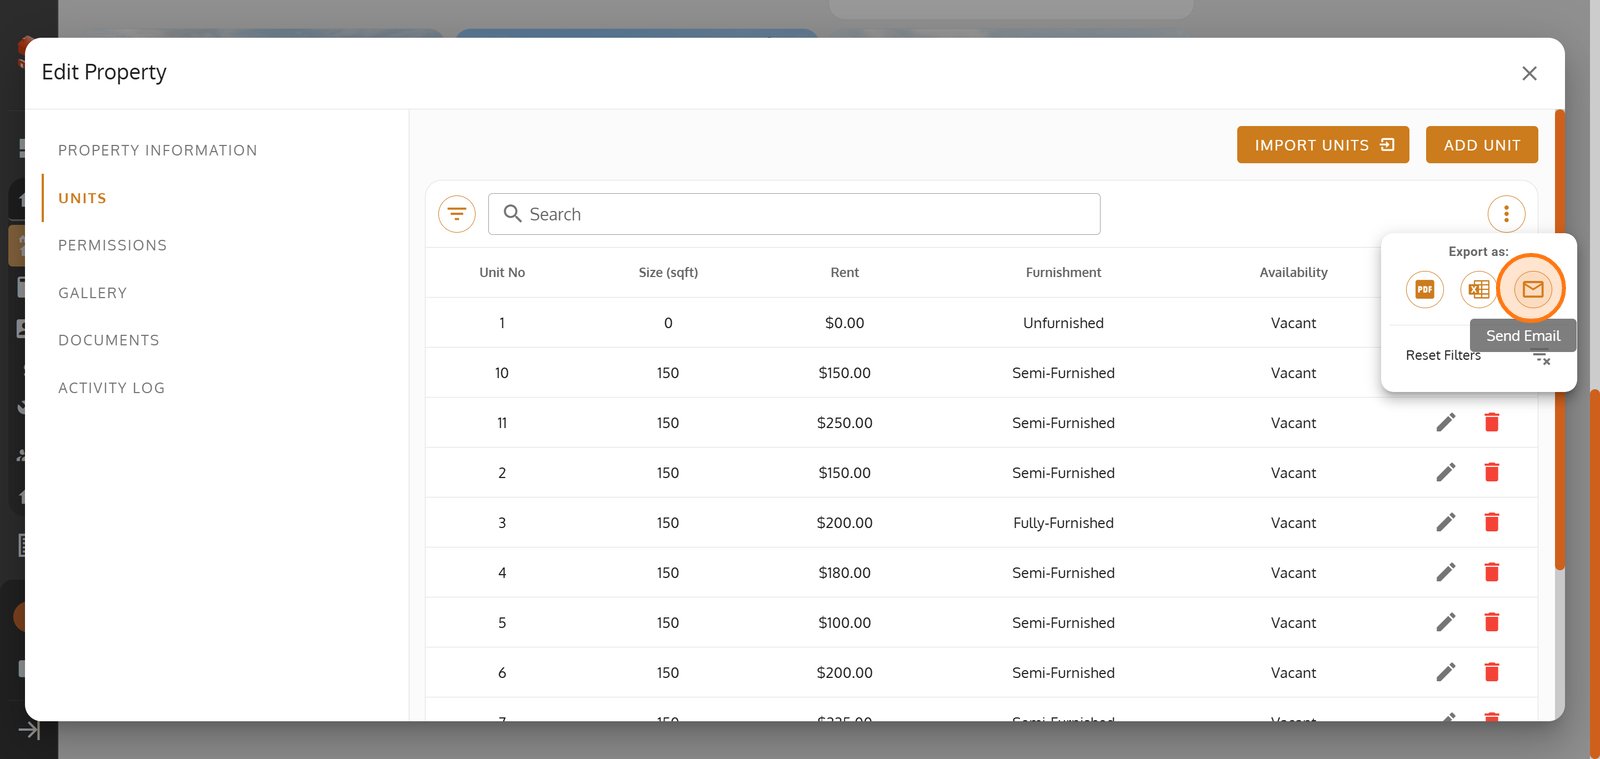
24. Send your unit data directly by email - perfect for sharing with your team or clients.
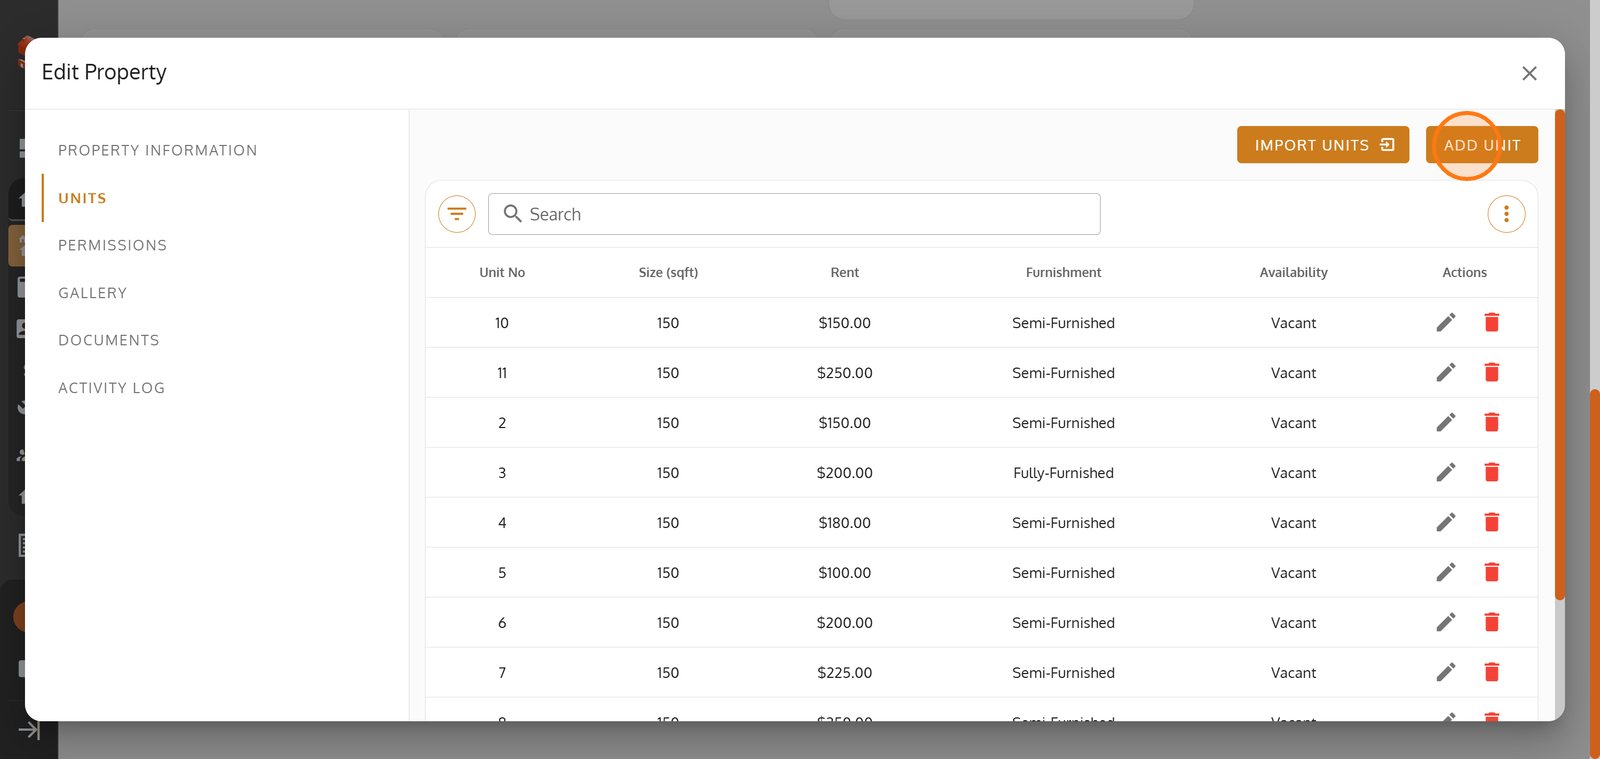
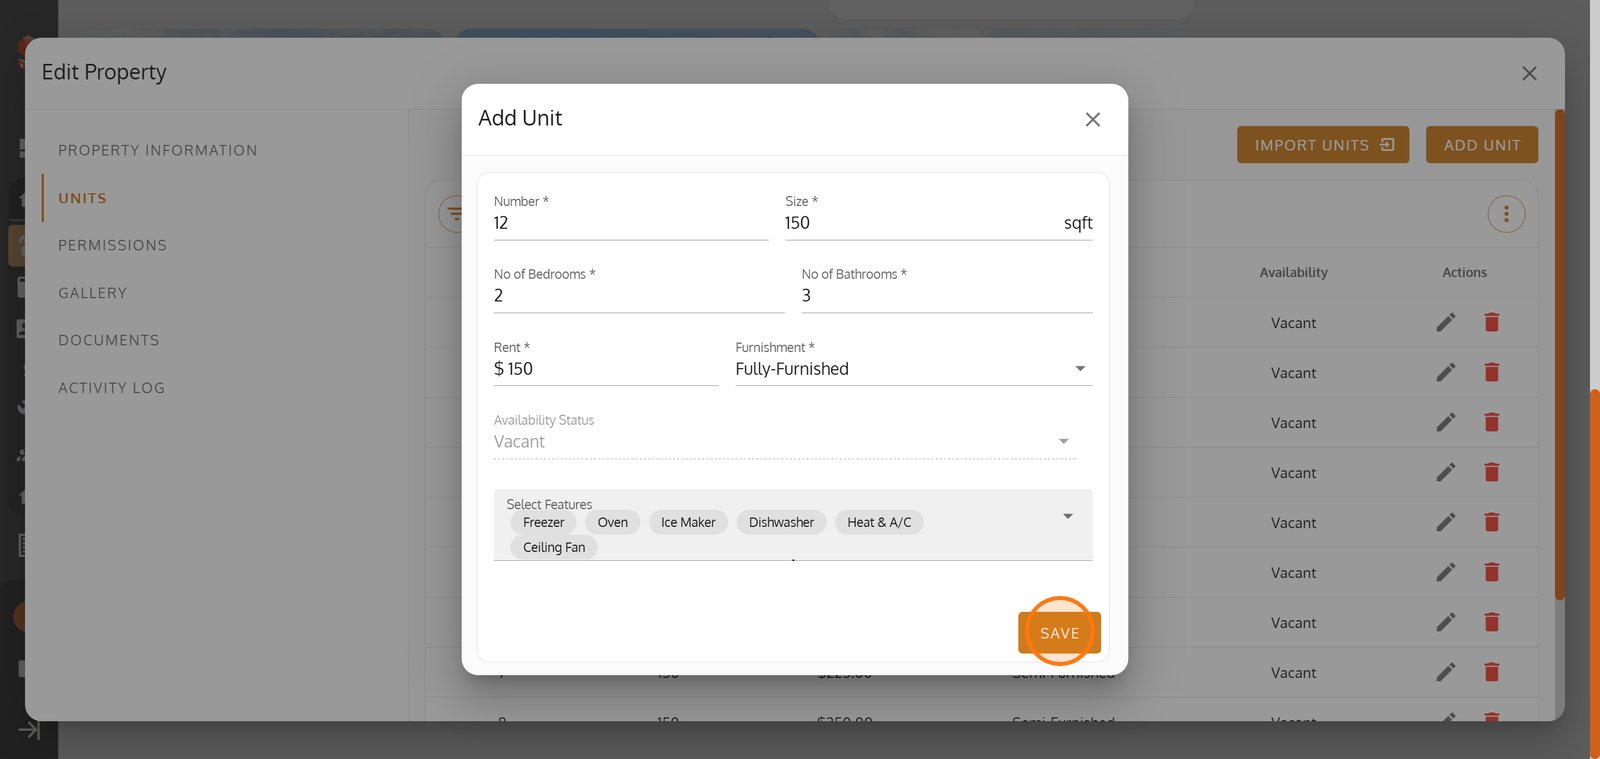
25. Add a new property unit by clicking 'ADD UNIT'.
26. Choose the unit's furnishing type to match tenant preferences.
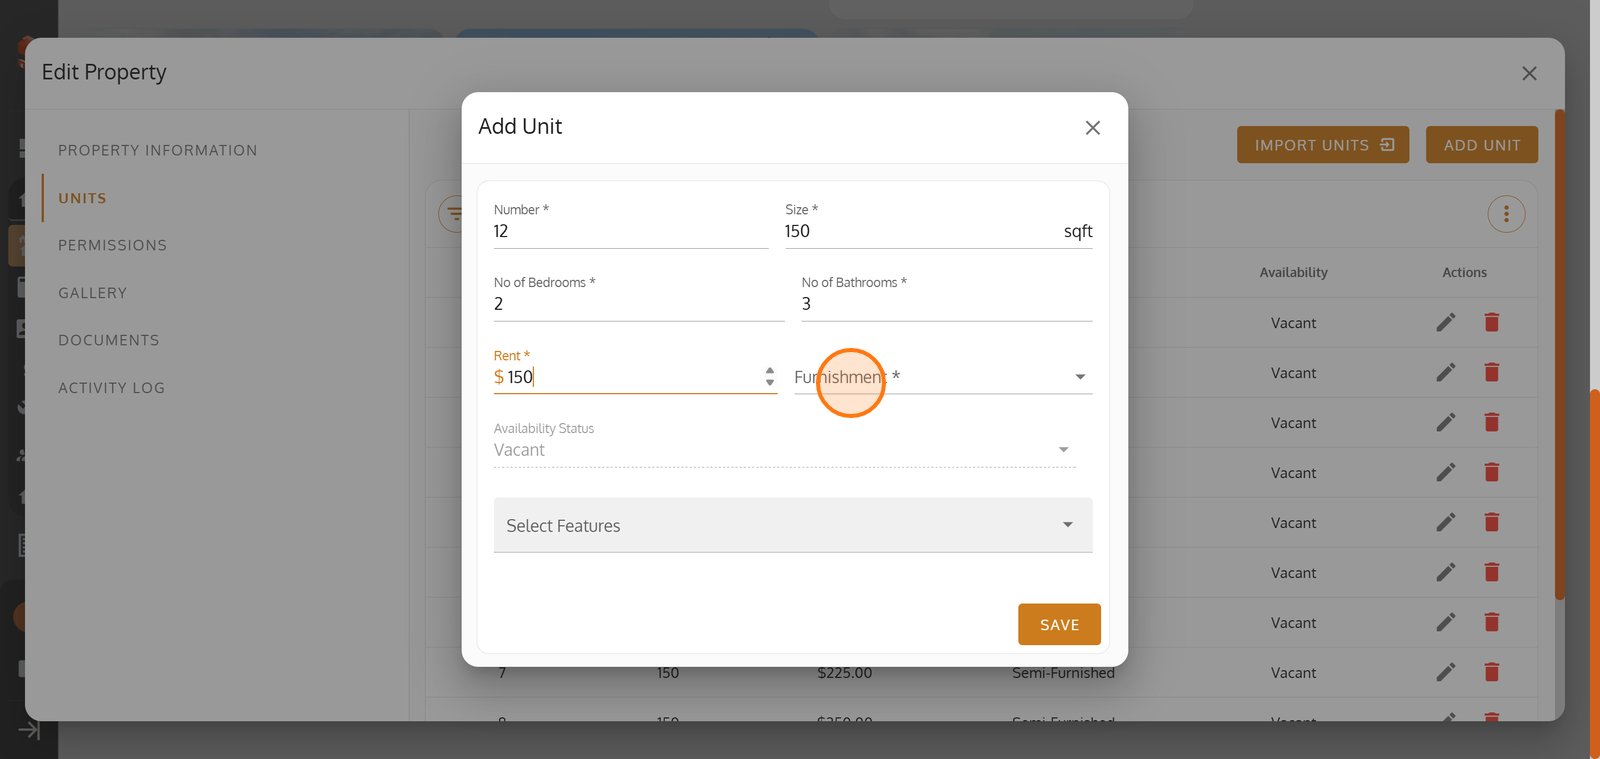
27. Click 'SAVE' to successfully add your fully detailed new unit.
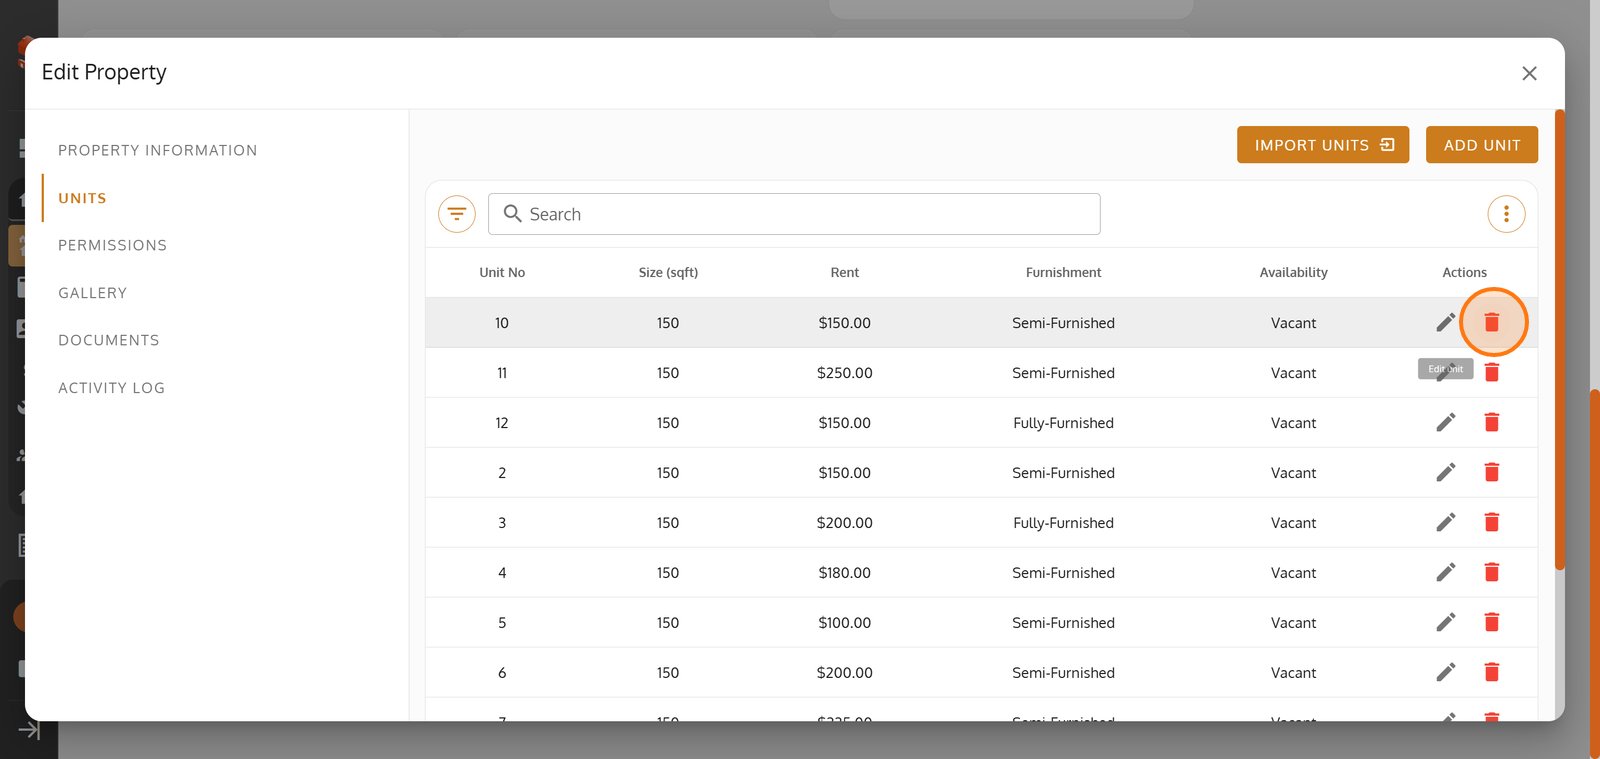
28. Click the Delete icon to remove this unit entry.
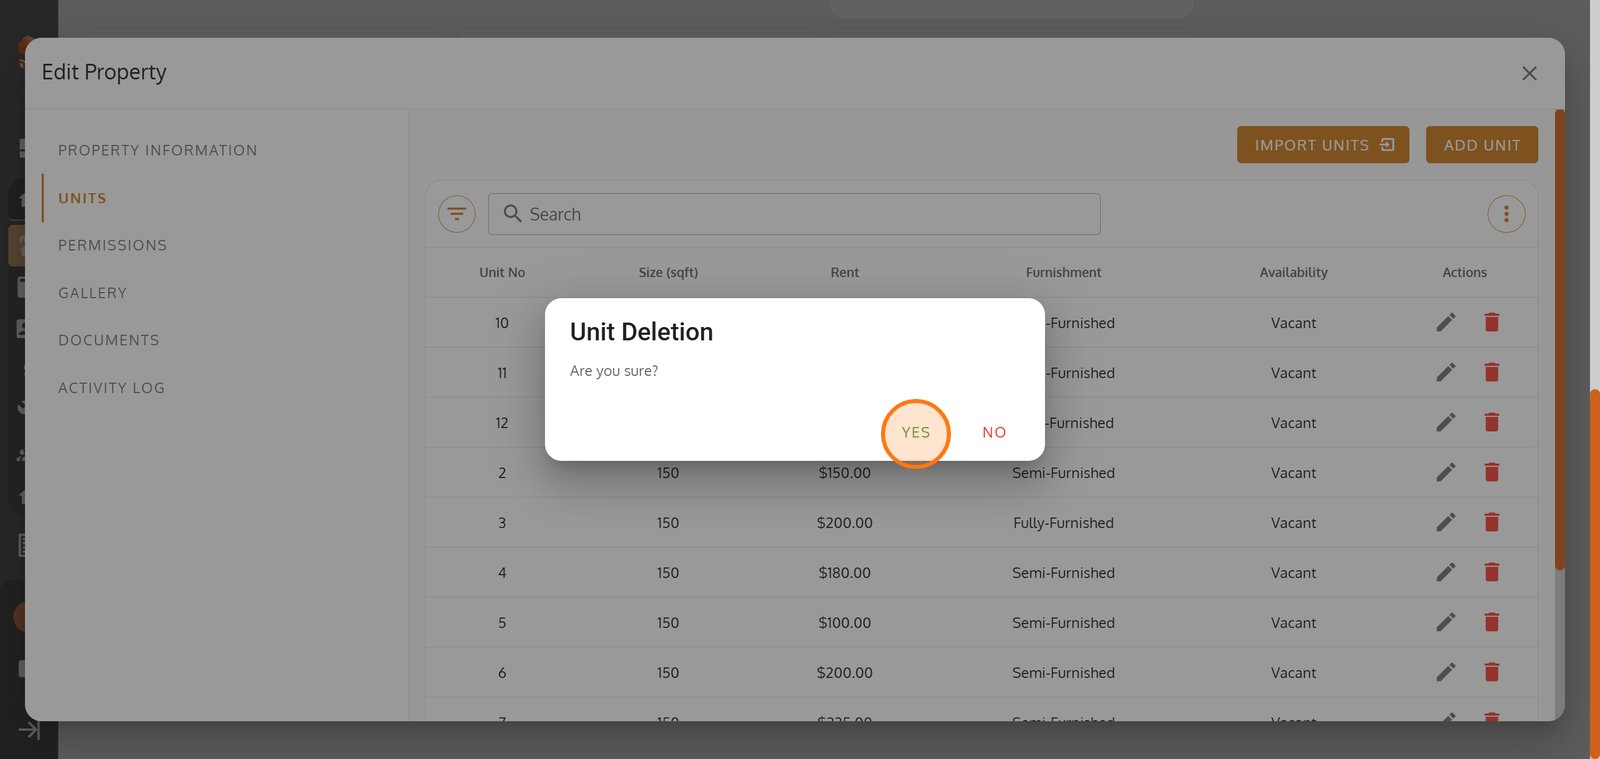
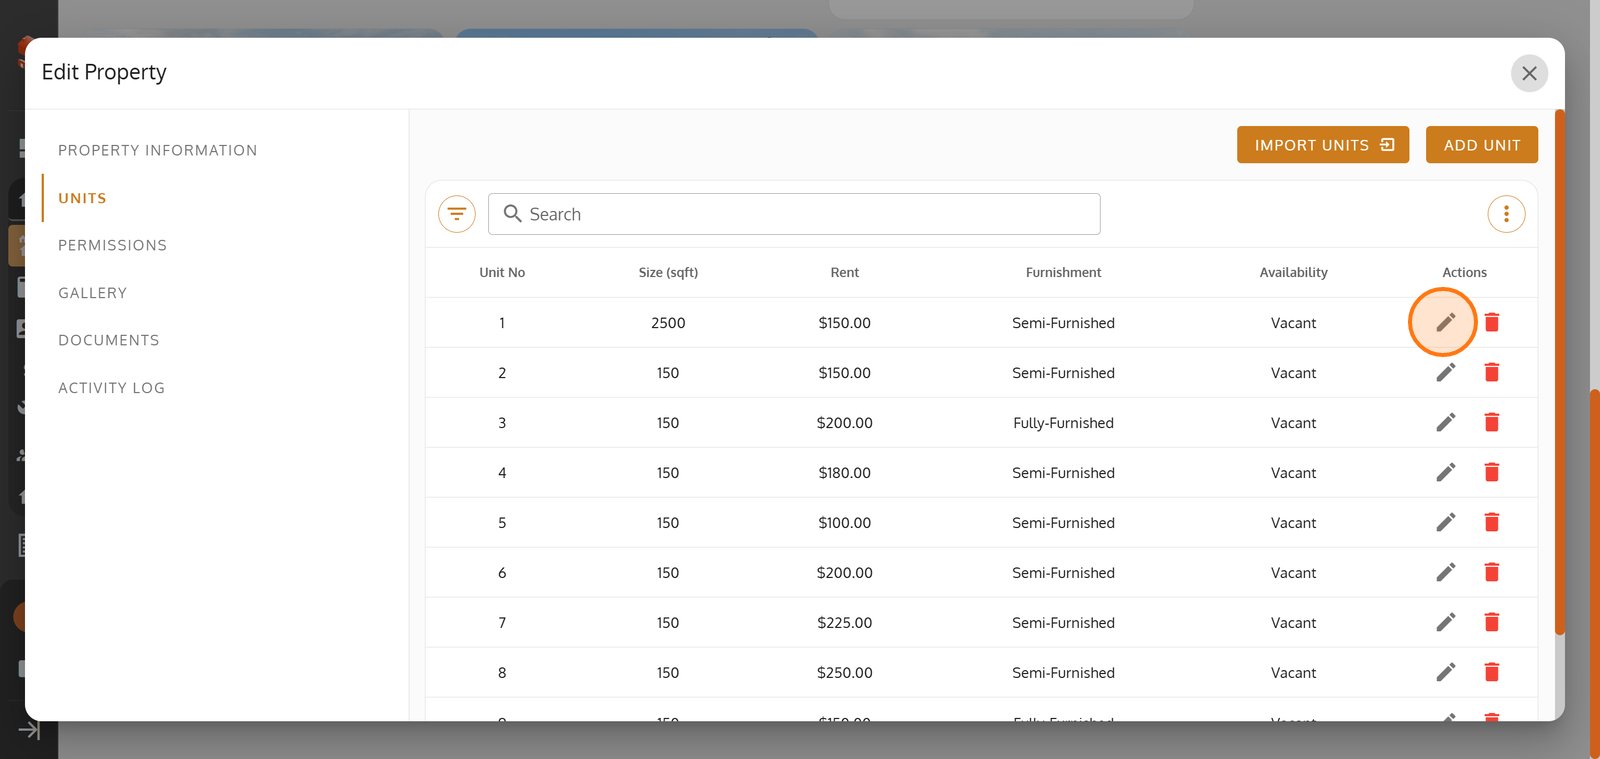
29. Click "Yes"
30.

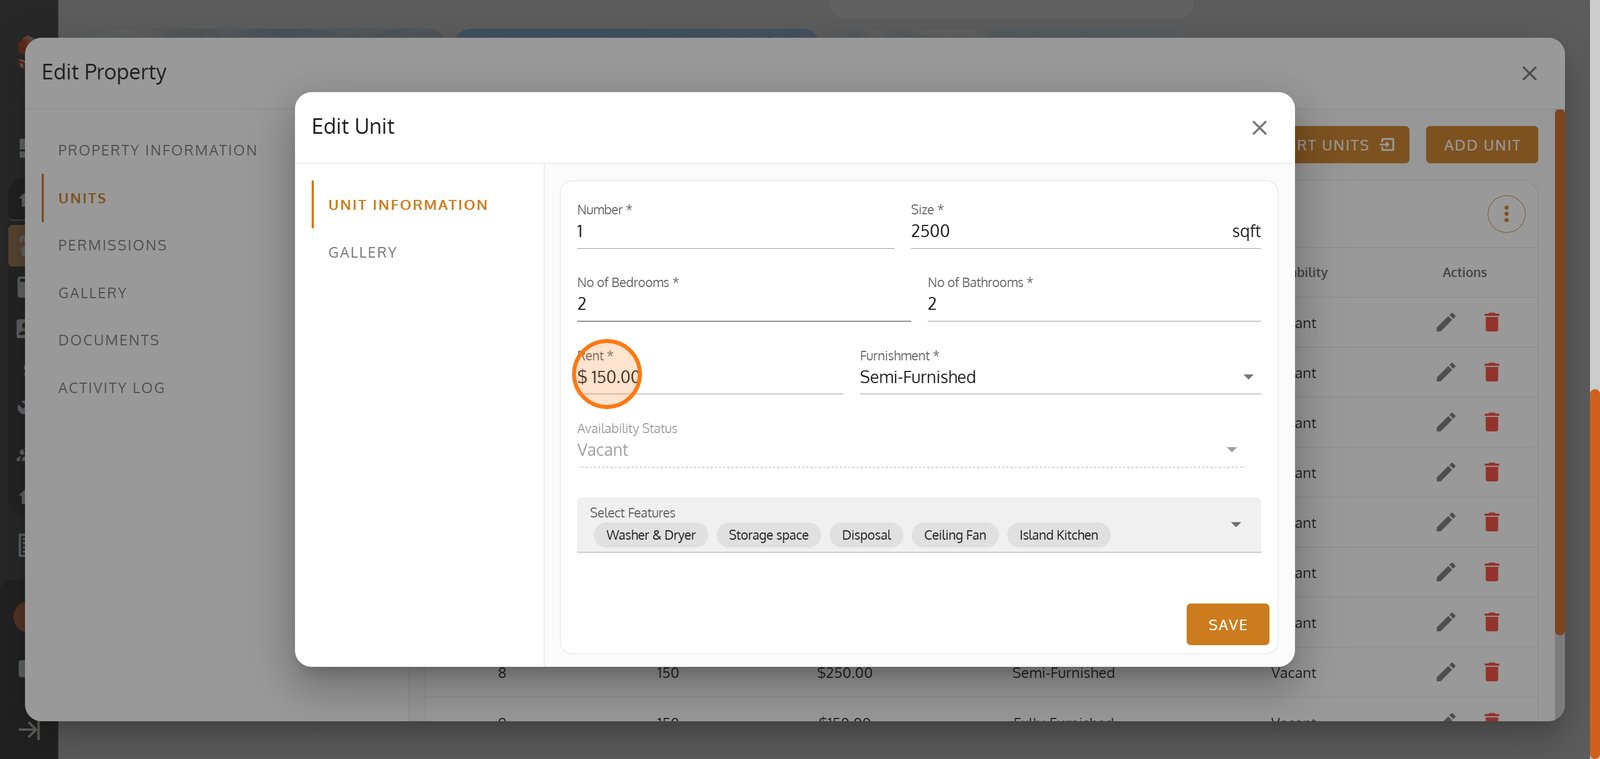
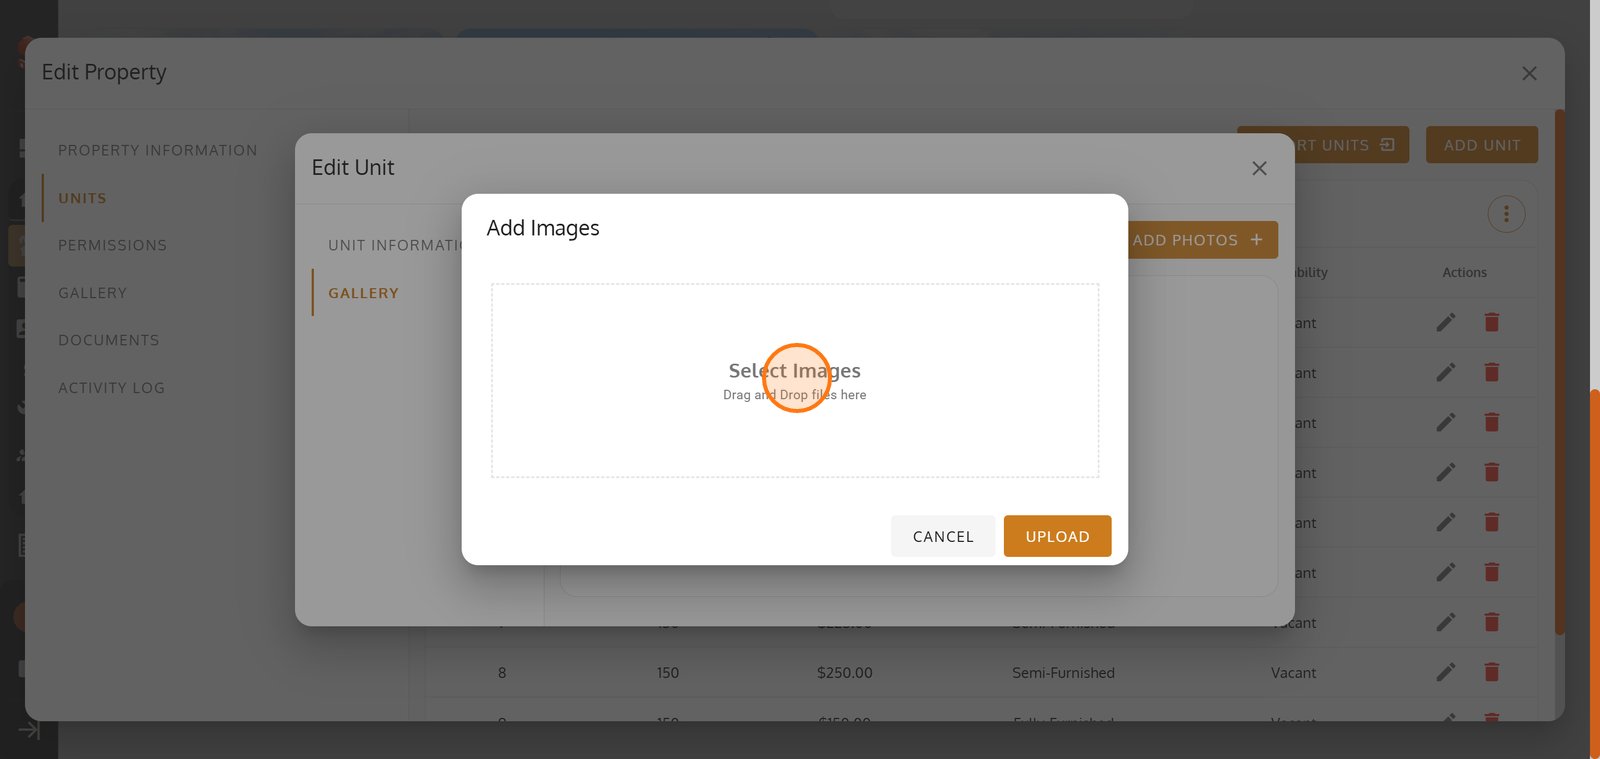
31. Click the Edit icon to start updating details for a specific rental unit.
32. Update the rent or review other unit details as needed.
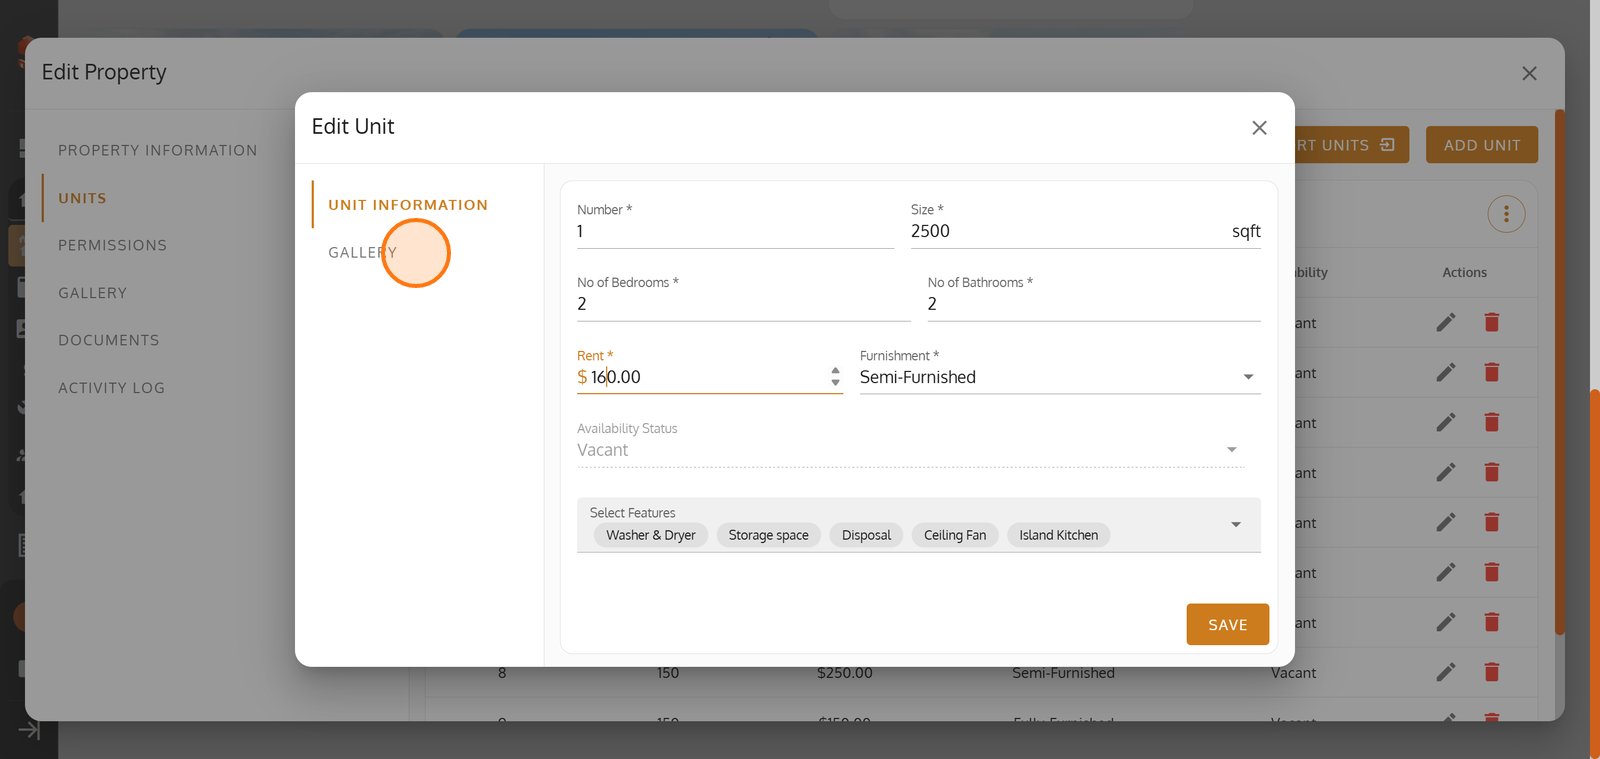
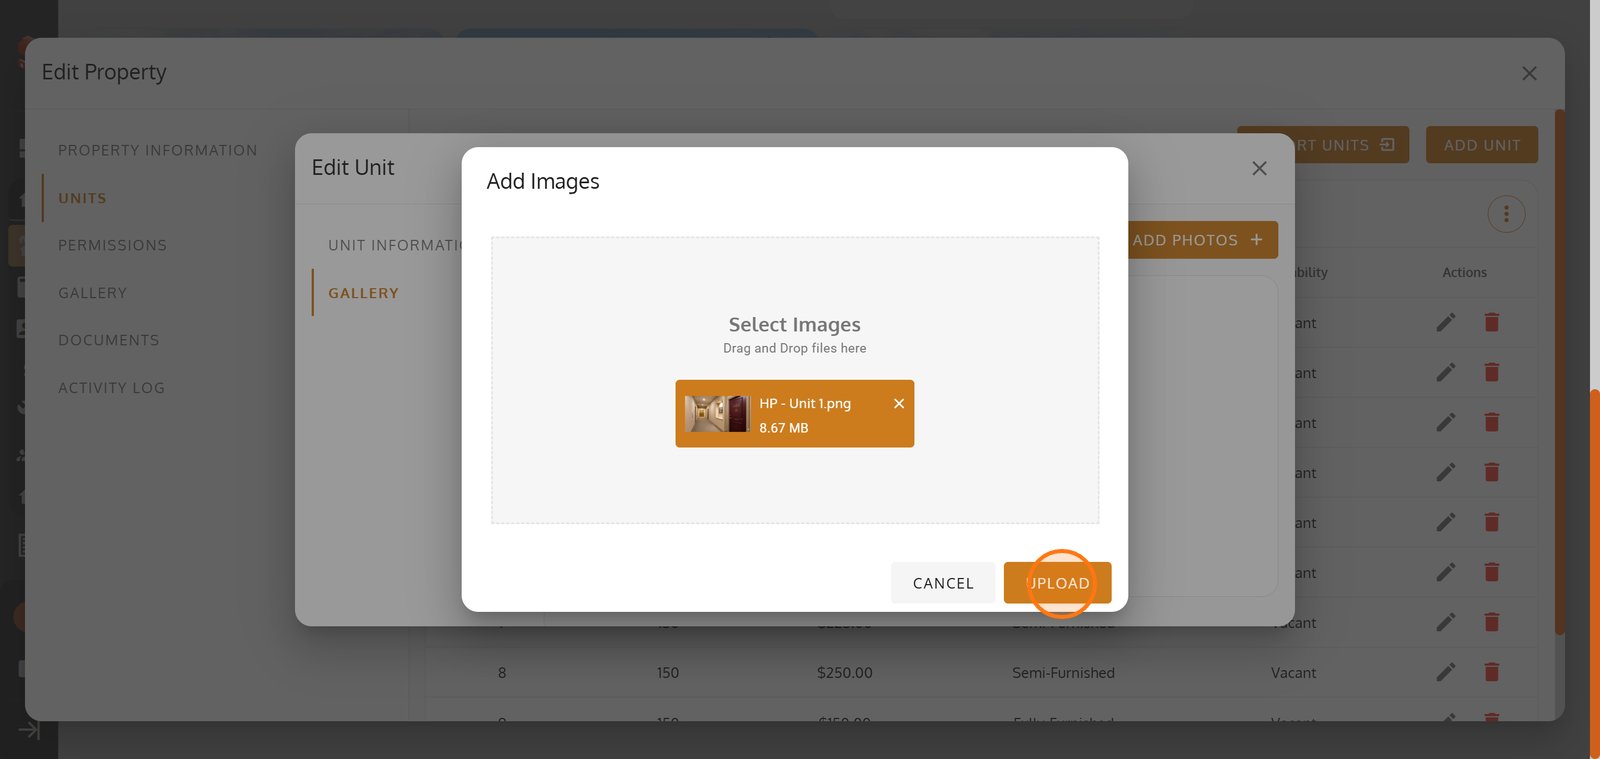
33. Switch to the GALLERY tab to manage or preview photos for this unit.
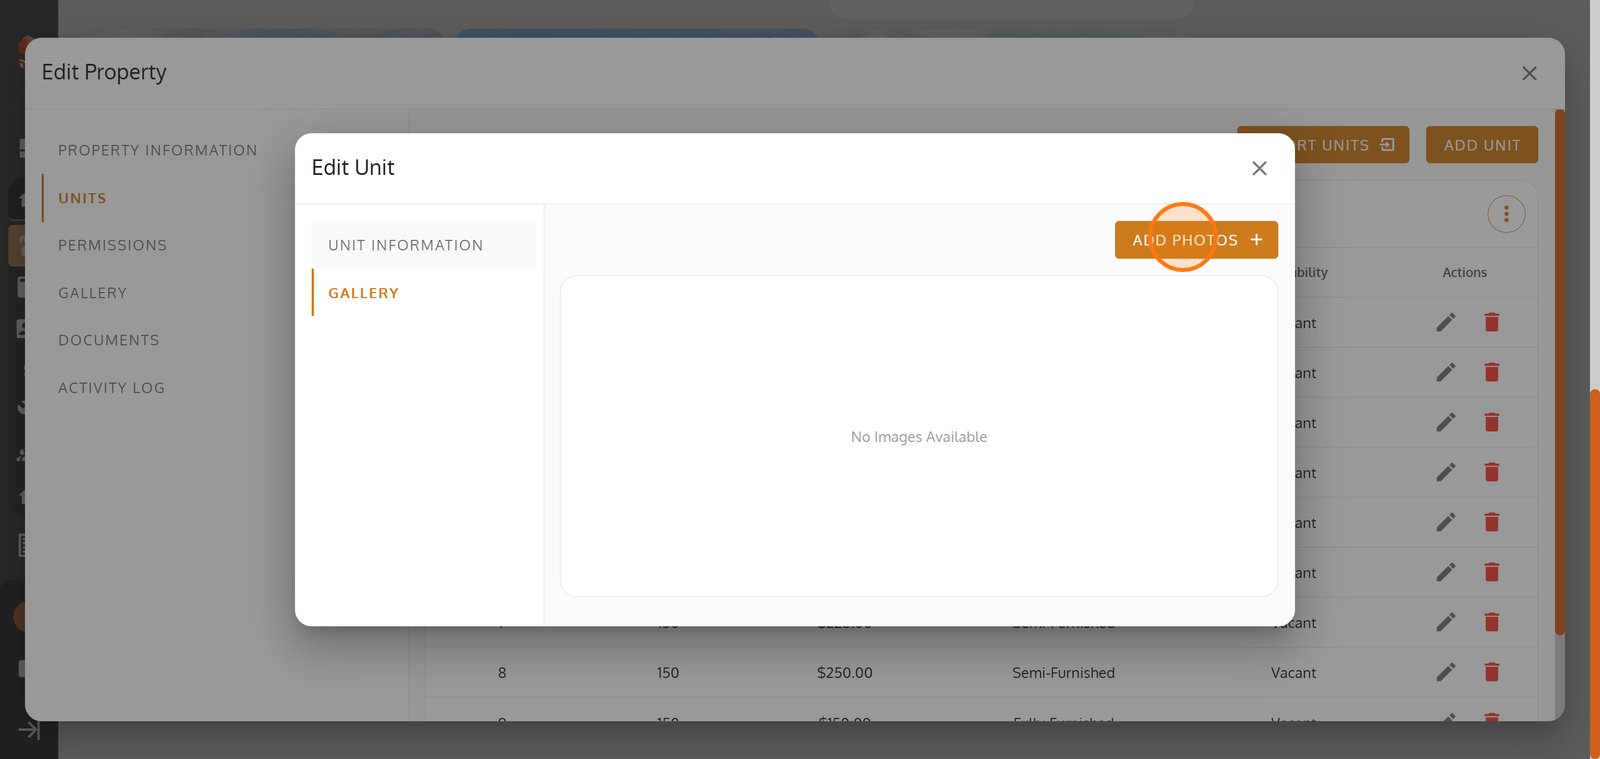
34. Select Add Photos to start enhancing your unit's listing with stunning visuals.
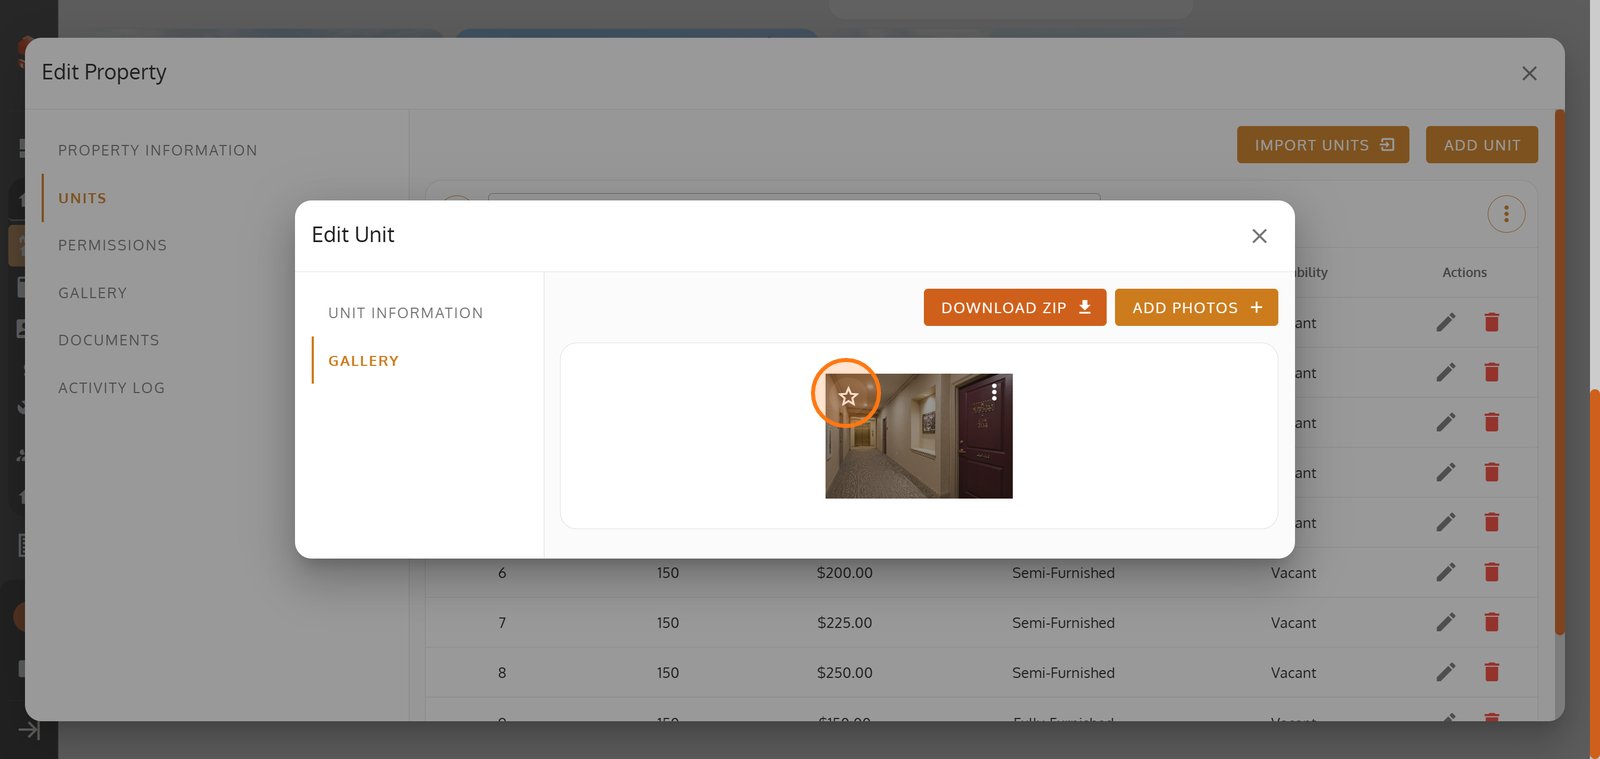
35. Choose or drag image files into this area to add them to your gallery.
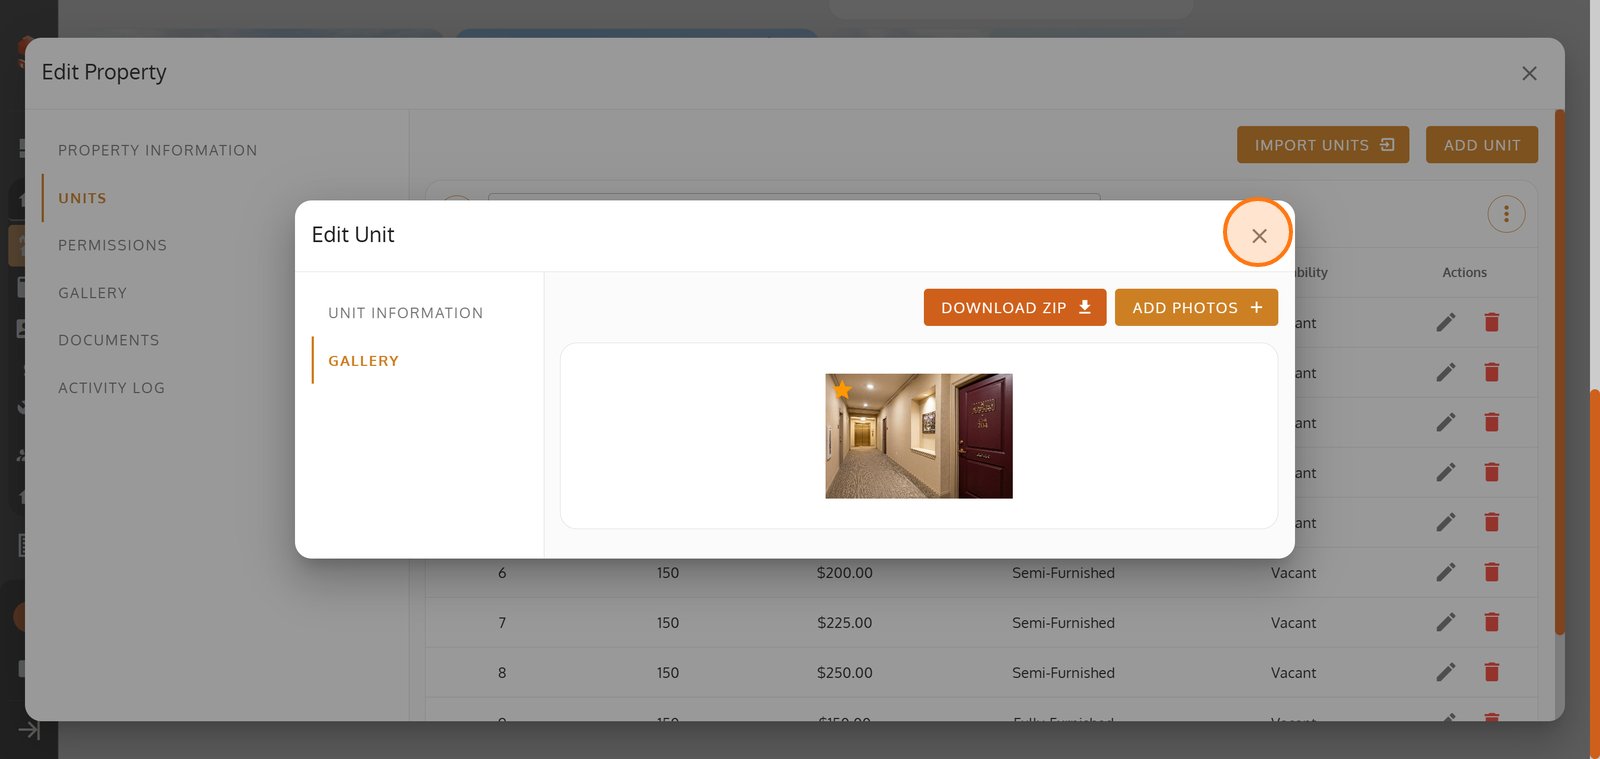
36. Click UPLOAD to add your selected images directly to the unit's gallery.
37. Set a featured image by clicking the star - this photo will grab renters' attention first.
38. Click Close to finish and save your changes to the unit.
39. Exit the editing window to return to your property overview.
40.