Payments
Add & Manage Tenant Payments
Discover how to add tenant payments, set payment dates, select methods, and confirm transactions for property management.
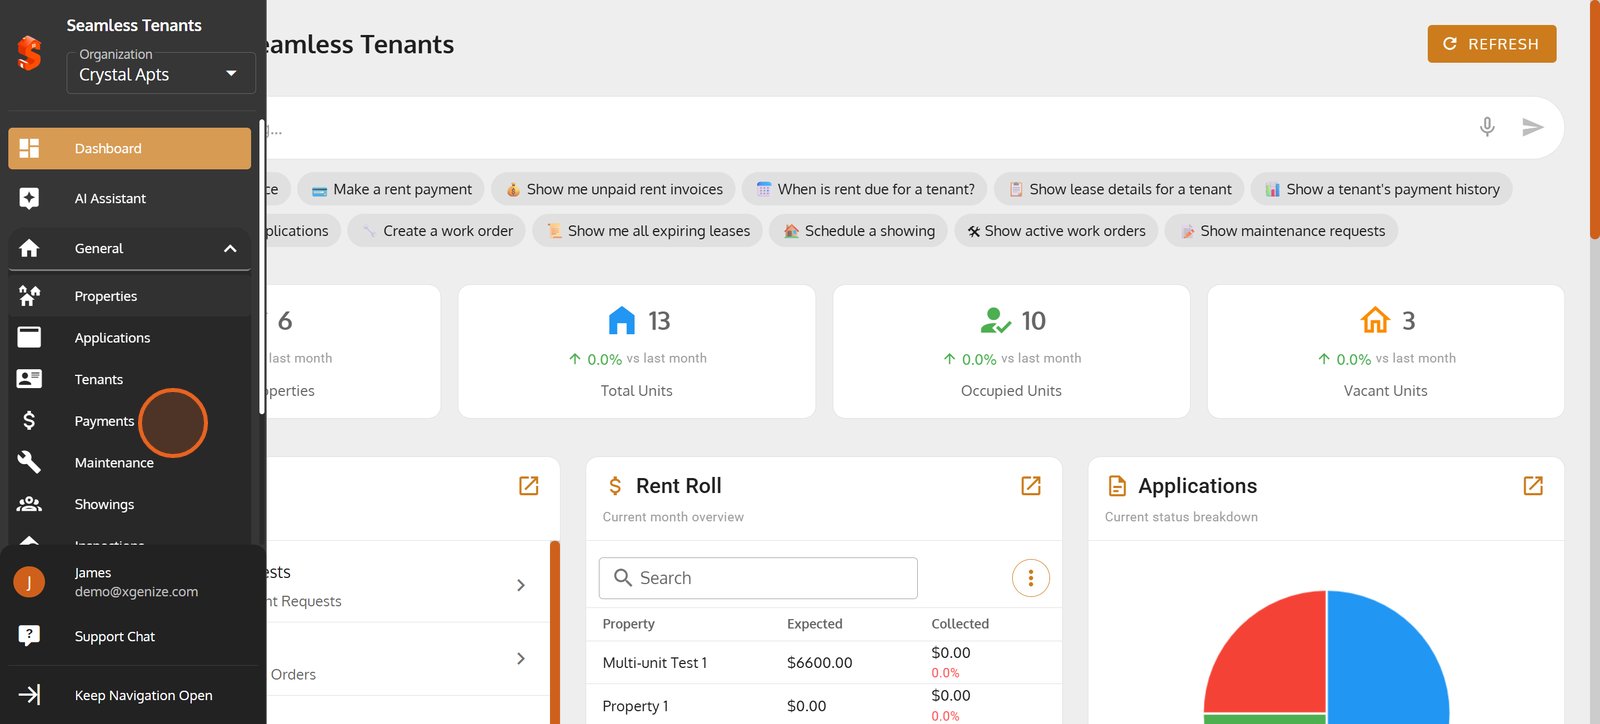
1. Begin by navigating to the 'General' section for a quick overview.

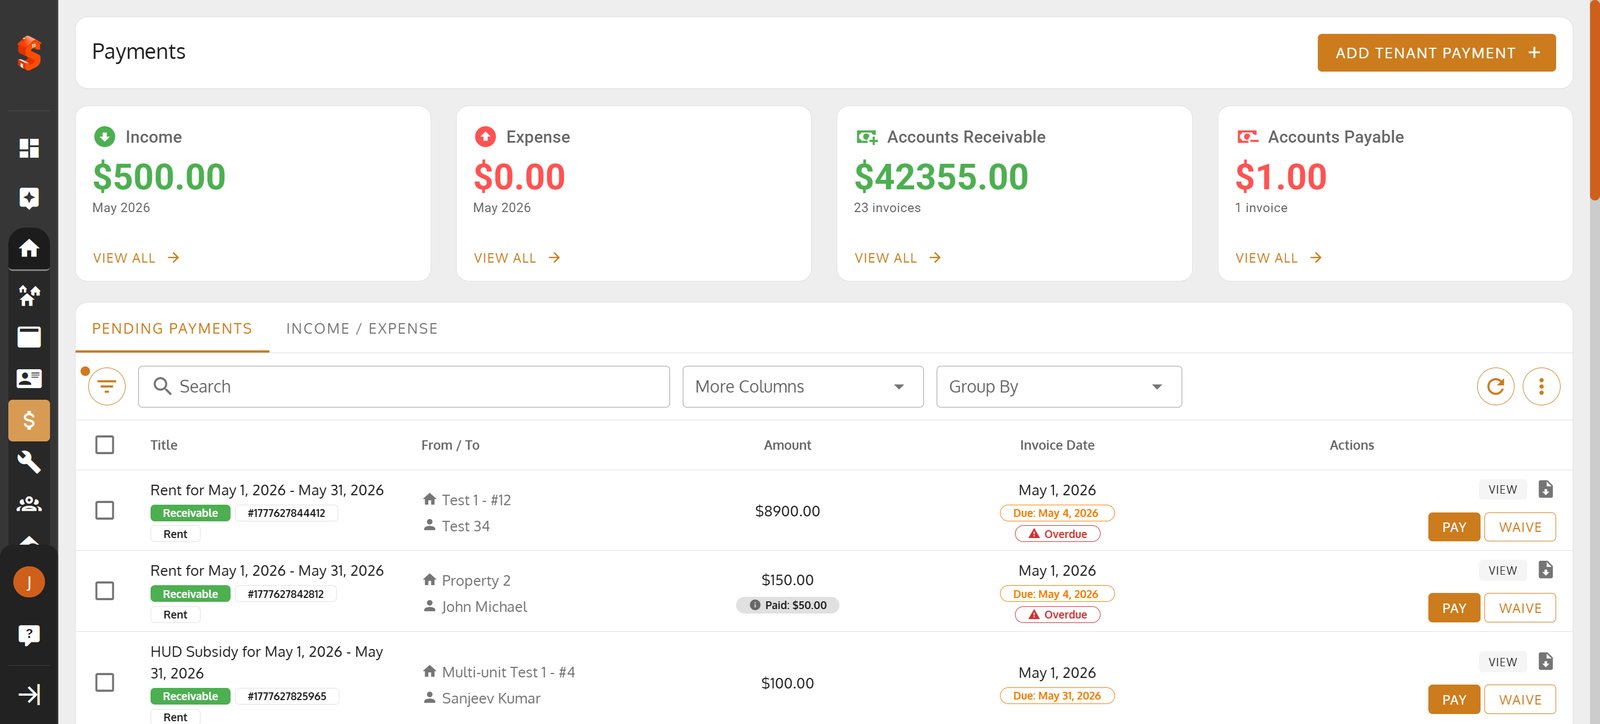
2. Switch to 'Payments' to access and manage all tenant payment history and upcoming transactions.
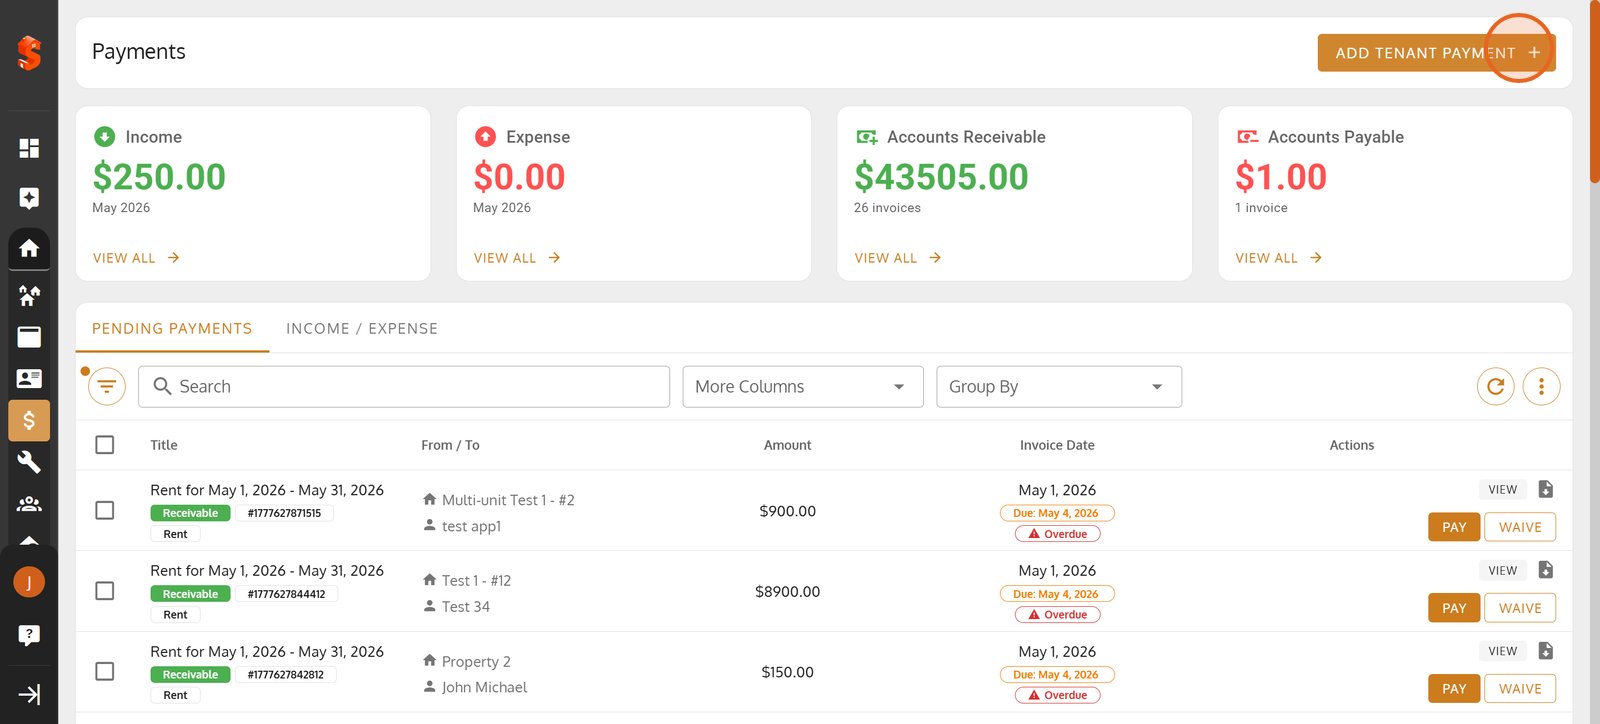
3. Select 'ADD TENANT PAYMENT' to instantly record a new rent or fee payment.
4. Click the 'Select Tenant' dropdown to choose who the payment will be recorded for.

5.

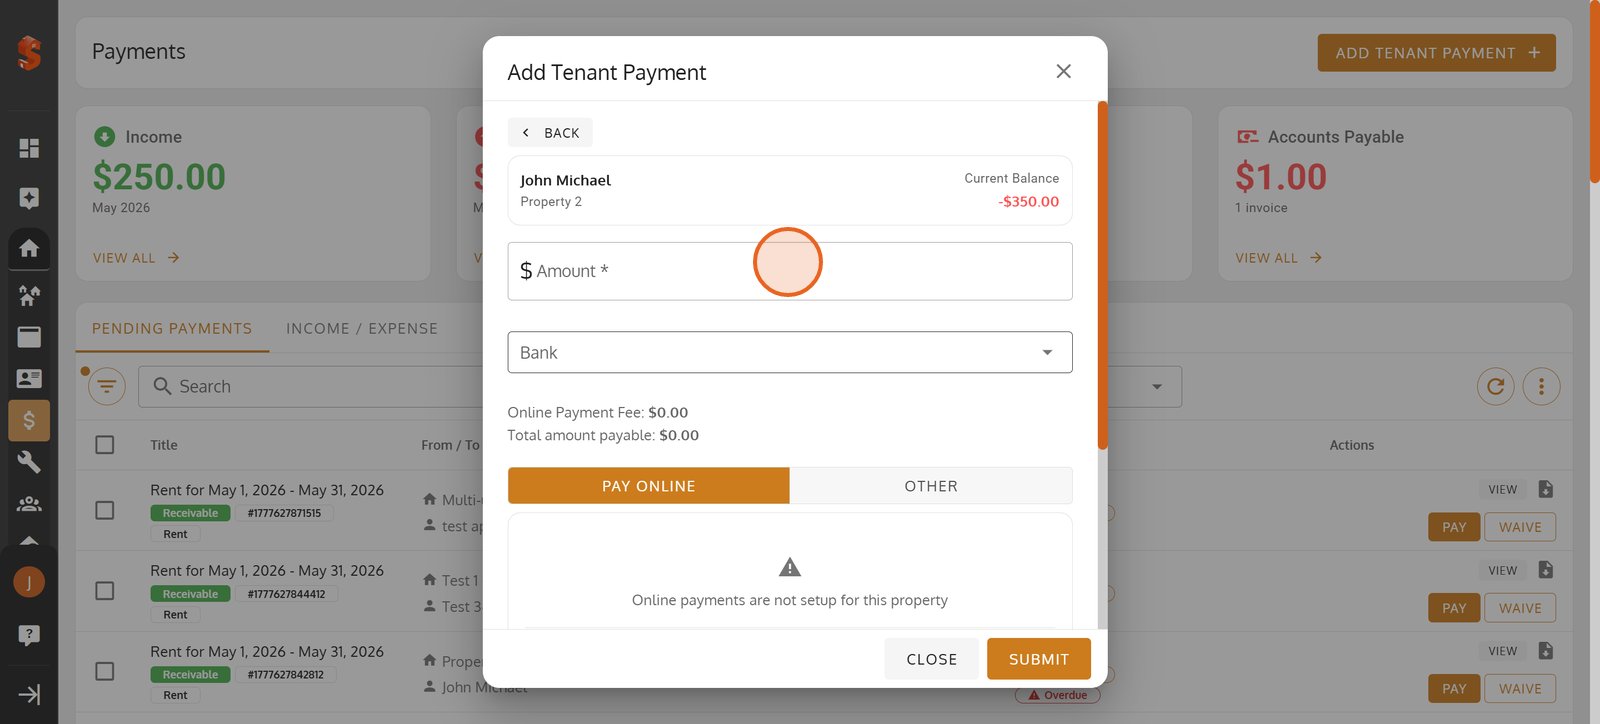
6. Enter the payment amount to keep tenant balances up-to-date.
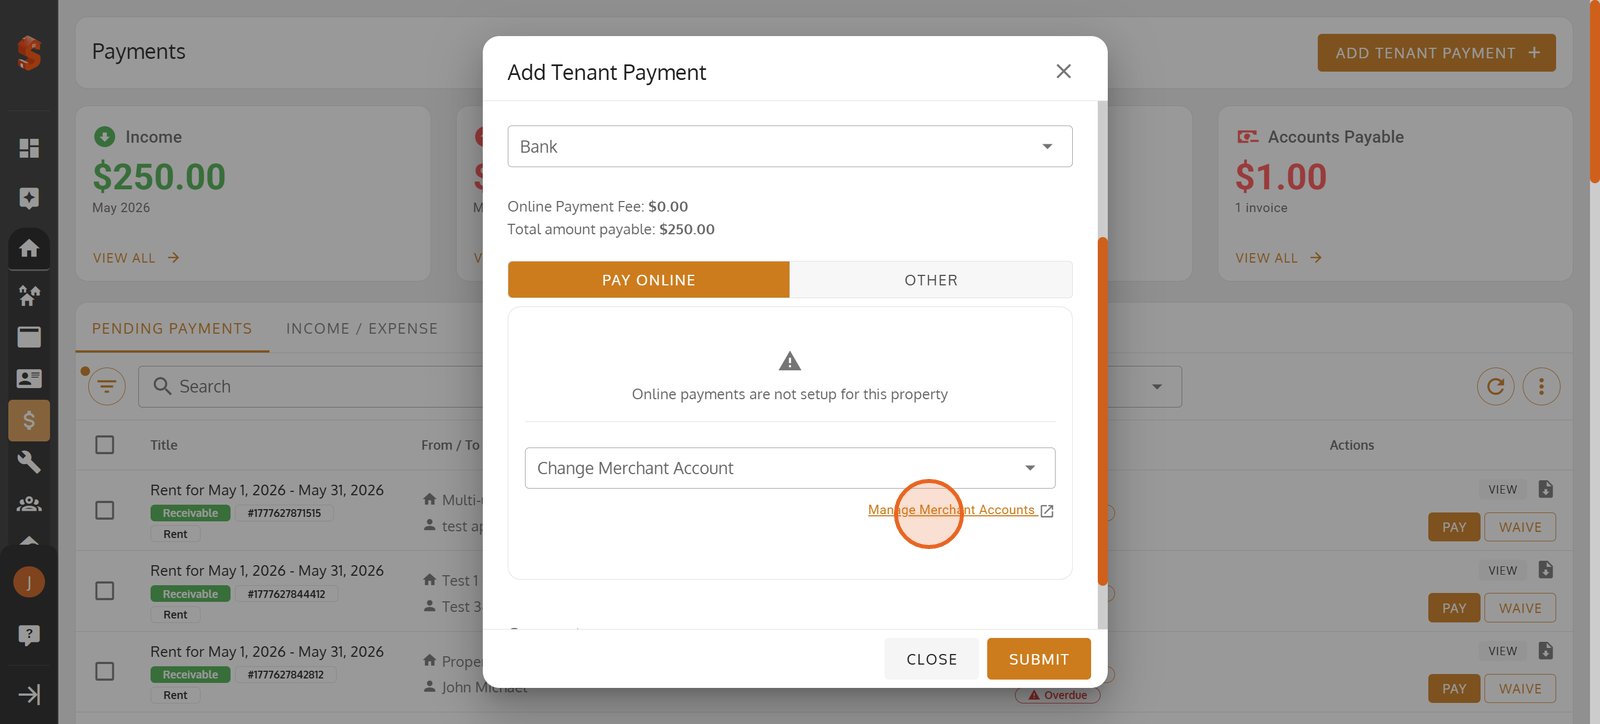
7. Tap 'Manage Merchant Accounts' to create Merchant Account to receive tenant payment.
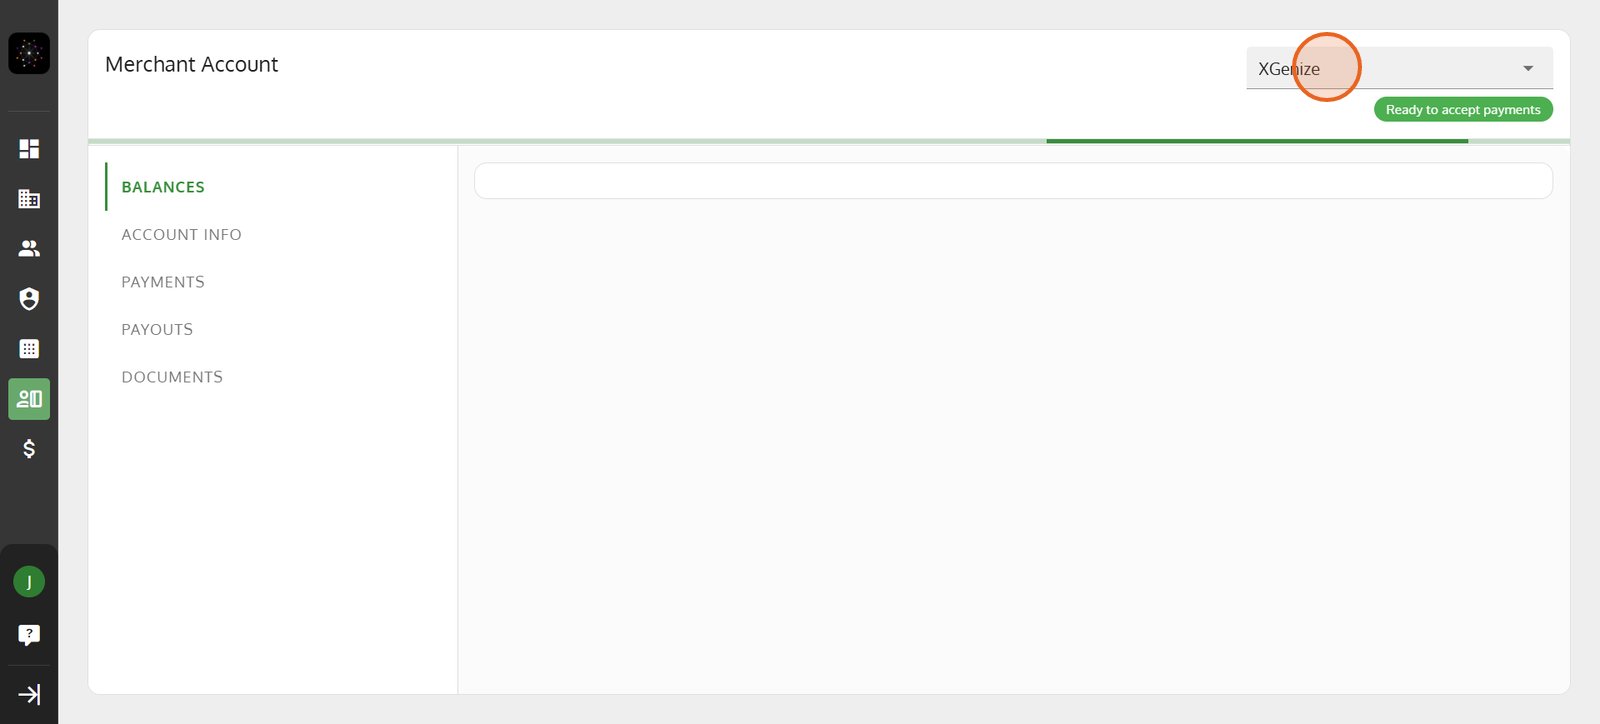
8. Use the account dropdown to select the merchant account tied to this property.
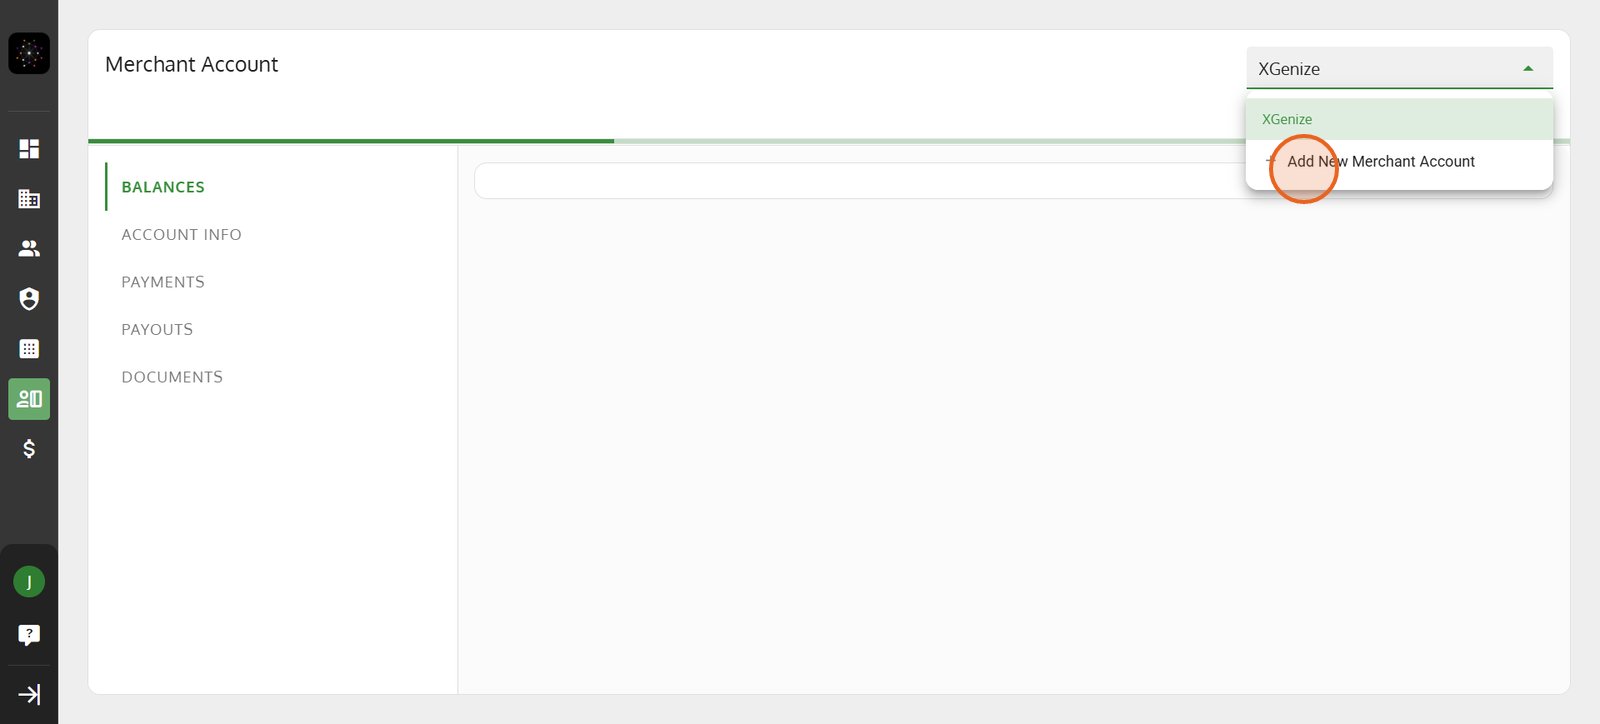
9. Choose 'Add New Merchant Account' to expand your accepted payment methods.
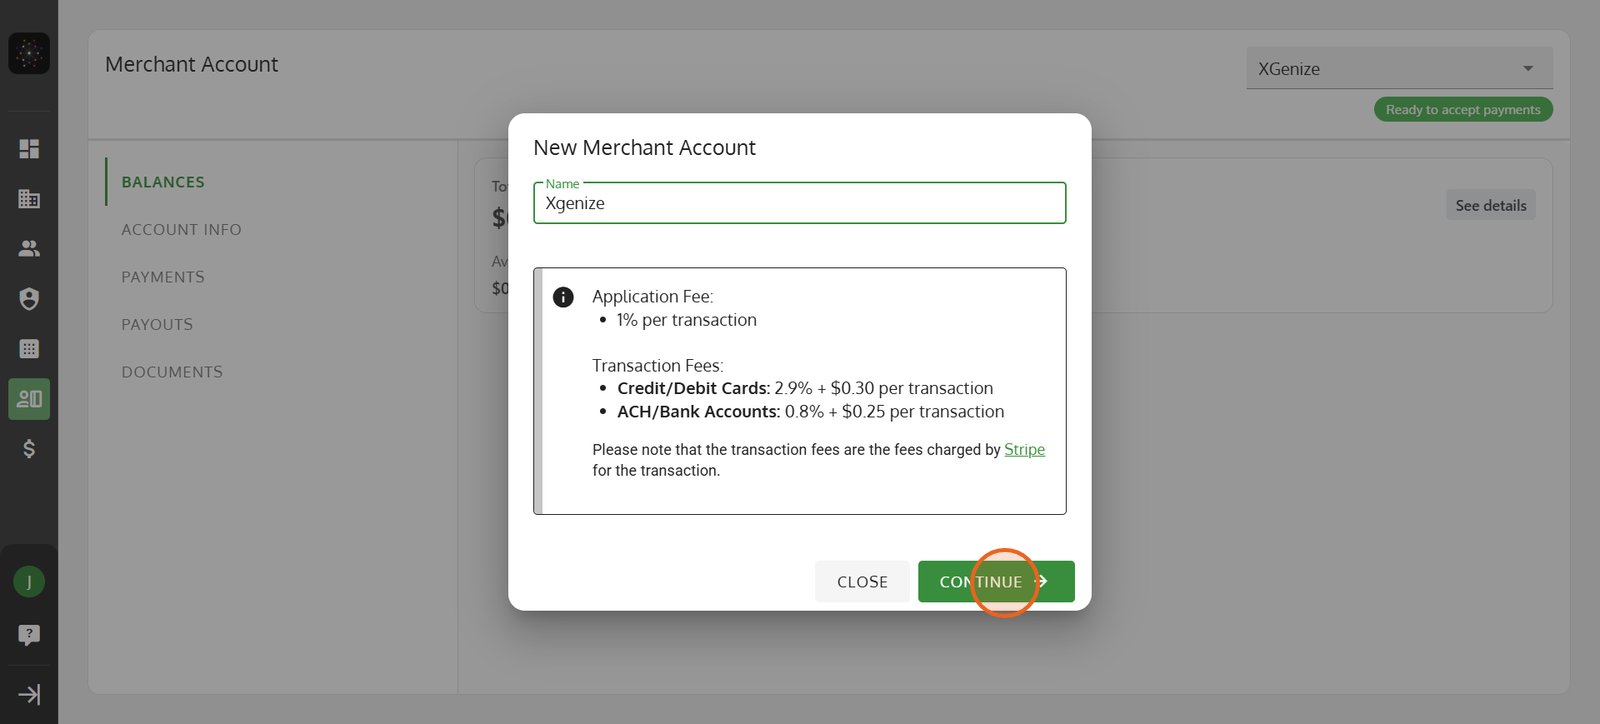
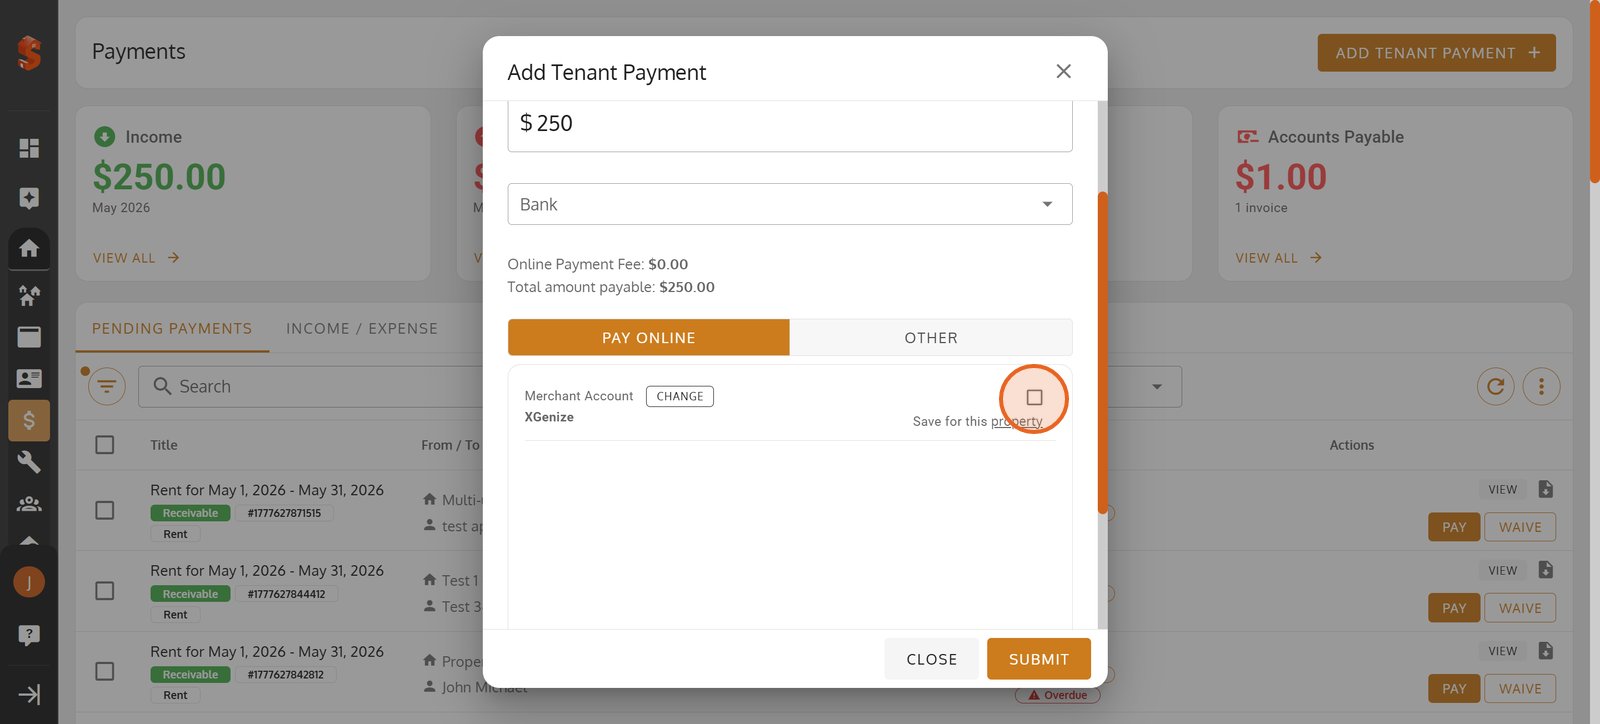
10. Enter a name for easy reference to this new merchant account.

11. Click 'CONTINUE' to proceed with merchant account setup and review fees.
12. Use the 'Change Merchant Account' option to receive the payment.

13. Check 'Save for this property' for smoother transactions in the future.
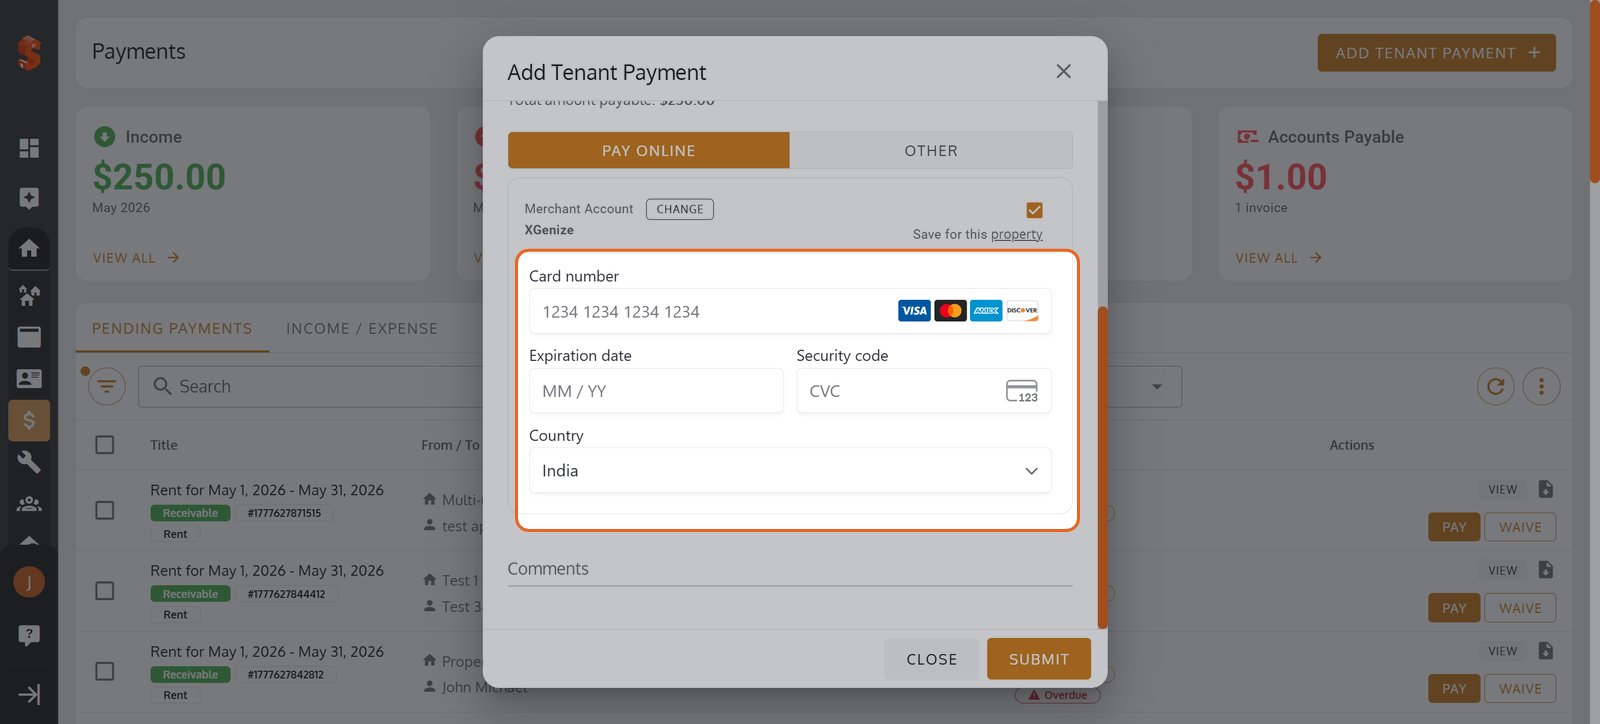
14. Enter the Card Details
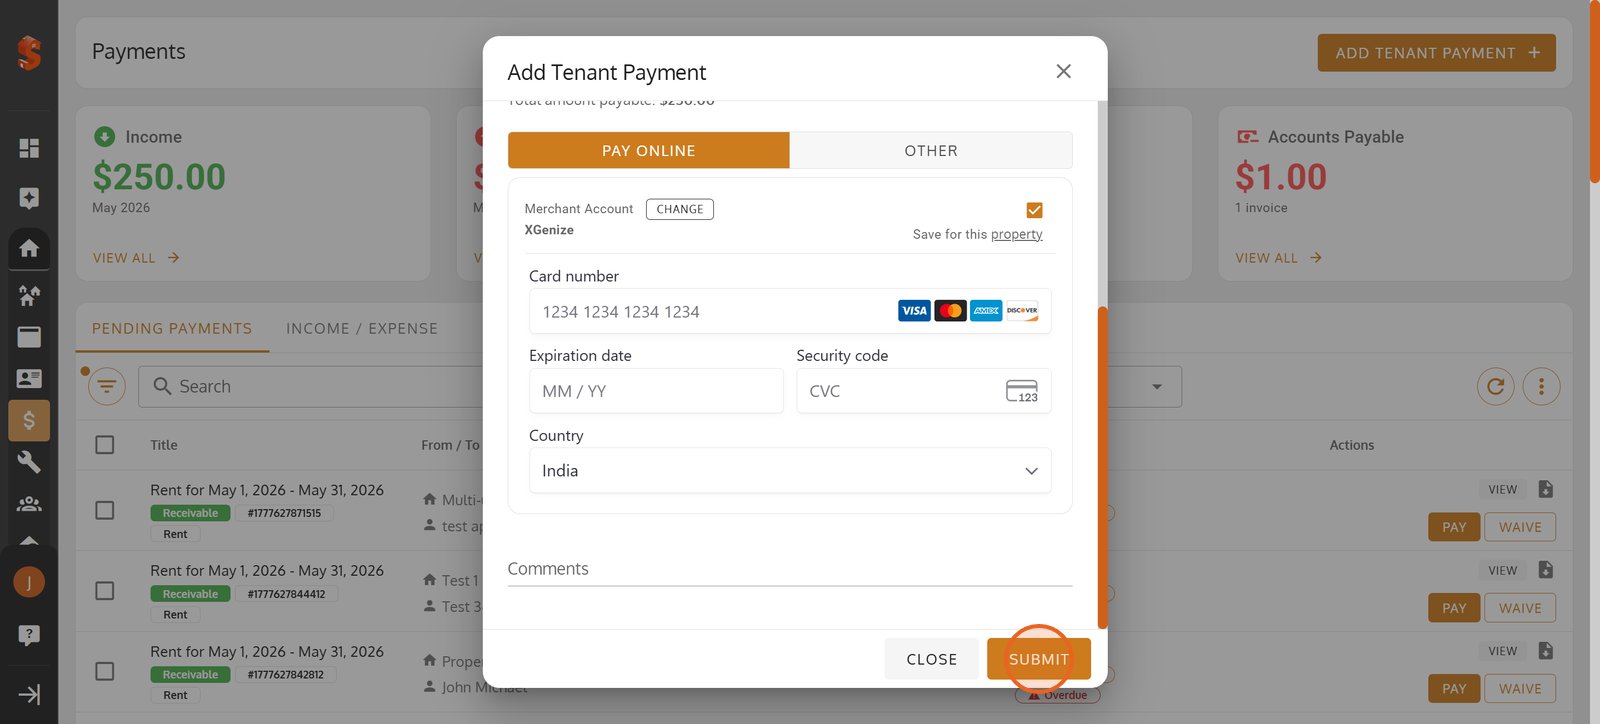
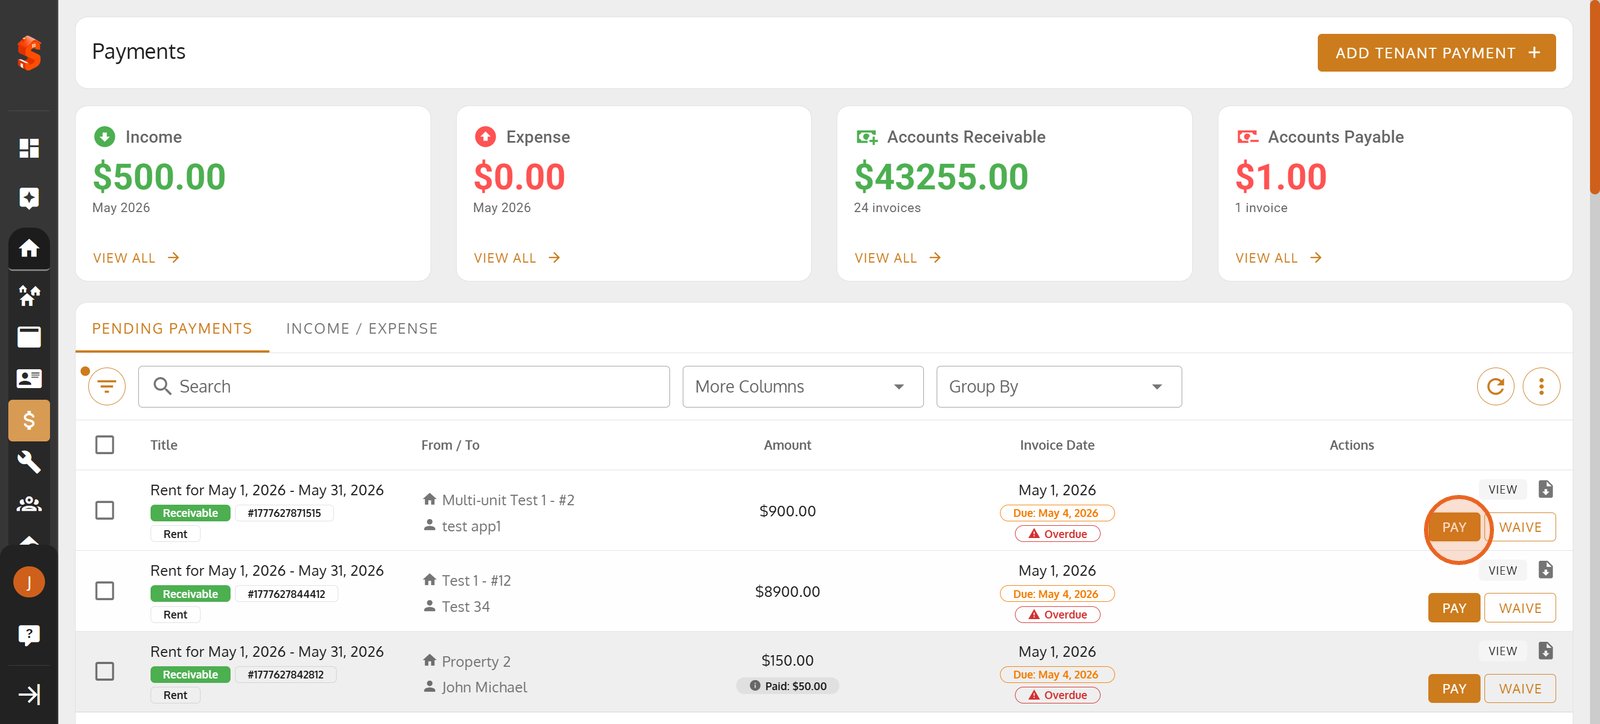
15. Click 'Submit' to process the payment using secure card details.
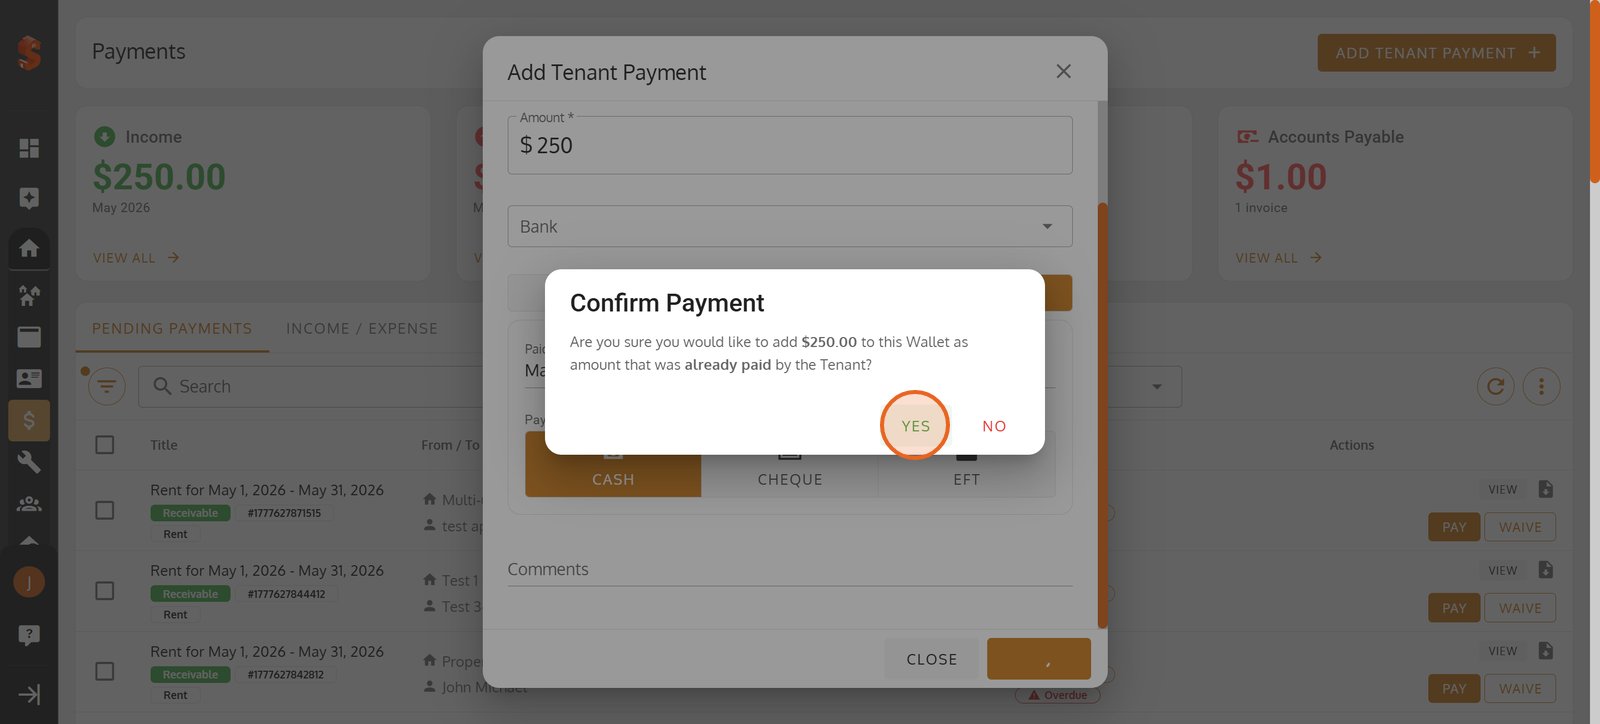
16. Click 'YES' to confirm and immediately credit the tenant's wallet with this payment.
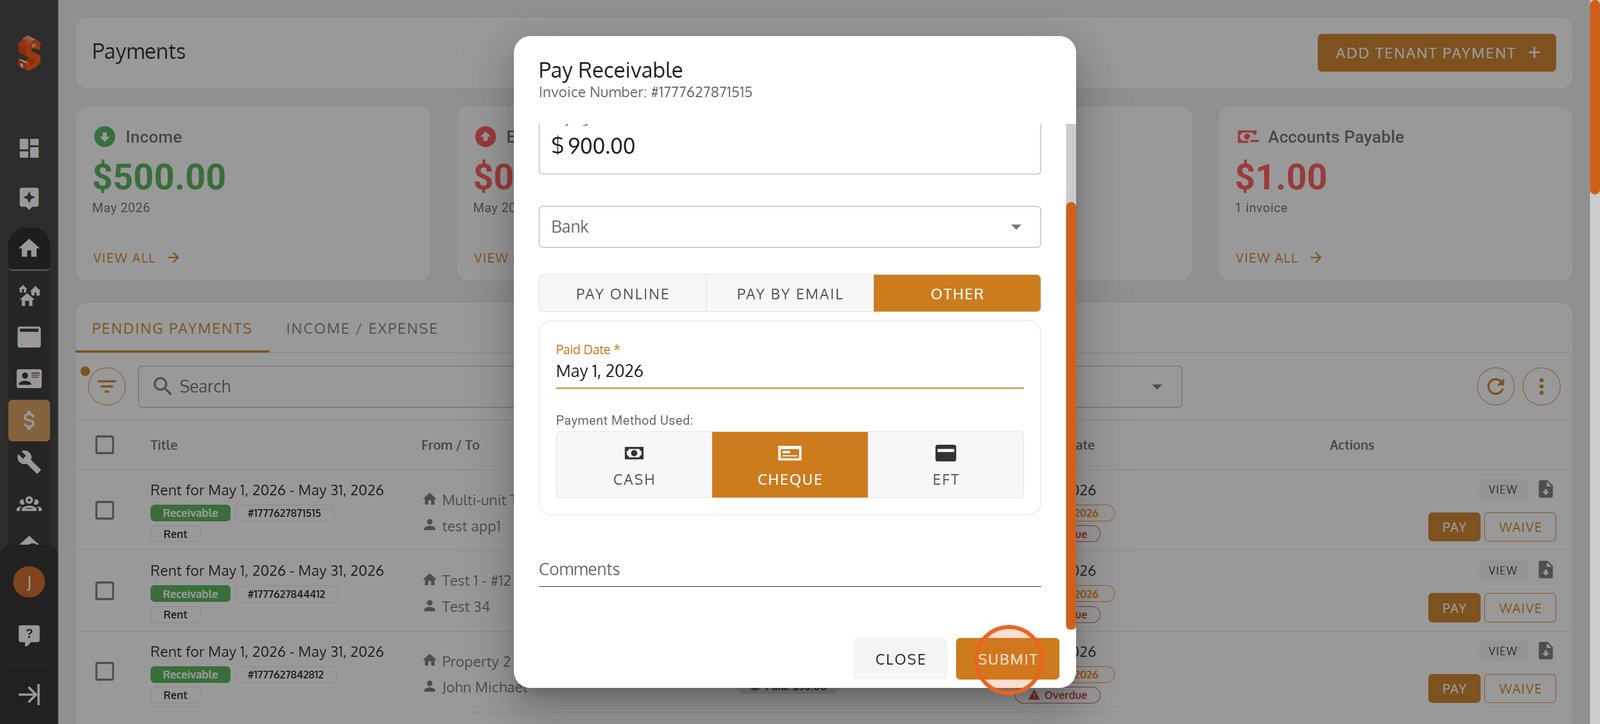
17. Click 'PAY' on any invoice to keep tenant accounts accurate and current.
18. Select the payment method, giving you flexible recording options.
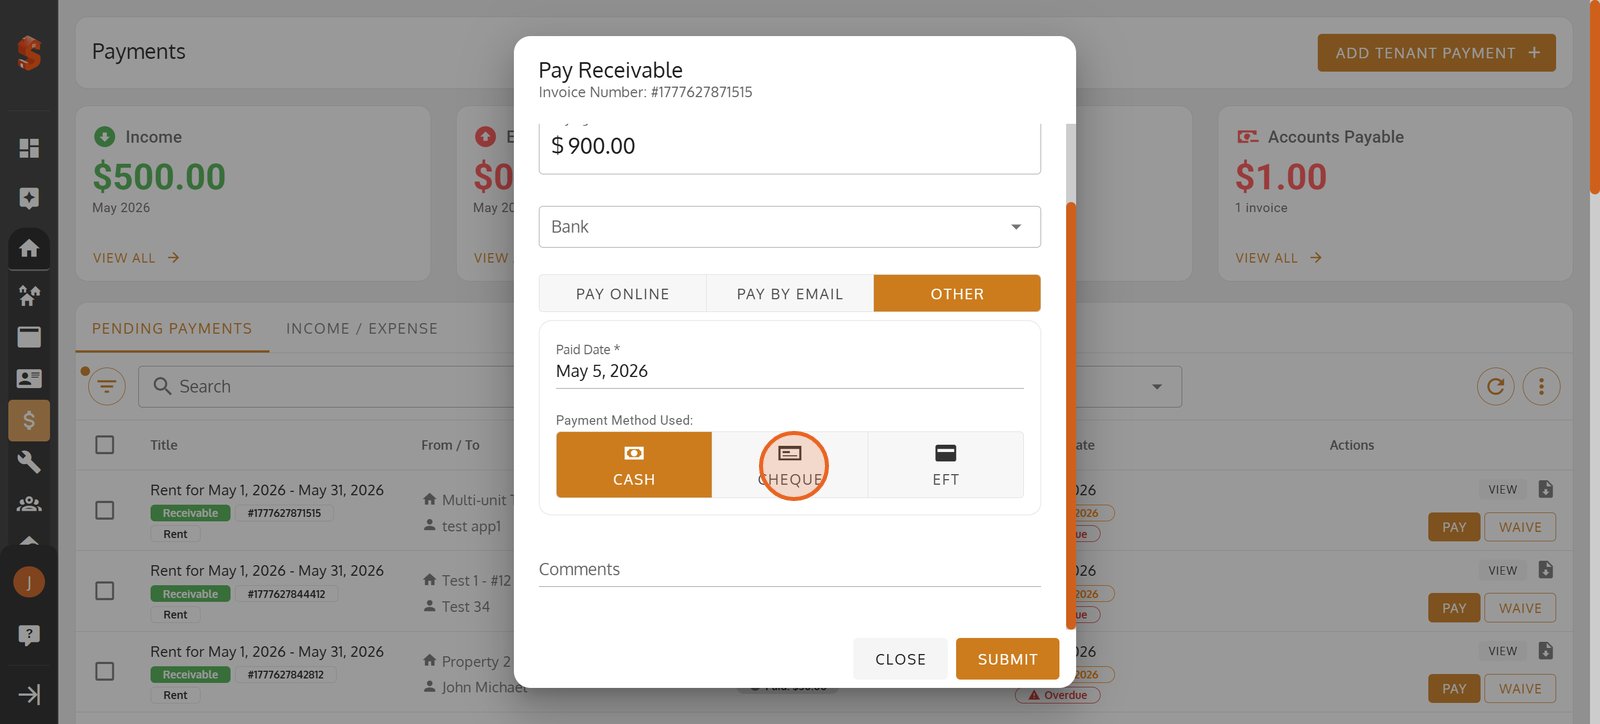
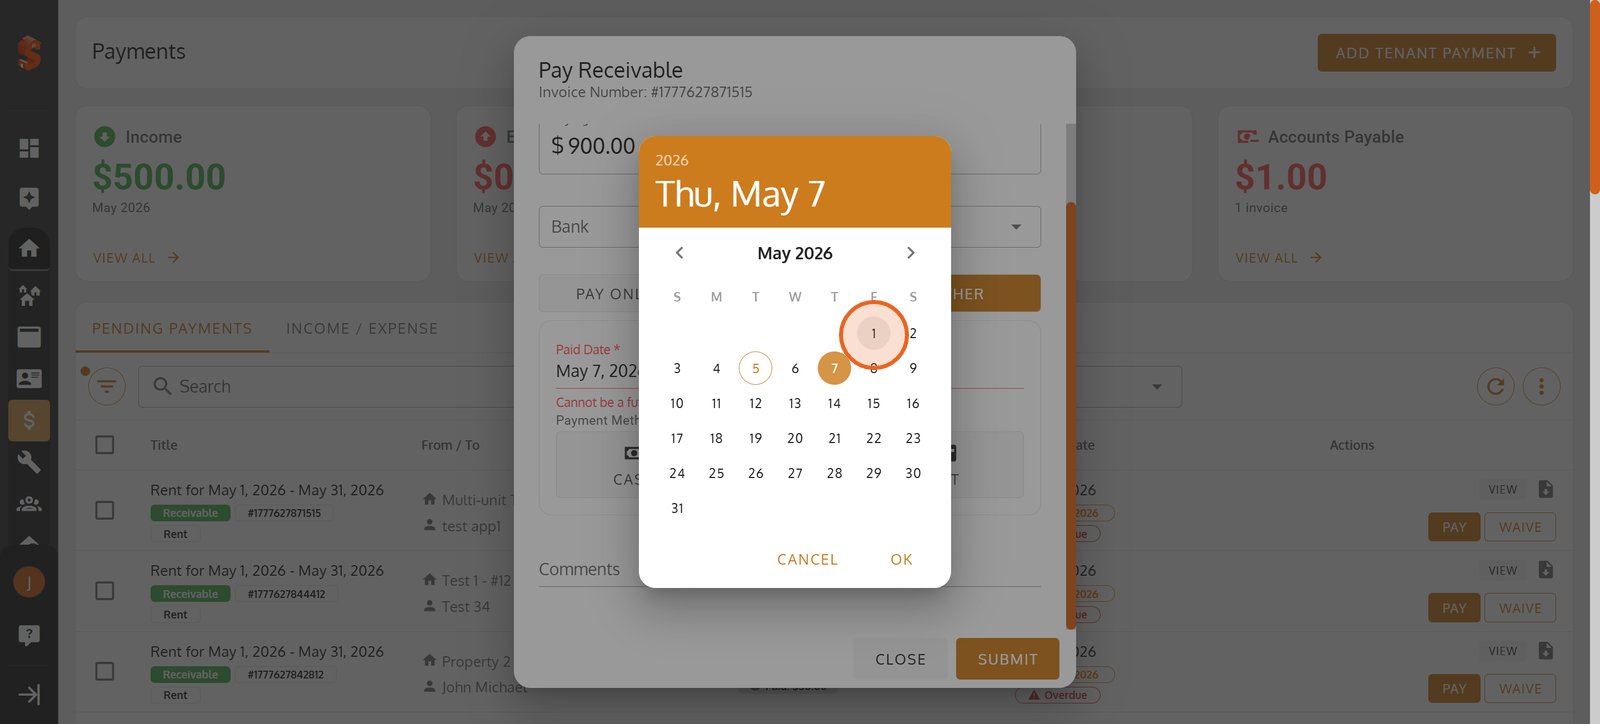
19. Set the correct 'Paid Date' - a crucial detail for timely financial reporting.

20. Choose the correct payment date to maintain precise transaction records.
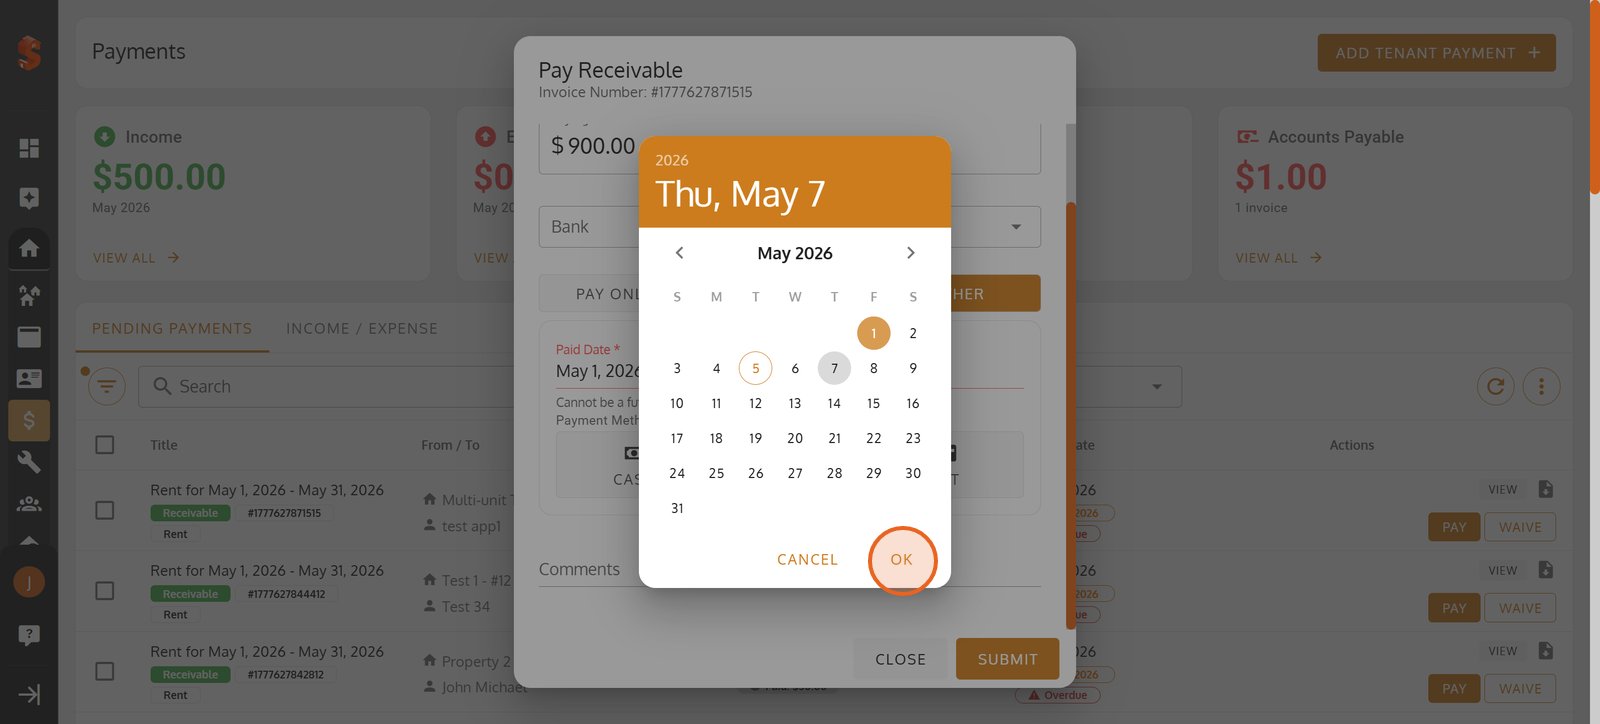
21. Hit 'OK' to confirm your date selection and continue payment processing.
22. Complete the payment submission to immediately update tenant balances.
23. Tap 'YES' to apply this payment so everything stays in sync with your records.

24.